标签:
上一话struts2,hibernate,spring整合笔记(1)
接下来继续
配置完struts之后就要开始hibernate的配置
hibernate的环境并不依赖web开发环境,在我第一次配置hibernate时用的javase,
在window-> preferences->java->user libraries,创建一个新的Use libraries,添加相应的jar包
再在项目build path->build configurationpath->add libraries 选择Use libraries加入你创建的libraries
正常情况下是没有问题的,在我配置之初也是没有问题的,spring与hibernate整合后也是没问题的
可是当ssh框架完全整合却出现了问题
究其原因,还是struts+spring中的测试类不认hibernate
所以,最好的办法就是就jar包统统加入lib中
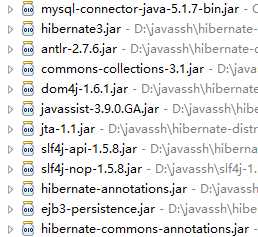
这个就是hibernate单独所需的jar包
其中包括了一些Annotation的内容,如果只是用xml配置文件,则无需加入
然后就是配置文件
同样,直接去例子里面找就好了
在src目录下新建hibernate.cfg.xml
<?xml version=‘1.0‘ encoding=‘utf-8‘?>
<!DOCTYPE hibernate-configuration PUBLIC
        "-//Hibernate/Hibernate Configuration DTD 3.0//EN"
        "http://hibernate.sourceforge.net/hibernate-configuration-3.0.dtd">

<hibernate-configuration>

    <session-factory>

        <!-- Database connection settings -->
        <property name="connection.driver_class">com.mysql.jdbc.Driver</property>
        <property name="connection.url">jdbc:mysql://localhost/oa</property>
        <property name="connection.username">root</property>
        <property name="connection.password"></property>

        <!-- JDBC connection pool (use the built-in) -->
        <!--<property name="connection.pool_size">1</property>-->
      <!-- SQL dialect -->
        <property name="dialect">org.hibernate.dialect.MySQLDialect</property>

        <!-- Enable Hibernate‘s automatic session context management -->
        <!--<property name="current_session_context_class">thread</property>-->

        <!-- Disable the second-level cache  -->
        <property name="cache.provider_class">org.hibernate.cache.NoCacheProvider</property>
     <!-- Echo all executed SQL to stdout -->
        <property name="show_sql">true</property>
        <property name="format_sql">true</property>

        <!-- Drop and re-create the database schema on startup -->
        <property name="hbm2ddl.auto">update</property>
         <mapping class="com.hibernate.user"/>
    </session-factory>

</hibernate-configuration>
这是一些最基础的配置,根据自己情况略加改动即可
然后写一个简单的javabean
package com.hibernate;

import javax.persistence.Entity;
import javax.persistence.GeneratedValue;
import javax.persistence.Id;


public class user {
    private int id;
    private String name;

    public int getId() {
        return id;
    }
    public void setId(int id) {
        this.id = id;
    }
    public String getName() {
        return name;
    }
    public void setName(String name) {
        this.name = name;
    }

}
为这个javabean提供配置文件,在相同的包内添加user.hbm.xml
<?xml version="1.0"?>
<!DOCTYPE hibernate-mapping PUBLIC
        "-//Hibernate/Hibernate Mapping DTD 3.0//EN"
        "http://hibernate.sourceforge.net/hibernate-mapping-3.0.dtd">

<hibernate-mapping package="com.hibernate">

    <class name="user" table="itcast_user">
        <id name="id">
            <generator class="native"/>
        </id>
        <property name="name" />
    </class>

</hibernate-mapping>
导入Junit,创建sourcefolder,创建一个相同的包
输入如下代码
package com.hibernate;

import static org.junit.Assert.*;
import java.util.Date;

import org.hibernate.Session;
import org.hibernate.SessionFactory;
import org.hibernate.cfg.AnnotationConfiguration;
import org.hibernate.cfg.Configuration;
import org.junit.Test;
public class test {

    @Test
    public void test() {
        user u=new user();
        u.setName("ni");
        Configuration cfg=new AnnotationConfiguration().configure();
        SessionFactory sf=cfg.configure().buildSessionFactory();
        Session session=sf.openSession();
        session.beginTransaction();
        session.save(u);
        session.getTransaction().commit();
        session.close();
         sf.close();
    }

}
将
<property name="hbm2ddl.auto">update</property>
中的update暂时改为create
记得在数据库添加oa库
运行出现user表
表中有一行数据就大功告成了
struts2,hibernate,spring整合笔记(2)
标签:
原文地址:http://www.cnblogs.com/asens/p/4521132.html