标签:
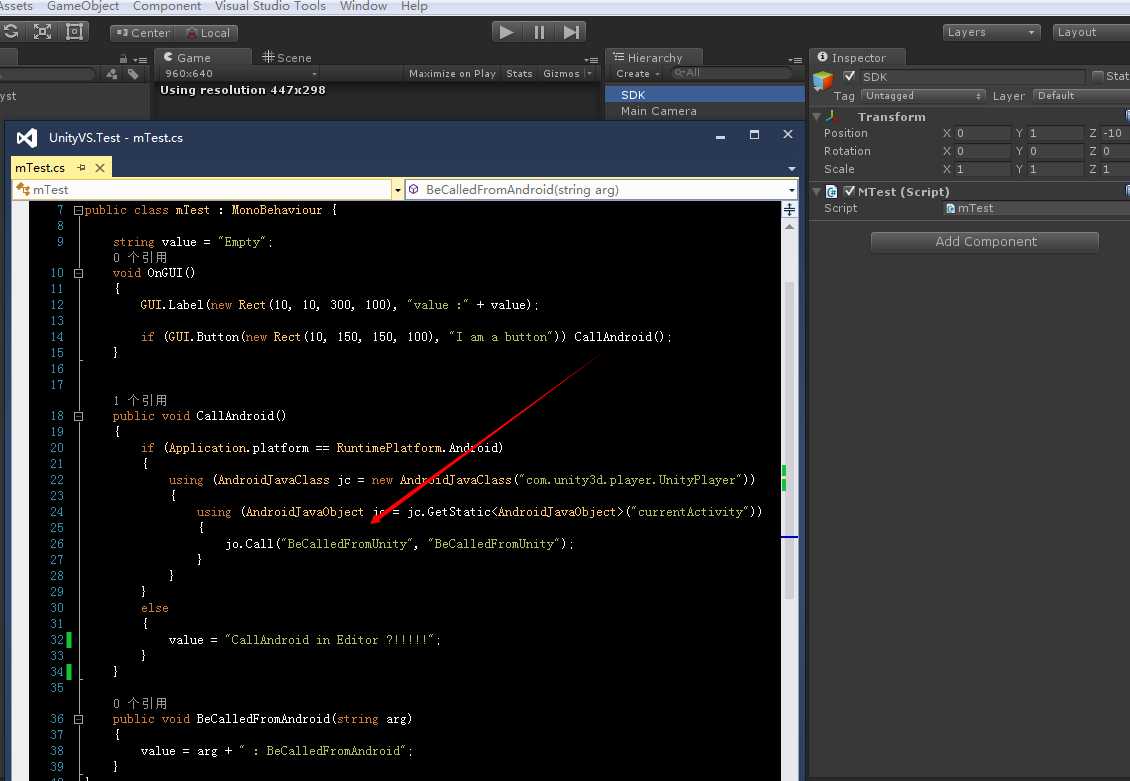
这几天抽空研究下Android SDK 自动化打包。顺便温习下Unity 与 Android 交互机制。
Example:

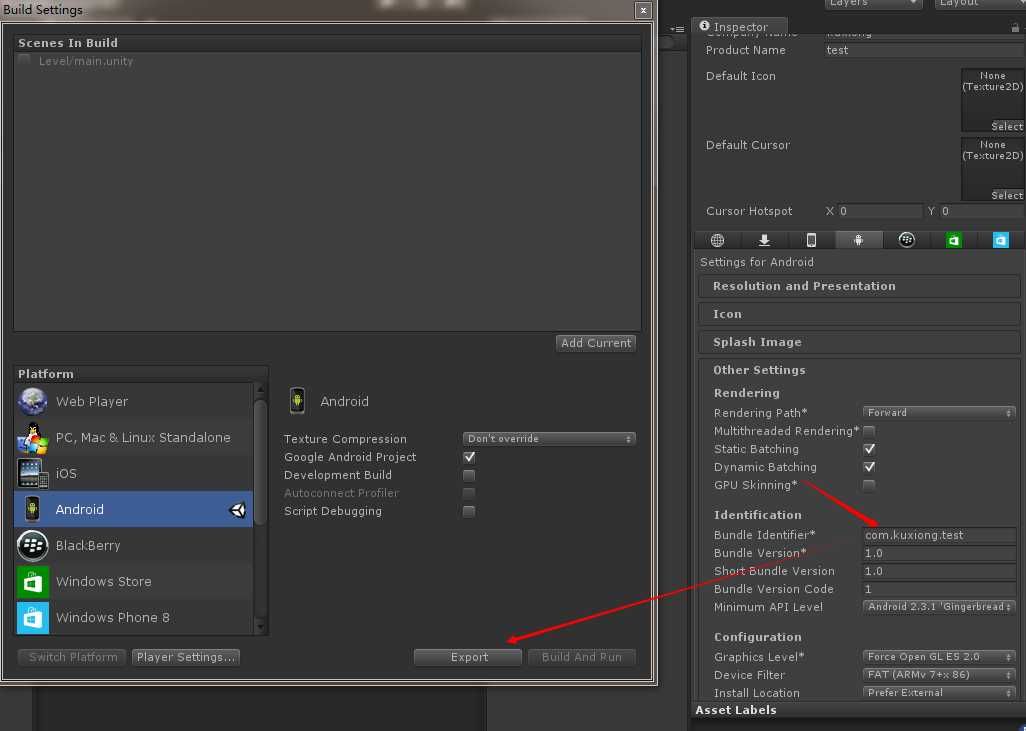
导出 Android Project
这里为了测试,就填了包名能导出就行了

Eclipse 导入之后 在 最开始启动的Activity 上加上一个被 u3d 代码调用的函数 即可
1     public void BeCalledFromUnity(String arg)
2     {
3         UnityPlayer.UnitySendMessage("SDK", "BeCalledFromAndroid", arg);
4     }
OK
消息通信搞定了

Step:
Download Ant. Uncompress the downloaded file into a directory.
Set environmental variables JAVA_HOME to your Java environment,
ANT_HOME to the directory you uncompressed Ant to, and add${ANT_HOME}/bin (Unix) or %ANT_HOME%/bin (Windows) to your PATH.
Check Installation:
You can check the basic installation with opening a new shell and typing ant. You should get a message like this
Buildfile: build.xml does not exist!
Build failed
So Ant works. This message is there because you need to write an individual buildfile for your project. With a ant -versionyou should get an output like
Apache Ant(TM) version 1.9.2 compiled on July 8 2013
参考:http://www.androidengineer.com/2010/06/using-ant-to-automate-building-android.html (目前我用的是1.9.4 有一点出入)
If you already have a project that you‘d like to add the Ant build script to, then there is an easy command line tool you can use.
Open up a command prompt and navigate to the base directory of your project.
From there, use the command:
android update project --path .
(PS:
Add Path If Fail
%ANDROID_SDK%\platform-tools
%ANDROID_SDK%\tools
)
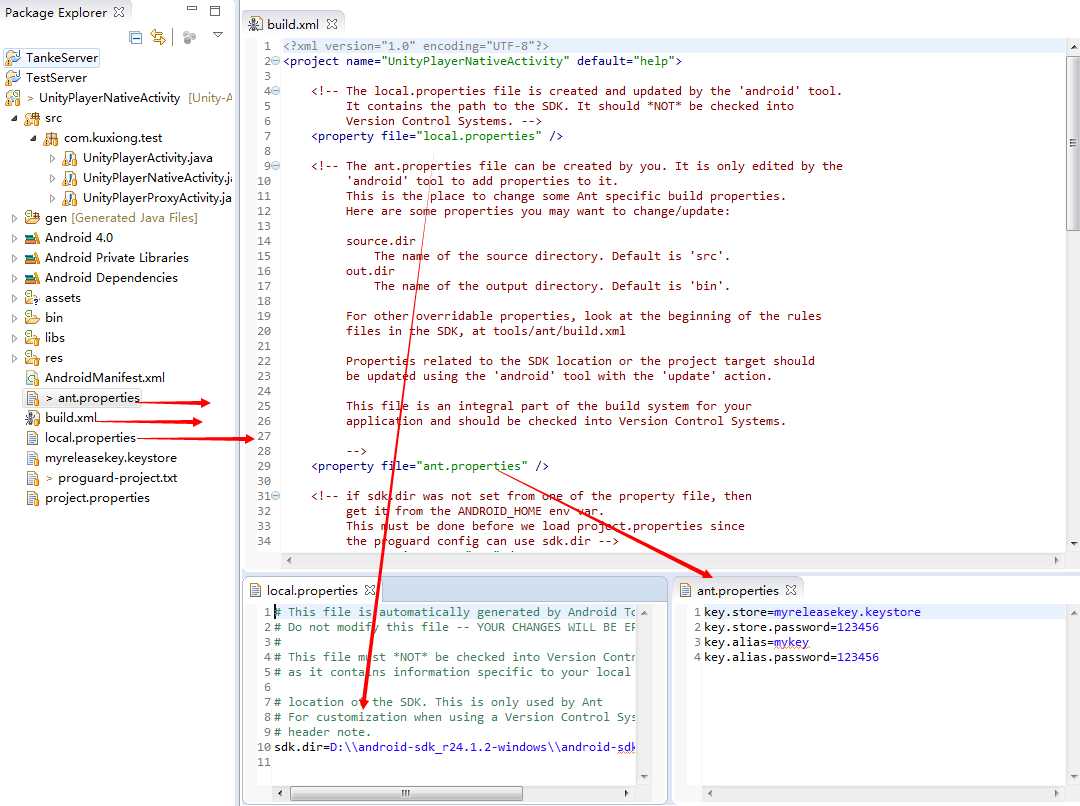
Here is an example of successful output:

其中ant.properties 是 手工添加的,为了自动化打包签名

Open up a command prompt and navigate to the base directory of your project.
From there, use the command:
-> ant release
=> 打包成功
目前我们已经构建了发布版本的签名APK,下一篇我会讲讲自定义build.xml 流程
Unity Android && Ant Automate Build 之一
标签:
原文地址:http://www.cnblogs.com/chongxin/p/4522672.html