标签:
//print_r(gd_info());if(function_exists(‘gd_info‘)){echo ‘<pre>‘;print_r(gd_info());}else{echo ‘没有开启gd库‘;}
//ox 16进制换算十进制oxff,ox33,ox99=#ff3399header("content-type:image/png");$m=imagecreate(200,90);//创建画布gd($m);//一般第一个颜色默认为画布的颜色$y=gd($m);//获取一个随机的颜色imagestring($m,5,35,40,‘hello china‘,$y);//在画布上输出文字,5代表文字大小,35x轴,40y轴,$y为文字的颜色imagepng($m);//浏览器输出图像imagepng($m,‘c:/‘.uniqid().‘.png‘);//将画布图像保存到硬盘上imagedestroy($m);//定义一个随机颜色函数function gd($i){return imagecolorallocate($i,mt_rand(0,255),mt_rand(0,255),mt_rand(0,255));

header(‘content-type:image/jpg‘);$i=imagecreatefromjpeg(‘m.jpg‘);imagestring($i,5,20,120,‘hellojkkjkj‘,show($i));imagejpeg($i);imagedestroy($i);function show($m){return imagecolorallocate($m,rand(0,255),rand(0,255),rand(0,255));}

$image , int $red , int $green , int $blue , int $alpha )$image , int $cx , int $cy , int $width , int $height , int $color )
//imagecolorallocatealpha(),png透明header(‘content-type:image/png‘);//imagcreate()建立画布的时候第一个颜色为背景$i=imagecreatetruecolor(400,400);//真彩图像,默认画布背景为黑色$rdd=imagecolorallocatealpha($i,255,0,0,100);//0-127$green=imagecolorallocatealpha($i,0,255,0,100);//0-127$b=imagecolorallocatealpha($i,0,255,255,100);//0-127imagefilledellipse($i,100,150,200,200,$rdd);imagefilledellipse($i,200,150,200,200,$green);imagefilledellipse($i,150,250,200,200,$b);//bool imagefilledellipse ( resource $image , int $cx , int $cy , int $width , int $height , int $color )画圆imagepng($i);imagedestroy($i);

$image , int $x , int $y , int $color )
header(‘content-type:image/png‘);$i=imagecreatetruecolor(400,400);//真彩图像,默认画布背景为黑色$rdd=imagecolorallocatealpha($i,255,0,0,0);$c=gc($i);imagesetpixel($i,50,60,$c);imagepng($i);imagedestroy($i);function gc($i){return imagecolorallocate($i,mt_rand(0,255),mt_rand(0,255),mt_rand(0,255));}

header(‘content-type:image/png‘);$i=imagecreatetruecolor(400,400);//真彩图像,默认画布背景为黑色$rdd=imagecolorallocatealpha($i,255,0,0,0);$c=gc($i);for($j=0;$j<400;$j++){ //$j小于底板的宽度imagesetpixel($i,$j,200,$c);//画点}imagepng($i);imagedestroy($i);function gc($i){return imagecolorallocate($i,mt_rand(0,255),mt_rand(0,255),mt_rand(0,255));}

header(‘content-type:image/png‘);$i=imagecreatetruecolor(300,300);//创建真彩图像//$im=imagecolorallocatealpha($i,255,0,255,0);for($h=1;$h<=300;$h+=10){$g=show($i);for($j=1;$j<=300;$j++){imagesetpixel($i,$j,$h,$g);}}imagepng($i);imagedestroy($i);function show($m){return imagecolorallocate($m,rand(0,255),rand(0,255),rand(0,255));}
header(‘content-type:image/png‘);$i=imagecreatetruecolor(300,300);//创建真彩图像for($h=1;$h<=300;$h+=35){$g=show($i);for($j=1;$j<=300;$j++){imagesetpixel($i,$j,$h,$g);}for($j=1;$j<=300;$j++){imagesetpixel($i,$h,$j,$g);}}imagepng($i);imagedestroy($i);function show($m){return imagecolorallocate($m,rand(0,255),rand(0,255),rand(0,255));}
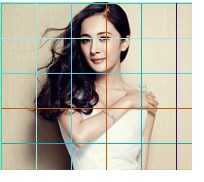
header(‘content-type:image/png‘);//$i=imagecreatetruecolor(300,300);//创建真彩图像$i=imagecreatefromjpeg(‘m.jpg‘);for($h=1;$h<=300;$h+=35){$g=show($i);for($j=1;$j<=300;$j++){imagesetpixel($i,$j,$h,$g);}for($j=1;$j<=300;$j++){imagesetpixel($i,$h,$j,$g);}}imagepng($i);imagedestroy($i);function show($m){return imagecolorallocate($m,rand(0,255),rand(0,255),rand(0,255));}
function gc($m){return imagecolorallocatealpha($m,rand(0,255),rand(0,255),rand(0,255),rand(30,150));}
<?phpheader(‘content-type:image/png‘);$i=imagecreatetruecolor(300,300);//创建真彩图像//$i=imagecreatefromjpeg(‘m.jpg‘);for($h=1;$h<=300;$h+=35){$g=show($i);$a=gc($i);for($j=1;$j<=300;$j++){imagesetpixel($i,$j,$h,$a);}for($j=1;$j<=300;$j++){imagesetpixel($i,$h,$j,$a);}}imagepng($i);imagedestroy($i);function show($m){return imagecolorallocate($m,rand(0,255),rand(0,255),rand(0,255));}function gc($m){return imagecolorallocatealpha($m,rand(0,255),rand(0,255),rand(0,255),rand(30,150));}
$image , int $x1 , int $y1 , int $x2 , int $y2 , int $color )
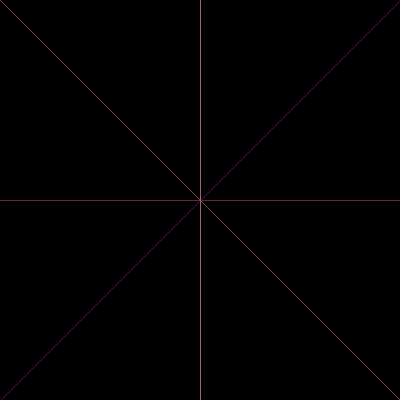
header(‘content-type:image/png‘);$i=imagecreatetruecolor(400,400);//创建真彩图像imageline($i,0,200,400,200,gc($i));imageline($i,200,0,200,400,gc($i));imageline($i,0,0,400,400,gc($i));imageline($i,400,0,0,400,gc($i));imagepng($i);imagedestroy($i);function show($m){return imagecolorallocate($m,rand(0,255),rand(0,255),rand(0,255));}function gc($m){return imagecolorallocatealpha($m,rand(0,255),rand(0,255),rand(0,255),rand(30,150));}
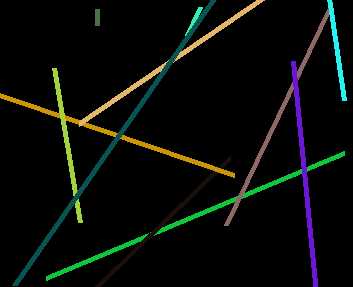
<?phpheader(‘content-type:image/png‘);$i=imagecreatetruecolor(400,400);//创建真彩图像for($j=0;$j<=100;$j++){imageline($i,mt_rand(0,400),mt_rand(0,400),mt_rand(0,400),mt_rand(0,400),show($i));}imagepng($i);imagedestroy($i);function show($m){return imagecolorallocate($m,rand(0,255),rand(0,255),rand(0,255));}function gc($m){return imagecolorallocatealpha($m,rand(0,255),rand(0,255),rand(0,255),rand(30,150));}
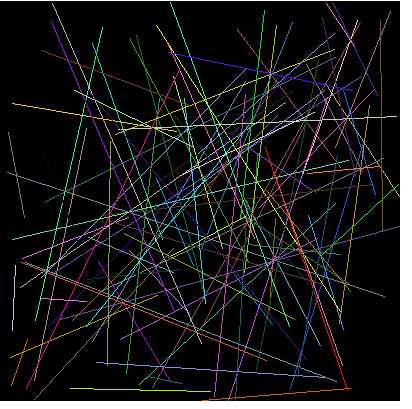
<?phpheader(‘content-type:image/png‘);$i=imagecreatetruecolor(400,400);//创建真彩图像imagesetthickness($i,5);//控制线条的粗细for($j=0;$j<=100;$j++){imageline($i,mt_rand(0,400),mt_rand(0,400),mt_rand(0,400),mt_rand(0,400),show($i));}imagepng($i);imagedestroy($i);function show($m){return imagecolorallocate($m,rand(0,255),rand(0,255),rand(0,255));}function gc($m){return imagecolorallocatealpha($m,rand(0,255),rand(0,255),rand(0,255),rand(30,150));}
$image , float $size , float $angle , int $x , int $y , int $color , string $fontfile , string $text )
<?php//imagecopyesampled image文件存盘使用gbk字符集时需要对中文文字进行转码 icnov(‘gbk‘,‘utf-8‘,‘中国人‘)header(‘content-type:image/png‘);$w=800;$h=280;$i=imagecreatetruecolor($w,$h);imagefill($i,0,0,imagecolorallocate($i,255,0,0));//00坐标在画布范围内$cc=imagecolorallocate($i,0,0,0);imagettftext($i,40,5,10,181,$cc,‘f.ttf‘,‘中国人-(China)‘);//第一个是字号,$c=imagecolorallocate($i,255,255,0);imagettftext($i,40,5,8,178,$c,‘f.ttf‘,‘中国人-(China)‘);imagepng($i);imagedestroy($i);

<?phpheader(‘content-type:image/png‘);$i=imagecreatetruecolor(400,400);//创建真彩图像$c=imagecolorallocate($i,255,0,0);imagefilledellipse($i,50,50,100,100,$c);imageellipse($i,150,50,100,100,$c);imagepng($i);imagedestroy($i);

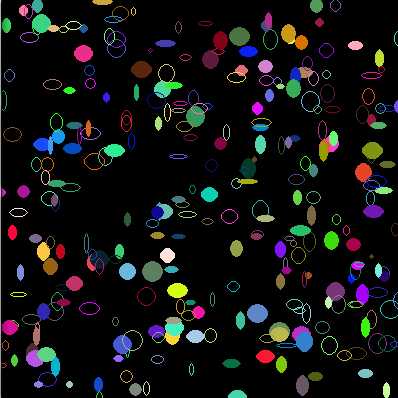
header(‘content-type:image/png‘);$i=imagecreatetruecolor(400,400);//创建真彩图像$c=imagecolorallocate($i,255,0,0);for($j=0;$j<=50;$j++){imagefilledellipse($i,mt_rand(0,400),mt_rand(0,400),mt_rand(5,20),mt_rand(5,20),$c);}imageellipse($i,150,50,5,5,$c);imagepng($i);imagedestroy($i);

<?php//imagecopyresampled()//原图生成缩略图$old=imagecreatefromjpeg(‘images/a.jpg‘);$ww=imagesx($old);//返回图片的宽$hh=imagesy($old);//返回图片的高//目标缩略图$w=100;$h=$w/$ww*$hh;$new=imagecreatetruecolor($w,$h);imagecopyresampled($new,$old,0,0,0,0, $w,$h,$ww,$hh);imagejpeg($new,‘images/s_a.jpg‘);imagedestroy($old);imagedestroy($new);
<?php//imagecopyresampled()//原图调整原图效果,限制图片的宽度最高为600$fn=‘images/02.jpg‘;$old=imagecreatefromjpeg($fn);$ww=imagesx($old);//返回图片的宽if($ww>600){$hh=imagesy($old);//返回图片的高//目标缩略图$w=600;$h=$w/$ww*$hh;$new=imagecreatetruecolor($w,$h);imagecopyresampled($new,$old,0,0,0,0, $w,$h,$ww,$hh);imagejpeg($new,$fn);imagedestroy($old);imagedestroy($new);}
<?php//imagecopyresampled()//原图调整原图效果header(‘content-type:image/jpg‘);$fn=‘images/office.jpg‘;$old=imagecreatefromjpeg($fn);$w=300;$h=300;$new=imagecreatetruecolor($w,$h);imagecopyresampled($new,$old,0,0,577,58, $w,$h,$w,$h);//效果好推荐使用imagejpeg($new);imagedestroy($old);imagedestroy($new);
<?phpheader(‘content-type:image/jpg‘);//不用直接显示输出可以不要,直接显示必须要$w=200;$h=200;$i=imagecreatetruecolor($w,$h);imagejpeg($i);imagedestroy($i);

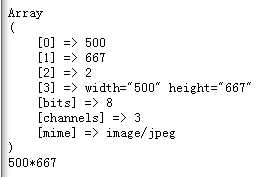
<?php$i=‘images/a.jpg‘;$info=getimagesize($i);echo ‘<pre>‘;print_r($info);echo $info[0].‘*‘.$info[1];
header(‘content-type:image/png‘);$i=imagecreatetruecolor(400,400);//创建真彩图像for($j=0;$j<=150;$j++){$c=gc($i);//imagefilledellipse($i,mt_rand(0,400),mt_rand(0,400),mt_rand(5,20),mt_rand(5,20),$c);imageellipse($i,mt_rand(0,400),mt_rand(0,400),mt_rand(5,20),mt_rand(5,20),$c);}imageellipse($i,150,50,5,5,$c);imagepng($i);imagedestroy($i);function gc($i){return imagecolorallocate($i,mt_rand(0,255),mt_rand(0,255),mt_rand(0,255));}

<?phpheader(‘content-type:image/png‘);$i=imagecreatetruecolor(400,400);//创建真彩图像for($j=0;$j<=150;$j++){$c=gc($i);imagefilledellipse($i,mt_rand(0,400),mt_rand(0,400),mt_rand(5,20),mt_rand(5,20),$c);//imageellipse($i,mt_rand(0,400),mt_rand(0,400),mt_rand(5,20),mt_rand(5,20),$c);}imageellipse($i,150,50,5,5,$c);imagepng($i);imagedestroy($i);function gc($i){return imagecolorallocate($i,mt_rand(0,255),mt_rand(0,255),mt_rand(0,255));}

<?phpheader(‘content-type:image/png‘);$i=imagecreatetruecolor(400,400);//创建真彩图像for($j=0;$j<=150;$j++){$c=gc($i);imagefilledellipse($i,mt_rand(0,400),mt_rand(0,400),mt_rand(5,20),mt_rand(5,20),$c);imageellipse($i,mt_rand(0,400),mt_rand(0,400),mt_rand(5,20),mt_rand(5,20),$c);}imageellipse($i,150,50,5,5,$c);imagepng($i);imagedestroy($i);function gc($i){return imagecolorallocate($i,mt_rand(0,255),mt_rand(0,255),mt_rand(0,255));}
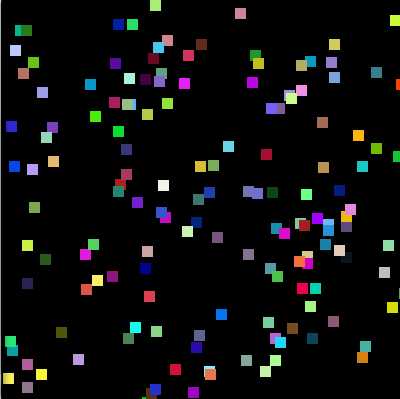
<?phpheader(‘content-type:image/png‘);$i=imagecreatetruecolor(400,400);//创建真彩图像for($j=0;$j<=150;$j++){$c=gc($i);imagefilledrectangle($i,mt_rand(0,400),mt_rand(0,400),mt_rand(5,20),mt_rand(5,20),$c);imagerectangle($i,mt_rand(0,400),mt_rand(0,400),mt_rand(5,20),mt_rand(5,20),$c);}imageellipse($i,150,50,5,5,$c);imagepng($i);imagedestroy($i);function gc($i){return imagecolorallocate($i,mt_rand(0,255),mt_rand(0,255),mt_rand(0,255));}
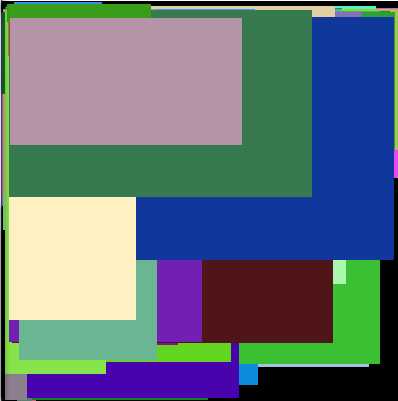
<?phpheader(‘content-type:image/png‘);$i=imagecreatetruecolor(400,400);//创建真彩图像for($j=0;$j<=150;$j++){$x=mt_rand(0,400);$y=mt_rand(0,400);imagefilledrectangle($i,$x,$y,$x+10,$y+10,gc($i));}imagepng($i);imagedestroy($i);function gc($i){return imagecolorallocate($i,mt_rand(0,255),mt_rand(0,255),mt_rand(0,255));}
$image , int $x1 , int $y1 , int $x2 , int $y2 , int $color )imagefilledrectangle() 在 image 图像中画一个用 color 颜色填充了的矩形,其左上角坐标为 x1,y1,右下角坐标为 x2,y2。0, 0 是图像的最左上角。
<?phpheader(‘content-type:image/png‘);$i=imagecreatetruecolor(400,400);//创建真彩图像for($j=0;$j<=150;$j++){$x=mt_rand(0,400);$y=mt_rand(0,400);$s=mt_rand(5,20);imagefilledrectangle($i,$x,$y,$x+$s,$y+$s,gc($i));}imagepng($i);imagedestroy($i);function gc($i){return imagecolorallocate($i,mt_rand(0,255),mt_rand(0,255),mt_rand(0,255));}

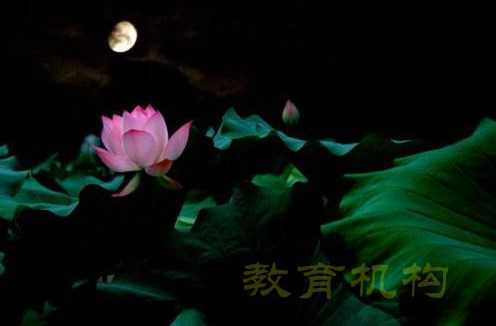
<?phpheader(‘content-type:image/jpg‘);$i=imagecreatefromjpeg(‘images/02.jpg‘);$w=imagesx($i);$h=imagesy($i);$c=imagecolorallocatealpha($i,255,255,0,100);imagettftext($i,40,0,240,300,$c,‘f.ttf‘,‘教育机构‘);imagejpeg($i);imagedestroy($i);
<?php$path = ‘f:/a/‘;$imgs = scandir($path);$logo = imagecreatefrompng(‘images/m.png‘);//$logo=imagerotate($logo,45,imagecolorallocatealpha($logo,0,0,0,127));$w = imagesx($logo);$h = imagesy($logo);foreach($imgs as $v){if($v==‘.‘ || $v==‘..‘){continue;}if(strtolower(substr($v,strrpos($v,‘.‘)+1)) == ‘jpg‘){$i = imagecreatefromjpeg($path.$v);$ww = imagesx($i);$hh = imagesy($i);// 水银logo效果imagecopy($i,$logo,$ww-$w-20,$hh-$h,0,0,$w,$h);imagejpeg($i,$path.‘logo_‘.$v);imagedestroy($i);}}imagedestroy($logo);

<?php$path = ‘./images/‘;$imgs = scandir($path);$logo = imagecreatefrompng(‘images/m.png‘);//$logo=imagerotate($logo,45,imagecolorallocatealpha($logo,0,0,0,127)); //水印的角度旋转$w = imagesx($logo);$h = imagesy($logo);foreach($imgs as $v){if($v==‘.‘ || $v==‘..‘){continue;}if(strtolower(substr($v,strrpos($v,‘.‘)+1)) == ‘jpg‘){$i = imagecreatefromjpeg($path.$v);$ww = imagesx($i);$hh = imagesy($i);// 水银logo效果imagecopy($i,$logo,$ww-$w-20,$hh-$h,0,0,$w,$h);imagejpeg($i,$path.‘logo_‘.$v);imagedestroy($i);}}imagedestroy($logo);
$image , int $cx , int $cy , int $w , int $h , int $s , int $e , int $color )cx,cy(图像左上角为 0, 0)为中心在 image 所代表的图像中画一个椭圆弧。w 和 h 分别指定了椭圆的宽度和高度,起始和结束点以 s 和 e 参数以角度指定。0°位于三点钟位置,以顺时针方向绘画。
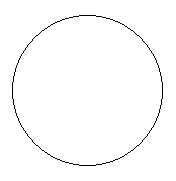
<?php// 创建一个 200X200 的图像$img = imagecreatetruecolor(200, 200);// 分配颜色$white = imagecolorallocate($img, 255, 255, 255);$black = imagecolorallocate($img, 0, 0, 0);imagefill($img,0,0,$white);// 画一个黑色的圆imagearc($img, 100, 100, 150, 150, 0, 360, $black);// 将图像输出到浏览器header("Content-type: image/png");imagepng($img);// 释放内存imagedestroy($img);
标签:
原文地址:http://www.cnblogs.com/lsr111/p/4523476.html