标签:
//把相对路径变成绝对路径。
string absolutePath = Server.MapPath(relativePath);
FileUpload控件:
属性:
FileName:文件名
HasFile:bool 是否选中了文件
FileBytes:要上传文件的二进制数据
方法:
SaveAs(string 绝对路径):上传,另存为。
一、上传到硬盘文件夹
(一)传单个文件
第一步:准备好文件及路径:
//把之前在客户端的文件名给取出来
string fileName = FileUpload1.FileName;
//防止文件重名
fileName = DateTime.Now.ToString("yyyyMMddhhmmsss") + fileName;
//把相对路径转化为绝对路径
string path = Server.MapPath("uploads/" + fileName);
第二步:执行上传:
//上传
FileUpload1.SaveAs(path); //参数必须根路径
注意:
1.如何防止文件重名?
2.如何防止同一时间点不同用户传统一文件名?
事例1:上传单个文件
 需要的控件FileUpload,button

 1  protected void btnUpload_Click(object sender, EventArgs e)
 2     {
 3         //FileUpload1.SaveAs(@"E:\0128授课内容\0530\uploads\aaa.jpg");
 4         //把之前在客户端的文件名给取出来
 5         string fileName = FileUpload1.FileName;
 6
 7         //防止文件重名
 8         fileName = DateTime.Now.ToString("yyyyMMddhhmmsss") + fileName;
 9
10         //把相对路径转化为绝对路径
11         string path = Server.MapPath("uploads/" + fileName);
12
13         //上传
14         FileUpload1.SaveAs(path);   //参数必须根路径
15
16     }
(二)传多个文件:
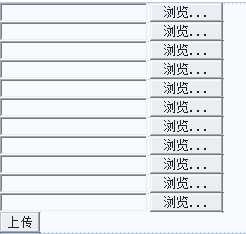
思路:遍历表单中所有的FileUpload控件,如果选择文件就上传
int index = 0;
foreach (Control ctrl in form1.Controls)
{
if (ctrl is FileUpload)
{
index++;
//取得每个上传控件
FileUpload upload = ctrl as FileUpload;
//上传控件中选上文件了
if (upload.HasFile)
{
//做文件路径出来
string path = Server.MapPath("uploads/" + DateTime.Now.ToString("yyyyMMddhhmmss") + index.ToString("00") + upload.FileName);
//上传
upload.SaveAs(path);
}
}
}
事例2:
 需要的控件FileUpload,button

 1 using System;
 2 using System.Collections.Generic;
 3 using System.Linq;
 4 using System.Web;
 5 using System.Web.UI;
 6 using System.Web.UI.WebControls;
 7
 8 public partial class Default2 : System.Web.UI.Page
 9 {
10     protected void Page_Load(object sender, EventArgs e)
11     {
12
13     }
14     protected void Button1_Click(object sender, EventArgs e)
15     {
16         int index = 0;
17         foreach (Control ctrl in form1.Controls)
18         {
19             if (ctrl is FileUpload)
20             {
21                 index++;
22                 //取得每个上传控件
23                 FileUpload upload = ctrl as FileUpload;
24                 //上传控件中选上文件了
25                 if (upload.HasFile)
26                 {
27                     //做文件路径出来
28                     string path = Server.MapPath("uploads/" + DateTime.Now.ToString("yyyyMMddhhmmss") + index.ToString("00") + upload.FileName);
29
30                     //上传
31                     upload.SaveAs(path);
32                 }
33             }
34         }
35     }
36 }
(一)传到数据库去
1.做数据库的操作代码。DA Data
Image字段对应在程序里是byte[]类型
2.做界面上的代码。
a.把界面的值取出来
FileUpload1.FileBytes - 用来获得上传文件的二进制数据。
b.送到数据库去
(二)从数据库中找出来,显示出来
法一:会生成垃圾文件
在服务端生成一个JPG,把这个JPG的路径赋给Image控件
法二:单独做一个用来显示图片二进制数据的页面。把这个页面赋给Image控件。
事例3:
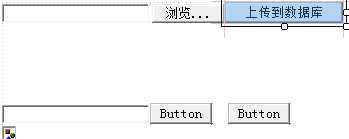
 需要的控件FileUpload,button,textBox,image

 1 using System;
 2 using System.Collections.Generic;
 3 using System.Linq;
 4 using System.Web;
 5 using System.Web.UI;
 6 using System.Web.UI.WebControls;
 7 using Data;
 8 using DA;
 9 using System.IO;
10 public partial class Default3 : System.Web.UI.Page
11 {
12     protected void Page_Load(object sender, EventArgs e)
13     {
14
15     }
16     protected void Button1_Click(object sender, EventArgs e)
17     {
18         //取界面数据
19         PhotoData data = new PhotoData();
20         data.Name = FileUpload1.FileName;
21         data.Pic = FileUpload1.FileBytes;  //FileBytes保存的是图片的二进制数据
22         //送到数据库去
23         new PhotoDA().Insert(data);
24     }
25     protected void Button2_Click(object sender, EventArgs e)
26     {
27         //从数据库中把数据取出来
28         PhotoDA da = new PhotoDA();
29         PhotoData data = da.Select(Convert.ToInt32(TextBox1.Text));
30
31         string temp = Server.MapPath("temp.jpg");
32         FileStream fs = new FileStream(temp, FileMode.Create);
33         fs.Write(data.Pic, 0, data.Pic.Length);
34         fs.Close();
35
36         Image1.ImageUrl = "temp.jpg";
37     }
38     protected void Button3_Click(object sender, EventArgs e)
39     {
40         Image1.ImageUrl = "ShowPIC.aspx?id=" + TextBox1.Text;
41     }
42 }

 1 using System;
 2 using System.Collections.Generic;
 3 using System.Linq;
 4 using System.Web;
 5 using System.Web.UI;
 6 using System.Web.UI.WebControls;
 7 using Data;
 8 using DA;
 9 public partial class ShowPIC : System.Web.UI.Page
10 {
11     protected void Page_Load(object sender, EventArgs e)
12     {
13         string id = Request["id"].ToString();
14
15         PhotoData data = new PhotoDA().Select(Convert.ToInt32(id));
16         if (data != null)
17         {
18             byte[] buffer = data.Pic;
19             Response.OutputStream.Write(buffer, 0, buffer.Length);
20             Response.End();
21         }
22     }
23 }
上传图片加水印:
//一、从上传数据中,转化成图片对象。
Stream s = FileUpload1.FileContent;
System.Drawing.Image img = System.Drawing.Image.FromStream(s);
//二、对图片对象进行画水印
//1.造笔
SolidBrush brush = new SolidBrush(Color.Yellow);
//2.造字体
Font font = new Font("Comic Sans MS", 18);
//3.找到图像绘图区域
Graphics g = Graphics.FromImage(img);
g.DrawString("http://www.itNBA.com", font, brush, 0, 0);
//三、图片对象另存到硬盘上去
string fileName = FileUpload1.FileName;
string path = Server.MapPath("uploads/" + fileName);
img.Save(path);
 需要的控件FileUpload,button

 1 using System;
 2 using System.Collections.Generic;
 3 using System.Linq;
 4 using System.Web;
 5 using System.Web.UI;
 6 using System.Web.UI.WebControls;
 7 using System.Drawing;
 8 using System.IO;
 9 public partial class Default4 : System.Web.UI.Page
10 {
11     protected void Page_Load(object sender, EventArgs e)
12     {
13
14     }
15     protected void Button1_Click(object sender, EventArgs e)
16     {
17         //一、从上传数据中,转化成图片对象。
18         Stream s = FileUpload1.FileContent;
19         System.Drawing.Image img = System.Drawing.Image.FromStream(s);
20
21         //二、对图片对象进行画水印
22         //1.造笔
23         SolidBrush brush = new SolidBrush(Color.Yellow);
24         //2.造字体
25         Font font = new Font("Comic Sans MS", 18);
26         //3.找到图像绘图区域
27         Graphics g = Graphics.FromImage(img);
28         //4.确定开始画位置
29         SizeF size = g.MeasureString("http://www.itNBA.com",font);
30         float x = 0, y = 0;
31         y = img.Height - size.Height;
32         x = img.Width - size.Width;
33         //5.开始画
34         g.DrawString("http://www.itNBA.com", font, brush, x, y);
35
36         //三、图片对象另存到硬盘上去
37         string fileName = FileUpload1.FileName;
38         string path = Server.MapPath("uploads/" + fileName);
39         img.Save(path);
40     }
41 }
标签:
原文地址:http://www.cnblogs.com/m123/p/4541664.html