yum -y install pcre-devel
groupadd -r nginx
useradd -g nginx -r nginx
tar xf nginx-1.6.2.tar.gz
cd nginx-1.6.2
./configure --prefix=/usr/local/nginx --conf-path=/etc/nginx/nginx.conf--user=nginx --group=nginx --error-log-path=/var/log/nginx/error.log--http-log-path=/var/log/nginx/access.log --pid-path=/var/run/nginx/nginx.pid--lock-path=/var/lock/nginx.lock --with-http_ssl_module --with-http_stub_status_module--with-http_gzip_static_module --with-http_flv_module --with-http_mp4_module--http-client-body-temp-path=/var/tmp/nginx/client--http-proxy-temp-path=/var/tmp/nginx/proxy--http-fastcgi-temp-path=/var/tmp/nginx/fastcgi --http-uwsgi-temp-path=/var/tmp/nginx/uwsgi
make && make install
mkdir -pv/var/tmp/nginx/{client,proxy,fastcgi,uwsgi}
编译参数说明:
--prefix=/usr/local/nginx #指定安装路径
--conf-path=/etc/nginx/nginx.conf #指定配置文件路径
--user=nginx #指定运行用户
--group=nginx #指定运行组
--error-log-path=/var/log/nginx/error.log #指定错误日志文件位置
--http-log-path=/var/log/nginx/access.log #指定访问日志文件位置
--pid-path=/var/run/nginx/nginx.pid #指定pid文件位置
--lock-path=/var/lock/nginx.lock #指定锁文件位置
--with-http_ssl_module #启用https功能
--with-http_stub_status_module #启用状态页面功能
--with-http_gzip_static_module #启用压缩功能
--with-http_flv_module #启用流媒体支持
--with-http_mp4_module #启用MP4支持
--http-client-body-temp-path=/var/tmp/nginx/client #指定客户端body临时目录
--http-proxy-temp-path=/var/tmp/nginx/proxy #指定proxy临时目录
--http-fastcgi-temp-path=/var/tmp/nginx/fastcgi #指定fastcgi临时目录
--http-uwsgi-temp-path=/var/tmp/nginx/uwsgi #指定uwsgi临时目录
启用nginx服务
[root@localhost ~]# /usr/local/nginx/sbin/nginx
[root@localhost ~]# ss -tnlp | grep nginx
LISTEN    0      128                       *:80                       *:*     users:(("nginx",38901,6),("nginx",38902,6))
访问测试

查看nginx启动的进程
[root@localhost ~]# ps aux | grep nginx
root     38901  0.0  0.1 45044  1064 ?        Ss  09:11   0:00 nginx: master process/usr/local/nginx/sbin/nginx
nginx    38902  0.0  0.1 45472  1928 ?        S   09:11   0:00 nginx: worker process
nginx启动,停止,重载
nginx 启动
nginx –s reload 重载
killall nginx 关闭
配置段:
main配置段:全局配置端
event:定义event模型工作特性
http{}:定义http协议相关的配置
配置指令:要以分号结尾,语法格式
Directory value1[value2…]
支持使用变量:
内置变量:
模块会提供变量定义
自定义变量:
Set var_name value
主配置段的指令:
用于调试、定位问题
正常运行必备的配置
优化性能的配置
事件相关的配置
1、指定允许worker进程的用户和组
语法:user USERNAME [GROUPNAME];
示例:user nginx nginx;
2、指明pid文件位置
语法:pid /path/to/pid_file
示例:pid /var/run/nginx/nginx.pid;
3、指定所有worker进程所能够打开的最大文件句柄数
默认系统设置每个用户只能打开1024个文件,如果nginx想支持超过1万个并发,那么其要支持打开的文件数量必须要超过1万。
语法:worker_rlimit_nofile #;
1、指明worker进程的个数
语法:worker_processes #;
说明:通常设置为物理CPU核心个数减1,或者减2。如果CPU为8核,那么值应该设置为7或者6。Tengine支持设置为auto。
2、提供缓存命中率
将进程绑定在指定cpu上面运行,使进程不会调度到其他cpu运行,继而可以提高缓存命中率。
语法:worker_cpu_affinitycpumask;
假设当前主机有四颗CPU,cpumask表示方法如下:
0000 0001 #第一颗CPU
0000 0010 #第二颗CPU
0000 0100 #第三颗CPU
0000 1000 #第四颗CPU
示例:worker_cpu_affinity00000001 00000010 00000100;
说明:Tengine支持设置为auto。
3、记时器解析度
当请求到达nginx的时候nginx需要对请求进行响应,响应完成需要记录日志,日志中会记录时间,记录时间就会进行系统调用获取当前系统时间。
如果时间解析度过大,可能会1秒中解析1000次,如果设置100毫秒解析1此,那么就会变成1秒解析10次,也可以设置为1秒解析1次。
语法:timer_resolution 100ms;
4、指明worker进程的nice值
语法:worker_priority number;
nice值:-20,19
nice值越小,优先级越高,优先级越高就会被优先调度到CPU上面运行。
1、accept_mutex {off|on};
master调度用户请求至各worker进程时使用的负载均衡锁;on表示能让多个worker轮流地、序列化地去响应新请求;
2、lock_file file;
accept_mutex用到的锁文件路径;
3、use[epoll|rtsig|select|poll];
指明使用的事件模型;建议让Nginx自行选择;
4、worker_connections#;
设定单个worker进程所能够处理的最大并发连接数量;
Nginx接受的最大并发连接=worker_connections *work_processes
1、daemon {on|off};
是否以守护进程方式运行nginx;调试时应该设置为Off;
2、master_process{on|off};
是否以master/worker模型来运行nginx; 调试时可以设置为off;
3、error_log file |stderr | syslog:server=address[,parameter=value] | memory:size [debug | info |notice | warn | error | crit | alert | emerg];
error_log位置 级别;
若要使用debug级别,需要在编译nginx时使用了--with-debug选项;
配置框架:
http {
    upstream {
        ...
    }

    server {    # 每个server类似于httpd中的一个<VirtualHost>;
       location  URL {
           root"/path/to/somedir";
           ...
       } # 类似于httpd中的<Location>,用于定义URL与本地文件系统的映射关系;
       locationURL {
           if... {
              ...
           }
       }
    }
    server {
       ...
    }

}
注意:与http相关的指令仅能够放置于http、server、location、upstream、if上下文,但有些指令仅应用于这5种上下文中的某些种;
1、server{}
功能:定义虚拟主机
示例:定义一个虚拟主机
修改主配置文件在http{}中设置如下内容
  server {
    listen80;
   server_name www.test.com;
    root"/vhosts/web1";
   }
准备web目录和网页文件
mkdir -p /vhosts/web1
echo "web1" > /vhosts/web1/index.html
重载nginx服务
/usr/local/nginx/sbin/nginx -s reload
访问测试
[root@localhost ~]# curl http://www.test.com
web1
2、listen
指定监听的地址和端口;
listenaddress[:port];
listenport; #表示监听所有地址
3、server_name NAME[...];
后可跟多个主机;名称还可以使用正则表达式(~)或通配符;
检查优先级:
(1)先做精确匹配检查;
(2)左侧通配符匹配检查:*.magedu.com
(3)右侧通配符匹配检查:如mail.*
(4)正则表达式匹配检查:如 ~^.*\.magedu\.com$
(5)default_server;
4、root path;
设置资源路径映射;用于指明请求的URL所对应的资源所在的文件系统上的起始路径;
5、location [ = | ~| ~* | ^~ ] uri { ... }
location@name { ... }
功能:允许根据用户请求的URI来匹配定义的各location;匹配到时,此请求将被相应的location配置块中的配置所处理,例如做访问控制等功能;
=:精确匹配检查;
~:正则表达式模式匹配检查,区分字符大小写;
~*:正则表达式模块匹配检查,不区分字符大小写;
^~:URI的前半部分匹配,不支持正则表达式;
匹配的优先级:精确匹配(=)、^~、~、~*、不带任何符号的location;
示例:定义了ABCED四个localion
location = / {
    [ configurationA ]
}

location / {
    [configuration B ]
}

location /documents/ {
    [configuration C ]
}

location ^~ /images/ {
    [configuration D ]
}

location ~* \.(gif|jpg|jpeg)$ {
    [configuration E ]
}
访问不同路径,匹配的localion
访问/ 会匹配到A
访问/index.html,会匹配到B
访问/documents/,会匹配到C
访问/images/a.gif,会匹配到D
访问/abc/a.gif,会匹配到E
示例:定义3个localion
修改nginx配置文件
   server {
     listen 80;
     server_name www.test.com;
     location / {
       root "/vhosts/web1";
     }
     location / {
       root "/vhosts/images";
     }
     location ~* \. (txt|text)$ {
       root "/vhosts/test";
     }
   }
创建images和test目录,并设置相关web页面文件
mkdir/vhosts/{images,text}
echo"test a.txt" > /vhosts/test/a.txt
echo"image a.txt" > /vhosts/images/a.txt
echo"web1 a.txt" > /vhosts/web1/a.txt
重载配置文件
/usr/local/nginx/sbin/nginx-s reload
访问测试
[root@localhost~]# curl www.test.com/a.txt
test a.txt
这里测试报错,寻找的路径实际是/vhosts/test/images/a.txt,匹配到的是第三个localion
[root@localhost ~]# curl www.test.com/images/a.txt
<html>
<head><title>404 Not Found</title></head>
<body bgcolor="white">
<center><h1>404 NotFound</h1></center>
<hr><center>nginx/1.6.2</center>
</body>
</html>
6、alias path;
用于location配置段,定义路径别名
例如实现:http://www.magedu.com/images/index.html<-- /vhosts/web1/images/index.html
修改nginx配置
    location/images/ {
       root"/vhosts/web1";
    }
创建相关文件
mkdir /vhosts/web1/images
echo "web1 images" >/vhosts/web1/images/index.html
访问测试
[root@localhost ~]# curl www.test.com/images/
web1 images
实现:http://www.magedu.com/images/index.html<-- /vhosts/web1/index.html
修改nginx配置文件
     location/images/ {
       alias"/vhosts/web1/";    #注意这里的结尾必须有/否则会报错
     }
访问测试
[root@localhost ~]# curl www.test.com/images/
web1
注意:root表示指明路径为对应的location"/" URL; alias表示路径映射,即location指令后定义的URL是相对于alias所指明的路径而言;
7、index file;
功能:默认主页面;
indexindex.php index.html;
8、error_page code[...] [=code] URI | @name
根据http响应状态码来指明特用的错误页面;
示例:设置错误页面
修改nginx配置文件
location / {
   root"/vhosts/web1";
   error_page404 /404_customed.html;
 }
设置错误页面
[root@localhost ~]# vim /vhosts/web1/404_customed.html
<h1>0_0,页面没有找到</h1>
验证:访问一个不存在的文件就会自动调整到404错误页面
[root@localhost ~]# curl www.test.com/abc.html
<h1>0_0,页面没有找到</h1>
[root@localhost ~]# curl -I www.test.com/abc.html
HTTP/1.1 404 Not Found
Server: nginx/1.6.2
Date: Sat, 23 May 2015 12:15:46 GMT
Content-Type: text/html
Content-Length: 32
Connection: keep-alive
ETag: "55606eac-20"
[=code]:以指定的响应码进行响应,而不是默认的原来的响应;默认表示以新资源的响应码为其响应码;
设置404响应码为200
     location/ {
       root"/vhosts/web1";
      error_page 404 =200 /404_customed.html;
     }
再次访问不存在文件,返回的响应码就是200;
[root@localhost ~]# curl -I www.test.com/abc.html
HTTP/1.1 200 OK
Server: nginx/1.6.2
Date: Sat, 23 May 2015 12:20:19 GMT
Content-Type: text/html
Content-Length: 32
Last-Modified: Sat, 23 May 2015 12:12:28 GMT
Connection: keep-alive
ETag: "55606eac-20"
Accept-Ranges: bytes
9、基于IP的访问控制
allowIP/Network;
denyIP/Network;
示例:拒绝自己访问
修改配置文件
     location/ {
       root"/vhosts/web1";
       deny 172.16.4.100;
      error_page 404 =200 /404_customed.html;
     }
验证:提供403没有权限访问
[root@localhost ~]# curl www.test.com
<html>
<head><title>403Forbidden</title></head>
<body bgcolor="white">
<center><h1>403Forbidden</h1></center>
<hr><center>nginx/1.6.2</center>
</body>
</html>
设置只允许172.16.0.0网段访问,拒绝其他所有人访问
     location/ {
       root"/vhosts/web1";
       allow172.16.0.0/16;
       denyall;
      error_page 404 =200 /404_customed.html;
     }
10、基于用户的访问控制
支持的认证方式: basic,digest;
auth_basic"";
auth_basic_user_file"/PATH/TO/PASSWORD_FILE"
账号密码文件建议使用htpasswd来创建;
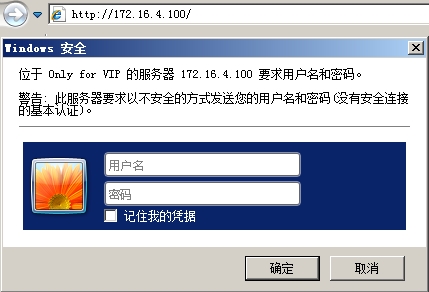
示例:设置访问网站需要输入用户名密码进行验证,验证通过才可访问。
     location/ {
       root"/vhosts/web1";
      auth_basic "Only for VIP";
      auth_basic_user_file /etc/nginx/users/.htpasswd;
     }
设置验证文件
[root@localhost ~]# mkdir /etc/nginx/users
[root@localhost ~]# htpasswd -c -m/etc/nginx/users/.htpasswd zhangsan
New password:
Re-type new password:
Adding password for user zhangsan
验证:访问web服务器,提供需要输入用户名和密码
11、https配置
创建CA
[root@localhost ~]# cd /etc/pki/CA/
[root@localhost CA]# (umask 077;openssl genrsa -outprivate/cakey.pem 2048)
[root@localhost CA]# openssl req -new -x509 -keyprivate/cakey.pem -out cacert.pem -days 3650
Country Name (2 letter code) [XX]:CN
State or Province Name (full name) []:HA
Locality Name (eg, city) [Default City]:ZZ
Organization Name (eg, company) [Default CompanyLtd]:MageEdu
Organizational Unit Name (eg, section) []:Ops
Common Name (eg, your name or your server‘shostname) []:ca.test.com
Email Address []:ca@admin.com
[root@localhost CA]# touch serial index.txt
[root@localhost CA]# echo 01 > serial
Nginx创建证书申请
[root@localhost ~]# cd /etc/nginx/
[root@localhostnginx]# mkdir ssl
[root@localhostnginx]# cd ssl/
[root@localhostssl]# (umask 077; openssl genrsa -out nginx.key 1024)
[root@localhostssl]# openssl req -new -key nginx.key -out nginx.csr
Country Name (2letter code) [XX]:CN
State or ProvinceName (full name) []:HA
Locality Name (eg,city) [Default City]:ZZ
Organization Name(eg, company) [Default Company Ltd]:MageEdu
Organizational UnitName (eg, section) []:Ops
Common Name (eg,your name or your server‘s hostname) []:www.test.com
Email Address[]:web@web.com
A challengepassword []:
An optional companyname []:
CA签署证书
[root@localhost ssl]# openssl ca -in nginx.csr -outnginx.crt -days 3655
Sign the certificate? [y/n]:y
1 out of 1 certificate requests certified, commit?[y/n]y
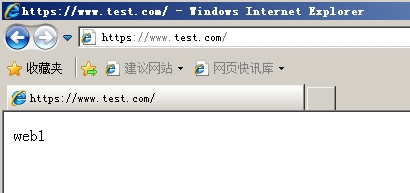
设置nginx启用https虚拟主机
  server {
       listen       443 ssl;
       server_name  www.test.com;

       ssl_certificate     /etc/nginx/ssl/nginx.crt;
       ssl_certificate_key /etc/nginx/ssl/nginx.key;

       ssl_session_cache   shared:SSL:1m;
       ssl_session_timeout  5m;

       ssl_ciphers  HIGH:!aNULL:!MD5;
       ssl_prefer_server_ciphers  on;

       location / {
           root   /vhosts/web1;
            index  index.html index.htm;
        }
重载配置文件,查看是否启用443端口
[root@localhost nginx]# /usr/local/nginx/sbin/nginx-s reload
[root@localhost nginx]# ss -tnl | grep 443
LISTEN    0      128                       *:443                      *:*
客户端访问验证
这时客户端访问web服务器的443端口还是会报错,这是因为客户端不信任CA颁发机构
需要将/etc/pki/CA/cacert.pem文件复制到客户端
并且客户端改名为cacert.crt,然后安装证书,并且放到根颁发机构
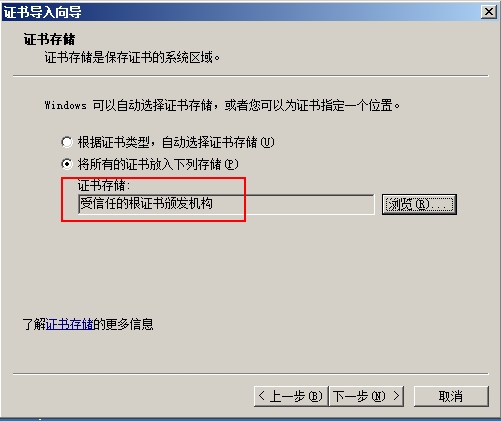
安装完证书之后就可以使用https协议访问了
12、stub_status{on|off};
仅能用于location上下文;
示例:修改配置文件,添加location
  location/status {
     stub_status on;
      allow172.16.0.0/16;
      denyall;
  }
结果示例:设置完成在url路径后根status即可打开状态页面

显示说明:
Active connections: 1 # 当前所有处于打开状态的连接数;
server accepts handled requests
5555 53
(1) 已经接受过的连接数
(2) 已经处理过的连接数
(3) 已经处理过的请求数;在“保持连接”模式下,请求数量可能会多于连接数量;
Reading: 0 Writing: 1 Waiting: 0
Reading:正处于接收请求状态的连接数;
Writing:请求已经接收完成,正处于处理请求或发送响应的过程中的连接数;
Waiting:保持连接模式,且处于活动状态的连接数;
13、rewrite regexreplacement flag;
功能:URL重写
flag:
last:一旦此rewrite规则重写完成后,就不再被后面其它的rewrite规则进行处理;而是由User Agent重新对重写后的URL再一次发起请求,并从头开始执行类似的过程,很容易造成死循环
一个死循环示例:被第一条rewrite规则匹配到之后,会使用新匹配到的URL访问nginx,nginx会再次对url进行重写,如果还匹配则再次访问,再次重写……
...
       rewrite^/images/(.*\.jpg)$ /imgs/$1 last;
       rewrite^/imgs/(.*\.jpg)$ /images/$1 last;
...
break:一旦此rewrite规则重写完成后,由User Agent对新的URL重新发起请求,且不再会被当前locatrion内的任何rewrite规则所检查;
示例:如果请求被第一条规则所匹配,那么就不会继续检查,而是直接对新匹配到的URL发起请求
       ...
       rewrite^/images/(.*\.jpg)$ /imgs/$1 break;
       rewrite^/imgs/(.*\.jpg)$ /images/$1 break;
       ....
redirect:以302响应码(临时重定向)返回新的URL;
permanent:以301响应码(永久重定向)返回新的URL;
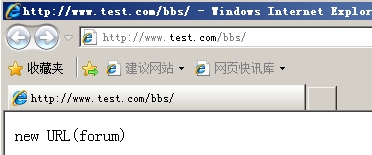
示例:将bbs重写为forum
修改配置文件
     location/ {
       root"/vhosts/web1";
      rewrite ^/bbs(.*)$ /forum/$1/ break;
     }
设置文档目录和网页文件相关信息
/usr/local/nginx/sbin/nginx -s reload
mkdir /vhosts/web1/forum
echo "new URL(forum)" > /vhosts/web1/forum/index.html
访问测试:访问bbs目录,出现forum目录下的内容就是重写成功了
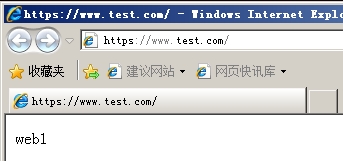
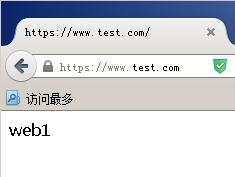
302重定向示例:访问bbs下的所有内容,重定向到https://www.test.com/
     location/ {
       root"/vhosts/web1";
      rewrite ^/bbs/(.*)$ https://www.test.com/$1 redirect;
     }
验证:
Linux端验证:
[root@localhost ~]# curl www.test.com/bbs/
<html>
<head><title>302Found</title></head>
<body bgcolor="white">
<center><h1>302Found</h1></center>
<hr><center>nginx/1.6.2</center>
</body>
</html>
Windows打开www.test.com/bbs就会直接调整到https://www.test.com/
14、if
语法:if (condition) {...}
应用环境:server, location
condition:
(1)变量名;
变量值为空串,或者以“0”开始,则为false;其它的均为true;
(2)以变量为操作数构成的比较表达式
可使用=, !=类似的比较操作符进行测试;
(3)正则表达式的模式匹配操作
~:区分大小写的模式匹配检查
~*:不区分大小写的模式匹配检查
!~和!~*:对上面两种测试取反
(4)测试路径为文件可能性:-f, !-f
(5)测试指定路径为目录的可能性:-d, !-d
(6)测试文件的存在性:-e, !-e
(7)检查文件是否有执行权限:-x, !-x
说明:!为取反
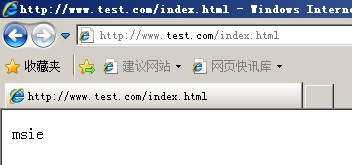
例如:如果用户请求为IE浏览器,则替换为msie下的内容
配置文件server段中配置
       if($http_user_agent ~* MSIE) {
           rewrite^(.*)$ /msie/$1 break;
       }
创建msie目录和网页文件
mkdir /vhosts/web1/msie
echo "msie" >/vhosts/web1/msie/index.html
验证:ie浏览器访问,出现msie内容,火狐浏览器访问出现web1内容
15、防盗链
配置方法:
location ~* \.(jpg|gif|jpeg|png)$ {
    valid_referersnone blocked www.magedu.com;   #合法引用者
    if ($invalid_referer){   #定义不合法用户的重定向
       rewrite^/ http://www.magedu.com/403.html;
    }
}
16、定制访问日志格式
log_format main ‘$remote_addr - $remote_user [$time_local]"$request" ‘
‘$status $body_bytes_sent"$http_referer" ‘
‘"$http_user_agent" "$http_x_forwarded_for"‘;
access_log logs/access.log main;
注意:此处可用变量为nginx各模块内建变量;
1、keepalive_timeout #;
长连接的超时时长,默认75s;
2、keepalive_requests #;
在一个长连接上所能够允许请求的最大资源数;
3、keepalive_disable [msie6|safari|none];
为指定类型的User Agent禁用长连接;
4、tcp_nodelay on|off;
是否对长连接使用TCP_NODELAY选项;
5、client_header_timeout #;
读取http请求报文首部的超时时长;
6、client_body_timeout #;
读取http请求报文body部分的超时时长;
7、send_timeout #;
发送响应报文的超时时长;
本文出自 “梅花香自苦寒来” 博客,请务必保留此出处http://ximenfeibing.blog.51cto.com/8809812/1660590
Nginx作为WEB服务相关配置(性能优化,网络连接,访问控制,虚拟主机,https等等)
原文地址:http://ximenfeibing.blog.51cto.com/8809812/1660590