标签:
自己想做一个简单的天气预报,由于能力有限,暂时做个简单的。
大概讲一下自己的开发步骤吧。
第一步:获得可以开发的json数据的及时更新的接口。
通过强大的度娘,我这里使用的json的地址是:http://wthrcdn.etouch.cn/weather_mini?citykey=101010100
第二步:实现各大城市编号的获取
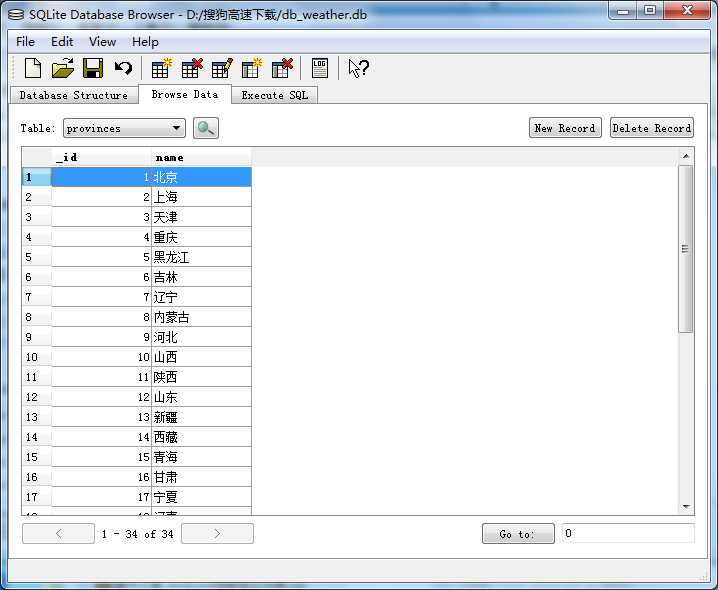
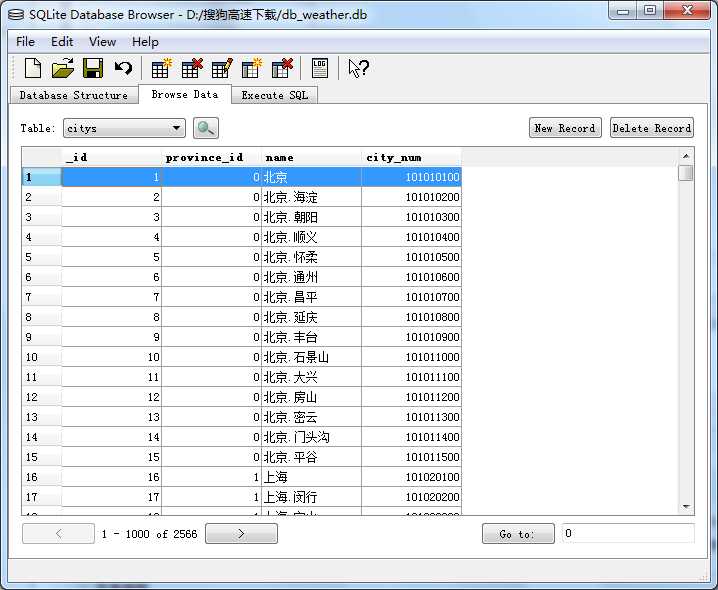
实现方法:网上下载一个包含各大城市的db文件db_weather.db,下载地址:http://pan.baidu.com/s/1hqkxlxM
这个db文件里面包含中国各大省份及城市编号,里面的大概内容截图如下所示
这个是省份表:
这个是城市表:
把这个db文件下载下来,通过DDMS,把这个文件放到android测试机的/sdcard目录下
然后编写一些界面响应,获取省份 以及城市的编号,例如北京:101010100
获取省份和城市编号的代码如下
以下是MainActivity的代码(初次写,很多方法没有进行封装,日后有机会进行代码优化)

  1 package com.oysd.mywea;
  2
  3 import java.io.File;
  4 import java.util.ArrayList;
  5 import java.util.List;
  6
  7 import android.app.Activity;
  8 import android.content.Intent;
  9 import android.database.Cursor;
 10 import android.database.sqlite.SQLiteDatabase;
 11 import android.os.Bundle;
 12 import android.view.Menu;
 13 import android.view.MenuItem;
 14 import android.view.View;
 15 import android.view.View.OnClickListener;
 16 import android.widget.AdapterView;
 17 import android.widget.AdapterView.OnItemSelectedListener;
 18 import android.widget.ArrayAdapter;
 19 import android.widget.Button;
 20 import android.widget.Spinner;
 21 import android.widget.Toast;
 22
 23 public class MainActivity extends Activity {
 24
 25     private File f = new File("/sdcard/weather/db_weather.db");
 26     private Spinner province;//省份
 27     private Spinner city;//城市
 28     private List<String> proset=new ArrayList<String>();//省份集合
 29     private List<String> cityset=new ArrayList<String>();//城市集合
 30     private Button showWea;
 31     private int pro_id;//省份id号
 32     private long city_num;
 33     private String pro_name;
 34
 35     @Override
 36     protected void onCreate(Bundle savedInstanceState) {
 37         super.onCreate(savedInstanceState);
 38         setContentView(R.layout.activity_main);
 39
 40         province = (Spinner) findViewById(R.id.provinces);
 41         city = (Spinner) findViewById(R.id.city);
 42         showWea = (Button) findViewById(R.id.showWea);
 43
 44         ArrayAdapter<String> pro_adapter = new ArrayAdapter<String>(this, android.R.layout.simple_spinner_item, getProSet());
 45         province.setAdapter(pro_adapter);
 46         province.setOnItemSelectedListener(new SelectProvince());//添加省份监听
 47
 48         city.setOnItemSelectedListener(new SelectCity());//添加城市选择监听
 49         showWea.setOnClickListener(new OnClickListener() {
 50
 51             @Override
 52             public void onClick(View v) {
 53                 // TODO Auto-generated method stub
 54
 55                 Bundle b = new Bundle();
 56                 b.putLong("city_num", city_num);
 57                 b.putString("pro_name", pro_name);
 58                 Intent intent = new Intent(MainActivity.this , WeaActivity.class);
 59                 intent.putExtras(b);
 60                 startActivity(intent);
 61             }
 62         });
 63     }
 64
 65     /**
 66      * 增加省份监听类
 67      * @author Administrator
 68      *
 69      */
 70     class SelectProvince implements OnItemSelectedListener{
 71
 72         @Override
 73         public void onItemSelected(AdapterView<?> parent, View view, int position,
 74                 long id) {
 75             // TODO Auto-generated method stub
 76             pro_id = position;
 77             pro_name = getProName();
 78             city.setAdapter(getAdapter());
 79         }
 80
 81         @Override
 82         public void onNothingSelected(AdapterView<?> arg0) {
 83             // TODO Auto-generated method stub
 84
 85         }
 86
 87     }
 88
 89     class SelectCity implements OnItemSelectedListener{
 90
 91         @Override
 92         public void onItemSelected(AdapterView<?> parent, View view, int position,
 93                 long id) {
 94             // TODO Auto-generated method stub
 95
 96             String cityname = parent.getItemAtPosition(position).toString();
 97             city_num = getCityNum(position);
 98
 99             //提示一下
100             Toast.makeText(getApplicationContext(), cityname+":" + city_num, 2000).show();
101
102         }
103
104         @Override
105         public void onNothingSelected(AdapterView<?> arg0) {
106             // TODO Auto-generated method stub
107
108         }
109
110     }
111
112     /**
113      * 返回省份集合
114      */
115     public List<String> getProSet(){
116         //打开数据库
117         SQLiteDatabase db1 = SQLiteDatabase.openOrCreateDatabase(f, null);
118         Cursor cursor = db1.query("provinces", null, null, null, null, null, null);
119         while(cursor.moveToNext()){
120             String pro = cursor.getString(cursor.getColumnIndexOrThrow("name"));
121             proset.add(pro);
122         }
123         cursor.close();
124         db1.close();
125         return proset;
126     }
127
128     /**
129      * 返回城市集合
130      */
131     public List<String> getCitySet(int pro_id){
132         cityset.clear();//清空一下城市列表
133
134         SQLiteDatabase db2 = SQLiteDatabase.openOrCreateDatabase(f, null);
135         Cursor cursor = db2.query("citys", null, "province_id=" + pro_id, null, null, null, null);
136         while(cursor.moveToNext()){
137             String city = cursor.getString(cursor.getColumnIndexOrThrow("name"));
138             cityset.add(city);
139         }
140         cursor.close();
141         db2.close();
142         return cityset;
143     }
144
145     /**
146      * 返回城市的编号
147      * @param position
148      * @return
149      */
150     public long getCityNum(int position){
151         SQLiteDatabase db3 = SQLiteDatabase.openOrCreateDatabase(f, null);
152         Cursor cursor = db3.query("citys", null, "province_id=" + pro_id, null, null, null, null);
153         cursor.moveToPosition(position);
154         long citynum = cursor.getLong(cursor.getColumnIndexOrThrow("city_num"));
155         cursor.close();
156         db3.close();
157         return citynum;
158     }
159
160     /**
161      * 获取省份名字
162      * @return
163      */
164     public String getProName(){
165         SQLiteDatabase db4 = SQLiteDatabase.openOrCreateDatabase(f, null);
166         int pp = pro_id + 1;
167         Cursor cursor = null;
168
169         cursor = db4.query("provinces", null, "_id=" + pp, null, null, null, null);
170         //cursor.moveToPosition(0);
171         String proname = null;
172         while(cursor.moveToNext()){
173         proname = cursor.getString(cursor.getColumnIndex("name"));
174         }
175         cursor.close();
176         db4.close();
177         return proname;
178     }
179     /**
180      * 返回选择城市的适配器
181      * @return
182      */
183     public ArrayAdapter<String> getAdapter(){
184         ArrayAdapter<String> city_adapter = new ArrayAdapter<String>(this, android.R.layout.simple_spinner_item, getCitySet(pro_id));
185         return city_adapter;
186     }
187 }
以下是这个MainActivity的布局文件(比较简单)
 1 <LinearLayout xmlns:android="http://schemas.android.com/apk/res/android"
 2     xmlns:tools="http://schemas.android.com/tools"
 3     android:layout_width="match_parent"
 4     android:layout_height="match_parent"
 5     android:orientation="vertical" >
 6
 7     <TextView
 8         android:layout_width="fill_parent"
 9         android:layout_height="wrap_content"
10         android:text="省份/直辖市"
11         android:textSize="20dp"
12         android:textStyle="bold" />
13
14     <Spinner
15         android:id="@+id/provinces"
16         android:layout_width="fill_parent"
17         android:layout_height="wrap_content" />
18
19     <TextView
20         android:layout_width="fill_parent"
21         android:layout_height="wrap_content"
22         android:text="市/县"
23         android:textSize="20dp"
24         android:textStyle="bold" />
25
26     <Spinner
27         android:id="@+id/city"
28         android:layout_width="fill_parent"
29         android:layout_height="wrap_content" />
30
31     <Button
32         android:id="@+id/showWea"
33         android:layout_width="fill_parent"
34         android:layout_height="wrap_content"
35         android:text="查看天气" />
36
37 </LinearLayout>
通过上面的操作,就能够正确获得省份名字以及选择的城市
第三步:将获得省份名字以及城市编号 与json地址进行拼接,然后获取json数据并且进行解析
这个过程首先与json地址进行拼接然后获得json的字符串数据:
以下是显示某城市的天气情况,里面包含了选择城市的编号与json地址进行拼接
 1 package com.oysd.mywea;
 2
 3 import java.util.ArrayList;
 4
 5 import com.google.gson.Gson;
 6 import com.oysd.mywea.WeatherBean.ChildWeatherBean.GrandChildsWeatherBean;
 7
 8 import android.app.Activity;
 9 import android.os.Bundle;
10 import android.widget.TextView;
11
12 public class WeaActivity extends Activity {
13
14     private static String PATH = "http://wthrcdn.etouch.cn/weather_mini?citykey=";
15     private TextView tvCity,tvWendu,tvWenduValue,tvTomWenduValue,tvCurrentWendu,tvNote,tvCurrentCity,tvTomWendu,tvTodayType,tvTomorrowType;
16
17     @Override
18     protected void onCreate(Bundle savedInstanceState) {
19         // TODO Auto-generated method stub
20         super.onCreate(savedInstanceState);
21         setContentView(R.layout.activity_weather);
22
23         tvCity = (TextView) findViewById(R.id.tvCity);
24         tvWendu = (TextView) findViewById(R.id.tvWendu);
25         tvWenduValue = (TextView) findViewById(R.id.tvWenduValue);
26         tvCurrentWendu = (TextView) findViewById(R.id.tvCurrentWendu);
27         tvNote = (TextView) findViewById(R.id.tvNote);
28         tvCurrentCity = (TextView) findViewById(R.id.tvCurrentCity);
29         tvTomWendu = (TextView) findViewById(R.id.tvTomWendu);
30         tvTodayType = (TextView) findViewById(R.id.tvTodayType);
31         tvTomorrowType = (TextView) findViewById(R.id.tvTomorrowType);
32         tvTomWenduValue = (TextView) findViewById(R.id.tvTomWenduValue);
33
34         long city_num = getIntent().getExtras().getLong("city_num");
35         String pro_name = getIntent().getExtras().getString("pro_name");
36         tvCity.setText(pro_name + "天气");
37         String path = PATH + city_num;//与json数据的地址进行拼接
38
39         String JsonString = HttpUtils.getJsonContent(path);//获得json数据的字符串格式
40
41         WeatherBean bean = getWeatherFromJson(JsonString);//info为正确编码解析后的json数据,在bean中就可以获取第一级的若干参数
42
43         final WeatherBean.ChildWeatherBean childWeatherBean = bean.data;//这是第二级的javabean,可获取当下的温度以及一些基本参数
44
45         WeatherBean.ChildWeatherBean.GrandChildWeatherBean grandChildWeahterBean = childWeatherBean.yesterday;
46
47         //yesterday中的内容算是第三级的内容了,下面这句话也是第三级的内容,只不过这是一个List集合,这里就可以直接获取到了。
48
49         ArrayList<WeatherBean.ChildWeatherBean.GrandChildsWeatherBean> grandChildsWeatherBeans = childWeatherBean.forecast;
50         GrandChildsWeatherBean TodayWendu = grandChildsWeatherBeans.get(0);
51         String strWendu = "今日温度范围: ";
52         tvWendu.setText(strWendu);
53         tvWenduValue.setText(TodayWendu.low + "\n" +TodayWendu.high);
54
55         String currentWendu = "当前温度: " + childWeatherBean.wendu;
56         tvCurrentWendu.setText(currentWendu);
57
58         String Note = "注意事项 : " + childWeatherBean.ganmao;
59         tvNote.setText(Note);
60
61         String currentCity = "所在位置 : " + childWeatherBean.city;
62         tvCurrentCity.setText(currentCity);
63
64         GrandChildsWeatherBean TomorrowWendu = grandChildsWeatherBeans.get(1);
65         String strTomWendu = "明日温度范围: ";
66         tvTomWendu.setText(strTomWendu);
67         tvTomWenduValue.setText(TomorrowWendu.low + "\n" +TomorrowWendu.high);
68
69         String todayType = "今日天气类型    " + TodayWendu.type;
70         String tomorrowType = "明日天气类型    " + TomorrowWendu.type;
71
72         tvTodayType.setText(todayType);
73         tvTomorrowType.setText(tomorrowType);
74
75
76     }
77
78
79     /**
80      * 通过Gson进行json数据的解析
81      * @param json
82      * @return
83      */
84     private WeatherBean getWeatherFromJson(String json) {
85
86         WeatherBean bean = new Gson().fromJson(json, WeatherBean.class);
87         return bean;
88     }
89 }
得到json地址之后,通过http协议进行获取json字符串类型的数据:
 1 package com.oysd.mywea;
 2
 3 import java.io.ByteArrayOutputStream;
 4 import java.io.IOException;
 5 import java.io.InputStream;
 6 import java.net.HttpURLConnection;
 7 import java.net.MalformedURLException;
 8 import java.net.URL;
 9
10 public class HttpUtils {
11
12     public HttpUtils() {
13     }
14
15     /**
16      * 获得json数据(String型)
17      * @param path
18      * @return
19      */
20     public static String getJsonContent(String path){
21         try {
22             URL url = new URL(path);
23             HttpURLConnection connection = (HttpURLConnection)url.openConnection();
24             connection.setConnectTimeout(3000);
25             connection.setRequestMethod("GET");
26             connection.setDoInput(true);
27             int code = connection.getResponseCode();
28             if(code == 200){
29                 //获取数据输入流
30                 String str = changeInputStream(connection.getInputStream());
31                 System.out.println(str);
32                 return str;
33             }
34         } catch (MalformedURLException e) {
35             e.printStackTrace();
36         } catch (IOException e) {
37             e.printStackTrace();
38         }
39         return null;
40     }
41
42     /**
43      * 将一个输入流转换成指定编码的字符串
44      * @param inputStream
45      * @return
46      */
47     private static String changeInputStream(InputStream inputStream) {
48         String jsonString = "";
49         ByteArrayOutputStream outputStream = new ByteArrayOutputStream();
50         int len = 0;
51         //把输入流转换成字符串
52         byte[] data = new byte[1024];
53         try {
54             while((len=inputStream.read(data))!=-1){
55                 outputStream.write(data,0,len);
56             }
57             jsonString = new String(outputStream.toByteArray());
58         } catch (IOException e) {
59             e.printStackTrace();
60         }
61         return jsonString;
62     }
63
64 }
获得String型的json数据之后,就需要对这个json进行解析了,这里使用的是Google的Gson库进行解析,
之所以使用Gson,主要还是因为定义了Bean之后,解析起来非常容易理解,也方便,不过需要针对json的具体格式进行定义相应的java bean
这个json的格式如下(需要直观查看json数据的格式,建议使用http://abv.cn/json/ ,此网址能够将json数据的显示格式显示的层次分明点)
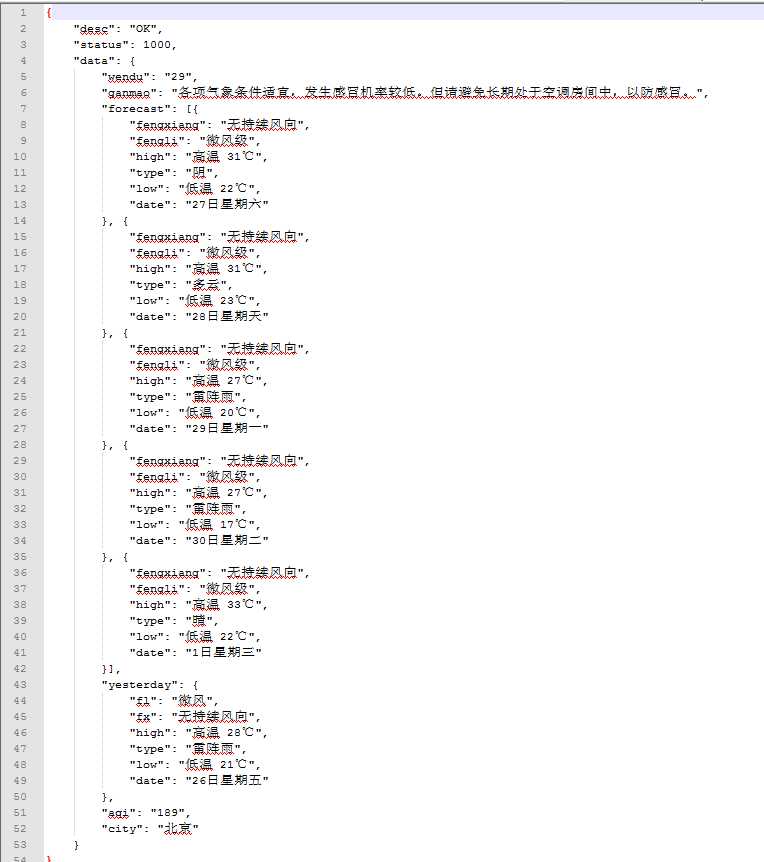
相对应的WeatherBean如下:
 1 package com.oysd.mywea;
 2
 3 import java.util.ArrayList;
 4
 5 public class WeatherBean {
 6     public ChildWeatherBean data;
 7     public int status;
 8     public String desc;
 9
10     public class ChildWeatherBean {
11         public int wendu;
12         public String ganmao;
13         public String city;
14         public GrandChildWeatherBean yesterday;
15         public ArrayList<GrandChildsWeatherBean> forecast;
16
17         public class GrandChildWeatherBean {
18
19             public String high;
20             public String fl;
21             public String date;
22             public String low;
23             public String type;
24             public String fx;
25         }
26
27         public class GrandChildsWeatherBean {
28             public String high;
29             public String fengli;
30             public String fengxiang;
31             public String date;
32             public String low;
33             public String type;
34         }
35     }
36 }
具体的解析代码截图如下:
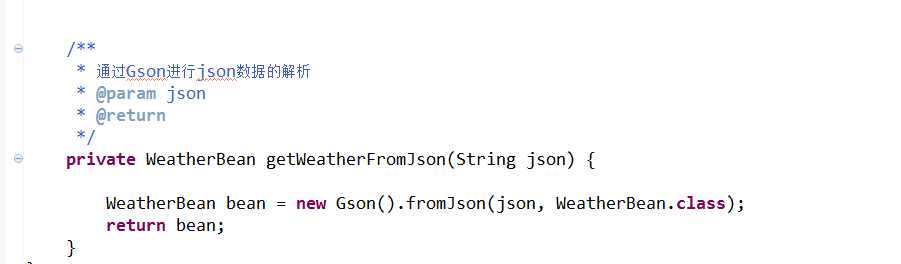
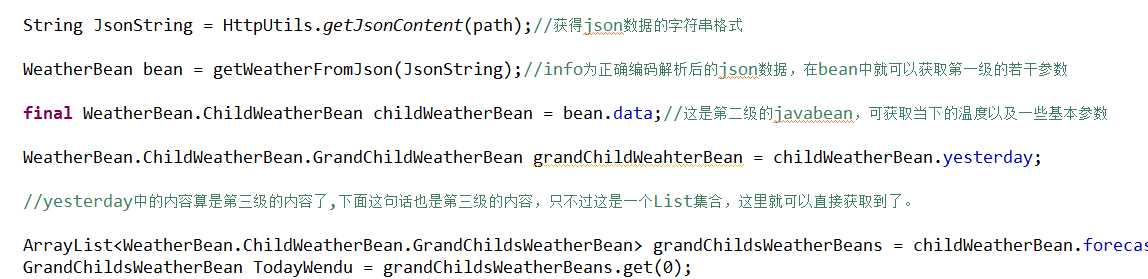
这样,数据解析之后,通过实例化对象,将想要的数据获取到,显示到天气情况界面
此界面也相对比较简单:
  1 <?xml version="1.0" encoding="utf-8"?>
  2 <LinearLayout xmlns:android="http://schemas.android.com/apk/res/android"
  3     android:layout_width="match_parent"
  4     android:layout_height="match_parent"
  5     android:orientation="vertical" >
  6
  7     <TextView
  8         android:id="@+id/tvCity"
  9         android:layout_width="fill_parent"
 10         android:layout_height="wrap_content"
 11         android:text=""
 12         android:textSize="28sp"/>
 13
 14      <View
 15           android:layout_width="fill_parent"
 16           android:layout_height="2dip"
 17           android:background="#FF0000ff"/>
 18
 19      <LinearLayout
 20          android:layout_width="fill_parent"
 21          android:layout_height="wrap_content"
 22          android:orientation="horizontal">
 23          <TextView
 24             android:id="@+id/tvWendu"
 25             android:layout_weight="1"
 26             android:layout_width="wrap_content"
 27             android:layout_height="wrap_content"
 28             android:text=""
 29             android:textSize="25sp"/>
 30          <TextView
 31             android:id="@+id/tvWenduValue"
 32             android:layout_weight="2"
 33             android:layout_width="wrap_content"
 34             android:layout_height="wrap_content"
 35             android:text=""
 36             android:textSize="25sp"/>
 37      </LinearLayout>
 38       <View
 39           android:layout_width="fill_parent"
 40           android:layout_height="2dip"
 41           android:background="#FFff0099"/>
 42
 43      <TextView
 44         android:id="@+id/tvCurrentWendu"
 45         android:layout_width="fill_parent"
 46         android:layout_height="wrap_content"
 47         android:text=""
 48         android:textSize="25sp"/>
 49      <View
 50           android:layout_width="fill_parent"
 51           android:layout_height="2dip"
 52           android:background="#FFff9999"/>
 53
 54      <TextView
 55         android:id="@+id/tvNote"
 56         android:layout_width="fill_parent"
 57         android:layout_height="wrap_content"
 58         android:text=""
 59         android:textSize="25sp"/>
 60
 61       <View
 62           android:layout_width="fill_parent"
 63           android:layout_height="2dip"
 64           android:background="#FF00ff99"/>
 65
 66       <TextView
 67         android:id="@+id/tvCurrentCity"
 68         android:layout_width="fill_parent"
 69         android:layout_height="wrap_content"
 70         android:text=""
 71         android:textSize="25sp"/>
 72
 73       <View
 74           android:layout_width="fill_parent"
 75           android:layout_height="2dip"
 76           android:background="#FF001155"/>
 77
 78      <LinearLayout
 79          android:layout_width="fill_parent"
 80          android:layout_height="wrap_content"
 81          android:orientation="horizontal">
 82          <TextView
 83             android:id="@+id/tvTomWendu"
 84             android:layout_weight="1"
 85             android:layout_width="wrap_content"
 86             android:layout_height="wrap_content"
 87             android:text=""
 88             android:textSize="25sp"/>
 89          <TextView
 90             android:id="@+id/tvTomWenduValue"
 91             android:layout_weight="2"
 92             android:layout_width="wrap_content"
 93             android:layout_height="wrap_content"
 94             android:text=""
 95             android:textSize="25sp"/>
 96      </LinearLayout>
 97
 98       <View
 99           android:layout_width="fill_parent"
100           android:layout_height="0.5dip"
101           android:background="#FF001100"/>
102
103       <TextView
104         android:id="@+id/tvTodayType"
105         android:layout_width="fill_parent"
106         android:layout_height="wrap_content"
107         android:text=""
108         android:textSize="25sp"/>
109
110       <View
111           android:layout_width="fill_parent"
112           android:layout_height="0.5dip"
113           android:background="#FF008800"/>
114
115       <TextView
116         android:id="@+id/tvTomorrowType"
117         android:layout_width="fill_parent"
118         android:layout_height="wrap_content"
119         android:text=""
120         android:textSize="25sp"/>
121 </LinearLayout>
到此,这个简单的天气程序基本上结束了。
整个项目需要下载,在此给出项目下载地址:http://pan.baidu.com/s/1gd3wcqJ
有什么问题尽管提出
标签:
原文地址:http://www.cnblogs.com/ouyangduoduo/p/4604314.html
