标签:

(小喵家的哈比镇楼)
小喵最近在整理资料。看到了通知这个东东,忍不住给大家分享一下自己的学习所得。
什么是通知
通知(Notification)是开发框架中观察者模式的一种实现方式,内部的实现机制由Cocoa框架支持,通常用于试图控制器和数据模型的交互。通过通知,可以向一个或者多个对象发送消息。
继承自NSObject,实现了NSCopying Protocol协议。
通知通过通知中心(NSNotificationCenter)广播给其他对象。通知包含一个名称(name), 对象(object属性), 和一个可选字典(dictionary 属性)三个参数。这些参数协助完成通知操作。
Notification一个 对象非常简单,就是poster要提供给observer的信息包裹。Notification 对象有两个重要的成员变量:name和object。一般name用来唯一标示一个通知对象,object都是指向发送者(poster)(为了让observer在接收到notification时可以回调到poster)所以,Notification有两个方法:- (NSString *)name, - (id)object可供调用。同时,Notification对象还包含一个参数,就是字典(可选参数),这个字典中存储一些传值过程中的信息,供接收者使用。系统要求这个参数是不可变字典。
以上信息构建好后,我们就可以创建一个通知。
NSNotification *notification = nil;
notification = [NSNotification notificationWithName: aName object: aObj userInfo: aDictionary];
其中,aName就是notification对象的名称,aObj 就是发送者,aDictionary是通知的可选字典参数。
通知创建好后就可以在必要的时候发送通知,发送通知的时候,需要一个控制中心来发送通知,这个控制中心就是通知中心(NSNotificationCenter)。我们也可以通过控制中心创建并发送通知,通常我们也是这么做得。
通知的实际运用
1. 页面关联性不大,但需要传递信息的地方。这两个页面一个作为发送者,一个作为监听者;
2. 需要向多个地方发送信息。一个页面作为发送者,多个页面作为监听者。
1.注册通知
2.发送通知
3.移除通知
代码实现
建立一个ViewController,修改为MRC。在.m文件里面操作。
先看注册通知
 1 - (void)viewDidLoad {
 2     [super viewDidLoad];
 3     UIView *mainView = [[[UIView alloc]initWithFrame:[UIScreen mainScreen].bounds]autorelease];
 4     self.view = mainView;
 5
 6     UIButton *redButton = [UIButton buttonWithType:UIButtonTypeRoundedRect];
 7     redButton.frame = CGRectMake(100, 100, 100, 30);
 8     [redButton setTitle:@"Red" forState:UIControlStateNormal];
 9     [redButton addTarget:self action:@selector(setRedColor) forControlEvents:UIControlEventTouchUpInside];
10     [self.view addSubview:redButton];
11
12     UIButton *blueButton = [UIButton buttonWithType:UIButtonTypeRoundedRect];
13     [blueButton setTitle:@"Blue" forState:UIControlStateNormal];
14     blueButton.frame = CGRectMake(100, 150, 100, 30);
15     [blueButton addTarget:self action:@selector(setBlueColor) forControlEvents:UIControlEventTouchUpInside];
16     [self.view addSubview:blueButton];
17     /**
18      *  注册通知
19      */
20     [[NSNotificationCenter defaultCenter] addObserver:self selector:@selector(doChange:) name:@"ColorChange" object:nil];
21
22 }
发送通知
 1 - (void)setBlueColor{
 2     /**
 3      *  发送通知
 4      */
 5     NSDictionary *dic = [NSDictionary dictionaryWithObject:@"blueColor" forKey:@"color"];
 6     [[NSNotificationCenter defaultCenter] postNotificationName:@"ColorChange" object:self userInfo:dic];
 7 }
 8
 9 - (void)setRedColor{
10     /**
11      *  发送通知
12      */
13     NSDictionary *dic = [NSDictionary dictionaryWithObject:@"redColor" forKey:@"color"];
14     [[NSNotificationCenter defaultCenter]postNotificationName:@"ColorChange" object:self userInfo:dic];
15 }
16
17 - (void)doChange:(NSNotification *)notification{
18     NSDictionary *dic = [notification userInfo];
19     NSString *colorStr = [dic valueForKey:@"color"];
20     UIColor *color = nil;
21
22     if ([colorStr isEqualToString:@"blueColor"]) {
23         color = [UIColor blueColor];
24     }
25     if ([colorStr isEqualToString:@"redColor"]) {
26         color = [UIColor redColor];
27     }
28     self.view.backgroundColor = color;
29 }
移除通知
1 - (void)dealloc{
2     /**
3      *  移除通知
4      */
5     [[NSNotificationCenter defaultCenter]removeObserver:self];
6     [super dealloc];
7 }
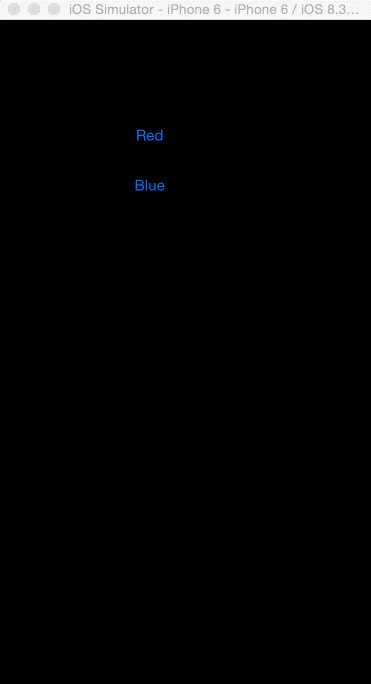
实现效果如下。点击红色屏幕变成红色,点击蓝色,屏幕变成蓝色。

小喵iOS开发成长记:通知(Notification)快速入门
标签:
原文地址:http://www.cnblogs.com/catKingCraig/p/4636197.html