标签:
由于工作需要,最近几天在研究Windows 2008下如何在IIS中寄宿WCF MSMQ,中间遇到不少问题,现将操作方法整理一下,方便其他朋友参考。
在本例中,添加WCF服务MyGreeting.svc,服务端代码如下:

 1 using System.ServiceModel;
 2
 3 namespace IisMsmqServer
 4 {
 5     [ServiceContract]
 6     public interface IMyGreeting
 7     {
 8         [OperationContract(IsOneWay = true)]
 9         void Hello(string name);
10     }
11 }

 1 using System;
 2 using System.IO;
 3 using System.Web.Hosting;
 4
 5 namespace IisMsmqServer
 6 {
 7     public class MyGreeting : IMyGreeting
 8     {
 9         public void Hello(string name)
10         {
11             string msg = string.Format("{0}[Info]...你好,{1}", DateTime.Now.ToString("yyyy-MM-dd HH:mm:ss"), name);
12             string fileName = Path.Combine(HostingEnvironment.MapPath("~"), "Log", "我的日志.txt");
13             TextHelper.WriteLineAppend(fileName, msg);
14         }
15     }
16 }
使用Edit Wcf Configuration工具或手工编辑WCF配置文件,其中绑定为netMsmqBinding:

<?xml version="1.0"?>
<configuration>
  <appSettings>
    <add key="aspnet:UseTaskFriendlySynchronizationContext" value="true"/>
  </appSettings>
  <system.web>
    <compilation targetFramework="4.5" debug="true"/>
    <httpRuntime targetFramework="4.5"/>
  </system.web>
  <system.serviceModel>
    <behaviors>
      <serviceBehaviors>
        <behavior name="msmqBehav">
          <serviceMetadata httpGetEnabled="true"/>
        </behavior>
      </serviceBehaviors>
    </behaviors>
    <bindings>
      <netMsmqBinding>
        <binding name="msmq" durable="false" useActiveDirectory="false" deadLetterQueue="Custom" exactlyOnce="false">
          <security mode="None">
            <transport msmqAuthenticationMode="None" msmqProtectionLevel="None"/>
            <message clientCredentialType="None"/>
          </security>
        </binding>
      </netMsmqBinding>
    </bindings>
    <services>
      <service behaviorConfiguration="msmqBehav" name="IisMsmqServer.MyGreeting">
        <endpoint address="net.msmq://localhost/private/huatao" binding="netMsmqBinding" bindingConfiguration="msmq" contract="IisMsmqServer.IMyGreeting"/>
      </service>
    </services>
  </system.serviceModel>
  <system.webServer>
    <modules runAllManagedModulesForAllRequests="true"/>
    <!--
        To browse web app root directory during debugging, set the value below to true.
        Set to false before deployment to avoid disclosing web app folder information.
      -->
    <directoryBrowse enabled="false"/>
  </system.webServer>
</configuration>
刚才在配置文件中配置的服务地址为:net.msmq://localhost/private/huatao,需要在服务器中创建专用消息队列“huatao”。
选中刚才创建的消息队列huatao,右键点击“属性”,在“安全”选项卡中为“Everyone”用户和“ANONYMOUS LOGON”用户配置全部控制权限。
如果希望其它服务器上的程序能把消息发送到本消息队列,还需要按如下方式修改注册表:
选中服务项目,右键点击“发布”,将其发布到资源管理器相应的文件目录中。

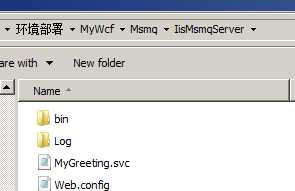
在IIS中新建网站msmq,在将下面的文件目录转换为应用程序IisMsmqServer。

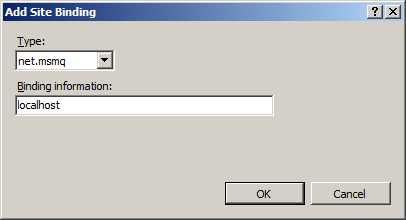
由于IIS是不能直接寄宿非HTTP协议的服务,此时网站是不能直接浏览的,需要在网站和应用程序中添加net.msmq协议。
选中网站msmq,右键点击“编辑绑定”。
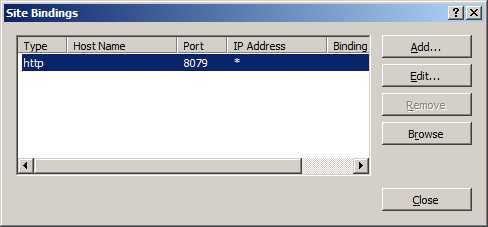
在弹出的网站绑定窗口中点击“添加”按钮,添加net.msmq协议绑定。
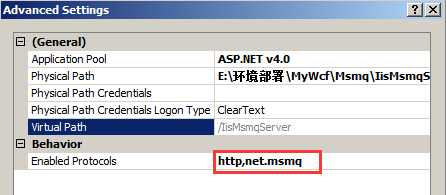
选中应用程序IisMsmqServer,选择“高级设置”项。
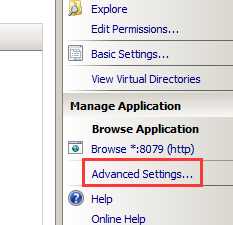
在“启用协议”中添加net.msmq协议支持,中间用逗号分隔。
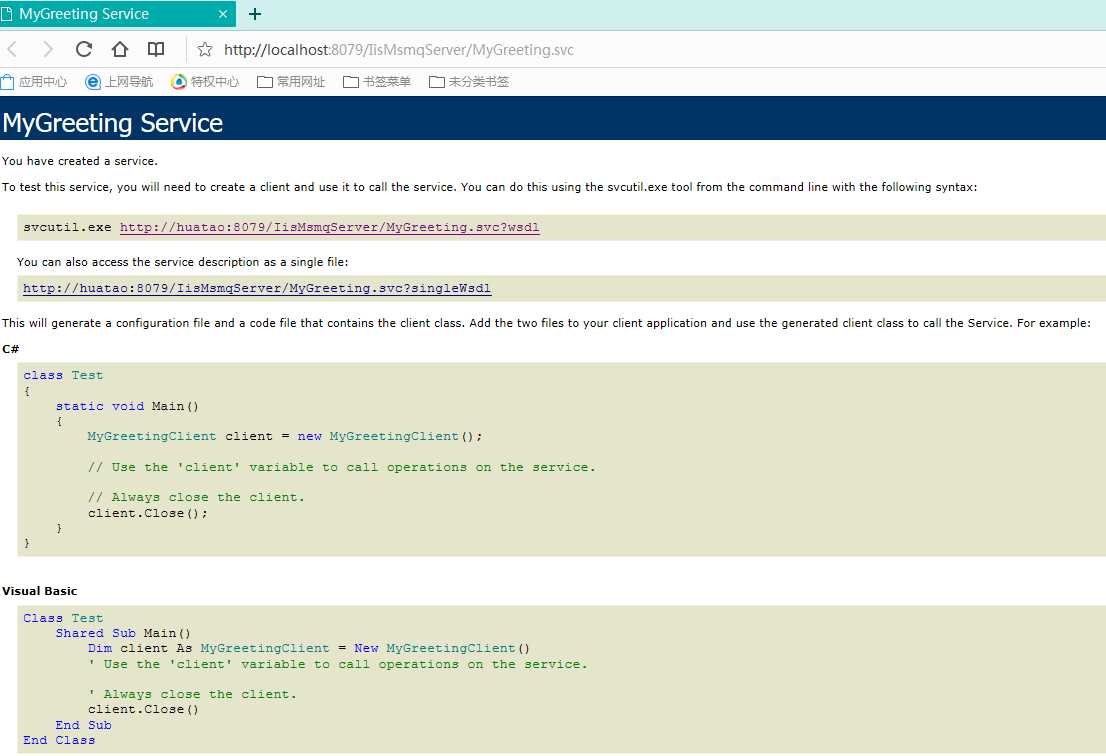
浏览服务文件MyGreeting.svc。

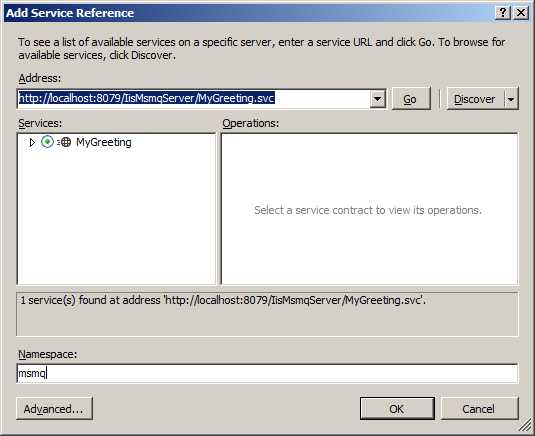
在客户端中引用服务。
再调用服务。

 1 using System;
 2 using WcfClient.msmq;
 3
 4 namespace WcfClient
 5 {
 6     class Program
 7     {
 8         static void Main(string[] args)
 9         {
10             Console.Title = "WCF客户端";
11             msmq.MyGreetingClient client = new MyGreetingClient();
12             client.Hello("测试");
13
14             Console.ReadLine();
15         }
16     }
17 }
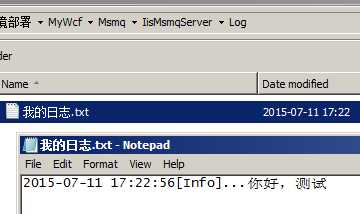
查看服务端,生成了一个日志文件:(注:服务端需事先创建一个Log目录)
如果要读取其它机器的消息队列,需要做两件事情:
修改WCF服务配置文件中的绑定地址,如:net.msmq://192.168.0.4/private/huatao

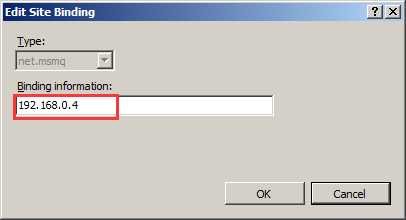
重新编辑网站的net.msmq协议绑定,将绑定信息修改为待读取消息的机器IP。
本文详细介绍了如何在Windows 2008环境中在IIS寄宿WCF MSMQ服务的方法,其中的关键点在:
Windows 2008下在IIS中寄宿WCF MSMQ的方法
标签:
原文地址:http://www.cnblogs.com/huatao/p/4638899.html