标签:
前面已经写过一篇java实现最基础的socket网络通信,这篇和之前那篇大同小异,只是将客户端代码移植到手机中,然后获取本机IP的方法略有不同。
先讲一下本篇中用到Android studio的使用吧
使用Android studio开发Android最基本的3个步骤:
(1)新建工程
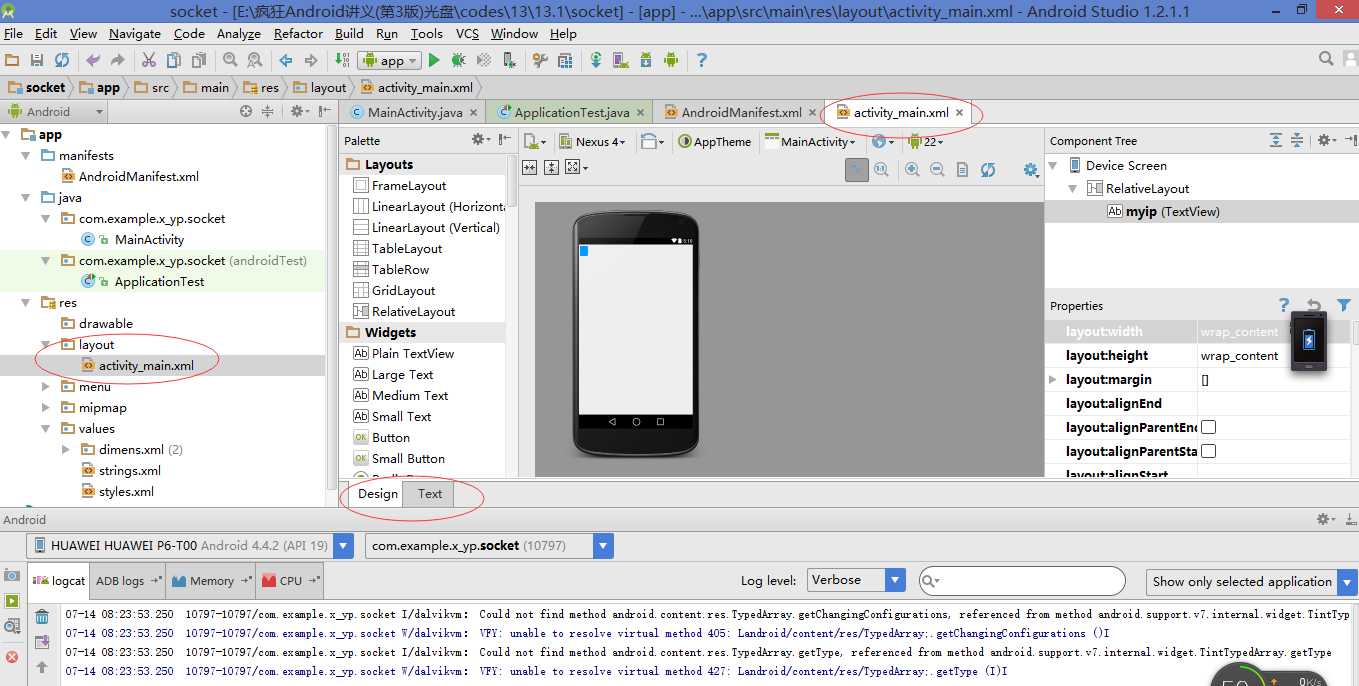
(2)在XML布局文件中定义应用程序的用户界面。

点击画圈中的Design和Text可以切换界面
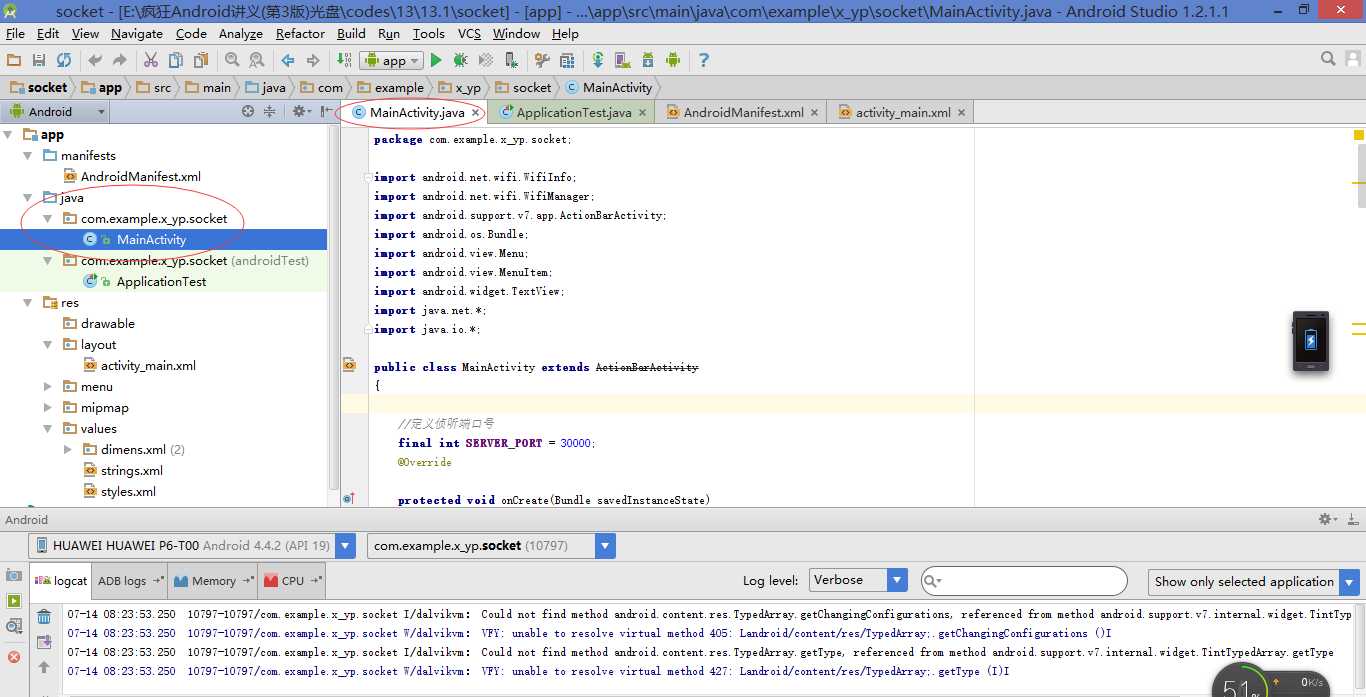
(3)在java代码中编写业务实现。

这里面用来写java代码
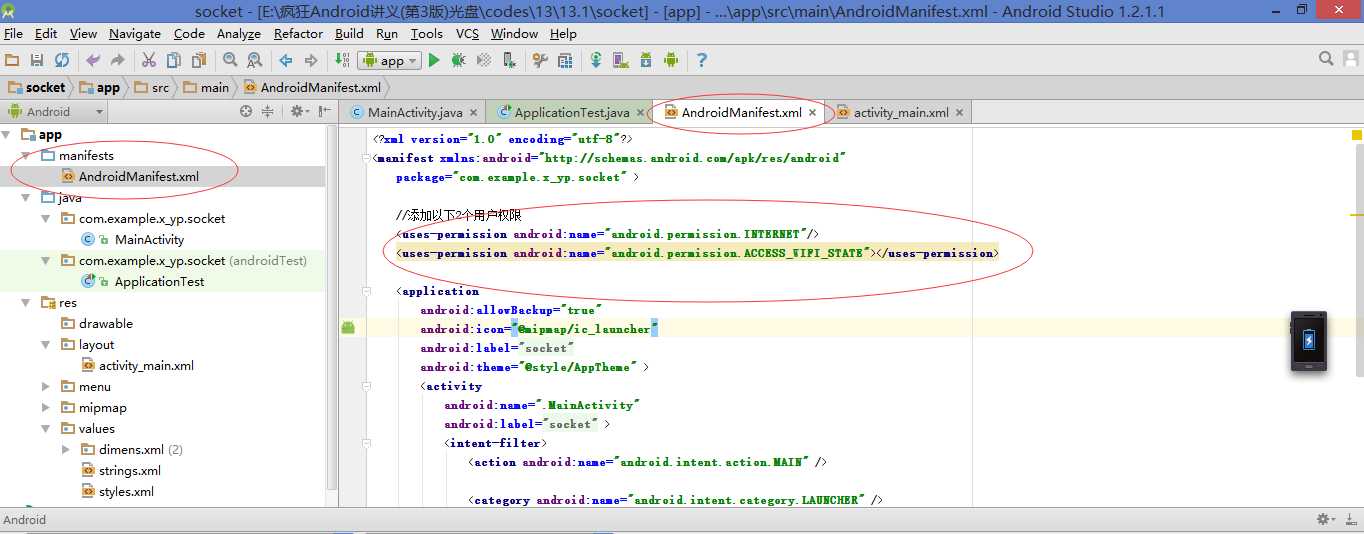
另外这篇文章还需要添加用户权限

好了,可以上代码了:
Android服务器端代码:
package com.example.x_yp.socket;

import android.net.wifi.WifiInfo;
import android.net.wifi.WifiManager;
import android.support.v7.app.ActionBarActivity;
import android.os.Bundle;
import android.view.Menu;
import android.view.MenuItem;
import android.widget.TextView;
import java.net.*;
import java.io.*;

public class MainActivity extends ActionBarActivity
{

    //定义侦听端口号
    final int SERVER_PORT = 30000;
    @Override

    protected void onCreate(Bundle savedInstanceState)
    {
        super.onCreate(savedInstanceState);
        setContentView(R.layout.activity_main);
        //打印本机的IP地址
        TextView myip=(TextView)findViewById(R.id.myip);
        myip.setText(getLocalIpAddress());
        //开一个新的线程来侦听客户端连接
       new Thread()
        {
            public void run()
            {
                startServer();
            }
        }.start();
    }
    // 得到本机WIFI下的ip地址
    private String getLocalIpAddress()
    {
        WifiManager wifiManager = (WifiManager) getSystemService(WIFI_SERVICE);
        WifiInfo wifiInfo = wifiManager.getConnectionInfo();
        // 获取32位整型IP地址
        int ipAddress = wifiInfo.getIpAddress();

        //返回整型地址转换成“*.*.*.*”地址
        return String.format("%d.%d.%d.%d",
                (ipAddress & 0xff), (ipAddress >> 8 & 0xff),
                (ipAddress >> 16 & 0xff), (ipAddress >> 24 & 0xff));
    }

    //进行socket连接通信
    private void startServer()
    {
        try
        {
            ServerSocket serverSocket = new ServerSocket(SERVER_PORT);
            //循环侦听客户端连接请求
            while (true)
            {
                Socket ss = serverSocket.accept();
                try
                {
                    // 将Socket对应的输出流包装成PrintStream
                    PrintStream ps = new PrintStream(ss.getOutputStream());
                    // 进行普通IO操作
                    ps.println("hello,you have recevied sever‘s messege");
                    // 关闭输出流,关闭Socket
                    ps.close();
                    ss.close();
                }
                catch (Exception e)
                {
                    e.printStackTrace();
                }
                finally
                {
                    ss.close();
                }
                Thread.sleep(3000);
            }
        }
        catch (Exception e)
        {
            e.printStackTrace();
        }
    }
    @Override
    public boolean onCreateOptionsMenu(Menu menu) {
        // Inflate the menu; this adds items to the action bar if it is present.
        getMenuInflater().inflate(R.menu.menu_main, menu);
        return true;
    }

    @Override
    public boolean onOptionsItemSelected(MenuItem item) {
        // Handle action bar item clicks here. The action bar will
        // automatically handle clicks on the Home/Up button, so long
        // as you specify a parent activity in AndroidManifest.xml.
        int id = item.getItemId();

        //noinspection SimplifiableIfStatement
        if (id == R.id.action_settings) {
            return true;
        }

        return super.onOptionsItemSelected(item);
    }
}
PC客户端代码:
/**
PC端代码
PC作为客户端,根据服务器的IP地址和端口号连接服务器
*/
import java.net.*;
import java.io.*;

public class PC_Client
{
    public static void main(String[] args)
        throws IOException
    {
        //Socket socket = new Socket("192.168.47.1" , 30000);//这里的IP地址填写手机端服务器的IP地址
        Socket socket = new Socket("192.168.1.114" , 30000);//这里的IP地址填写手机端服务器的IP地址
        // 将Socket对应的输入流包装成BufferedReader
        BufferedReader br = new BufferedReader(new InputStreamReader(socket.getInputStream()));
        // 进行普通IO操作
        String line = br.readLine();
        System.out.println("来自服务器的数据:" + line);
        // 关闭输入流、socket
        br.close();
        socket.close();
    }
}
OK,下载到手机中,手机和电脑可以通信了
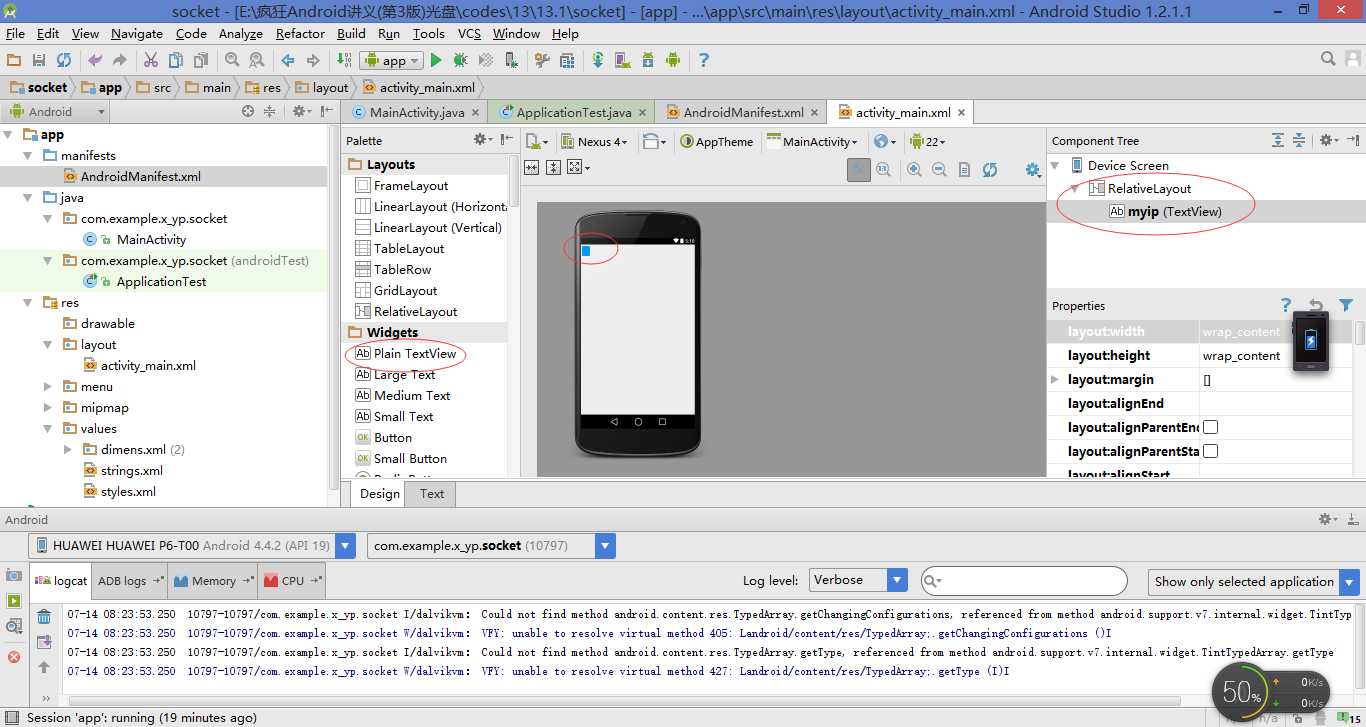
补充一下用到的图形界面的内容:

这里添加完控件之后,设置一个ID,这里设置成了myip
然后java程序中,通过 findViewById函数与控件相连接,
这里用TextView myip=(TextView)findViewById(R.id.myip);
然后就可以在java中控制控件了
标签:
原文地址:http://www.cnblogs.com/bewolf/p/4644493.html