标签:
常见的向用户发送提示信息的方式有3种,分别为:
1)发送Toast信息
2)弹出对话框
3)发送通知
总结如下:
方式1:发送Toast信息:
这种方式最简单,在之前的学习中多次使用过。Toast是在一个浮动于应用之上的View中显示信息,显示一定的时间间隔后自动消失,不可获得焦点。
最简单的用法就是之前的学习中一直使用的:通过一个静态的makeText()方法返回一个Toast对象,然后调用show()方法。
如:
布局文件添加一个Button:
 1 <Button
 2
 3         android:id="@+id/button1"
 4
 5         android:onClick="showToast"
 6
 7         android:layout_width="wrap_content"
 8
 9         android:layout_height="wrap_content"
10
11         android:layout_gravity="center_horizontal"
12
13         android:layout_margin="20dp"
14
15         android:text="@string/show_toast" />
MainActivity.java添加一个showToast()方法:
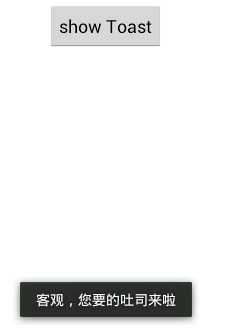
1 public void showToast(View view){
2
3           Toast.makeText(this, "客观,您要的吐司来啦", Toast.LENGTH_LONG).show();
4
5 }
显示结果:
通常情况下,Toast.makeText()这个方法已然够用了,但是,如果有些别的需求,就需要看一下Toast的帮助信息了:

在Toast这个类中定义了两个常量:LENGTH_LONG和LENGTH_SHORT,用来表示Toast显示的时长。想让Toast停留的时间长一点,可以设置为LENGTH_LONG,否则设置为LENGTH_SHORT。
LENGTH_LONG的实际值为1,LENGTH_SHORT的实际值为0。在用到的地方也可以直接传入0或者1,但是阅读起来就显得不太直观了。

Toast中只定义了一个构造函数,传入一个上下文对象,返回一个空的Toast对象。
更常用的是,通过下面两个静态方法获取Toast对象:

这两个方法的区别在于第二个参数,该参数表示要显示的文本内容,第一个方法传入strings.xml中的一个字符串id,而第二个方法直接传入字符串对象,之前用到的都是第二个方法。下面测试下传入id的方法:
strings.xml中加入一个<string>节点:
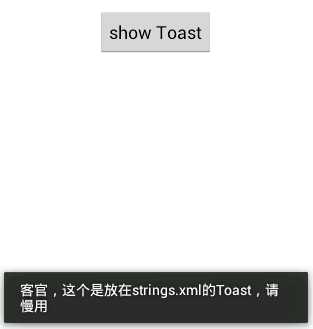
<string name="tv_text">客官,这个是放在strings.xml的Toast,请慢用</string>
修改showToast()方法:
1 public void showToast(View view){
2
3           Toast.makeText(this, R.string.tv_text, Toast.LENGTH_LONG).show();
4
5 }
运行结果:
如果直接使用Toast的构造方法获取一个Toast对象的话,该对象是一个空的Toast,这时,是不能直接show()的,毕竟没有任何要显示的内容。
如果:new Toast(this).show();
会报错:

提示,必须先调用setView():

当然,肯定有对应的getView():

这两个方法,分别用来给Toast设置要显示的View和取得当前Toast对象的View。
测试下setView()方法:
新建一个tv.xml布局文件:
 1 <LinearLayout xmlns:android="http://schemas.android.com/apk/res/android"
 2
 3     android:layout_width="match_parent"
 4
 5     android:layout_height="match_parent"
 6
 7     android:gravity="center_horizontal"
 8
 9     android:orientation="vertical" >
10
11     <TextView
12
13         android:id="@+id/tv"
14
15         android:layout_width="wrap_content"
16
17         android:layout_height="wrap_content"
18
19         android:text="@string/tv_text" />
20
21
22
23     <Button
24
25         android:id="@+id/btn1"
26
27         android:layout_width="wrap_content"
28
29         android:layout_height="wrap_content"
30
31         android:text="Button" />
32
33 </LinearLayout>
修改showToast()方法:
 1 public void showToast(View view){
 2
 3           Toast toast = new Toast(this);
 4
 5           View v = getLayoutInflater().from(this).inflate(R.layout.tv, null);
 6
 7           toast.setView(v);
 8
 9           toast.show();
10
11 }
显示效果:
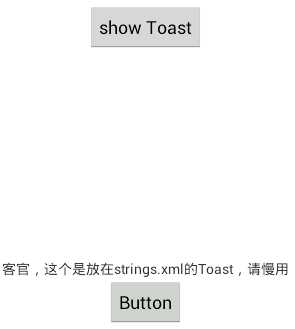
直接把tv.xml中的内容都显示出来了,真丑……虽然显示有按钮,即便设置了事件监听,但是由于Toast是不能获取焦点的,所以点击是没有任何反应的。
在使用makeText()方法时,传入了三个参数,而构造方法只传入了与之对应的第一个表示上下文的参数,因而肯定有对应的setter方法:

setText()用于设置Toast中显示的信息,但是,注意到帮助文档中的信息:是用于修改之前使用makeText()创建的Toast对象显示的信息,如Toast对象是通过构造方法创建的是不能调用setText()方法的。

setDuration()用于设置显示的时长。
感觉还是挺鸡肋的,加起来都不如一个makeText()。
下面这个方法,可能看起来稍微有用些:

用来设置Toast的显示位置,如:
修改tv.xml设置个绿色背景,不要按钮了,太丑也没用:
 1 <LinearLayout xmlns:android="http://schemas.android.com/apk/res/android"
 2
 3     android:layout_width="wrap_content"
 4
 5     android:layout_height="wrap_content"
 6
 7     android:background="#00ff00"
 8
 9     android:orientation="vertical" >
10
11     <TextView
12
13         android:id="@+id/tv"
14
15         android:layout_width="wrap_content"
16
17         android:layout_height="wrap_content"
18
19         android:text="客官,您要的Toast来啦,请慢用" />
20
21 </LinearLayout>
修改showToast()方法:
 1 public void showToast(View view){
 2
 3           Toast toast = new Toast(this);
 4
 5           toast.setView(getLayoutInflater().inflate(R.layout.tv, null));
 6
 7           toast.setDuration(1);
 8
 9           toast.setGravity(Gravity.CENTER, 0, 0);
10
11           toast.show();
12
13 }
Gravity.CENTER表示的水平垂直均居中显示,后面的参数分别表示在第一个参数的基础上x轴方向上的偏移及y轴方向上的偏移,正数表示x轴上向右移动,y轴上向下移动;负数则表示x轴上向左移动,y轴上向上移动。这里指定为0,表示不偏移。
显示效果:
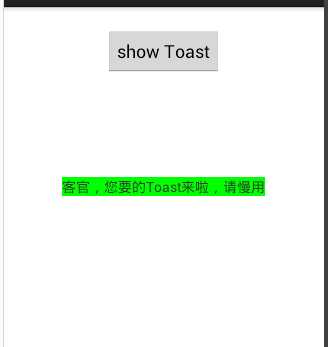
确实,居中显示了,而且是绿色背景,还是好丑,实际中应该不会这样用吧,费力不讨好。
总结:上面一大堆无用的东西,实际使用中直接使用makeText()方法获取Toast对象,需要修改显示位置,则调用setGravity()方法即可。实在需要自定义布局时再使用构造及setView()方法。
方式2:弹出对话框:
通过弹出对话框的形式向用户发送提示信息的方式,就需要用到AlertDialog这个类,准确来说,用的更多的是它的内部类AlertDialog.Builder类。
其实,弹出对话框的流程很简单:
1)获取一个AlertDialog.Builder对象:
AlertDialog.Builder builder = new Builder(this);
2)调用Builder的各种setXX方法,设置对话框的样式:
如:
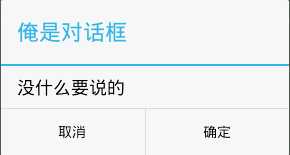
builder.setTitle("俺是对话框");

builder.setMessage("没什么要说的");
3)显示对话框:
builder.show();
1.弹出一个简单对话框的示例:
修改布局文件,添加一个按钮,用于弹出对话框:
 1 <Button
 2
 3         android:id="@+id/button2"
 4
 5         android:onClick="showDialog"
 6
 7         android:layout_width="wrap_content"
 8
 9         android:layout_height="wrap_content"
10
11         android:layout_gravity="center_horizontal"
12
13         android:layout_margin="20dp"
14
15         android:text="弹出对话框" />
在MainActivity中添加一个button2回调的方法:
 1 public void showDialog(View view){
 2
 3           AlertDialog.Builder builder = new Builder(this);
 4
 5           builder.setTitle("俺是对话框");
 6
 7           builder.setMessage("没什么要说的");
 8
 9           builder.setPositiveButton("确定", new OnClickListener() {
10
11
12
13                  @Override
14
15                  public void onClick(DialogInterface dialog, int which) {
16
17                       Toast.makeText(MainActivity.this, "你点了确定,啥也没有", 1).show();
18
19                  }
20
21            });
22
23           builder.setNegativeButton("取消", new OnClickListener() {
24
25
26
27                  @Override
28
29                  public void onClick(DialogInterface dialog, int which) {
30
31                       Toast.makeText(MainActivity.this, "取消啦", 1).show();
32
33                  }
34
35            });
36
37           builder.show();
38
39 }
运行结果:
但是,此时如果按下Back键,该对话框就自动关闭了,一般我们需要的是用户或者按下确定或者按下取消,这时就可以设置按下Back不进行任何操作:
builder.setCancelable(false);
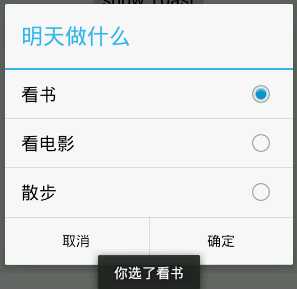
2.弹出一个单选框,修改showDialog()方法:
 1 builder.setTitle("明天做什么");
 2
 3 final String[] items = new String[]{"看书","看电影","散步"};
 4
 5 builder.setSingleChoiceItems(items, -1, new OnClickListener() {
 6
 7
 8
 9              @Override
10
11              public void onClick(DialogInterface dialog, int which) {
12
13                    // TODO Auto-generated method stub
14
15                    Toast.makeText(MainActivity.this, "你选了"+items[which], 1).show();
16
17                    dialog.dismiss();
18
19              }
20
21 });
第一个参数是一个数组类型的单选项
第二个参数表示默认选定项目的下标,-1表示默认一个都不选
第三个参数指定选定项目的事件监听器。
dialog.dismiss();表示关闭对话框
显示效果:
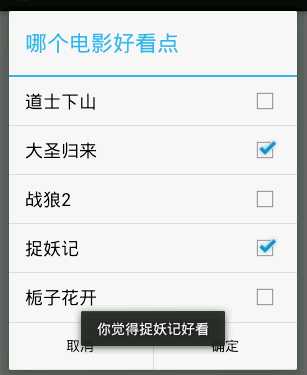
3.弹出一个复选框,修改showDialog()方法:
 1 builder.setTitle("哪个电影好看点");
 2
 3       final String[] items = new String[]{"道士下山","大圣归来","战狼2","捉妖记","栀子花开"};
 4
 5       builder.setMultiChoiceItems(items, new boolean[]{false,false,false,false,false}, new OnMultiChoiceClickListener() {
 6
 7
 8
 9              @Override
10
11              public void onClick(DialogInterface dialog, int which, boolean isChecked) {
12
13                    // TODO Auto-generated method stub
14
15                    Toast.makeText(MainActivity.this, "你觉得"+items[which]+(isChecked?"好看":"不好看"), 0).show();
16
17              }
18
19 });
运行结果:
4.显示一个进度对话框:
1 ProgressDialog pd = new ProgressDialog(this);
2
3 pd.setTitle("正在缓冲……");
4
5 pd.setMessage("这网好烂啊……");
6
7 pd.show();
运行结果:

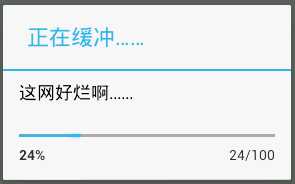
调用: pd.setProgressStyle(ProgressDialog.STYLE_HORIZONTAL); 可以将进度对话框改为水平进度条的样式:
 1 final ProgressDialog pd = new ProgressDialog(this);
 2
 3       pd.setTitle("正在缓冲……");
 4
 5       pd.setMessage("这网好烂啊……");
 6
 7       pd.setProgressStyle(ProgressDialog.STYLE_HORIZONTAL);
 8
 9       pd.setMax(100);
10
11       pd.show();
12
13       new Thread(){
14
15             public void run(){
16
17                  try {
18
19                         for (int i = 0; i < 100; i++) {
20
21                               Thread.sleep(1000);
22
23                               pd.setProgress(i);
24
25                         }
26
27                         pd.dismiss();
28
29                    } catch (Exception e) {
30
31                         e.printStackTrace();
32
33                    }
34
35             }
36
37       }.start();
运行结果:
注意:此时点击屏幕对话框之外的部分,发现对话框消失了,解决方法:调用pd.setCancelable(false)。
方式3:发送通知:
当应用程序不在前台时,或者只有后台服务在运行,也许通过通知的方式向用户发送提示信息更方便一些:
要使用通知,涉及到的类有:NotificationManager和Notification这两个类。
见名知意,前一个用于管理通知,后一个就是被管理的通知实体类。
首先看管理器类:
NotificationManager要管理通知,所以有几个比较常用的方法:
首先要获取NotificationManager对象:
但是,查看帮助手册却没有发现它的构造方法……
文档中这样描述的:

所以,应当通过getSystemService(String)方法获取NotificationManager对象。
这个方法时Context中的方法,查看帮助手册发现:
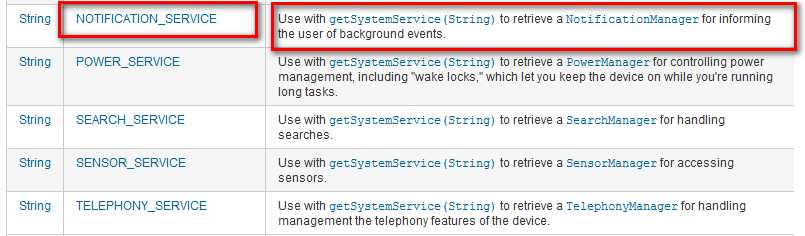
Context中定义了好几个String类型的常量,其中就有NOTIFICATION_SERVICE,后面的描述信息更是直接说明通过将这个字符串常量传给getSystemService()可以获取NotificationManager实例。

但是getSystemService()方法返回的是Object对象,故而,需要强制类型转换:
NotificationManager manager = (NotificationManager) getSystemService(Context.NOTIFICATION_SERVICE);

notify()方法用于发出一个通知,cancel()方法由于取消通知。
有了通知管理器,要让它发送通知,还是需要有通知实体的:

构造方法参数说明:
第一个参数用来指定通知在状态栏的图标
第二个参数用来指定通知在状态栏的描述
第三个参数用来指定什么时候显示
如:
Notification notification = new Notification(R.drawable.ic_launcher, "这是一个通知", System.currentTimeMillis());
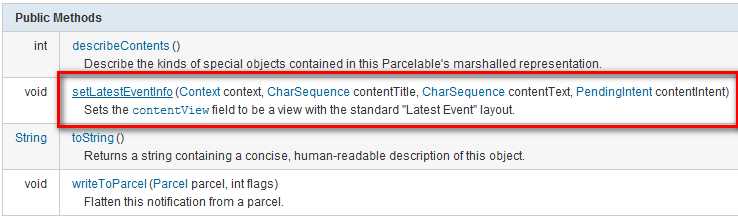
Notification中的方法就这几个,最有用的只有setLatestEventInfo()方法
用于给通知在任务栏中的显示设置一个标准的布局
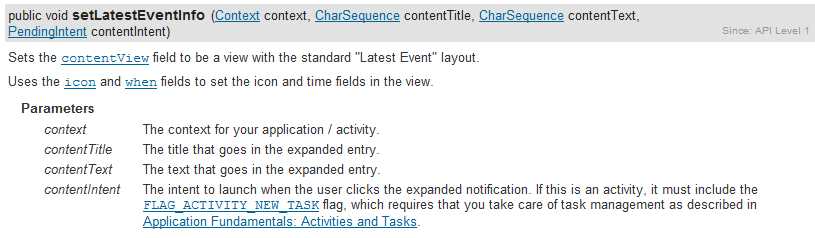
参数说明:
第一个参数指定上下文
第二个参数指定在任务栏中显示的标题
第三个参数指定在任务栏中显示的内容
第四个参数是PendingIntent类型的,是一种特殊的意图,用于指定通知被点击之后的动作,若设置为空则表示不进行任何处理。
一个简单的通知示例:
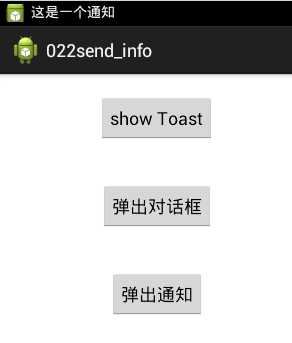
在布局文件中添加第三个按钮,用于发送通知:
 1 <Button
 2
 3         android:id="@+id/button3"
 4
 5         android:onClick="showNotification"
 6
 7         android:layout_width="wrap_content"
 8
 9         android:layout_height="wrap_content"
10
11         android:layout_gravity="center_horizontal"
12
13         android:layout_margin="20dp"
14
15         android:text="弹出通知" />
在MainActivity中添加一个showNotification()方法,用于按钮的回调:
 1 public void showNotification(View view){
 2
 3           NotificationManager manager = (NotificationManager) getSystemService(Context.NOTIFICATION_SERVICE);
 4
 5           Notification notification = new Notification(R.drawable.ic_launcher, "这是一个通知", System.currentTimeMillis());
 6
 7           notification.setLatestEventInfo(this, "这是个通知", "没有通知内容", null);
 8
 9           manager.notify(123, notification);
10
11 }
运行效果:
查看任务栏:
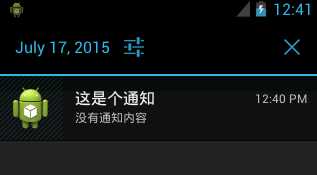
但是,点击这个通知是没有任何反应的。
因为notification.setLatestEventInfo(this, "这是个通知", "没有通知内容", null);第四个参数设置为null了。
下面稍微了解下关于第四个参数的内容:
PendingIntent:延迟意图,是一种特殊的意图,这种意图并不是在发出之后立即得到执行,而是交由其他应用在恰当的时候进行执行处理。
PendingIntent实例的获得可以通过以下几个静态方法:
getActivity(Context, int, Intent, int)返回一个PendingIntent实例用于启动一个新的Activity。
getBroadcast(Context, int, Intent, int) 返回一个PendingIntent实例用于发出广播
getService(Context, int, Intent, int) 返回一个PendingIntent实例用于启动一个新的Service。
它们均需要传入一个上下文对象,及一个普通的Intent对象。
下面获取一个PendingIntent对象,用来打开一个新的Activity,然后将其传入notification.setLatestEventInfo()方法:
新建一个Actvity:
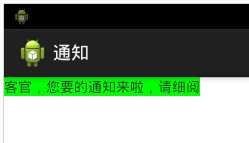
 1 public class NotificationActivity extends Activity {
 2
 3
 4
 5       @Override
 6
 7       protected void onCreate(Bundle savedInstanceState) {
 8
 9            super.onCreate(savedInstanceState);
10
11            setContentView(R.layout.tv);
12
13       }
14
15 }
布局文件:
<LinearLayout xmlns:android="http://schemas.android.com/apk/res/android"

    android:layout_width="wrap_content"

    android:layout_height="wrap_content"

    android:background="#00ff00"

    android:orientation="vertical" >

    <TextView

        android:id="@+id/tv"

        android:layout_width="wrap_content"

        android:layout_height="wrap_content"

        android:text="客官,您要的通知来啦,请细阅" />

</LinearLayout>
修改showNotification()方法:
public void showNotification(View view){
NotificationManager manager = (NotificationManager) getSystemService(Context.NOTIFICATION_SERVICE);
Notification notification = new Notification(R.drawable.ic_launcher, "这是一个通知", System.currentTimeMillis());
Intent intent = new Intent(this, NotificationActivity.class);
PendingIntent pi = PendingIntent.getActivity(this, 0, intent, PendingIntent.FLAG_CANCEL_CURRENT);
notification.setLatestEventInfo(this, "这是个通知", "没有通知内容", pi);
manager.notify(123, notification);
}
运行结果:
点击通知:
Notification中更多的是设置通知的各个属性,来更改通知的类型:
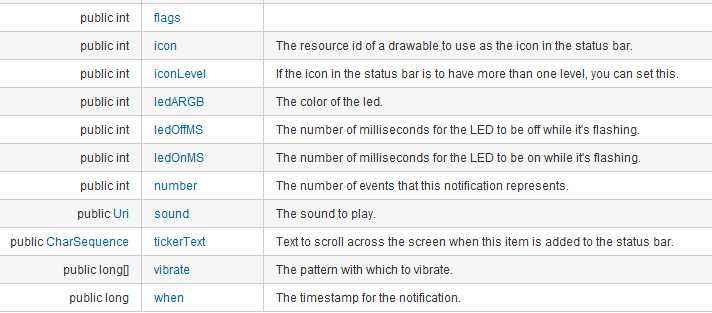
这些字段都是共有的,可以直接赋值:
如:notificaion.icon设置通知的图标
notification.sound设置通知的铃音
notification.vibrate设置通知的震动模式,需要赋值为一个long的数组
如notification.vibrate = new long[]{0,1000,500,1000,500};下标为偶数的表示静止时间,下标为奇数的表示震动时间,单位为毫秒
ledARGB、ledOffMS、ledOnMS可以用来通知到来时led灯的显示方式
这些都可以自己测试使用下,这里不一一列举了。
此外,新版本中可以采用与对话框类似的Builder内部类方式,创建Notification对象那个,并设置其属性,但出于兼容性的考虑,这里没有列举:
简单示例如下:
Notification notification = new Notification.Builder(this)
.setSmallIcon(R.drawable.ic_launcher).setContentTitle("这是个通知")
.setContentText("没有通知内容").getNotification();
manager.notify(123, notification);
以上,就是三种向用户发送提示信息的三种方式。
android菜鸟学习笔记29----Android应用向用户发送提示信息的方式总结
标签:
原文地址:http://www.cnblogs.com/dqrcsc/p/4655772.html