标签:
接之前一篇博客中介绍到服务器返回JSON数据给安卓客户端,本篇在此基础上增加了图片的下载和ListView显示的功能。首先添加一个ListView的简单布局如下,ListView中显示的内容为图片、名称和价格。
<?xml version="1.0" encoding="utf-8"?>
<RelativeLayout xmlns:android="http://schemas.android.com/apk/res/android"
    android:id="@+id/vview"
    android:layout_width="fill_parent"
    android:layout_height="fill_parent"
    android:background="@drawable/listviewbackground"
    android:paddingBottom="5dp"
    android:paddingLeft="5dp"
    android:paddingRight="5dp"
    android:paddingTop="5dp" >

    <ImageView
        android:id="@+id/image"
        android:layout_width="80dp"
        android:layout_height="65dp"
        android:src="@drawable/image_loading" />

    <TextView
        android:id="@+id/title"
        android:layout_width="wrap_content"
        android:layout_height="wrap_content"
        android:layout_marginLeft="5dp"
        android:layout_toRightOf="@id/image"
        android:textColor="#000000"
        android:textSize="13dp"
        android:textStyle="italic" />

    <TextView
        android:id="@+id/time"
        android:layout_width="wrap_content"
        android:layout_height="wrap_content"
        android:layout_alignParentBottom="true"
        android:layout_below="@id/title"
        android:layout_marginLeft="5dp"
        android:layout_marginTop="5dp"
        android:layout_toRightOf="@id/image"
        android:textColor="#000000"
        android:textSize="11dp" />

</RelativeLayout>
接下来需要为ListView自定义一个适配器,自定义的这个适配器继承于ArrayAdapter<PictureBean>,在自定义适配器的构造方法中直接调用父类的构造方法将PictureBean对象部署到适配器中,然后重写其getView方法,为ListView中的控件添加显示内容。这部分的代码如下:
package com.example.restaurant;

import java.util.HashMap;
import java.util.List;
import java.util.Map;

import android.app.Activity;
import android.content.Context;
import android.graphics.Bitmap;
import android.graphics.BitmapFactory;
import android.view.LayoutInflater;
import android.view.View;
import android.view.ViewGroup;
import android.widget.ArrayAdapter;
import android.widget.ImageView;
import android.widget.TextView;

import com.example.domain.PictureBean;

public class MyImageAndTextListAdapter extends ArrayAdapter<PictureBean> {

    public MyImageAndTextListAdapter(Context context, List<PictureBean> newsList) {
        super(context, 0, newsList);
    }

    private Map<Integer, View> viewMap = new HashMap<Integer, View>();

    @Override
    public View getView(int position, View convertView, ViewGroup parent) {
        View rowView = this.viewMap.get(position);
        if (rowView == null) {
            LayoutInflater inflater = ((Activity) this.getContext())
                    .getLayoutInflater();
            rowView = inflater.inflate(R.layout.item, null);
            PictureBean picture = this.getItem(position);

            TextView textView = (TextView) rowView.findViewById(R.id.title);
            textView.setText(picture.getName());

            TextView textView2 = (TextView) rowView.findViewById(R.id.time);
            textView2.setText("价格:" + picture.getPrice());

            ImageView imageView = (ImageView) rowView.findViewById(R.id.image);
            String str = picture.getName() + "$" + picture.getPrice() + ".jpg";
            Bitmap bitmap = BitmapFactory.decodeFile("/sdcard/restaurant/"
                    + str);
            imageView.setImageBitmap(bitmap);
            viewMap.put(position, rowView);
        }
        return rowView;
    }
}
添加完布局和适配器之后,接下来进行数据的读取和显示工作。在MainActivity的onCreate()方法中首先判断数据库中是否有数据,若数据库为空则从服务器端读取数据,若不为空则直接从数据库中读取数据。从服务器中获取数据的代码如下:
/**
     * 从服务器获取图片信息并将图片保存在SDCard上
     */
    private void updateFromServer() {

        showProgressDialog();
        getInfoThread = new Thread(new Runnable() {
            @Override
            public void run() {
                try {
                    // 获得从服务器返回的图片信息和路径 JSON
                    Pictures = UptadePictureService.getJSONPictures();

                } catch (Exception e) {
                    // Toast.makeText(MainActivity.this, "连接服务器失败!",
                    // Toast.LENGTH_SHORT).show();
                } finally {
                    downOK = true;
                }
            }
        });
        getInfoThread.start();
        /**
         * 下载图片线程
         */
        getPictureThread = new Thread(new Runnable() {
            @Override
            public void run() {
                try {
                    // 等待获取图片信息线程执行完毕
                    while (getInfoThread.getState() != Thread.State.TERMINATED) {

                    }
                    for (PictureBean picture : Pictures) {
                        /**
                         * 对传递进来的path进行处理
                         * 例如:E:\webTest\Restaurant\WebContent\Pictures
                         * \川菜\四喜丸子$22.jpg
                         * 将其转换成:Restaurant/Pictures/川菜/四喜丸子$22.jpg
                         */
                        String str = picture.getName() + "$"
                                + picture.getPrice() + ".jpg";
                        Bitmap bitmap = BitmapFactory
                                .decodeFile("/sdcard/restaurant/" + str);
                        if (bitmap == null) {
                            String url = picture.getPath();
                            String[] strList = url.split("\\\\");
                            url = strList[2] + "/" + strList[4] + "/"
                                    + strList[5] + "/" + strList[6];
                            // 下载图片并保存在SD卡中
                            down_file("http://192.168.1.103:8080/" + url,
                                    "/sdcard/restaurant/");
                        }
                    }

                    Message msg = new Message();
                    msgHandle.sendMessage(msg);
                } catch (Exception e) {
                    // Toast.makeText(MainActivity.this, "连接服务器失败!",
                    // Toast.LENGTH_SHORT).show();
                } finally {

                }

            }
        });
        getPictureThread.start();

    }


public void down_file(String url, String path) throws Exception {

        String filename = url.substring(url.lastIndexOf("/") + 1);
        /**
         * 处理中文路径 :由于URLEncoder.encode会对‘/‘和‘:‘进行转码,通过下面的代码可以避免这种错误
         */
        String[] strList = url.split("\\/");
        url = "";
        for (String mstr : strList) {
            if (mstr.contains(":")) {
                url = url + mstr + "/";
            } else {
                url = url + URLEncoder.encode(mstr, "utf-8") + ‘/‘;
            }
        }
        url = url.substring(0, url.length() - 1);
        Log.d("MainActivity", url);
        URL myURL = new URL(url);
        HttpURLConnection conn = (HttpURLConnection) myURL.openConnection();
        conn.setConnectTimeout(5000);
        conn.setRequestMethod("GET");
        if (conn.getResponseCode() == 200) {
            InputStream inputStream = conn.getInputStream();
            File file = new File(path);
            if (!file.exists()) {
                file.mkdir();
            }
            FileOutputStream out = new FileOutputStream(path + filename);
            // 把数据存入路径+文件名
            byte buf[] = new byte[1024];
            do {
                // 循环读取
                int numread = inputStream.read(buf);
                if (numread == -1) {
                    break;
                }
                out.write(buf, 0, numread);
            } while (true);
            inputStream.close();
        }

    }
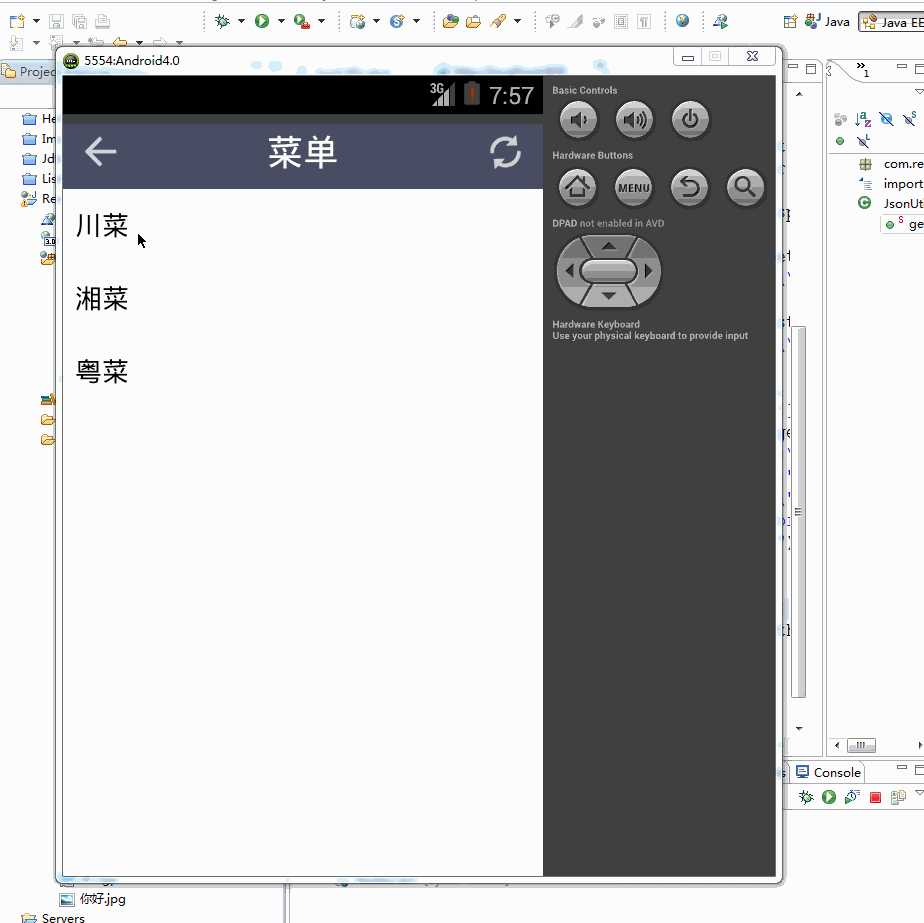
接下来添加一个更新菜单按钮,该按钮可以从服务器获取最新的菜单信息。把应用部署到安卓模拟器上,基本的效果如下图所示:

标签:
原文地址:http://www.cnblogs.com/xiaoxiongbb/p/4665620.html