标签:style blog http color 使用 strong
iOS开发项目篇—14点击标题按钮弹出菜单
一、简单说明
(1)简单实现
 1 -(void)titleButtonClick:(UIButton *)titleButton
 2 {
 3     UIImage *titleImage=[UIImage imageWithName:@"navigationbar_arrow_down"];
 4
 5     if (titleButton.currentImage==titleImage) {
 6         //换成箭头向上
 7         [titleButton setImage:[UIImage imageWithName:@"navigationbar_arrow_up"] forState:UIControlStateNormal];
 8         //显示菜单
 9         UIImageView *titleMenu=[[UIImageView alloc]init];
10         titleMenu.size=CGSizeMake(150, 250);
11         titleMenu.image=[UIImage resizedImage:@"popover_background"];
12         //获取主窗口
13         UIView *window=[UIApplication sharedApplication].keyWindow;
14         [window addSubview:titleMenu];
15     }else
16     {
17         //换成箭头向下
18         [titleButton setImage:[UIImage imageWithName:@"navigationbar_arrow_down"] forState:UIControlStateNormal];
19     }
20 }
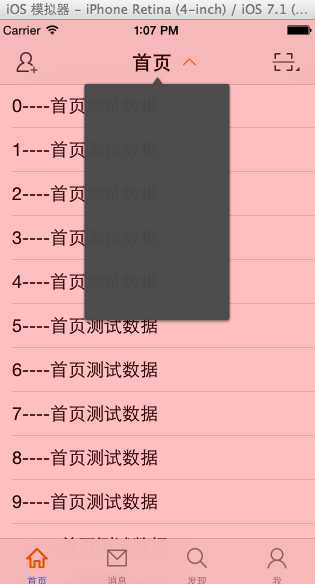
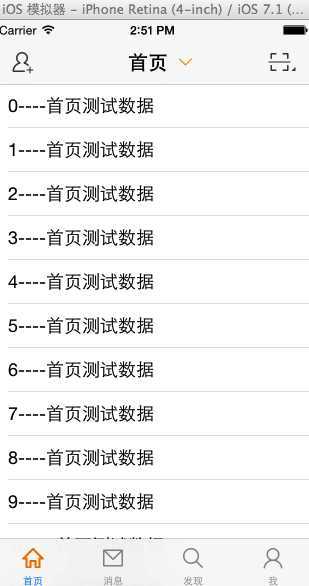
实现效果:

 1 -(void)titleButtonClick:(UIButton *)titleButton
 2 {
 3     UIImage *titleImage=[UIImage imageWithName:@"navigationbar_arrow_down"];
 4
 5     if (titleButton.currentImage==titleImage) {
 6         //换成箭头向上
 7         [titleButton setImage:[UIImage imageWithName:@"navigationbar_arrow_up"] forState:UIControlStateNormal];
 8         //显示菜单
 9         UIImageView *titleMenu=[[UIImageView alloc]init];
10         titleMenu.size=CGSizeMake(150, 250);
11         titleMenu.image=[UIImage resizedImage:@"popover_background"];
12         //获取主窗口
13         UIView *window=[UIApplication sharedApplication].keyWindow;
14         titleMenu.centerX=window.width*0.5;
15         titleMenu.y=55;
16         [window addSubview:titleMenu];
17     }else
18     {
19         //换成箭头向下
20         [titleButton setImage:[UIImage imageWithName:@"navigationbar_arrow_down"] forState:UIControlStateNormal];
21     }
22 }
效果:

 1 -(void)titleButtonClick:(UIButton *)titleButton
 2 {
 3     UIImage *titleImage=[UIImage imageWithName:@"navigationbar_arrow_down"];
 4
 5     if (titleButton.currentImage==titleImage) {
 6         //换成箭头向上
 7         [titleButton setImage:[UIImage imageWithName:@"navigationbar_arrow_up"] forState:UIControlStateNormal];
 8
 9         //获取主窗口
10         UIView *window=[UIApplication sharedApplication].keyWindow;
11
12         //添加一个全局的遮盖按钮
13         UIButton *cover=[[UIButton alloc]init];
14         cover.frame=window.bounds;
15         cover.backgroundColor=[UIColor redColor];
16         cover.alpha=0.2;
17         [window addSubview:cover];
18
19         //显示菜单
20         UIImageView *titleMenu=[[UIImageView alloc]init];
21         titleMenu.size=CGSizeMake(150, 250);
22         titleMenu.image=[UIImage resizedImage:@"popover_background"];
23         titleMenu.centerX=window.width*0.5;
24         titleMenu.y=55;
25         [window addSubview:titleMenu];
26     }else
27     {
28         //换成箭头向下
29         [titleButton setImage:[UIImage imageWithName:@"navigationbar_arrow_down"] forState:UIControlStateNormal];
30     }
31 }
 1 -(void)titleButtonClick:(UIButton *)titleButton
 2 {
 3     UIImage *titleImage=[UIImage imageWithName:@"navigationbar_arrow_down"];
 4
 5     if (titleButton.currentImage==titleImage) {
 6         //换成箭头向上
 7         [titleButton setImage:[UIImage imageWithName:@"navigationbar_arrow_up"] forState:UIControlStateNormal];
 8
 9         //获取主窗口
10         UIView *window=[UIApplication sharedApplication].keyWindow;
11
12         //添加一个全局的遮盖按钮
13         UIButton *cover=[[UIButton alloc]init];
14         cover.frame=window.bounds;
15 //        cover.backgroundColor=[UIColor redColor];
16         //清除颜色
17         cover.backgroundColor=[UIColor clearColor];
18         cover.alpha=0.2;
19         [window addSubview:cover];
20
21         //显示菜单
22         UIImageView *titleMenu=[[UIImageView alloc]init];
23         //设置为可交互的
24         titleMenu.userInteractionEnabled=YES;
25         titleMenu.size=CGSizeMake(150, 250);
26         titleMenu.image=[UIImage resizedImage:@"popover_background"];
27         titleMenu.centerX=window.width*0.5;
28         titleMenu.y=55;
29         [window addSubview:titleMenu];
30     }else
31     {
32         //换成箭头向下
33         [titleButton setImage:[UIImage imageWithName:@"navigationbar_arrow_down"] forState:UIControlStateNormal];
34     }
35 }
二、封装菜单栏
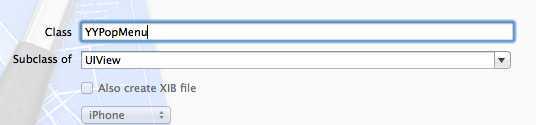
 1 //
 2 //  YYPopMenu.h
 3
 4 #import <UIKit/UIKit.h>
 5 @class YYPopMenu;
 6
 7 @protocol YYPopMenuDelegate <NSObject>
 8
 9 @optional
10 -(void)popMenuDidDismissed:(YYPopMenu *)popMenu;
11 @end
12
13
14 @interface YYPopMenu : UIView
15 /**
16  *  初始化方法
17  */
18 -(instancetype)initWithContentView:(UIView *)contentView;
19 +(instancetype)popMenuWithContentView:(UIView *)contentView;
20
21 /**
22  *  设置菜单的背景图片
23  */
24 -(void)setBackground:(UIImage *)background;
25 /**
26  * 显示菜单
27  */
28 -(void)showInRect:(CGRect)rect;
29
30 /**
31  *  关闭菜单
32  */
33 -(void)dismiss;
34
35 @property(nonatomic,strong)id<YYPopMenuDelegate> delegate;
36 @end
实现:
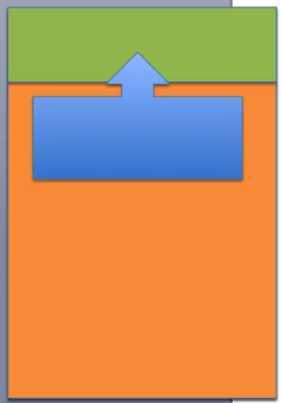
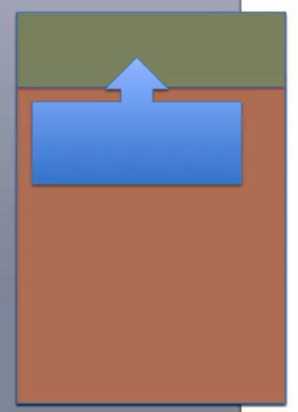
  1 //
  2 //  YYPopMenu.m
  3 //  08-微博弹出菜单
  4 //
  5
  6 #import "YYPopMenu.h"
  7
  8 @interface YYPopMenu()
  9 @property(nonatomic,strong)UIView *contentView;
 10 /**
 11  *  最底部的遮盖 :屏蔽除菜单以外控件的事件
 12  */
 13 @property(nonatomic,strong)UIImageView *container;
 14 /**
 15  *  最底部的遮盖 :屏蔽除菜单以外控件的事件
 16  */
 17 @property(nonatomic,strong)UIButton *cover;
 18 @end
 19 @implementation YYPopMenu
 20
 21 #pragma mark-初始化方法
 22 //init方法会调用该方法
 23 - (id)initWithFrame:(CGRect)frame
 24 {
 25     self = [super initWithFrame:frame];
 26     if (self) {
 27         /**添加菜单内部的两个子控件*/
 28         //1.添加一个遮盖按钮
 29         UIButton *cover=[[UIButton alloc]init];
 30         //清除颜色
 31         cover.backgroundColor=[UIColor clearColor];
 32         [cover addTarget:self action:@selector(coverClick) forControlEvents:UIControlEventTouchUpInside];
 33         [self addSubview:cover];
 34         self.cover=cover;
 35
 36         //2.添加单箭头的菜单图片
 37         UIImageView *container=[[UIImageView alloc]init];
 38         //设置为可交互的
 39         container.userInteractionEnabled=YES;
 40         container.size=CGSizeMake(200, 100);
 41         container.image=[UIImage resizedImage:@"popover_background"];
 42         [self addSubview:container];
 43         self.container=container;
 44     }
 45     return self;
 46 }
 47
 48 -(instancetype)initWithContentView:(UIView *)contentView
 49 {
 50     if (self=[super init]) {
 51         self.contentView=contentView;
 52     }
 53     return self;
 54 }
 55
 56 +(instancetype)popMenuWithContentView:(UIView *)contentView
 57 {
 58     return [[self alloc]initWithContentView:contentView];
 59 }
 60
 61 -(void)layoutSubviews
 62 {
 63     [super layoutSubviews];
 64     self.cover.frame=self.bounds;
 65 }
 66 #pragma mark-内部方法
 67 -(void)coverClick
 68 {
 69     [self dismiss];
 70 }
 71
 72 #pragma mark-公共方法
 73 -(void)setBackground:(UIImage *)background
 74 {
 75     self.container.image=background;
 76 }
 77
 78 -(void)showInRect:(CGRect)rect
 79 {
 80     //添加菜单到整体的窗口上
 81     UIWindow *window=[UIApplication sharedApplication].keyWindow;
 82     self.frame=window.bounds;
 83     [window addSubview:self];
 84
 85     //设置容器的frame
 86     self.container.frame=rect;
 87     [self.container addSubview:self.contentView];
 88
 89     // 设置容器里面内容的frame
 90     CGFloat topMargin = 12;
 91     CGFloat leftMargin = 5;
 92     CGFloat rightMargin = 5;
 93     CGFloat bottomMargin = 8;
 94
 95     self.contentView.y = topMargin;
 96     self.contentView.x = leftMargin;
 97     self.contentView.width = self.container.width - leftMargin - rightMargin;
 98     self.contentView.height = self.container.height - topMargin - bottomMargin;
 99
100 }
101
102 -(void)dismiss
103 {
104     //一旦调用了该方法,就通知代理删除菜单栏
105     if ([self.delegate respondsToSelector:@selector(popMenuDidDismissed:)]) {
106         [self.delegate popMenuDidDismissed:self];
107     }
108     [self removeFromSuperview];
109 }
110 @end
使用:
  1 //
  2 //  YYHomeTableViewController.m
  3 //
  4
  5 #import "YYHomeTableViewController.h"
  6 #import "YYOneViewController.h"
  7 #import "YYTitleButton.h"
  8 #import "YYPopMenu.h"
  9
 10 @interface YYHomeTableViewController ()<YYPopMenuDelegate>
 11 @property(nonatomic,assign)BOOL down;
 12 @end
 13
 14 @implementation YYHomeTableViewController
 15
 16 - (id)initWithStyle:(UITableViewStyle)style
 17 {
 18     self = [super initWithStyle:style];
 19     if (self) {
 20         // Custom initialization
 21     }
 22     return self;
 23 }
 24
 25 - (void)viewDidLoad
 26 {
 27     [super viewDidLoad];
 28
 29     //设置导航栏的按钮
 30     self.navigationItem.leftBarButtonItem=[UIBarButtonItem itemWithImageName:@"navigationbar_friendsearch" highImageName:@"navigationbar_friendsearch_highlighted" target:self action:@selector(friendsearch)];
 31     self.navigationItem.rightBarButtonItem=[UIBarButtonItem itemWithImageName:@"navigationbar_pop" highImageName:@"navigationbar_pop_highlighted" target:self action:@selector(pop)];
 32
 33     //设置导航栏按钮
 34     YYTitleButton *titleButton=[[YYTitleButton alloc]init];
 35     //设置文字
 36     [titleButton setTitle:@"首页" forState:UIControlStateNormal];
 37     //设置图标
 38     [titleButton setImage:[UIImage imageWithName:@"navigationbar_arrow_down"] forState:UIControlStateNormal];
 39     //设置背景
 40     [titleButton setBackgroundImage:[UIImage resizedImage:@"navigationbar_filter_background_highlighted"] forState:UIControlStateHighlighted];
 41
 42     //设置尺寸
 43     titleButton.width=100;
 44     titleButton.height=35;
 45     //监听按钮的点击事件
 46     [titleButton addTarget:self action:@selector(titleButtonClick:) forControlEvents:UIControlEventTouchUpInside];
 47     self.navigationItem.titleView=titleButton;
 48 }
 49
 50 -(void)titleButtonClick:(UIButton *)titleButton
 51 {
 52 //    UIImage *titleImage=[UIImage imageWithName:@"navigationbar_arrow_down"];
 53 //
 54 //    if (titleButton.currentImage==titleImage) {
 55         //换成箭头向上
 56         [titleButton setImage:[UIImage imageWithName:@"navigationbar_arrow_up"] forState:UIControlStateNormal];
 57
 58         UITableView *tableView=[[UITableView alloc]init];
 59         [tableView setBackgroundColor:[UIColor yellowColor]];
 60         YYPopMenu *menu=[YYPopMenu popMenuWithContentView:tableView];
 61         [menu showInRect:CGRectMake(60, 55, 200, 200)];
 62         menu.delegate=self;
 63
 64 //    }else
 65 //    {
 66 //        //换成箭头向下
 67 //        [titleButton setImage:[UIImage imageWithName:@"navigationbar_arrow_down"] forState:UIControlStateNormal];
 68 //    }
 69 }
 70
 71
 72 #pragma mark-YYPopMenuDelegate
 73 //弹出菜单
 74 -(void)popMenuDidDismissed:(YYPopMenu *)popMenu
 75 {
 76     YYTitleButton *titleButton=(YYTitleButton *)self.navigationItem.titleView;
 77     [titleButton setImage:[UIImage imageWithName:@"navigationbar_arrow_down"] forState:UIControlStateNormal];
 78 }
 79 -(void)pop
 80 {
 81     YYLog(@"---POP---");
 82 }
 83 -(void)friendsearch
 84 {
 85     //跳转到one这个子控制器界面
 86     YYOneViewController *one=[[YYOneViewController alloc]init];
 87     one.title=@"One";
 88     //拿到当前控制器
 89     [self.navigationController pushViewController:one animated:YES];
 90
 91 }
 92
 93 #pragma mark - Table view data source
 94 - (NSInteger)tableView:(UITableView *)tableView numberOfRowsInSection:(NSInteger)section
 95 {
 96     return 20;
 97 }
 98
 99 - (UITableViewCell *)tableView:(UITableView *)tableView cellForRowAtIndexPath:(NSIndexPath *)indexPath
100 {
101     static NSString *ID = @"cell";
102     UITableViewCell *cell = [tableView dequeueReusableCellWithIdentifier:ID];
103     if (!cell) {
104         cell = [[UITableViewCell alloc] initWithStyle:UITableViewCellStyleSubtitle reuseIdentifier:ID];
105     }
106     cell.textLabel.text = [NSString stringWithFormat:@"%d----首页测试数据", indexPath.row];
107     return cell;
108 }
109
110 - (void)tableView:(UITableView *)tableView didSelectRowAtIndexPath:(NSIndexPath *)indexPath
111 {
112     //点击cell的时候,跳到下一个界面
113     UIViewController *newVc = [[UIViewController alloc] init];
114     newVc.view.backgroundColor = [UIColor redColor];
115     newVc.title = @"新控制器";
116     [self.navigationController pushViewController:newVc animated:YES];
117 }
118
119 @end
实现:

iOS开发项目篇—14点击标题按钮弹出菜单,布布扣,bubuko.com
标签:style blog http color 使用 strong
原文地址:http://www.cnblogs.com/wendingding/p/3833464.html