http://cstriker1407.info/blog/use-vs2012-to-compile-and-use-the-c-stl-stlport/
参考网址:
【 http://blog.csdn.net/lwc91319/article/details/10627415 】
【 http://blog.csdn.net/fullsail/article/details/6848945 】
【 http://blog.csdn.net/goxigo/article/details/4548197 】
【 http://hi.baidu.com/dbfr2011818/item/d21e23d9f804211c20e2502f 】
【 http://blog.csdn.net/huangxy10/article/details/7616633 】
搭建步骤:
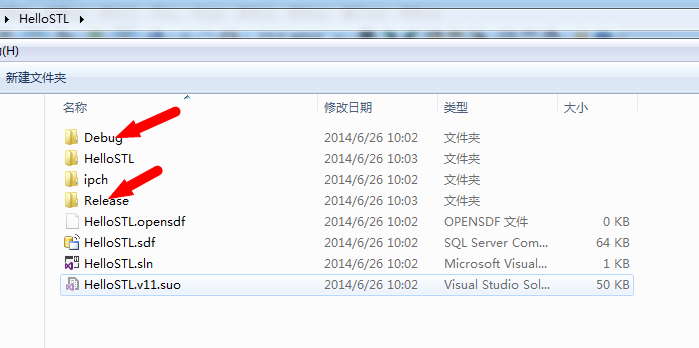
首先在VS2012下新建一个【 Win32控制台程序 】,分别在【 Debug 】和【 Release 】模式下编译,运行一次,如下图:

这样本地目录中会出现两个输出文件夹。如下图:
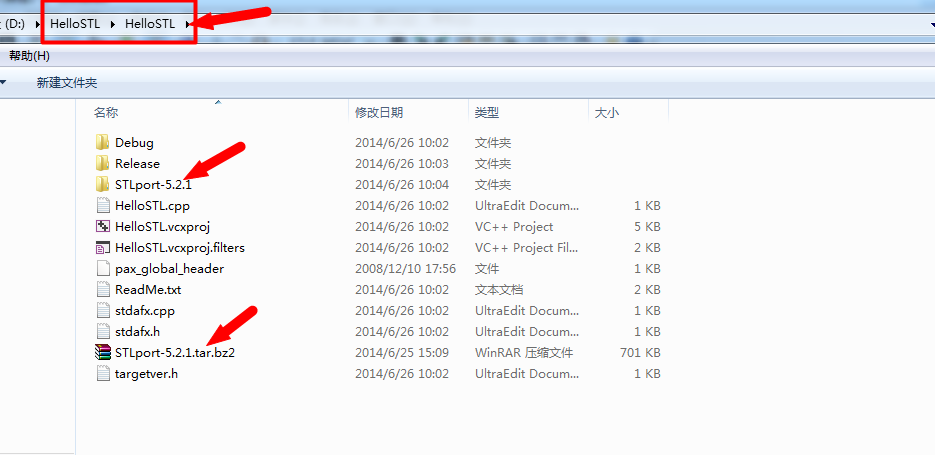
然后去STLport的网站下载【 http://sourceforge.net/projects/stlport/ 】,解压到工程子目录下,如下图:
进入该目录,修改文件【 D:\HelloSTL\HelloSTL\STLport-5.2.1\stlport\stl\_cstdlib.h 】的158行,改为
#if !defined(_STLP_MSVC) || (_STLP_MSVC < 1600) |
inline _STLP_LONG_LONG abs(_STLP_LONG_LONG __x) { return __x < 0 ? -__x : __x; } |
#endif |
原来的:

改为:

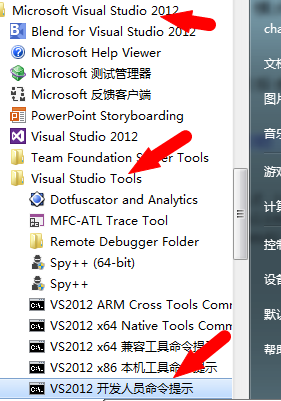
启动【 VS2012 开发人员命令提示 】,如下图:
然后输入以下命令:
C:\Program Files (x86)\Microsoft Visual Studio 11.0>D: #切换分区 |
。。。。 |
D:\>cd HelloSTL/HelloSTL/STLport-5.2.1 #切换目录 |
。。。。 |
D:\HelloSTL\HelloSTL\STLport-5.2.1>configure msvc9 #configure |
。。。。 |
D:\HelloSTL\HelloSTL\STLport-5.2.1>cd build/lib #切换目录 |
。。。。 |
D:\HelloSTL\HelloSTL\STLport-5.2.1\build\lib>nmake clean install #nmake |
。。。。 |
等待一会儿,待编译完成。
修改VS2012的工程属性,注意配置为所有配置,如下图:

【 包含目录 】中增加【 D:\HelloSTL\HelloSTL\STLport-5.2.1\stlport 】
【 库目录 】中增加【 D:\HelloSTL\HelloSTL\STLport-5.2.1\lib 】
为了简单起见,这里将.dll直接复制到输出目录下,将【 D:\HelloSTL\HelloSTL\STLport-5.2.1\bin 】下的6个文件全部复制到【D:\HelloSTL\Debug 】和【 D:\HelloSTL\Release 】目录下。
然后将main函数修改为:
#include "stdafx.h" |
#include "vector" |
int _tmain(int argc, _TCHAR* argv[]) |
{ |
std::vector<int> testVector; |
testVector.push_back(100); |
printf("%d", testVector.size()); |
getchar(); |
return 0; |
} |
编译,运行就可以了。也可以断点调试。
Release模式调试
这里作者遇到了一个小问题,在不同的环境下,VS2012的项目的debug模式中会出现断点调试进入了【 D:\HelloSTL\HelloSTL\STLport-5.2.1\stlport\stl\debug 】目录下,这里作者猜测是使用了debug模式的问题,作者使用了一种比较奇怪的方式,来使调试进入【 D:\HelloSTL\HelloSTL\STLport-5.2.1\stlport\stl 】目录,方法如下:
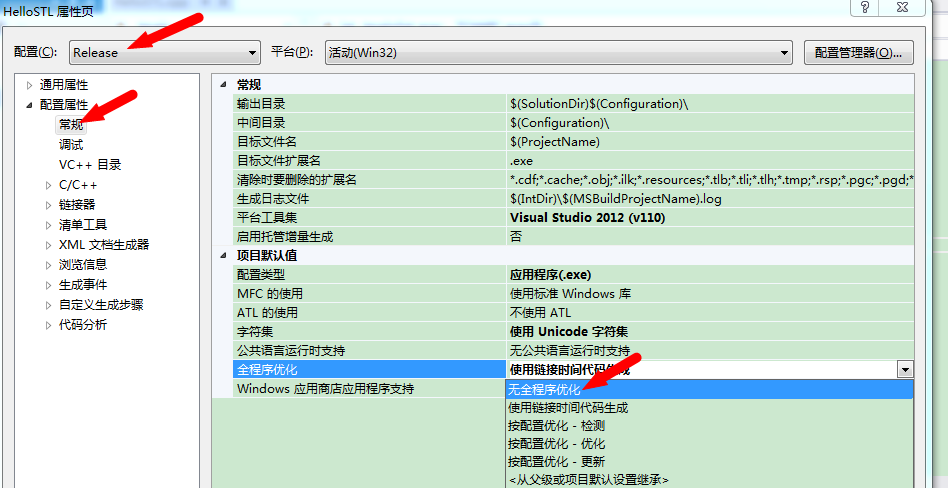
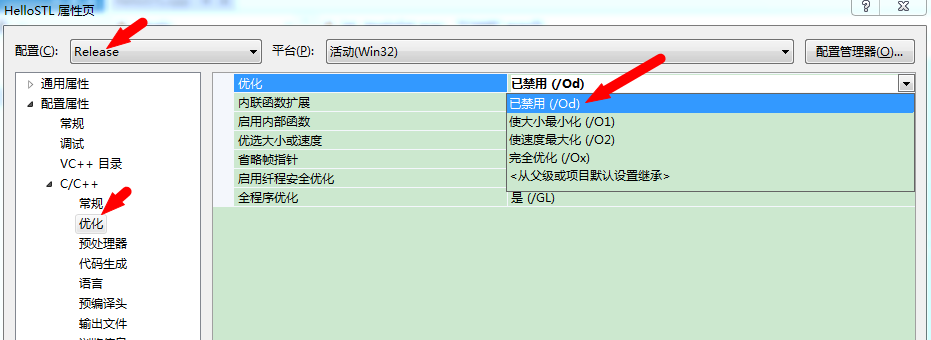
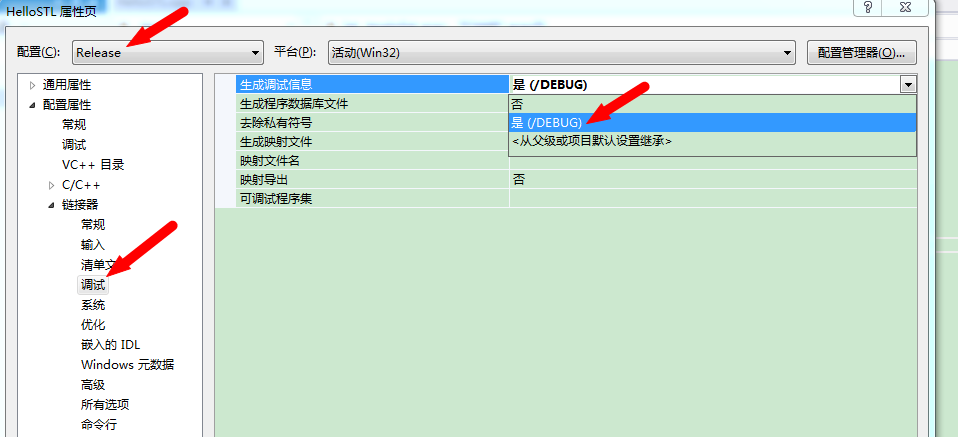
将项目切换到release模式,在release模式下使用断点调试。此时,要修改3个地方,如下图,修改好之后,就可以在release模式下进行调试,此时会进入【 D:\HelloSTL\HelloSTL\STLport-5.2.1\stlport\stl 】目录。
修改点: