标签:
画画板
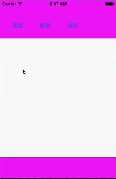
1.搭建界面(3个按钮,1个View)
2.为重写touchesBegan:等方法,需要自定义一个View,新建一个View,名为NJView,然后在故事板将这个View的Class设置为NJView
3.在NJView.m中重写方法
//开始触摸
-(void)touchesBegan:(NSSet *)touches withEvent:(UIEvent *)event
{
//1.获取手指对应UITouch对象
UITouch *touch = [touches anyObject];
//2.通过UITouch对象获取手指触摸的位置
CGPoint startPoint = [touch locationInView:touch.view];
//3.创建一个小数组,用于保存当前路径所有的点
NSMutableArray *subPoints = [NSMutableArray array];
//4.将手指触摸的起点存储到小数组中
[subPoints addObejct:[NSValue valueWithCGPoint:startPoint]];
//5.将小数组存储到大数组中
[self.totalPoints addObejct:subPoints];
}
//移动
-(void)touchesMoved:(NSSet *)touches withEvent:(UIEvent *)event
{
//1.获取手指对应UITouch对象
UITouch *touch = [touches anyObject];
//2.通过UITouch对象获取手指触摸的位置
CGPoint movePoint = [touch locationInView:touch.view];
//3.从大数组中取出当前路径对应的小数组
NSMutableArray *subPoints = [self.totalPoints lastObject];
//4.将手指移动时触摸的点存储到小数组中
[subPoints addObejct:[NSValue valueWithCGPoint:movePoint]];
//5.调用drawRect:方法重绘视图
[self setNeedsDisplay];
}
//离开view(停止触摸)
-(void)touchesEnded:(NSSet *)touches withEvent:(UIEvent *)event
{
//1.获取手指对应UITouch对象
UITouch *touch = [touches anyObject];
//2.通过UITouch对象获取手指触摸的位置
CGPoint endPoint = [touch locationInView:touch.view];
//3.从大数组中取出当前路径对应的小数组
NSMutableArray *subPoints = [self.totalPoints lastObject];
//4.将手指离开时触摸的点存储到小数组中
[subPoints addObejct:[NSValue valueWithCGPoint:endPoint]];
//5.调用drawRect:方法重绘视图
[self setNeedsDisplay];
}
//画线
//上述几个方法获取的点不能直接在下面的方法用,在类扩展中声明一个数组用来装这些点,然后再取出来用
定义一个大数组(大数组中保存小数组,每一个小数组保存一条直线所有的点)
@property (nonatomic,strong)NSMutableArray *totalPoints;
- (NSMutableArray *)totalPoints
{
if(_totalPoints == nil){
_totalPoints = [NSMutableArray array];
}
return _totalPoints;
}
-(void)drawRect:(CGRect)rect
{
//1.获取上下文
CGContextRef ctx = UIGraphicsGetCurrentContext();
//遍历大数组,取出所有的小数组(每个小数组代表一条线段)
for (NSMutableArray *subPointArray in self.totalPoints){
//遍历小数组,取出小数组中所有的点
for (int index = 0;index < subPointArray.count;index++){
//1.取出小数组中的每一个点
CGPoint *point = self.points[index] CGPointValue];
//2.绘制线段
if (0 == index){
//2.1.设置线段的起点
CGContextMoveToPoint = (ctx,point.x,point.y);
} else
{
//2.2. 设置线段的终点
CGContextAddLineToPoint(ctx,point.x,point.y);
}
}
}
for (int index = 0;index < self.points.count;index++){
CGPoint *point = self.points[index] CGPointValue];
//2.绘制线段
if (0 == index){
//2.1.设置线段的起点
CGContextMoveToPoint = (ctx,point.x,point.y);
}else
{
//2.2. 设置线段的终点
CGContextAddLineToPoint(ctx,point.x,point.y);
}
}
CGContextSetLineCap(ctx,kCGLineCapRound);
CGContextSetLineJoin(ctx,kCGLineJoinRound);
CGContextSetLineWidth(ctx,10);
//3.渲染
CGContextStrokePath(ctx);
}
4.监听清屏按钮,回退按钮和保存按钮,并监听View属性(控制器头文件)
5.在NJView.h里提供方法(面向对象思想,控制器只负责调用)
-(void)clearView;
-(void)backView;
6.在NJView.m里实现方法
-(void)clearView
{
[self.totalPoints removeAllObjects];
[self setNeedsDisplay];
}
-(void)backView
{
[self.totalPoints removeLastObjects];
[self setNeedsDisplay];
}
7.在控制器实现文件中实现方法
-(IBAction)clearBtnClick{
[self.customView clearView];
}
-(IBAction)backBtnClick {
[self.customView backView];
}
-(IBAction)saveBtnClick {
UIImage *newimage = [UIImage captureImageWithView:self.customView];
//保存图片到相册
UIImageWriteToSavedPhotosAlbum(newImage,self,@selector(image:didFinishSavingWithError:contextInfo:), nil);
}
-(void)image:(UIImage *)image didFinishSavingWithError:(NSError *)error contextInfo:(void *)contextInfo
{
if (error){
[MBProgressHUD showError:@"保存失败,请检测应用是否拥有访问相册的权限"];
} else {
[MBProgressHUD showSuccess:@"保存成功"];
}
}
8.新建一个类,为CaptureView
(用来截图,这样只需要把需要截图的View传进来即可)
在CaptureView.h中
+(UIImage *)captureImageWithView:(UIView *)view;
在CaptureView.m中
+(UIImage *)captureImageWithView:(UIView *)view
{
// 1.创建一个bitmap的上下文
UIGraphicsBeginImageContext(view.frame.size);
//2.将要保存的view的layer绘制到bitmap上下文中
[view.layer renderInContext:UIGraphicsGetCurrentContext()];
//3.取出绘制好的图片
UIImage *newImage = UIGraphicsGetImageFromCurrentImageContext();
return newImage;
}
PS:以后截屏只需导入这个类,然后调用captureImageWithView:方法即可。像这样经常用的代码,封装起来以后会很轻松。
标签:
原文地址:http://www.cnblogs.com/marshall-yin/p/4710407.html