标签:
产品推荐界面的实现
目前很多公司都仅仅只有一个项目,所以他们关于其他的项目肯定会做相应的推广,而在APp内部使用产品推荐实现APP的推广使一种很常见的现象,因为不需要什么成本,所以今天就简单介绍一下这么去搭建一个简单的产品推荐界面。
本章重点:
好了下面就来看看关于产品推荐界面是怎么去实现的!
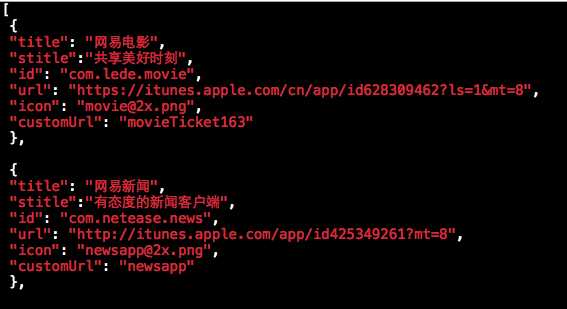
1:JSON数据

2:对应的模型属性和模型方法(这里就不多介绍了)
 1 @property (nonatomic, copy) NSString *title;
 2
 3 @property (nonatomic, copy) NSString *stitle;
 4
 5 @property (nonatomic, copy) NSString *ID;
 6
 7 @property (nonatomic, copy) NSString *url;
 8
 9 @property (nonatomic, copy) NSString *icon;
10
11 @property (nonatomic, copy) NSString *customUrl;
12
13
14
15 -(instancetype)initWithDict:(NSDictionary *)dict;
16
17 +(instancetype)productWithDict:(NSDictionary *)dict;
模型方法的实现
 1 -(instancetype)initWithDict:(NSDictionary *)dict
 2
 3 {
 4
 5     if (self == [super init]) {
 6
 7         self.title = dict[@"title"];
 8
 9         self.stitle = dict[@"stitle"];
10
11         self.ID = dict[@"id"];
12
13         self.url = dict[@"url"];
14
15         self.icon = dict[@"icon"];
16
17         self.customUrl = dict[@"customUrl"];
18
19     }
20
21     return self;
22
23 }
24
25
26
27 +(instancetype)productWithDict:(NSDictionary *)dict
28
29 {
30
31     return [[self alloc] initWithDict:dict];
32
33 }
3:自定义Cell
 1 +(instancetype)cellWithTableView:(UITableView *)tableView
 2
 3 {
 4
 5     static NSString *ID = @"Cell";
 6
 7     iCocosProductsCell *cell = [tableView dequeueReusableCellWithIdentifier:ID];
 8
 9     if (cell == nil) {
10
11         cell = [[iCocosProductsCell alloc] initWithStyle:UITableViewCellStyleSubtitle reuseIdentifier:ID];
12
13     }
14
15     return cell;
16
17 }
4:控制器中实现最基本的方法:
 1 - (void)viewDidLoad {
 2
 3     [super viewDidLoad];
 4
 5
 6
 7     self.title = @"产品推荐";
 8
 9
10
11 }
12
13
14
15 #pragma mark - Table view data source
16
17 - (NSInteger)tableView:(UITableView *)tableView numberOfRowsInSection:(NSInteger)section {
18
19
20
21     return self.products.count;
22
23 }
24
25
26
27 - (UITableViewCell *)tableView:(UITableView *)tableView cellForRowAtIndexPath:(NSIndexPath *)indexPath {
28
29     iCocosProductsCell *cell = [iCocosProductsCell cellWithTableView:tableView];
30
31
32
33     iCocosProductsModel *products = self.products[indexPath.row];
34
35
36
37     cell.products = products;
38
39
40
41     return cell;
42
43 }
5:这里就是控制器中的重点,也就是JSON数据的加载和序列化,关于JSON数据的序列化详细请查看笔者之前写的:
我们使用一个可变数组,实现将JSON数据序列化出来的数组存放在里面方便后面的tableView代理方法直接使用,这里前面的MVC已经非常清楚了,
定义可变数组
 1 -(NSMutableArray *)products
 2
 3 {
 4
 5
 6
 7 实现懒加载可变数组
 8
 9     if (_products == nil) {
10
11         _products = [NSMutableArray array];
12
13
14
15
16
17 //       NSString *urlPath = [[NSBundle mainBundle] pathForResource:@"more_project.json" ofType:nil];
18
19 //
20
21 //        NSData *data = [NSData dataWithContentsOfURL:[NSURL URLWithString:urlPath]];
22
23
24
25         NSURL *jsonPath = [[NSBundle mainBundle] URLForResource:@"more_project.json" withExtension:nil];
26
27         NSData *data = [NSData dataWithContentsOfURL:jsonPath];
28
29
30
31         id arrdata = [NSJSONSerialization JSONObjectWithData:data options:0 error:nil];
32
33
34
35         if ([arrdata isKindOfClass:[NSArray class]]) {
36
37             for (NSDictionary *dict in arrdata) {
38
39                 iCocosProductsModel *products = [iCocosProductsModel productWithDict:dict];
40
41
42
43                 [_products addObject:products];
44
45             }
46
47         }
48
49
50
51
52
53         NSLog(@"%@", _products);
54
55     }
56
57     return _products;
58
59 }
6:要现实数组,我就需要在自定义Cell中实现相应的数据显示方法
定义一个模型属性:
重写他的setter方法,设置对应的数据:
 1 -(void)setProducts:(iCocosProductsModel *)products
 2
 3 {
 4
 5     _products = products;
 6
 7
 8
 9     self.imageView.image = [UIImage imageNamed:products.icon];
10
11
12
13     self.textLabel.text = products.title;
14
15
16
17     self.detailTextLabel.text = products.stitle;
18
19 }
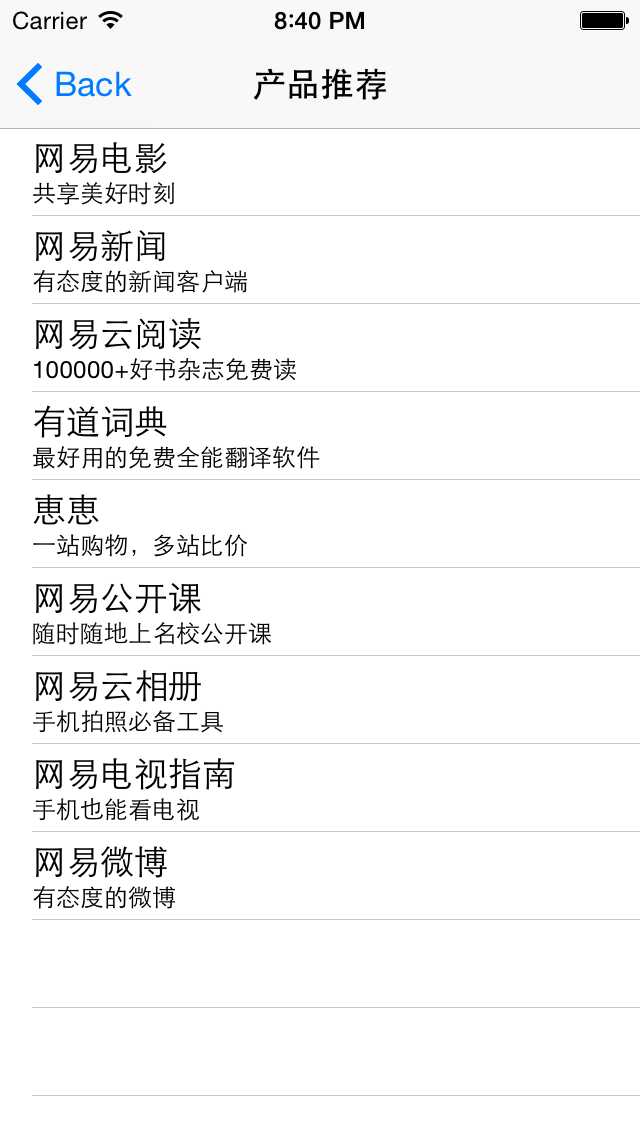
此时就可以简单的现实数据了:

关于图片为什么不显示,这里是一个需要注意的地方,平时开发中我们要根据需求来开发,比如在我们的json数据中图片都是有@2x.png的,但是Xcode有会默认帮我们在后面加上@2x.png,所以有的时候就可能导致图片不显示,这个时候我们就需要使用字符串的替换方法将@2x.png替换成空的字符串,当然你也可以使用其他的方法
1     NSString *imgName = [products.icon stringByReplacingOccurrencesOfString:@"@2x.png" withString:@""];
2
3     self.imageView.image = [UIImage imageNamed:imgName];
7:然就要实现Cell中下载按钮的现实和业务逻辑的实现,这里说一下思路
所以这里我们在模型中新增一个两个属性
1:判断是否安装对应软件:
2:打开对应的URL
实现判断是否安装对应App的getter方法,传入模型中对应的值。
这里设置到了应用调整的知识,其实就相当去设备中的路径:scheme + :// + indentifer
使用上面传如的值结合单例UIApplication的canOpenURL方法判断是否可以打开(即是都安装对应的软件)
 1 -(BOOL)isInstall
 2
 3 {
 4
 5 #warning 跳转应用 scheme + :// + indentifer
 6
 7     NSString *openUrl = [NSString stringWithFormat:@"%@://%@",self.customUrl, self.ID];
 8
 9
10
11     self.openURL = openUrl;
12
13
14
15     // 应用已经安装
16
17     return  [[UIApplication sharedApplication] canOpenURL:[NSURL URLWithString:openUrl]];
18
19 }
8:然后在Cell实现下载或者打开按钮的现实和业务逻辑的实现:
首先在私有拓展中声明一个按钮的属性
然后懒加载按钮并且为按钮添加点击事件:
 1 -(UIButton *)rightBtn
 2
 3 {
 4
 5     if (_rightBtn == nil) {
 6
 7         _rightBtn = [UIButton buttonWithType:UIButtonTypeCustom];
 8
 9
10
11         [_rightBtn addTarget:self action:@selector(btnClick) forControlEvents:UIControlEventTouchUpInside];
12
13     }
14
15     return _rightBtn;
16
17 }
下面就要实现第七点说道的两个重要的地方了,
1)设置按钮的图片
根据是否按钮对应的软件,在模型属性的setter方法中判断模型中的isInstall是否有值,如果有值就设置对应已经安装的图片(可直接打开),如果没有值酒设置下载按钮的图片,并且设置按钮自动适配大小
 1     if (!products.isInstall) {
 2
 3         [self.rightBtn setImage:[UIImage imageNamed:@"appadcell_downloadbutton"] forState:UIControlStateNormal];
 4
 5     } else {
 6
 7         [self.rightBtn setImage:[UIImage imageNamed:@"appadcell_openbutton"] forState:UIControlStateNormal];
 8
 9     }
10
11
12
13     [self.rightBtn sizeToFit];
最后就是实现按钮的点击了,点击按钮做对应的额事情,可能是直接打开应用,也可能使转到App Store中对应的链接地址下载对应的应用(设置设计到了部分的真机知识,但是不足以去完全讲解一些真机相关的,关于真机后面的文章中会详细介绍)。
在监听按钮点击的方法中,判断对应的isInstall是否有值有酒打开应用,没有就转到App Store下载
 1 -(void)btnClick
 2
 3 {
 4
 5     if (self.products.isInstall) {
 6
 7         [[UIApplication sharedApplication] openURL:[NSURL URLWithString:self.products.openURL]];
 8
 9     } else {
10
11         [[UIApplication sharedApplication] openURL:[NSURL URLWithString:self.products.url]];
12
13     }
14
15 }
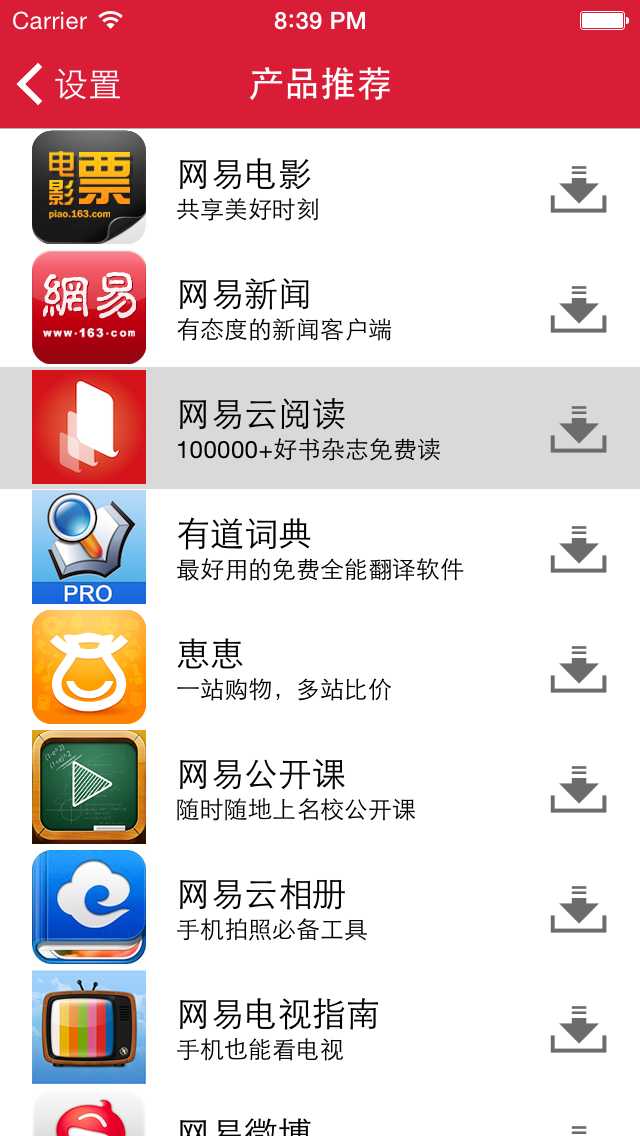
最后我们会看到这样的界面

标签:
原文地址:http://www.cnblogs.com/iCocos/p/4733069.html