标签:
使用UICollectionView实现新特性界面
关于CollectionView是一个很好用的控件,或许你还没有接触过,但是你肯定接触过UITableView,它可以实现UITableView实现不了的功能,知识UITableView使用的地方不不是很难,而CollectionView如果你只是简单的实现一些界面布局撒的很简单,但是如果涉及到比较炫酷或者比较高级的功能就需要更加深入的研究了。
今天主要是以一个新特性的界面介绍CollectionView的简单使用。
关于新特性界面在没有CollectionView之前我们用的基本上都是UIScrollView,当然现在也有很多App还是使用UIScrollView,但是如果你学会的CollectionView的使用,你会发现你再也不想使用其他方式了。
对比CollectionView和UIScrollView他有两个优点
如果你都不想使用那么你可以试试使用UITableView,它同样使用了缓存机制,而且使用也不难,只要将它旋转90度就可以,具体使用请自行验证。
好多废话不多说,下面来看看怎么使用CollectionView去搭建一个新特性界面。
具体的一些创建项目和CollectionView的细节这里就不多说了,你可以回想一下UItableView的使用。
首先,我们和使用UItableView的时候一样,创建一个标志ID
static NSString *const ID = @"iCocos";
注册Cell
1 [self.collectionView registerClass:[iCocosNewFeatureCell class] forCellWithReuseIdentifier:ID];
设置代理并且实现代理方法
1 self.collectionView.delegate = self;
代理方法
 1 -(NSInteger)numberOfSectionsInCollectionView:(UICollectionView *)collectionView
 2
 3 {
 4
 5     return 1;
 6
 7 }
 8
 9 -(NSInteger)collectionView:(UICollectionView *)collectionView numberOfItemsInSection:(NSInteger)section
10
11 {
12
13     return iCocosCount;
14
15 }
16
17  //这里使用的是自定义Cell
18
19 -(UICollectionViewCell *)collectionView:(UICollectionView *)collectionView cellForItemAtIndexPath:(NSIndexPath *)indexPath
20
21 {
22
23     iCocosNewFeatureCell *cell = [collectionView dequeueReusableCellWithReuseIdentifier:ID forIndexPath:indexPath];
24
25     cell.backgroundColor = [UIColor redColor];
26
27     return cell;
28
29 }
初始化UICollectionView布局,并且设置布局的相应属性
 1 -(instancetype)initWithCoder:(NSCoder *)aDecoder
 2
 3 {
 4
 5     UICollectionViewFlowLayout *layout = [[UICollectionViewFlowLayout alloc] init];
 6
 7
 8
 9     //    layout.itemSize = [UIApplication sharedApplication].keyWindow.frame.size;   //不能使用这种方法,因为这个时候Window还没有创建
10
11     layout.itemSize = [UIScreen mainScreen].bounds.size;
12
13 //        layout.itemSize = CGSizeMake(320, 568);
14
15
16
17
18
19     layout.minimumLineSpacing = 0;
20
21
22
23     //    layout.minimumInteritemSpacing = 0;
24
25
26
27     layout.scrollDirection = UICollectionViewScrollDirectionHorizontal;
28
29
30
31
32
33     return [super initWithCollectionViewLayout:layout];
34
35 }
这里使用的是initWithCoder方法,如果使用的是代理创建那么就需要实现init方法,这里就不多说明了。
在ViewDidLoad中设置collectionView的相应属性
在Cell中定义一个属性用来给外界传递图片数据
1 @property (nonatomic, strong) UIImage *image;
在内部实现文件中定义一个图片控件用来在UICollectionView中显示没一个Item的图片
1 @property (nonatomic, weak) UIImageView *imageView;
懒加载图片控件
 1 -(UIImageView *)imageView
 2
 3 {
 4
 5     if (_imageView == nil) {
 6
 7         UIImageView *imageView = [[UIImageView alloc] initWithFrame:self.bounds];
 8
 9
10
11         _imageView = imageView;
12
13
14
15         [self.contentView addSubview:imageView];
16
17
18
19     }
20
21     return _imageView;
22
23 }
24
25
重写他的setter方法,设置图片控件的图片为传进来的图片数据
 1 -(void)setImage:(UIImage *)image
 2
 3 {
 4
 5     _image = image;
 6
 7
 8
 9     self.imageView.image = image;
10
11 }
在代理方法中将图片传递进来显示
1 NSString *name = [NSString stringWithFormat:@"guide%zdBackground",indexPath.item + 1];
2
3
4
5     UIImage *image = [UIImage imageNamed:name];
6
7
8
9     cell.image = image;
此时就可以看到对应的图片显示并且还可以滑动

然后我们就需在对应的Item中添加一些相应的控件显示
在控制器中创建一个图片控件用来记录需要切换的图片
1 @property (nonatomic, weak) UIImageView *boll;
创建四个控件显示到对应的位置
 1  UIImageView *line = [[UIImageView alloc] initWithImage:[UIImage imageNamed:@"guideLine"]];
 2
 3     line.x -= 190;
 4
 5     [self.collectionView addSubview:line];
 6
 7
 8
 9     UIImageView *boll = [[UIImageView alloc] initWithImage:[UIImage imageNamed:@"guide1"]];
10
11     boll.x += 10;
12
13     [self.collectionView addSubview:boll];
14
15     _boll = boll;
16
17
18
19     UIImageView *topText = [[UIImageView alloc] initWithImage:[UIImage imageNamed:@"guideLargeText1"]];
20
21     topText.y = self.collectionView.frame.size.height * 0.7;
22
23     [self.collectionView addSubview:topText];
24
25
26
27     UIImageView *bottomText = [[UIImageView alloc] initWithImage:[UIImage imageNamed:@"guideSmallText1"]];
28
29     bottomText.y = self.collectionView.frame.size.height * 0.83;
30
31     [self.collectionView addSubview:bottomText];
32
33
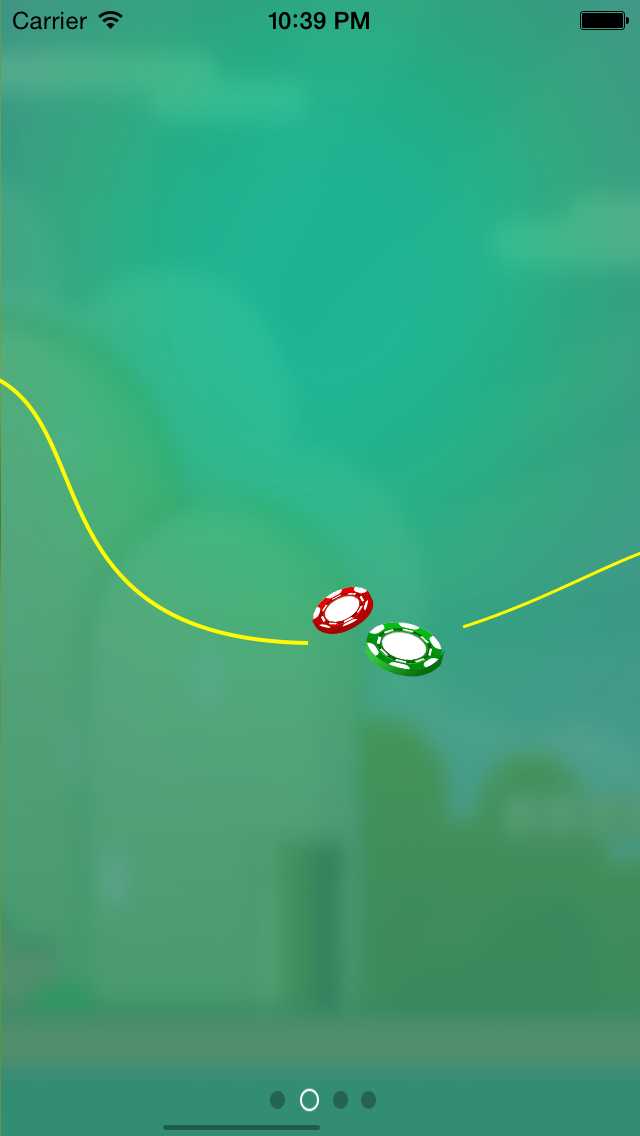
此时我们就可以看到一个简单的新特性界面显示在我们面前

下面我们要做的就是滑动每一页之后,在显示下一页的同时以动画的方法出现对应的信息(控件)
在控制器中实现UICollectionView的代理方法(其实是父类UIscrollView的代理方法)
并且在里面实现相应的业务逻辑,这里其实主要是设置到得一个偏移一个屏幕的宽度
/******************************************************************************
* *
* Inquiry macros *
* *
* iCocos--Description *
* *
******************************************************************************/
 1 #pragma mark 偏移计算:重点
 2
 3 -(void)scrollViewDidEndDecelerating:(UIScrollView *)scrollView
 4
 5 {
 6
 7     CGFloat offsetX = scrollView.contentOffset.x;
 8
 9
10
11     CGFloat delt = offsetX - _lastOff;
12
13
14
15     _boll.x += 2 * delt;
16
17
18
19     [UIView animateWithDuration:0.25 animations:^{
20
21         _boll.x -= delt;
22
23     }];
24
25      int page = offsetX / scrollView.width + 1;
26
27
28
29     NSString *str = [NSString stringWithFormat:@"guide%d", page];
30
31     _boll.image = [UIImage imageNamed:str];
32
33
34
35     _lastOff = offsetX;
36
37
38
39 }
当我们再次滑动的时候就可以看到动画的效果显示出对应的图片控件(你也可以使用其他的)
关于新特性是撒这里就不多说了(平时每次下载活着更新一次App的时候进入主界面第一眼看到的界面),既然有了新特性那么肯定需要进入主界面的地方,跟大部分应用一样,我们在最后一页增加一个按钮实现点击按钮跳转到主界面。
在Cell中创建并且懒加载一个按钮控件,并且放到Cell的对应位置,然后为他添加点击事件,实现点击就会进入主界面
 1 -(UIButton *)startBtn
 2
 3 {
 4
 5     if (_startBtn == nil) {
 6
 7         UIButton *startBtn = [UIButton buttonWithType:UIButtonTypeCustom];
 8
 9         _startBtn = startBtn;
10
11
12
13         [startBtn setBackgroundImage:[UIImage imageNamed:@"guideStart"] forState:UIControlStateNormal];
14
15
16
17         [startBtn addTarget:self action:@selector(Start) forControlEvents:UIControlEventTouchUpInside];
18
19
20
21         startBtn.center = CGPointMake(self.width * 0.5, self.height * 0.85);
22
23
24
25         [self.contentView addSubview:startBtn];
26
27     }
28
29     return _startBtn;
30
31 }
32
33
34
35 -(void)Start
36
37 {
38
39     NSLog(@"iCocos Start—这里就不实现了,因为主要讲解的是新特性界面——“);
40
41 }
最后你会发现在你滑动的每个界面都会有一个按钮显示在同一的位置,这个时候我吗酒需要判断是否是最后一个界面,如果是则显示如果不是则隐藏。
在Cell中定义一个方法来给外界传值传递Item的索引和Item的总数
1 -(void)setIndexpath:(NSIndexPath *)indexPath count:(int)count;
在内部根据判断来显示和隐藏按钮
 1 -(void)setIndexpath:(NSIndexPath *)indexPath count:(int)count
 2
 3 {
 4
 5     if (indexPath.item == count - 1) {
 6
 7         self.startBtn.hidden = NO;
 8
 9     } else {
10
11         self.startBtn.hidden =  YES;
12
13     }
14
15 }
最后我们在UICollectionView的代理方法中就只要通过cell调用这个方法去传递对应的索引和总数进来就可以实现显示和隐藏。
[cell setIndexpath:indexPath count:4];
最后的界面

个人感觉这里有点多余,最后还是创建了不需要的控件在窗口上面,关于这里笔者还没有想到什么好的方法,或许是创建按钮的时候判断,但是试过了没有成功,如果你有什么好的方法可以联系笔者相互学习。
iOS开发——技术实战OC篇&使用UICollectionView实现新特性界面
标签:
原文地址:http://www.cnblogs.com/iCocos/p/4733327.html