标签:btrfs、文件系统
一、Btrfs文件系统介绍
Btrfs(Butter FS),由Oracle于2007年宣布并进行中的COW(copy-on-write式)文件系统。目标是取代Linux目前的ext3文件系统,改善ext3的限制,特别是单一文件大小的限制,总文件系统大小限制以及加入文件校验和特性。加入目前ext3/4未支持的一些功能,例如可写的磁盘快照(snapshots),以及支持递归的快照(snapshots of snapshots),内建磁盘阵列(RAID)支持,支持子卷(Subvolumes)的概念,允许在线调整文件系统大小等.....
二、环境准备
操作系统:CentOS7
新添加3块新磁盘:/dev/sdb、/dev/sdc、/dev/sdd
三、btrfs文件系统管理及应用
1、btrfs文件系统的创建
[root@localhost ~]# mkfs.btrfs -L data /dev/sdb /dev/sdc #创建btrfs,卷标设置为data
2、btrfs文件系统信息的查看
[root@localhost ~]# btrfs filesystem show       #显示系统中的btrfs文件系统
Label: ‘data‘  uuid: a1ab4260-2dbe-4e62-bb55-4c53533d85a8
	Total devices 2 FS bytes used 112.00KiB
	devid    1 size 20.00GiB used 2.03GiB path /dev/sdb
	devid    2 size 20.00GiB used 2.01GiB path /dev/sdc
[root@localhost ~]# blkid /dev/sdb        #查看btrfs中物理卷/dev/sdb的信息
/dev/sdb: LABEL="data" UUID="a1ab4260-2dbe-4e62-bb55-4c53533d85a8" UUID_SUB="6f565410-b2f7-45db-b7b8-efd6f9fd3523" TYPE="btrfs"
[root@localhost ~]# blkid /dev/sdc        #查看btrfs中物理卷/dev/sdc的信息
/dev/sdc: LABEL="data" UUID="a1ab4260-2dbe-4e62-bb55-4c53533d85a8" UUID_SUB="4f2ec113-886a-48e1-b9b7-8d90eec29841" TYPE="btrfs"
3、挂载刚建立的btrfs文件系统到/html目录,并使用df查看
[root@localhost ~]# mkdir /html           #创建/html目录
[root@localhost ~]# mount /dev/sdb /html    #将btrfs文件系统挂载至/html
[root@localhost ~]# df -h
/dev/sdb                  40G  1.0M   38G   1% /html
4、在线调整btrfs文件系统的大小
注:扩展和缩减都不能超过1个磁盘的空间大小
[root@localhost ~]# btrfs filesystem resize -15G /html   #缩减btrfs文件系统15G
Resize ‘/html‘ of ‘-15G‘
[root@localhost ~]# df -h        #查看缩减后的信息
/dev/sdb                  25G  1.0M  8.0G   1% /html
[root@localhost ~]# btrfs filesystem resize +10G /html  #扩展btrfs文件系统10G
Resize ‘/html‘ of ‘+10G‘
[root@localhost ~]# df -h        # 查看扩展后的信息
/dev/sdb                  35G  1.0M   28G   1% /html
5、向btrfs文件系统中添加或移除物理设备/dev/sdd
[root@localhost ~]# btrfs device add /dev/sdd /html   #添加/dev/sdd磁盘到btrfs文件系统
[root@localhost ~]# df -h
/dev/sdb                  55G  448K   55G   1% /html
[root@localhost ~]# btrfs device delete /dev/sdb /html  #从btrfs文件系统移除/dev/sdb磁盘
[root@localhost ~]# df -h
/dev/sdc                  40G  448K   40G   1% /html
6、子卷的创建、删除及挂载
与子卷相关的命令介绍
btrfs subvolume create [-i <qgroupid>] [<dest>/]<name> 创建子卷 btrfs subvolume delete [options] <subvolume> [<subvolume>...] 删除子卷 btrfs subvolume snapshot [-r] <source> <dest>|[<dest>/]<name> 创建子卷的快照 btrfs subvolume show <subvol-path> 显示子卷的信息 btrfs subvolume list [options] [-G [+|-]value] [-C [+|-]value] [--sort=gen,ogen,rootid,path] <path> 查看btrfs文件系统中子卷列表 |
(1)创建子卷/html/logs
[root@localhost ~]# btrfs subvolume create /html/logs
Create subvolume ‘/html/logs‘
(2)查看子卷/html/logs的相关信息
[root@localhost ~]# btrfs subvolume list /html     #显示子卷列表
ID 260 gen 37 top level 5 path logs
[root@localhost ~]# btrfs subvolume show /html/logs #显示子卷详细信息
(3)删除子卷
[root@localhost ~]# btrfs subvolume delete /html/logs   # 删除子卷
Transaction commit: none (default)
Delete subvolume ‘/html/logs‘
(4)挂载子卷的方法
注;单独挂载子卷的话,就不能看到父卷中的文件
测试一:挂载子卷并复制/etc/inittab到子卷中,然后挂载父卷可以查看子卷中的文件
[root@localhost ~]# mount -o subvol=logs /dev/sdc /messages  #挂载子卷到/messages上
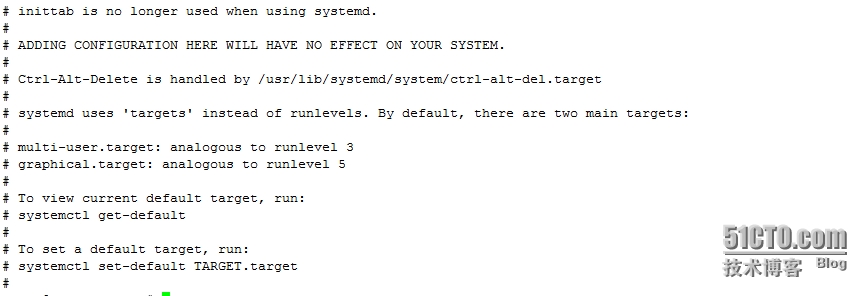
[root@localhost ~]# cp /etc/inittab /messages/
[root@localhost ~]# umount /messages/
[root@localhost ~]# cat /html/logs/inittab     #挂载父卷并查看子卷中的文件内容
 测试二:复制/etc/fstab到父卷中,卸载父卷,单独挂载子卷,子卷看不到父卷中的文件
[root@localhost ~]# cp /etc/fstab /html    #复制/etc/fstab到父卷
[root@localhost ~]# ll /html
-rw-r--r--. 1 root root 619 Aug 13 00:50 fstab
drwxr-xr-x. 1 root root  14 Aug 13 00:49 logs
[root@localhost ~]# mount -o subvolid=261 /dev/sdc /messages/     #使用子卷id挂载
[root@localhost ~]# ll /messages/                 #只能查看到子卷挂载目录中的文件
total 4
-rw-r--r--. 1 root root 511 Aug 13 00:49 inittab
[root@localhost ~]# ll /html           #看不到父卷中的文件
total 0
(5)子卷的快照创建和删除
注:必须要挂载父卷
创建子卷的快照
[root@localhost ~]# mount /dev/sdc /html
[root@localhost ~]# btrfs subvolume snapshot /html/logs /html/logs_snapshot  #创建子卷的快照
Create a snapshot of ‘/html/logs‘ in ‘/html/logs_snapshot‘
[root@localhost ~]# btrfs subvolume list /html     #显示子卷信息
ID 261 gen 50 top level 5 path logs
ID 262 gen 50 top level 5 path logs_snapshot
[root@localhost ~]# cat /html/logs_snapshot/inittab  #查看快照中的文件,跟原卷中一样;修改原卷中的文件,快照卷也不会发生变化
删除子卷的快照
[root@localhost ~]# btrfs subvolume delete /html/logs_snapshot  #删除子卷的快照
Transaction commit: none (default)
Delete subvolume ‘/html/logs_snapshot‘
[root@localhost ~]# btrfs subvolume list /html     #父卷中子卷的信息
ID 261 gen 50 top level 5 path logs
(6)ext文件系统与btrfs文件系统间的转换
[root@localhost ~]# btrfs-convert --help #查看btrfs-convert的使用帮助 btrfs-convert: invalid option -- ‘-‘ usage: btrfs-convert [-d] [-i] [-n] [-r] device -d disable data checksum #关闭数据校验码 -i ignore xattrs and ACLs #忽略xattrs和acls -n disable packing of small files # -r roll back to ext2fs #回滚到ext文件系统 |
使用/dev/sdb磁盘划分1个5G的分区/dev/sdb1,并格式化为ext4文件系统使用;卸载ext4文件系统,并强制修复,然后转换成btrfs文件系统;然后再回滚回ext4文件系统
[root@localhost ~]# mkfs.ext4 /dev/sdb1   #格式化/dev/sdb1为ext4文件系统
[root@localhost ~]# blkid /dev/sdb1     #查看磁盘分区信息
/dev/sdb1: UUID="6733d53d-bcd8-4341-9f0d-8e1654eef58e" TYPE="ext4"
[root@localhost ~]# mount /dev/sdb1 /mnt   #挂载ext4分区
[root@localhost ~]# echo "ext4 filesystem." > /mnt/ext4.txt  #创建1个文件用于测试使用
[root@localhost ~]# cat /mnt/ext4.txt  #查看该文件内容
ext4 filesystem.
ext4文件系统转换为btrfs文件系统,并查看里面的文件是否有问题;
注:转换完成后,里面会多出来个ext2_saved的目录;
[root@localhost ~]# umount /mnt              #卸载/dev/sdb1分区
[root@localhost ~]# fsck -f /dev/sdb1      #强制修复/dev/sdb1分区
fsck from util-linux 2.23.2
e2fsck 1.42.9 (28-Dec-2013)
Pass 1: Checking inodes, blocks, and sizes
Pass 2: Checking directory structure
Pass 3: Checking directory connectivity
Pass 4: Checking reference counts
Pass 5: Checking group summary information
/dev/sdb1: 12/327680 files (0.0% non-contiguous), 58463/1310720 blocks
[root@localhost ~]# btrfs-convert /dev/sdb1   #转换成btrfs文件系统
creating btrfs metadata.
creating ext2fs image file.
cleaning up system chunk.
conversion complete.
[root@localhost ~]# blkid  /dev/sdb1      #查看转换后的分区信息
/dev/sdb1: UUID="4caab68c-da42-44a8-9cc0-9745b69a3ace" UUID_SUB="3b3e28ea-4d95-42ad-8abc-b68fd82b65b5" TYPE="btrfs"
[root@localhost ~]# cat /mnt/ext4.txt    #查看文件内容
ext4 filesystem.
将btrfs文件系统再转换回原来的ext4文件系统,要卸载之后才可以回滚
[root@localhost ~]# umount /mnt          #卸载btrfs文件系统
[root@localhost ~]# btrfs-convert -r /dev/sdb1       #执行回滚操作
rollback complete.
[root@localhost ~]# blkid  /dev/sdb1    #查看回滚后的磁盘分区信息
/dev/sdb1: UUID="6733d53d-bcd8-4341-9f0d-8e1654eef58e" TYPE="ext4"
[root@localhost ~]# mount /dev/sdb1 /mnt     #再挂载后查看里面的内容
[root@localhost ~]# ll /mnt
total 20
-rw-r--r--. 1 root root    17 Aug 13 02:09 ext4.txt
drwx------. 2 root root 16384 Aug 13 02:00 lost+found
Btrfs 也有一个重要的缺点,当 BTree 中某个节点出现错误时,文件系统将失去该节点之下的所有的文件信息。而 ext2/3 却避免了这种被称为”错误扩散”的问题。但无论怎样, btrfs 将是 Linux 未来最有希望的文件系统。
本文出自 “bengbengtu” 博客,请务必保留此出处http://bengbengtu.blog.51cto.com/9505633/1689643
标签:btrfs、文件系统
原文地址:http://bengbengtu.blog.51cto.com/9505633/1689643