标签:
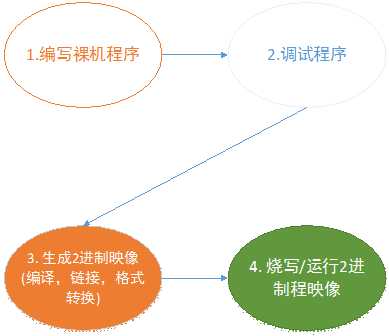
本次只考虑3,4步
1.1
交差工具链
[root@cfm880 home]# mkdir S3-ARM/Part1/lesson1
mkdir: 无法创建目录"S3-ARM/Part1/lesson1": 没有那个文件或目录
[root@cfm880 home]# mkdir S3-ARM
[root@cfm880 home]# cd S3-ARM/
[root@cfm880 S3-ARM]# mkdir Part1
[root@cfm880 S3-ARM]# cd Part1/
[root@cfm880 Part1]# mkdir lesson1
[root@cfm880 Part1]# cd lesson1/
[root@cfm880 lesson1]# chmod 777 ./
[root@cfm880 lesson1]# ls
ARM-Tools.tar.gz
[root@cfm880 lesson1]# tar xzf ARM-Tools.tar.gz
[root@cfm880 lesson1]# ls
ARM-tools ARM-Tools.tar.gz
[root@cfm880 lesson1]# cd ARM-tools/
[root@cfm880 ARM-tools]# ls
arm-linux-gcc-4.3.2.tgz dnw eclipse-cpp-helios-SR2-linux-gtk.tar.gz
arm-linux-gdb-7.5.tar.gz dnw_usb.ko JLink_Linux_V434a.tgz
[root@cfm880 ARM-tools]# rm /usr/local/arm/ -rf
[root@cfm880 ARM-tools]# tar xzf arm-linux-gcc-4.3.2.tgz -C /
[root@cfm880 ARM-tools]# cd /usr/local/arm/4.3.2/bin/
[root@cfm880 bin]# ls
arm-linux-addr2line arm-linux-objdump arm-none-linux-gnueabi-gcov
arm-linux-ar arm-linux-ranlib arm-none-linux-gnueabi-gdb
arm-linux-as arm-linux-readelf arm-none-linux-gnueabi-gdbtui
arm-linux-c++ arm-linux-size arm-none-linux-gnueabi-gprof
arm-linux-c++filt arm-linux-sprite arm-none-linux-gnueabi-ld
arm-linux-cpp arm-linux-strings arm-none-linux-gnueabi-nm
arm-linux-g++ arm-linux-strip arm-none-linux-gnueabi-objcopy
arm-linux-gcc arm-none-linux-gnueabi-addr2line arm-none-linux-gnueabi-objdump
arm-linux-gcc-4.3.2 arm-none-linux-gnueabi-ar arm-none-linux-gnueabi-ranlib
arm-linux-gcov arm-none-linux-gnueabi-as arm-none-linux-gnueabi-readelf
arm-linux-gdb arm-none-linux-gnueabi-c++ arm-none-linux-gnueabi-size
arm-linux-gdbtui arm-none-linux-gnueabi-c++filt arm-none-linux-gnueabi-sprite
arm-linux-gprof arm-none-linux-gnueabi-cpp arm-none-linux-gnueabi-strings
arm-linux-ld arm-none-linux-gnueabi-g++ arm-none-linux-gnueabi-strip
arm-linux-nm arm-none-linux-gnueabi-gcc
arm-linux-objcopy arm-none-linux-gnueabi-gcc-4.3.2
添加PATH环境变量
[root@cfm880 home]# vim /root/.bashrc
export PATH=$PATH:/usr/local/arm/4.3.2/bin
[root@cfm880 home]# source /root/.bashrc
[root@cfm880 home]# cd /home/S3-ARM/Part1/lesson1/
[root@cfm880 lesson1]# ls
ARM-tools ARM-Tools.tar.gz led.lds led.S Makefile
[root@cfm880 lesson1]# arm-linux-gcc -g -c led.S
[root@cfm880 lesson1]# ls
ARM-tools ARM-Tools.tar.gz led.lds led.o led.S Makefile
[root@cfm880 lesson1]# arm-linux-ld -Tled.lds -o led.elf led.o
[root@cfm880 lesson1]# ls
ARM-tools ARM-Tools.tar.gz led.elf led.lds led.o led.S Makefile
[root@cfm880 lesson1]# arm-linux-objcopy -O binary led.elf led.bin
[root@cfm880 lesson1]# ls
ARM-tools ARM-Tools.tar.gz led.bin led.elf led.lds led.o led.S Makefile
[root@cfm880 lesson1]# make clean
rm *.o led.elf led.bin
[root@cfm880 lesson1]# make
arm-linux-gcc -g -o led.o -c led.S
arm-linux-ld -Tled.lds -o led.elf led.o
arm-linux-objcopy -O binary led.elf led.bin
[root@cfm880 lesson1]# ls
ARM-tools ARM-Tools.tar.gz led.bin led.elf led.lds led.o led.S Makefile
烧写到开放板
裸机程序烧写到nandflash
利用nandflsah安装辅助程序安装
将boot开关从00011001à00011111即由nandflash到sd卡启动
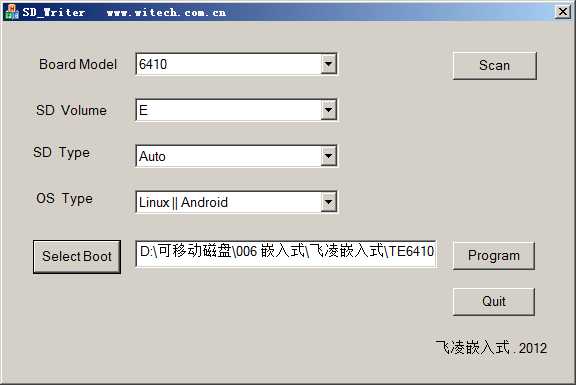
打开D:\可移动磁盘\006 嵌入式\飞凌嵌入式\TE6410基础资料-256\Linux-3.0.1\Linux烧写工具\SD_Writer.exe
打开D:\Program Files\SecureCRT_绿色版
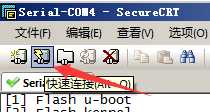
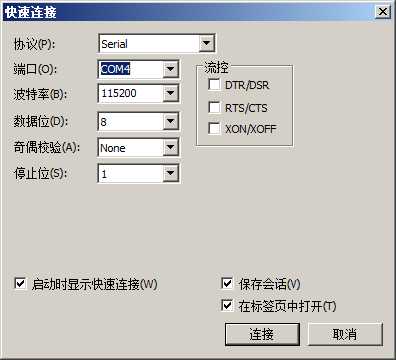
使光标在开发板上电
按住空格键从SD卡启动
###################### User Menu for OK6410#####################
[1] Format the nand flash
[2] Burn image from SD card
[3] Burn image from USB
[4] Reboot the u-boot
[5] Exit to command line
-----------------------------Select---------------------------------
Enter your Selection:1
?
NAND scrub: device 0 whole chip
Warning: scrub option will erase all factory set bad blocks!
There is no reliable way to recover them.
Use this command only for testing purposes if you
are sure of what you are doing!
?
Really scrub this NAND flash? <y/N>
scrub aborted
?
###################### User Menu for OK6410#####################
[1] Format the nand flash
[2] Burn image from SD card
[3] Burn image from USB
[4] Reboot the u-boot
[5] Exit to command line
-----------------------------Select---------------------------------
Enter your Selection:3
使s3c6400x设备连接到虚拟机
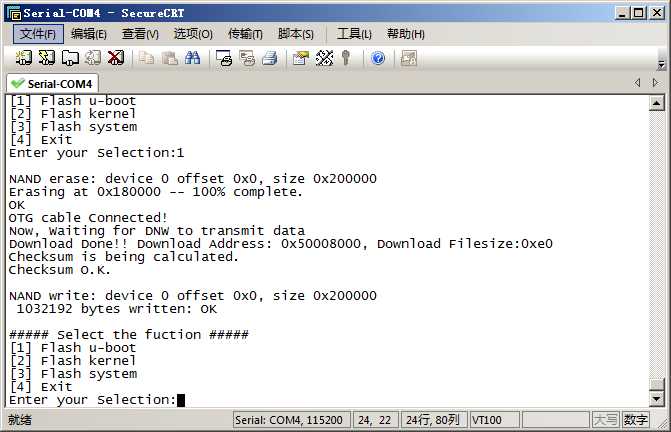
##### Select the fuction #####
[1] Flash u-boot
[2] Flash kernel
[3] Flash system
[4] Exit
Enter your Selection:1
?
NAND erase: device 0 offset 0x0, size 0x200000
Erasing at 0x180000 -- 100% complete.
OK
OTG cable Connected!
Now, Waiting for DNW to transmit data
Download Done!! Download Address: 0x50008000, Download Filesize:0xe0
Checksum is being calculated.
Checksum O.K.
?
NAND write: device 0 offset 0x0, size 0x200000
1032192 bytes written: OK
?
[root@cfm880 ~]# cd /home/S3-ARM/Part1/lesson1/
[root@cfm880 lesson1]# ls
ARM-tools ARM-Tools.tar.gz led.bin led.elf led.lds led.o led.S Makefile
[root@cfm880 lesson1]# cd ARM-tools/
[root@cfm880 ARM-tools]# ls
arm-linux-gcc-4.3.2.tgz dnw eclipse-cpp-helios-SR2-linux-gtk.tar.gz
arm-linux-gdb-7.5.tar.gz dnw_usb.ko JLink_Linux_V434a.tgz
[root@cfm880 ARM-tools]# insmod dnw_usb.ko
?
Message from syslogd@cfm880 at Sep 13 23:42:34 ...
kernel:GuoQian USB driver for DNW!
[root@cfm880 ARM-tools]# ./dnw ../led.bin 50008000
addr = 50008000
File name : ../led.bin
File size : 224 bytes
Start Sending data...
Sent 100% ???? 234 bytes !OK
标签:
原文地址:http://www.cnblogs.com/chengfangming/p/4804079.html