标签:style blog http color 文件 2014
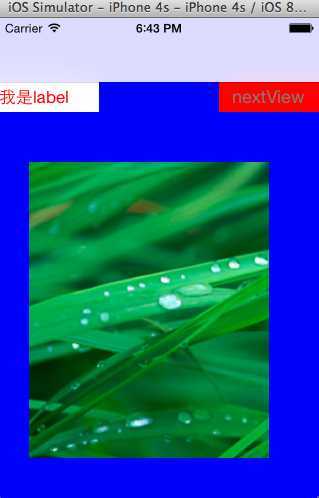
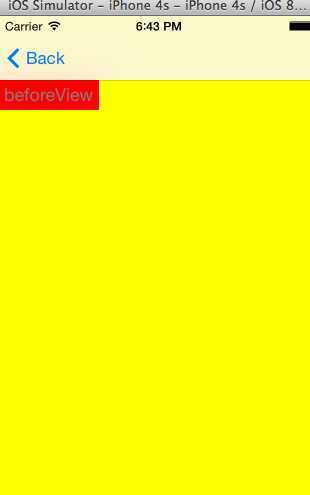
#import "AppDelegate.h"
#import "FisrtViewController.h"

@interface AppDelegate ()


@end

@implementation AppDelegate


- (BOOL)application:(UIApplication *)application didFinishLaunchingWithOptions:(NSDictionary *)launchOptions {
    self.window = [[UIWindow alloc] initWithFrame:[[UIScreen mainScreen] bounds]];
    // Override point for customization after application launch.
    self.window.backgroundColor = [UIColor whiteColor];
    [self.window makeKeyAndVisible];

    //声明一个视图控制器用于导航器加载
    FisrtViewController *fViewController=[[FisrtViewController alloc]init];
    fViewController.view.backgroundColor=[UIColor blueColor];
    //定义一个导航器来加载第一个视图控制器,即跟视图控制器
    UINavigationController *navController=[[UINavigationController alloc]initWithRootViewController:fViewController];
    self.window.rootViewController=navController;

    return YES;
}

//第一个视图控制器类的实现文件
#import "FisrtViewController.h"
#import "SecondViewController.h"
@interface FisrtViewController ()

@end

@implementation FisrtViewController

- (instancetype)initWithNibName:(NSString *)nibNameOrNil bundle:(NSBundle *)nibBundleOrNil
{
    self = [super initWithNibName:nibNameOrNil bundle:nibBundleOrNil];
    if (self) {
        // Custom initialization
    }
    return self;
}

- (void)viewDidLoad
{
    [super viewDidLoad];
    // Do any additional setup after loading the view.

    //在跟视图控制器中添加一个标签和按钮
    UILabel *label=[[UILabel alloc]initWithFrame:CGRectMake(0, 64, 100, 30)];
    label.text=@"我是label";
    label.textColor=[UIColor redColor];
    label.backgroundColor=[UIColor whiteColor];
    [self.view addSubview:label];

    UIButton *nextBtn=[UIButton buttonWithType:UIButtonTypeCustom];
    nextBtn.frame=CGRectMake(220, 64, 100, 30);
    [nextBtn setTitle:@"nextView" forState:UIControlStateNormal];
    [nextBtn setTitleColor:[UIColor grayColor] forState:UIControlStateNormal];
    nextBtn.backgroundColor=[UIColor redColor];
    [nextBtn addTarget:self action:@selector(nextDidClik:) forControlEvents:UIControlEventTouchUpInside];
    [self.view addSubview:nextBtn];

    UIImageView *imageView=[[UIImageView alloc]initWithFrame:CGRectMake(30, 144, 240, 296)];
    imageView.image=[UIImage imageNamed:@"1.png"];
    [self.view addSubview:imageView];
}
//按钮触发时加载到第二个视图控制器
- (void)nextDidClik:(UIButton *)sender
{
    SecondViewController *secondViewController=[[SecondViewController alloc]init];
    secondViewController.view.backgroundColor=[UIColor yellowColor];

    [self.navigationController pushViewController:secondViewController animated:YES];

}


//第二个视图控制器类的实现文件
#import "SecondViewController.h"

@interface SecondViewController ()

@end

@implementation SecondViewController

- (instancetype)initWithNibName:(NSString *)nibNameOrNil bundle:(NSBundle *)nibBundleOrNil
{
    self = [super initWithNibName:nibNameOrNil bundle:nibBundleOrNil];
    if (self) {
        // Custom initialization
    }
    return self;
}

- (void)viewDidLoad
{
    [super viewDidLoad];
    // Do any additional setup after loading the view.
    UIButton *beforeBtn=[UIButton buttonWithType:UIButtonTypeCustom];
    beforeBtn.frame=CGRectMake(0, 64, 100, 30);
    [beforeBtn setTitle:@"beforeView" forState:UIControlStateNormal];
    [beforeBtn setTitleColor:[UIColor grayColor] forState:UIControlStateNormal];
    beforeBtn.backgroundColor=[UIColor redColor];
    [beforeBtn addTarget:self action:@selector(beforeBtn:) forControlEvents:UIControlEventTouchUpInside];
    [self.view addSubview:beforeBtn];


}
//按钮触发时返回到前一个视图控制器中
- (void)beforeBtn:(UIButton *)sender
{
    [self.navigationController popToRootViewControllerAnimated:YES];
}
标签:style blog http color 文件 2014
原文地址:http://www.cnblogs.com/lidongq/p/3845408.html