标签:
目前来讲,在各大网站都会使用到焦点轮播图,因为它占用地方少,交互性好,是前端设计必须要掌握的技能之一。
原理:使用三层嵌套,最里层装载图片,图片需要浮动。最里层设置相对定位。然后再使用JavaScript设置一个定时器,每过一段时间便让最里层的块的left值改变。
而第二层则需要设置overflow:hidden;这个属性,否则将会导致这个层被子层撑大。不美观。

此图便为实现效果图。
下面先讲一讲如何布局。
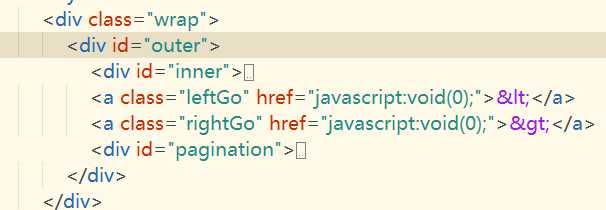
首先布局分为三大块,一块为inner,包裹住所有的图片;一块为outer,决定展示的窗口;两个a标签为左右箭头;pagination块则包裹着下面的每一小块span标签;
wrap是最外面的块,控制着整个轮播图的位置。
然后,设置相关的样式。如图:
.wrap{
	width:510px;//显示窗口大小
	margin:20px auto;
}
#outer{//此样式代码必须全设,否则将无法成功
	width:510px;//显示窗口大小,可用百分比代替
	overflow: hidden;
	position: relative;
	left:0;
	top:0;
}
#inner{
	width:9999px;//为能装下所有图片
	position: relative;
	left:0;
	top:0;
	overflow: hidden;//清除浮动
}
#inner img{
	float:left;
}
#outer a{//确定两个小箭头的位置
	position: absolute;
	width:30px;
	height:30px;
	font-size: 30px;
	text-align: center;
	line-height: 30px;
	top:50%;
	margin-top: -15px;
	background-color: #ccc;
	opacity: 0;
	filter: alpha(opacity=0);
}
#outer .active{
	background-color: #9f9f9f;
}
#outer:hover a{
	opacity: 0.6;
	filter: alpha(opacity=60);
}
#outer .leftGo{
	left:0;
}
#outer .rightGo{
	right:0;
}
#pagination{
	position: absolute;
	bottom: 20px;
	width:100%;
	text-align: center;
}
#pagination span{
	display: inline-block;
	width:30px;
	height:30px;
	line-height: 30px;
	border-radius: 50%;
	background-color: #fbfbfb;
	opacity: 0.6;
	filter: alpha(opacity=60);
	cursor: pointer;
	-webkit-user-select: none;
}
至此,相关的样式便设置完,我们开始进入高大上的Javascript。
首先我们思考整个页面将会发生的事件:
1.每过一段时间,最里层的inner的left就会改变。
2.每一个下标都对应着一个图片。当前显示图片改变,下标改变。
3.当点击下标时,当前显示图片改变成相对应的图片。
4.当鼠标移入到展示层,图片停止滑动,两边的箭头显示。当鼠标移出,回复滑动,两边的箭头虚化。
5.当鼠标点击左右两边的箭头,图片向前滑动/向后滑动;
当我们了解完基本的事件之后,我们便可以开始设置绑定相关的事件了。
 1 timer = setInterval(AutoGo,2000);//设置计时器
 2     leftGo.onclick=function(){
 3         Goleft();//点击左边的小箭头
 4     };
 5     rightGo.onclick = function(){
 6         Goright();//点击右边的小箭头
 7     };
 8     inner.onmouseover=function(){
 9         clearInterval(timer);//鼠标移入,清除计时器
10     }
11     inner.onmouseleave=function(){
12     timer = setInterval(AutoGo,2000);//鼠标移出,启动计时器
13     }
14     function AutoGo(){
15         //自动轮播
16         var start =inner.offsetLeft;//距离左边的边框的长度
17         var end = - index * picWidth;//终点
18         var moveDistance = end - start;
19         var speed = 20;//要走的步数
20         var speedCount = 0;
21         clearInterval(AutoTimer);
22             //清除之前的计时器,否则会越走越快
23         clearInterval(timer);
24         AutoTimer = setInterval(function(){
25             speedCount++;
26             if(speedCount >=speed){
27                             //步数足够
28                 clearInterval(AutoTimer);
29                 clearInterval(timer);
30                 timer = setInterval(Goright,1000);
31                 //再次启动计时器
32             }
33             inner.style.left = moveDistance *     speedCount/speed +start+"px";
34 //每步要走的距离
35         },100)
36         for(var i = 0 ; i<spanArr.length;i++){
37                     //下标的样式改变,以及点击事件的绑定
38             spanArr[i].index = i;
39             spanArr[i].className="";
40             spanArr[index].className="active";
41             spanArr[i].onclick =function(){
42                 index=this.index;//传递当前点击的位置
43                 AutoGo();
44             }
45         }
46     }
47     function Goleft(){
48         //往左走一步;
49         index--;
50         if(index<0){
51             index =imgArr.length-1;
52         }
53         AutoGo();
54
55     }
56
57     function    Goright(){
58         //往右走一步
59         index++;
60         if(index>imgArr.length-1){
61             index =0;
62         }
63         AutoGo();
64     }
至此,相关的设置就完成了。
但是在此过程中有一些问题需要注意:
1.计时器在每次调用之前必须清除,否则当有多个事件触发的时候计时器会叠加,从而会越走越快。
2.一些重复的代码没必要重复写,应该要封装到函数里面去。
3.当对多个相同的元素进行操作时,注意不要让数组越界。
4.要考虑兼容性问题
5.要注意代码的格式化。
如若转载,请说明出处,谢谢
标签:
原文地址:http://www.cnblogs.com/programerHuan/p/4808879.html