标签:
今天研究了下 CoreData 发现挺方便的,打算以后的项目中就用coredata 代替sqlite。现将使用方法整理如下:
1.新建一个工程,勾选CoreData,这样在生成的工程中,会自动帮你生成必须的代码,不用自己在创建,减少麻烦。
2.生成的coredata相关的代码在AppDelegate中,为了提高复用性,我单独建立一个类
ManagedObjectBase用来进行保存。
ManagedObjectBase.h
@interface ManagedObjectBase : NSObject
//被管理的对象上下文
@property (readonly, strong, nonatomic) NSManagedObjectContext *managedObjectContext;
//被管理的对象模型
@property (readonly, strong, nonatomic) NSManagedObjectModel *managedObjectModel;
//持久化存储协调者
@property (readonly, strong, nonatomic) NSPersistentStoreCoordinator *persistentStoreCoordinator;
- (void)saveContext;
- (NSURL *)applicationDocumentsDirectory;
@end
ManagedObjectBase.m
#import "ManagedObjectBase.h"
@implementation ManagedObjectBase
#pragma mark - Core Data stack
@synthesize managedObjectContext = _managedObjectContext;
@synthesize managedObjectModel = _managedObjectModel;
@synthesize persistentStoreCoordinator = _persistentStoreCoordinator;
// 返回应用程序Docment目录的NSURL类型
- (NSURL *)applicationDocumentsDirectory {
// The directory the application uses to store the Core Data store file. This code uses a directory named "com.polysaas.IosProject" in the application‘s documents directory.
return [[[NSFileManager defaultManager] URLsForDirectory:NSDocumentDirectory inDomains:NSUserDomainMask] lastObject];
}
// 返回 被管理的对象模型
- (NSManagedObjectModel *)managedObjectModel {
if (_managedObjectModel != nil) {
return _managedObjectModel;
}
NSURL *modelURL = [[NSBundle mainBundle] URLForResource:@"IosProject" withExtension:@"momd"];
_managedObjectModel = [[NSManagedObjectModel alloc] initWithContentsOfURL:modelURL];
return _managedObjectModel;
}
// 返回 持久化存储协调者
- (NSPersistentStoreCoordinator *)persistentStoreCoordinator {
if (_persistentStoreCoordinator != nil) {
return _persistentStoreCoordinator;
}
_persistentStoreCoordinator = [[NSPersistentStoreCoordinator alloc] initWithManagedObjectModel:[self managedObjectModel]];
NSURL *storeURL = [[self applicationDocumentsDirectory] URLByAppendingPathComponent:@"IosProject.sqlite"];
//增加版本升级
NSDictionary *options = [NSDictionary dictionaryWithObjectsAndKeys:
[NSNumber numberWithBool:YES],
NSMigratePersistentStoresAutomaticallyOption,
[NSNumber numberWithBool:YES],
NSInferMappingModelAutomaticallyOption, nil];
NSError *error = nil;
NSString *failureReason = @"There was an error creating or loading the application‘s saved data.";
if (![_persistentStoreCoordinator addPersistentStoreWithType:NSSQLiteStoreType configuration:nil URL:storeURL options:options error:&error]) {//原来为nil
// Report any error we got.
NSMutableDictionary *dict = [NSMutableDictionary dictionary];
dict[NSLocalizedDescriptionKey] = @"Failed to initialize the application‘s saved data";
dict[NSLocalizedFailureReasonErrorKey] = failureReason;
dict[NSUnderlyingErrorKey] = error;
error = [NSError errorWithDomain:@"YOUR_ERROR_DOMAIN" code:9999 userInfo:dict];
// Replace this with code to handle the error appropriately.
// abort() causes the application to generate a crash log and terminate. You should not use this function in a shipping application, although it may be useful during development.
NSLog(@"Unresolved error %@, %@", error, [error userInfo]);
abort();
}
return _persistentStoreCoordinator;
}
//返回 被管理的对象上下文
- (NSManagedObjectContext *)managedObjectContext {
// Returns the managed object context for the application (which is already bound to the persistent store coordinator for the application.)
if (_managedObjectContext != nil) {
return _managedObjectContext;
}
NSPersistentStoreCoordinator *coordinator = [self persistentStoreCoordinator];
if (!coordinator) {
return nil;
}
_managedObjectContext = [[NSManagedObjectContext alloc] init];
[_managedObjectContext setPersistentStoreCoordinator:coordinator];
return _managedObjectContext;
}
#pragma mark - Core Data Saving support
- (void)saveContext {
NSManagedObjectContext *managedObjectContext = self.managedObjectContext;
if (managedObjectContext != nil) {
NSError *error = nil;
if ([managedObjectContext hasChanges] && ![managedObjectContext save:&error]) {
// Replace this implementation with code to handle the error appropriately.
// abort() causes the application to generate a crash log and terminate. You should not use this function in a shipping application, although it may be useful during development.
NSLog(@"Unresolved error %@, %@", error, [error userInfo]);
abort();
}
}
}
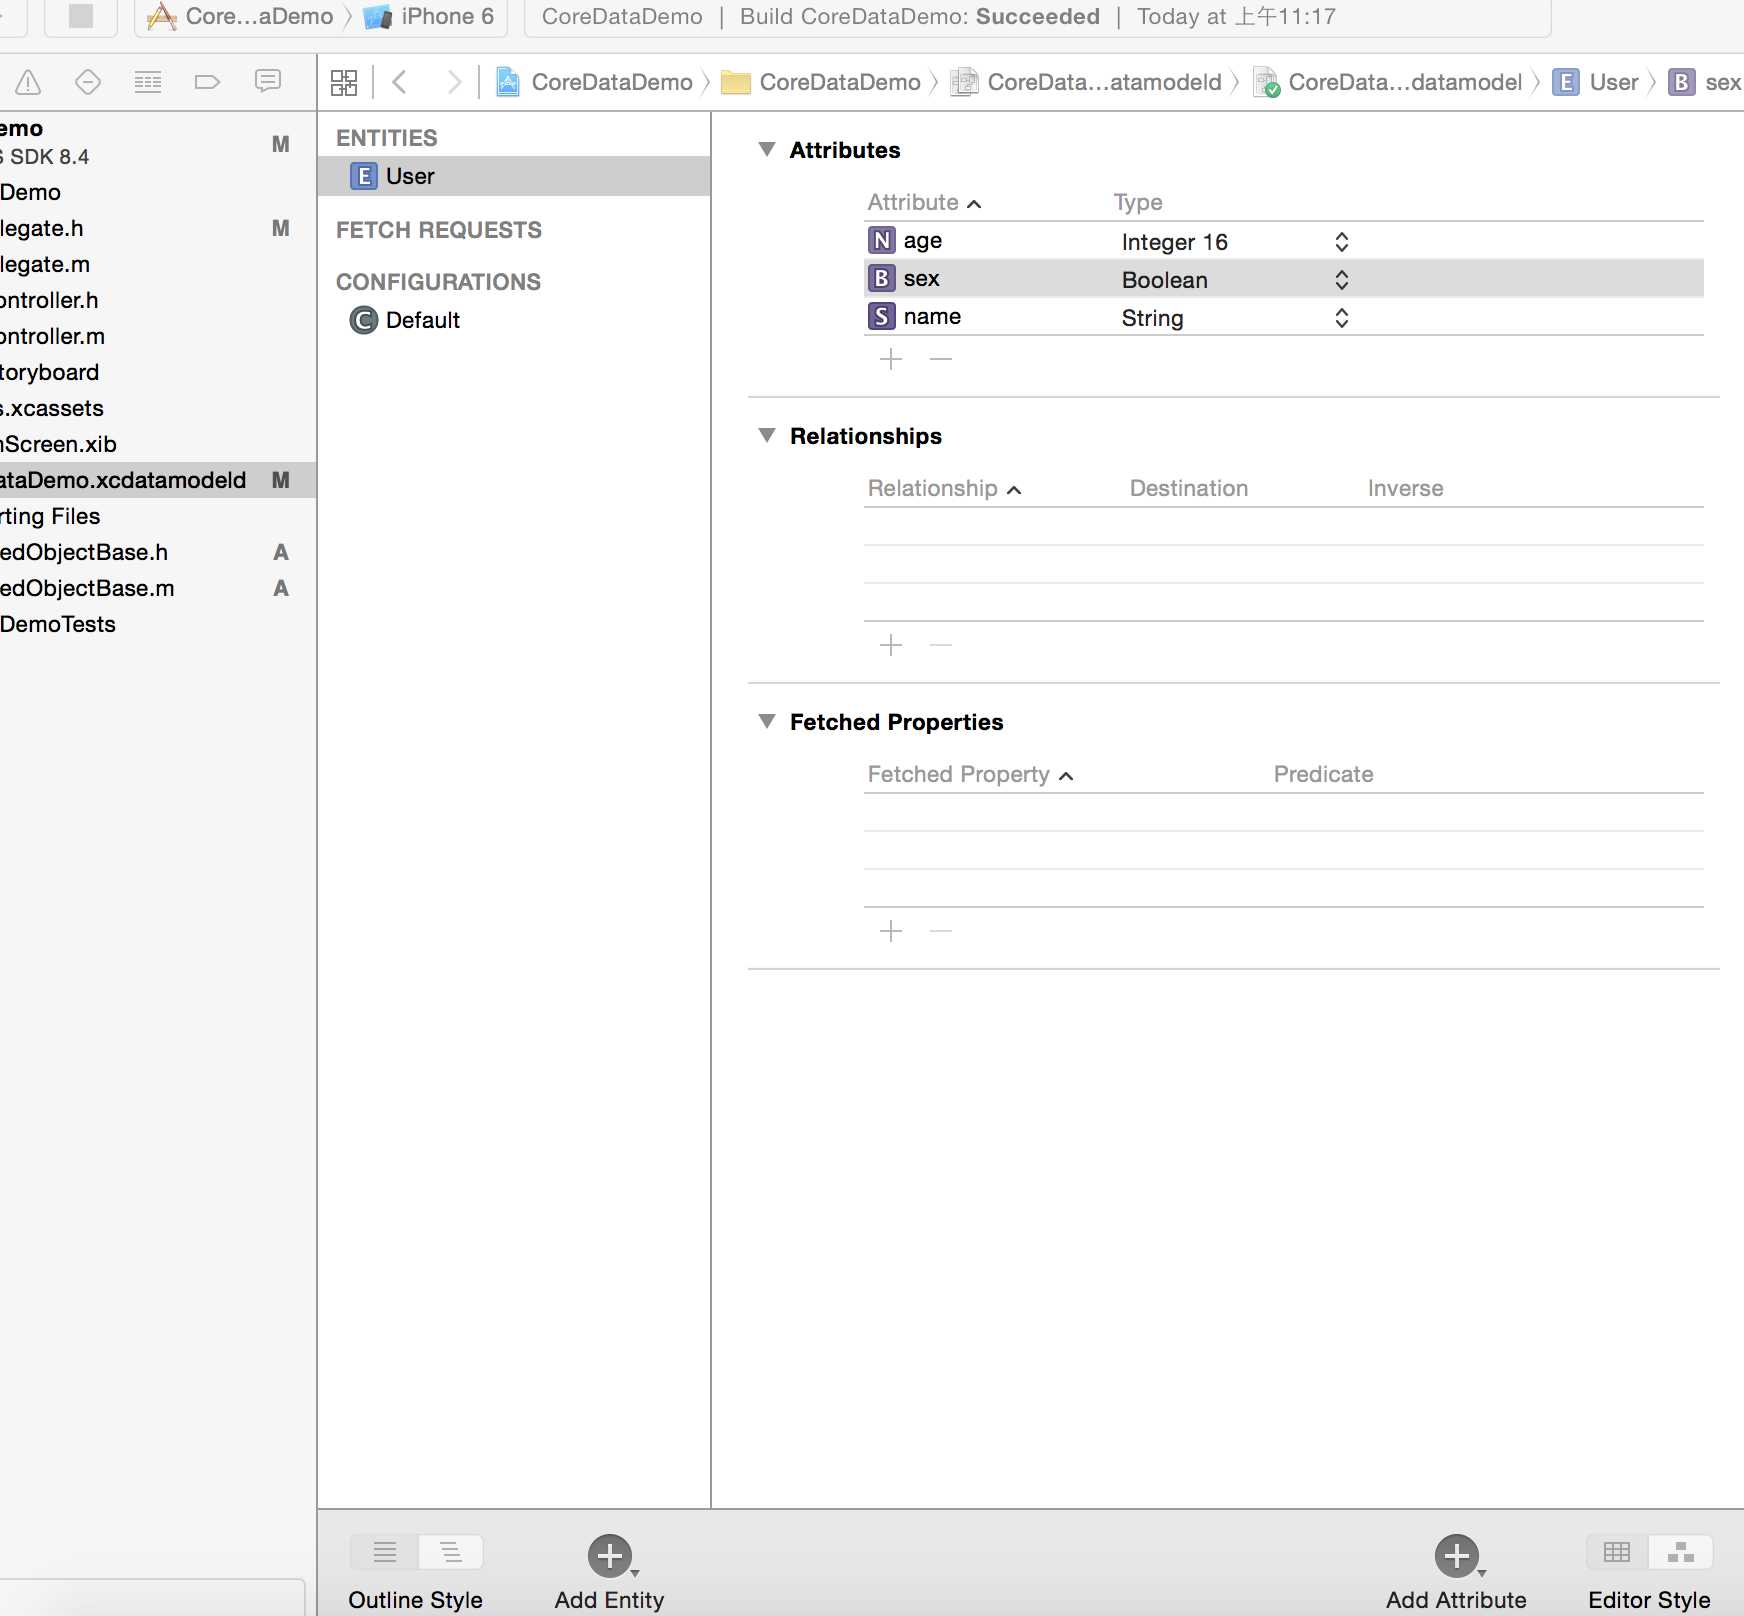
3.使用CoreDataDemo.xcdatamodeld进行实体类的编辑 和属性的添加

4.添加完成后需要定义一个与之对应的实体类 User.
@interface User : NSObject
@property (nonatomic,copy) NSString *name;
@property (nonatomic,assign) NSUInteger age;
@property (nonatomic,assign) BOOL sex;
@end
5. 最重要的步骤就是要操作coredata了,创建一个User Coredata操作类
UserManager
UserManager.m
@implementation UserManager
static UserManager *sharedManager = nil;
+ (UserManager*)sharedManager
{
static dispatch_once_t once;
dispatch_once(&once, ^{
sharedManager = [[self alloc] init];
[sharedManager managedObjectContext];
});
return sharedManager;
}
//插入
-(int) create:(User*)model
{
NSManagedObjectContext *cxt = [self managedObjectContext];
User *note = [NSEntityDescription insertNewObjectForEntityForName:@"User" inManagedObjectContext:cxt];
//保存数据
//[note setValue: model.name forKey:@"name"];
note.name = model.name;
NSError *savingError = nil;
if ([self.managedObjectContext save:&savingError]){
NSLog(@"插入数据成功");
} else {
NSLog(@"插入数据失败");
return -1;
}
return 0;
}
6.这样一个基本的数据插入就可以进行了,写个代码验证下:
UserManager *userManager = [UserManager sharedManager];
User *user = [[User alloc] init];
user.name = @"张三";
[userManager create:user];
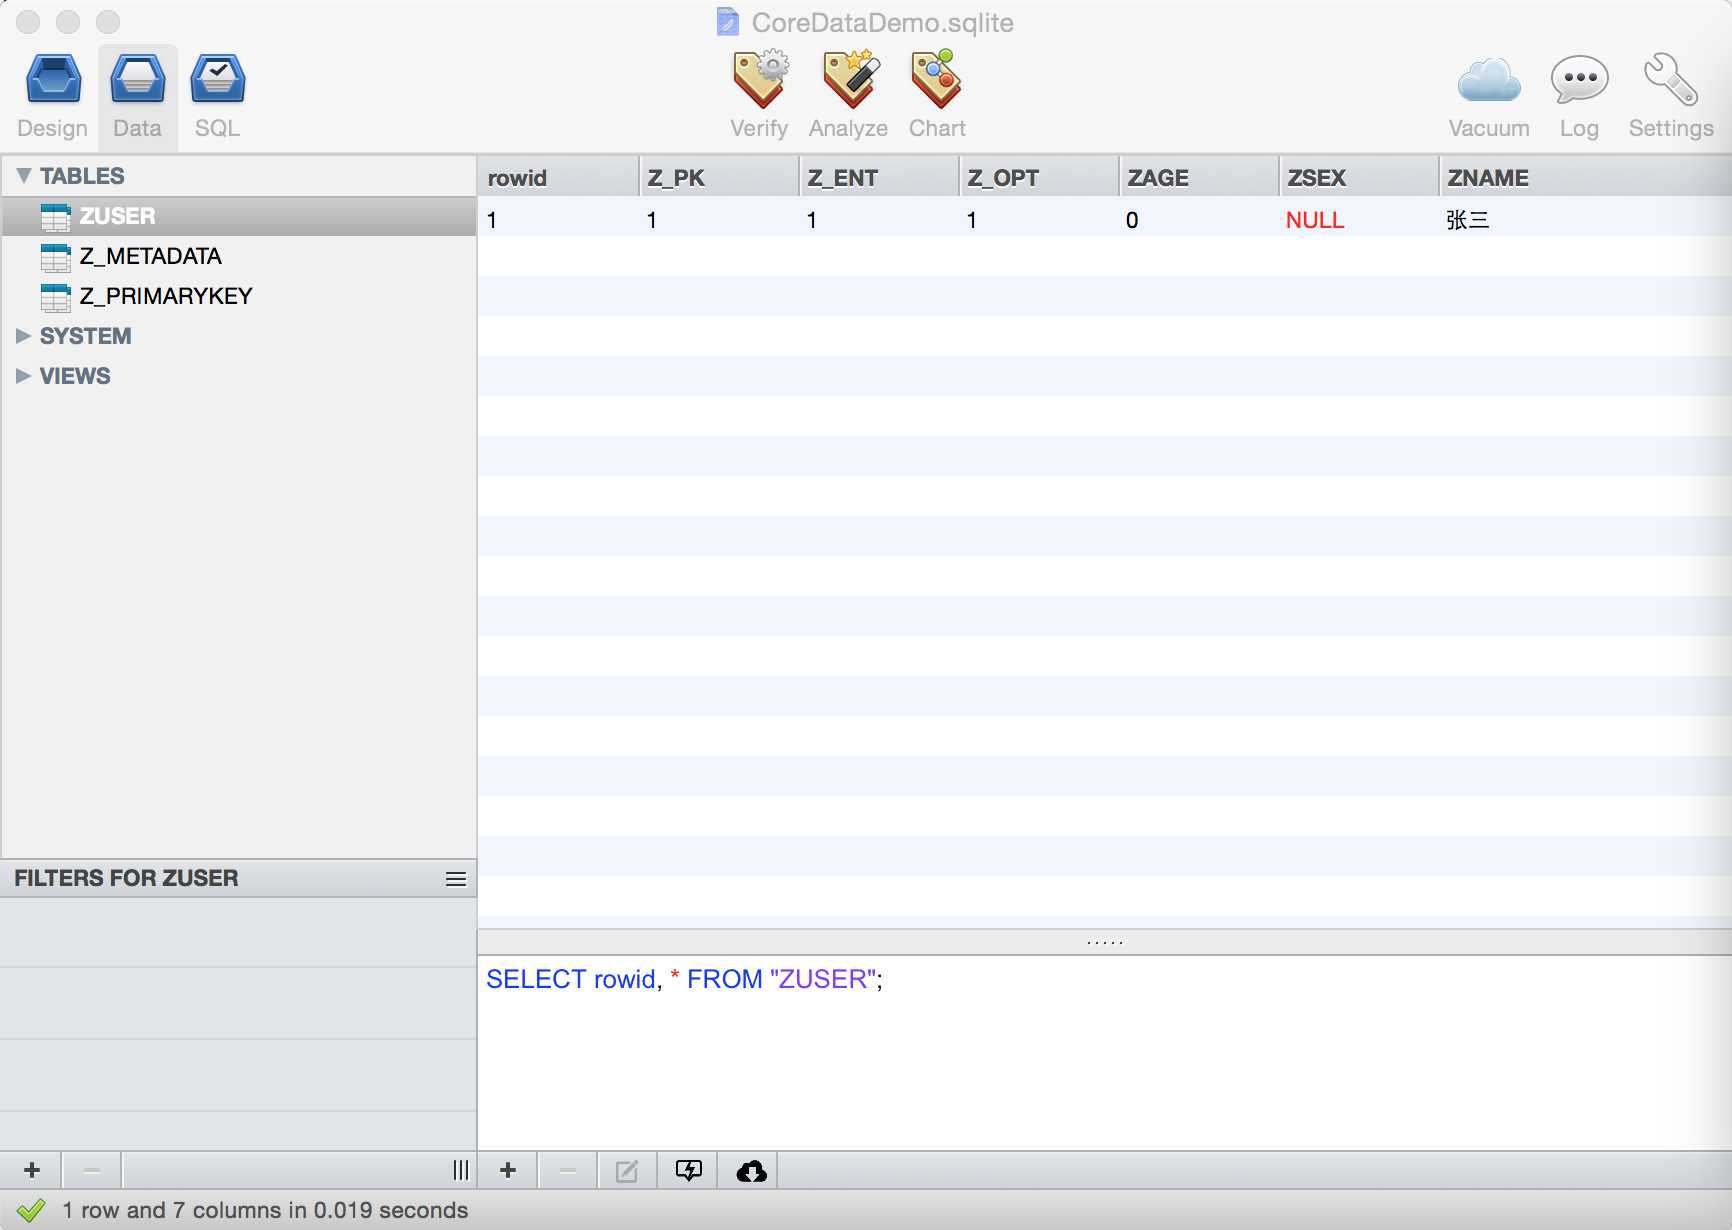
这样在Document目录下 就会生成数据库了,如图

下篇文章 继续关于 coredata操作
标签:
原文地址:http://www.cnblogs.com/menchao/p/4828505.html