标签:
前言:前面三篇分享了下DDD里面的两个主要特性:聚合和仓储。领域层的搭建基本完成,当然还涉及到领域事件和领域服务的部分,后面再项目搭建的过程中慢慢引入,博主的思路是先将整个架构走通,然后一步一步来添加相关元素,使架构慢慢变得丰满。这篇打算分享下应用层的搭建。根据DDD的设计原则,应用层不包含任何领域逻辑,它主要的作用是协调任务,或者叫调度任务,维护应用程序状态。根据博主的理解,应用层是用来隔离领域层的,假设没有应用层,那么我们的界面层可以直接调用领域层的逻辑,也就是说可以直接访问领域的model,这样的坏处显而易见:一是领域model不是纯粹的数据model,它含有领域的行为,直接将其传到前台会造成调用的混乱;二是仓储是和数据持久化打交道了,界面直接调用仓储,也就是界面直接和数据打交道,也不符合一般分层的原则。所以我们引入应用层,本文应用层是一个以控制台项目为宿主的WCF服务。我们来看代码设计。
WCF(Windows Communication Foundation)是由微软发展的一组数据通信的应用程序开发接口,可以翻译为Windows通讯接口,它是.NET框架的一部分。由 .NET Framework 3.0 开始引入。WCF的最终目标是通过进程或不同的系统、通过本地网络或是通过Internet收发客户和服务之间的消息。关于WCF的理论知识,需要我们了解的是经典的ABC。
关于WCF的理论在此就不再展开,下面结合我们的项目代码我们从零开始一步一步来搭建一个自己的WCF服务吧。

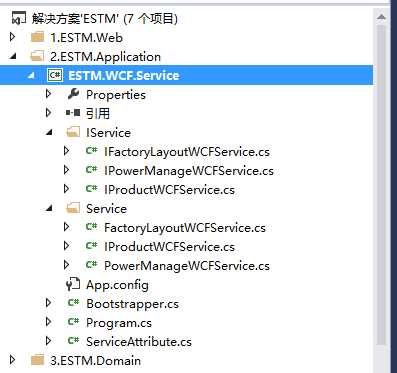
项目按照模块为单位划分服务,比如权限模块,我们就有一个权限的接口契约IPowerManageWCFService。IService文件夹里面放了3个接口,分别对应系统3个模块的接口契约,Service文件夹里面分别对应了3个接口的实现。ServiceAttribute.cs里面定义了两个特性,表示接口是WCF的服务。我们来看看具体的代码。
namespace ESTM.WCF.Service
{
    //标记此特性的为WCF服务接口
    public class ServiceInterfaceAttribute : Attribute
    {
    }

    //标记此特性的为WCF服务接口实现类
    public class ServiceClassAttribute : Attribute
    {
    }
}
    /// <summary>
    /// 工厂布局模块接口契约
    /// </summary>
    [ServiceInterface]
    [ServiceContract]
    public interface IFactoryLayoutWCFService
    {
        [OperationContract]
        List<DTO_TM_PLANT> GetAllPlant();
    }
    /// <summary>
    /// 权限管理模块接口契约
    /// </summary>
    [ServiceContract]
    [ServiceInterface]
    public interface IPowerManageWCFService
    {
        [OperationContract]
        IList<DTO_TB_DEPARTMENT> GetAllDepartment();
    }
    /// <summary>
    /// 产品管理模块接口契约
    /// </summary>
    [ServiceContract]
    [ServiceInterface]
    public interface IProductWCFService
    {
        [OperationContract]
        IList<DTO_TP_PRODUCT> GetAllProduct();
    }
接口契约[ServiceContract]表示该接口遵守接口契约协定,[OperationContract]操作契约,这两个特性都是WCF内置的东西。[ServiceInterface]的用处我们待会说。
    [ServiceClass]
    public class FactoryLayoutWCFService : IFactoryLayoutWCFService
    {
        public List<DTO_TM_PLANT> GetAllPlant()
        {
            throw new NotImplementedException();
        }
    }
    [ServiceClass]
    public class ProductWCFService : IProductWCFService
    {
        public IList<DTO_TP_PRODUCT> GetAllProduct()
        {
            throw new NotImplementedException();
        }
    }
    [ServiceClass]
    public class PowerManageWCFService : IPowerManageWCFService
    {
        public IList<DTO_TB_DEPARTMENT> GetAllDepartment()
        {
            throw new NotImplementedException();
        }
    }
[ServiceClass]特性和接口上面的[ServiceInterface]特性对应,用于标记契约和实现。
   public class Bootstrapper
    {
        private string strBaseServiceUrl = ConfigurationManager.AppSettings["ServiceUrl"].ToString();

        //启动所有的服务
        public void StartServices()
        {
            //1.读取此程序集里面的有服务契约的接口和实现类
            var assembly = Assembly.Load(typeof(Bootstrapper).Namespace);
            var lstType = assembly.GetTypes();
            var lstTypeInterface = new List<Type>();
            var lstTypeClass = new List<Type>();
            foreach (var oType in lstType)
            {
                //2.通过接口上的特性取到需要的接口和实现类
                var lstCustomAttr = oType.CustomAttributes;
                if (lstCustomAttr.Count() <= 0)
                {
                    continue;
                }
                var oInterfaceServiceAttribute = lstCustomAttr.FirstOrDefault(x => x.AttributeType.Equals(typeof(ServiceInterfaceAttribute)));
                if (oInterfaceServiceAttribute != null)
                {
                    lstTypeInterface.Add(oType);
                    continue;
                }
                var oClassServiceAttribute = lstCustomAttr.FirstOrDefault(x => x.AttributeType.Equals(typeof(ServiceClassAttribute)));
                if (oClassServiceAttribute != null)
                {
                    lstTypeClass.Add(oType);
                }
            }

            //3.启动所有服务
            foreach (var oInterfaceType in lstTypeInterface)
            {
          //通过反射找到接口的实现类,找到配对然后启动服务
                var lstTypeClassTmp = lstTypeClass.Where(x => x.GetInterface(oInterfaceType.Name) != null).ToList();
                if (lstTypeClassTmp.Count <= 0)
                {
                    continue;
                }
                if(lstTypeClassTmp[0].GetInterface(oInterfaceType.Name).Equals(oInterfaceType))
                {
                    var oTask = Task.Factory.StartNew(() =>
                    {
                        OpenService(strBaseServiceUrl + "/" + oInterfaceType.Name, oInterfaceType, lstTypeClassTmp[0]);
                    });
                }
            }
        }

        //通过服务接口类型和实现类型启动WCF服务
        private void OpenService(string strServiceUrl, Type typeInterface, Type typeclass)
        {
            Uri httpAddress = new Uri(strServiceUrl);
            using (ServiceHost host = new ServiceHost(typeclass))
            {
                ///////////////////////////////////////添加服务节点///////////////////////////////////////////////////
                host.AddServiceEndpoint(typeInterface, new WSHttpBinding(), httpAddress);
                if (host.Description.Behaviors.Find<ServiceMetadataBehavior>() == null)
                {
                    ServiceMetadataBehavior behavior = new ServiceMetadataBehavior();
                    behavior.HttpGetEnabled = true;
                    behavior.HttpGetUrl = httpAddress;
                    host.Description.Behaviors.Add(behavior);
                }
                host.Opened += delegate
                {
                    Console.ForegroundColor = ConsoleColor.Green;
                    Console.WriteLine("服务启动成功。服务地址:" + strServiceUrl);
                };

                host.Open();
                while (true)
                {
                    Console.ReadLine();
                }
            }
        }
    }
对应的App.Config里面对应的服务的URL
  <appSettings>
    <add key="ServiceUrl" value="http://127.0.0.1:1234/MyWCF.Server"/>
  </appSettings>
StartServices()方法通过反射和两个特性[ServiceClass]与[ServiceInterface],依次启动三个服务。
然后再Program里面调用
     static void Main(string[] args)
        {
            var oBootstrapper = new Bootstrapper();
            oBootstrapper.StartServices();
            Console.ReadLine();
        }
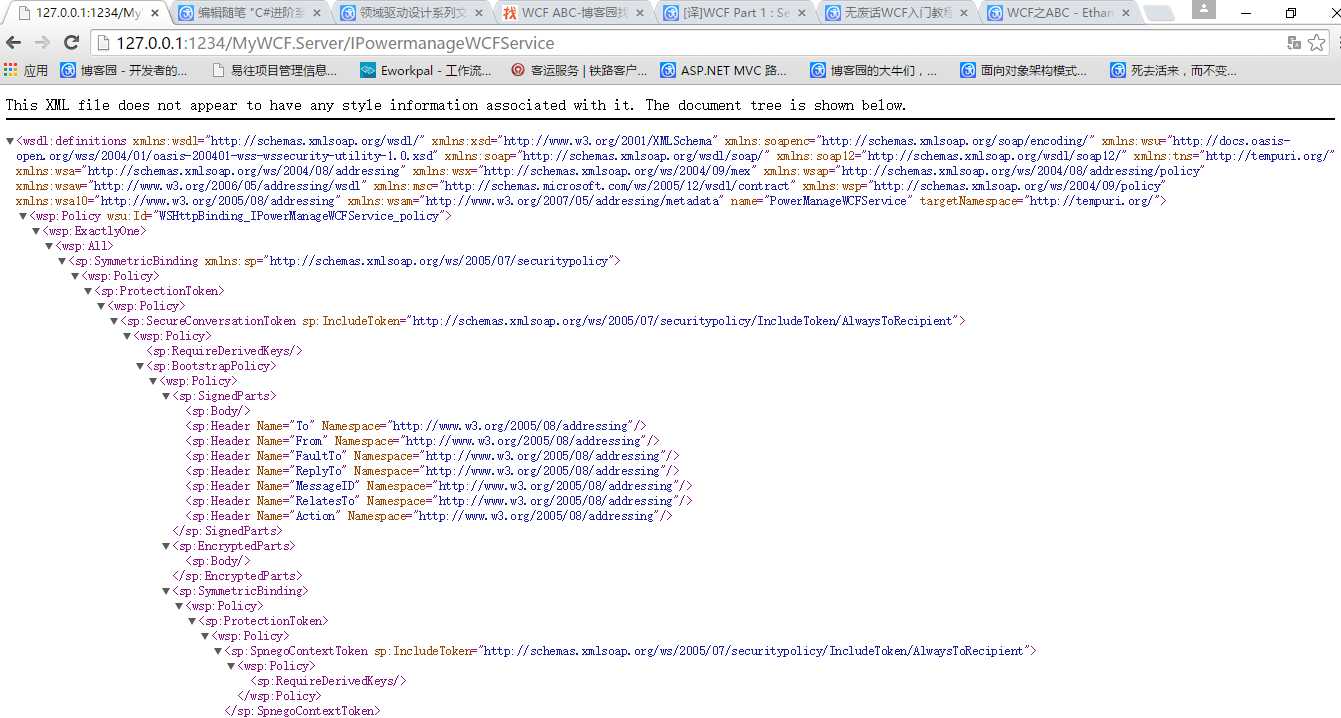
得到结果:

我们随便选择一个服务,通过浏览器访问,测试服务是否启动成功。

至此,WCF服务基本完成。
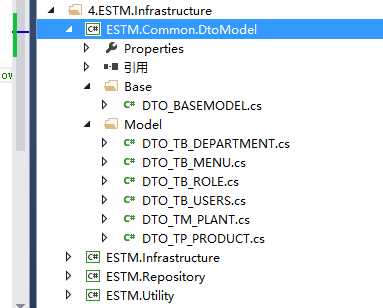
DTO,全称Data Transfer Object,数据传输对象。DTO是一个贫血模型,也就是它里面基本没有方法,只有一堆属性,并且所有属性都具有public的getter和setter访问器。为什么需要一个DTO对象?这个问题在C#进阶系列——MEF实现设计上的“松耦合”(终结篇:面向接口编程)这篇里面介绍过,它的作用其实很单一,就是用于数据传递和数据绑定。至于DTO如何设计,博主的项目里,DTO是按照聚合来划分的,也就是一个聚合对应一个DTO,DTO里面属性的定义可以根据项目需求来定。我们来看看代码:

    /// <summary>
    /// 所有DTO model的父类,用作泛型约束
    /// </summary>
    [DataContract]
    public class DTO_BASEMODEL
    {
    }
/// <summary>
    /// TB_DEPARTMENT
    /// </summary>
    [DataContract]
    public class DTO_TB_DEPARTMENT : DTO_BASEMODEL
    {
        [DataMember]
        public string DEPARTMENT_ID { get; set; }

        [DataMember]
        public string DEPARTMENT_NAME { get; set; }

        [DataMember]
        public string PARENT_ID { get; set; }

        [DataMember]
        public string DEPARTMENT_LEVEL { get; set; }

        [DataMember]
        public string STATUS { get; set; }
    }
其他DTO都和这个类似,就不一一列举了。由于DTO需要由WCF传递到Web前台,所以要求这个对象可以序列化,需要标记[DataContract]和[DataMember]两个特性,DTO_BASEMODEL作为所有DTO的父类, 用作泛型约束和定义DTO的一些公用特性。到此,WCF的搭建基本完成,下篇我们来介绍下Automapper的使用。累死我了,今天先到这吧,也不早了,博主也要安歇了。晚安!
还是附上 源码 吧,要不然园友们要说博主小气呢~~有兴趣可以看看。
标签:
原文地址:http://www.cnblogs.com/Leo_wl/p/4845040.html