标签:
这一次数字媒体的作业是在模拟水波的基础上(波浪相关实现参考:http://www.cnblogs.com/linchw3/p/4840995.html)使用控制杆进行相关控制,原本以为opengl应该会有相关的函数可以直接实现控制杆,可是找了好久没有找到(应该是没有这种函数,不太肯定),所以只好自己手打控制杆,后来发现其实,很简单,其实控制杆就是一个矩形(代表杆),一个随着鼠标移动的矩形(代表滑块),还有一个鼠标监控,以实现波浪高度的调节杆为例子:
首先是绘制一个控制杆(矩形):
1 glBegin(GL_QUADS);
2 glColor3f(0.3f, 0.7f, 0.7f);
3 glVertex2f(-0.898, 0.5);
4 glVertex2f(-0.898, -0.5);
5 glVertex2f(-0.883, -0.5);
6 glVertex2f(-0.883, 0.5);
7 glEnd();
然后绘制一个滑块(矩形):
1 glBegin(GL_QUADS);
2 glColor3f(0.2f, 0.5f, 0.6f);
3 glVertex2f(block_x1, block_y1);
4 glVertex2f(block_x1, (block_y1 - 0.05));
5 glVertex2f(block_x1 + 0.04, block_y1 - 0.05);
6 glVertex2f(block_x1 + 0.04, block_y1);
7 glEnd();
好了,控制杆画好了,接下来是控制了,这里要用到这两个函数:
void glutMouseFunc(void (*func)(int button, int state,
                                int x, int y));(参考:https://www.opengl.org/documentation/specs/glut/spec3/node50.html)
void glutMotionFunc(void (*func)(int x, int y));(参考:https://www.opengl.org/resources/libraries/glut/spec3/node51.html)
这两个函数允许我们去使用鼠标去进行交互,控制,区别是前一个函数是控制鼠标点击事件的,后一个函数是控制鼠标按下去然后进行拖动的事件的。
先说鼠标点击事件,我用的函数是void processMouse(int button, int state, int x, int y),我这里的设定是,点击之后,滑块会滑到你点击的位置,然后通过计算与起点的距离和滑动杆长度的比例来控制滑动幅度如下:
1 if (x > 56 && x < 72 && y >= 255 && y < 456) {
2             block_y1 = 0.5f -(y + 0.0f - 249.0f) / 208.0f;
3             high = 2 * (1-(y + 0.0f - 249.0f) / 208.0f);
4         }
这里的56,72等的数值是控制杆所在位置的鼠标的值,然后high是波浪的高度,这里用2去乘是因为我设定2为最大。
然后说鼠标在点击状态下拖动的控制函数void processMouseActiveMotion(int x, int y):我这里的设定是,滑块跟着鼠标走,然后通过计算与起点的距离和滑动杆长度的比例来控制滑动幅度如下:
1 if (x > 56 && x < 72 && y >= 255 && y < 456) {
2         block_y1 = 0.5f - (y + 0.0f - 249.0f) / 208.0f;
3         high = 2 * (1 - (y + 0.0f - 249.0f) / 208.0f);
4     }
OK,控制杆画好了,控制函数也写好了,然后把glutMouseFunc(processMouse); glutMotionFunc(processMouseActiveMotion)加到main函数就好了的。效果如下:
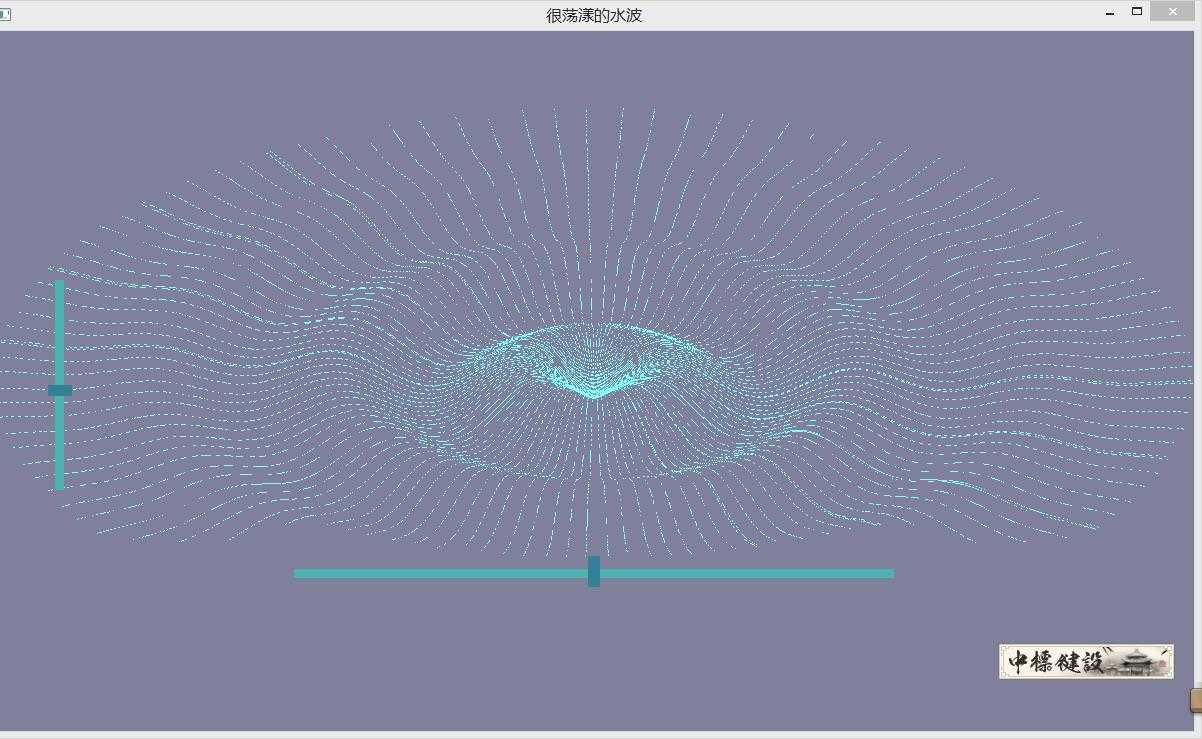
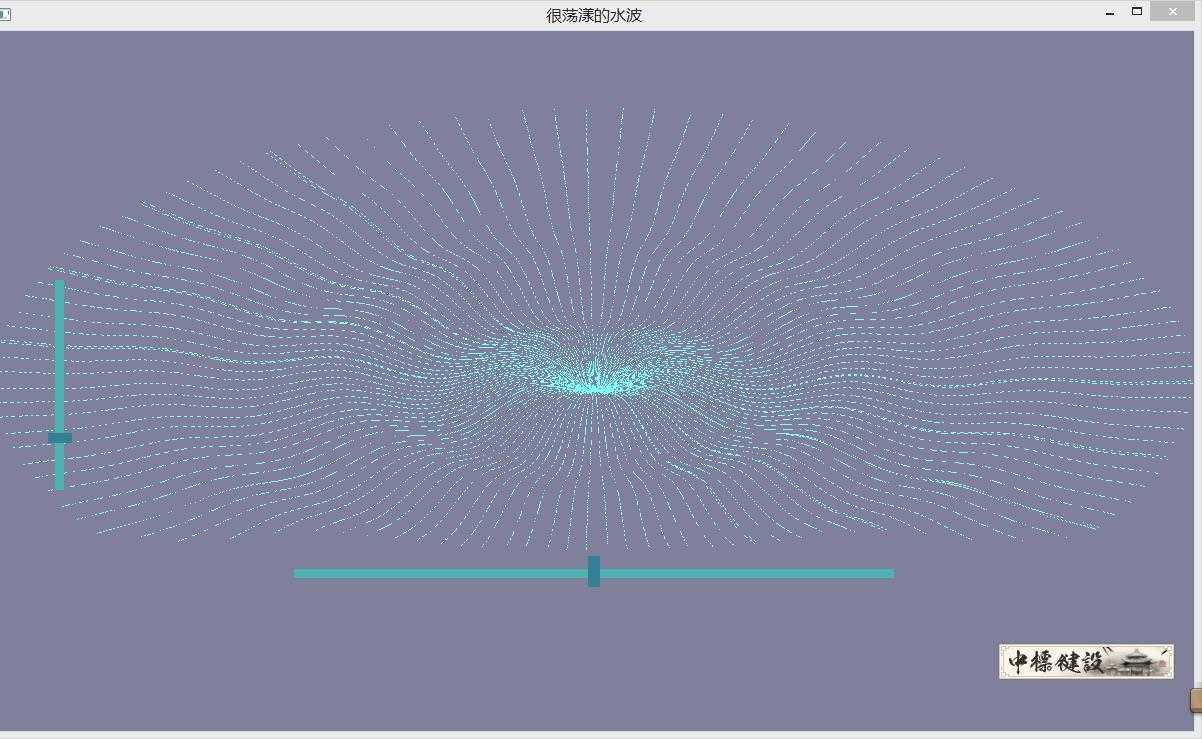
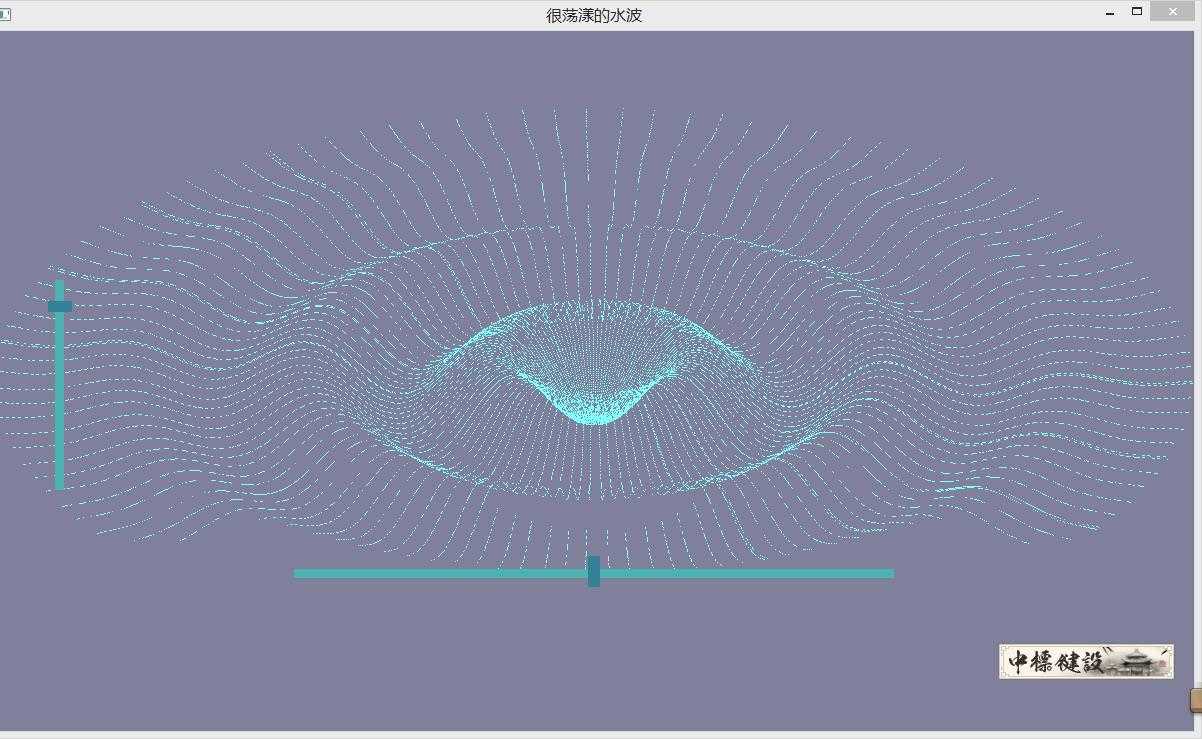
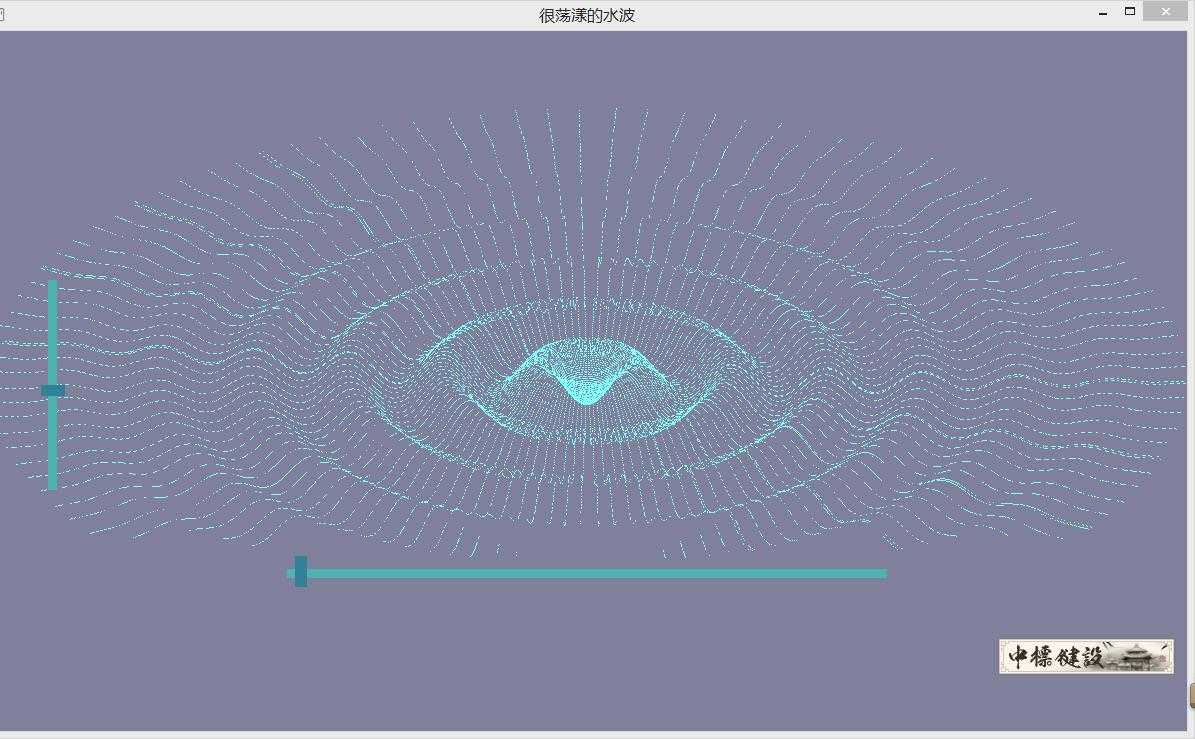
另外横着的是控制荡漾的频率的,实现和上面差不多,效果如下:
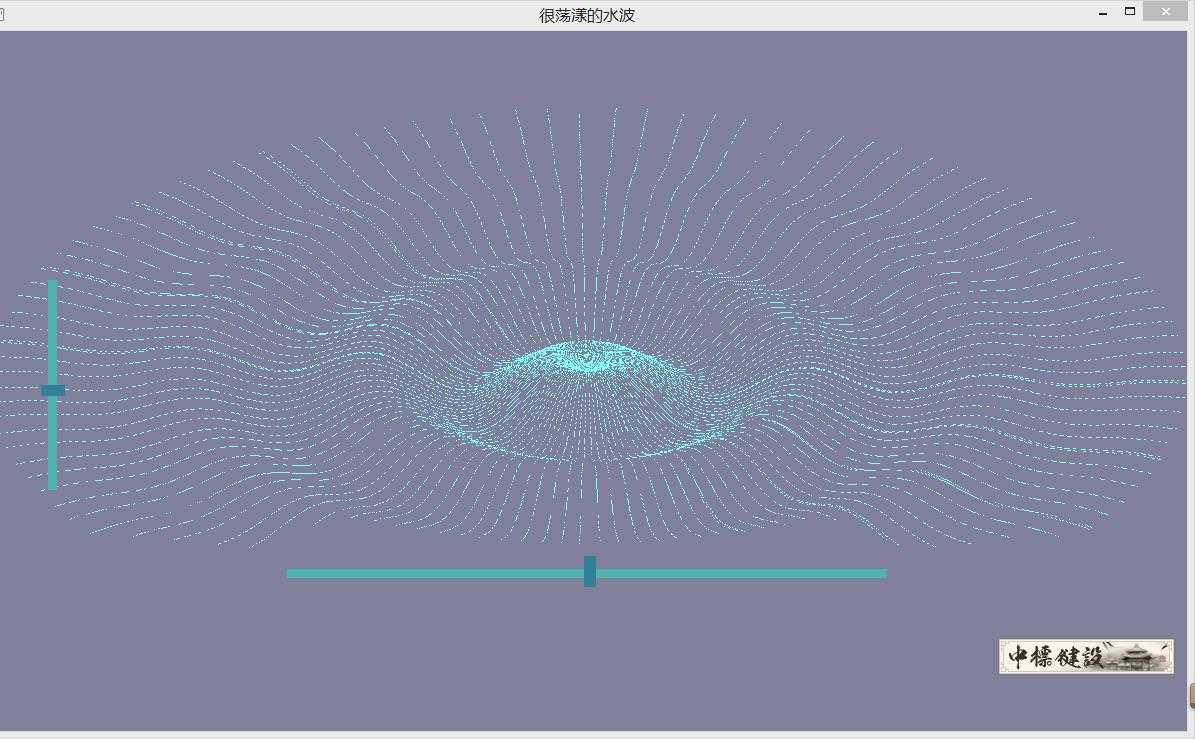
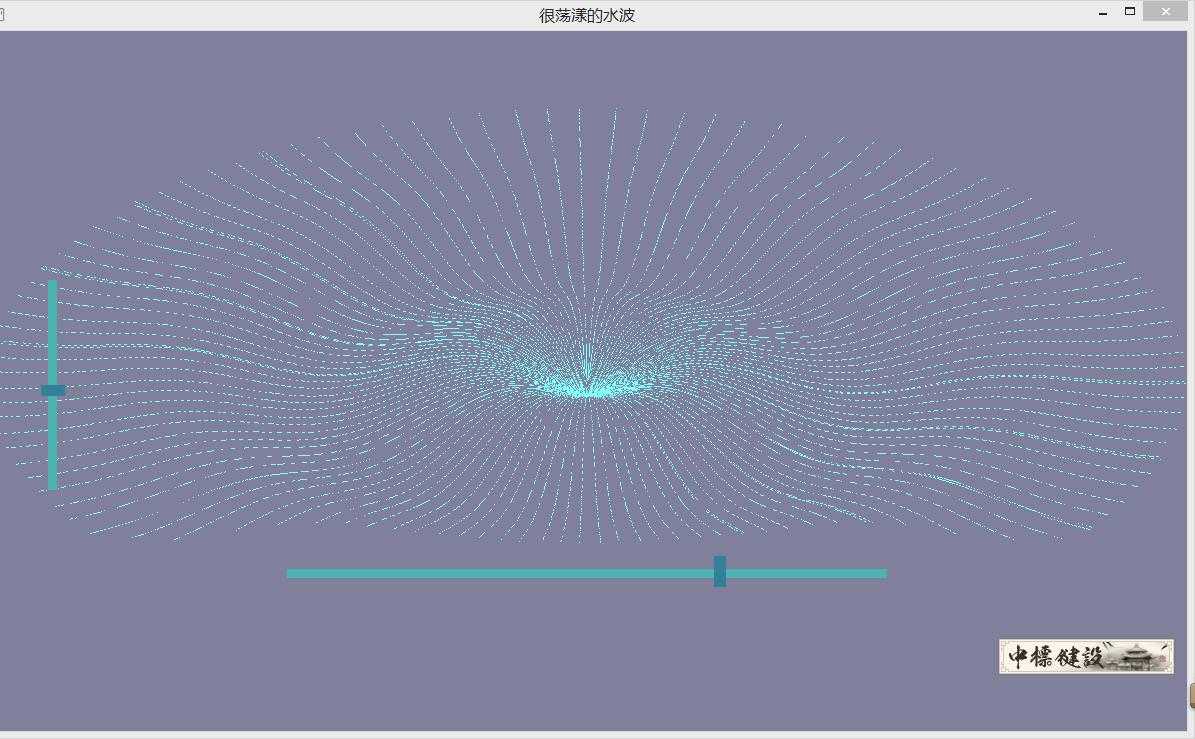
附上整个代码:
  1 #include <GL/glut.h>
  2 #include <math.h>
  3 #include<iostream>
  4
  5 const GLfloat factor = 0.1f;
  6 GLfloat num = 0.0f;
  7 GLfloat block_x = -0.01f;
  8 GLfloat block_y = -0.8f;
  9 GLfloat high = 1.0f;
 10 GLfloat width = 2.0f;
 11 GLfloat block_x1 = -0.91f;
 12 GLfloat block_y1 = -0.02f;
 13 void myDisplay(void) {
 14     GLfloat x;
 15     //set the backgroud color
 16     glClearColor(0.5f, 0.5f, 0.6f, 1.0f);
 17     glClear(GL_COLOR_BUFFER_BIT | GL_DEPTH_BUFFER_BIT);
 18     //set the point we look it
 19     glMatrixMode(GL_MODELVIEW);
 20     //replaces the current matrix with the identity matrix
 21     glLoadIdentity();
 22     gluLookAt(0, -0.5, 0.4, 0, 0, 0, 0, 0, 0.5);
 23
 24
 25     glBegin(GL_LINES);
 26     //set the color of the line
 27     glColor3f(0.5f, 1.0f, 1.0f);
 28     //draw the line
 29     for (float i = 0.0f; i < 360.0; i += 3.0) {
 30         for (x = 0; x < 1.0f / factor; x += 0.01f) {
 31             glVertex3f(x*factor*cos(i), high * (1 - x*factor)*cos(width * x - num)*factor, x*factor*sin(i));
 32         }
 33     }
 34     glEnd();
 35
 36
 37     /*以下是关于垂直调节杆的设置*/
 38     glBegin(GL_QUADS);
 39     glColor3f(0.3f, 0.7f, 0.7f);
 40     glVertex2f(-0.898, 0.5);
 41     glVertex2f(-0.898, -0.5);
 42     glVertex2f(-0.883, -0.5);
 43     glVertex2f(-0.883, 0.5);
 44     glEnd();
 45
 46
 47     glBegin(GL_QUADS);
 48     glColor3f(0.2f, 0.5f, 0.6f);
 49     glVertex2f(block_x1, block_y1);
 50     glVertex2f(block_x1, (block_y1 - 0.05));
 51     glVertex2f(block_x1 + 0.04, block_y1 - 0.05);
 52     glVertex2f(block_x1 + 0.04, block_y1);
 53     glEnd();
 54
 55
 56
 57     /*以下是关于水平的横杆的设置*/
 58     glBegin(GL_QUADS);
 59     //glColor3f(0.5f, 1.0f, 1.0f);
 60     glColor3f(0.3f, 0.7f, 0.7f);
 61     glVertex2f(-0.5, -0.86);
 62     glVertex2f(-0.5, -0.9);
 63     glVertex2f(0.5, -0.9);
 64     glVertex2f(0.5, -0.86);
 65     glEnd();
 66
 67
 68     glBegin(GL_QUADS);
 69     glColor3f(0.2f, 0.5f, 0.6f);
 70     glVertex2f(block_x, block_y);
 71     glVertex2f(block_x, (block_y - 0.14));
 72     glVertex2f(block_x + 0.02, block_y - 0.14);
 73     glVertex2f(block_x + 0.02, block_y);
 74     glEnd();
 75
 76     glFlush();
 77     glutSwapBuffers();
 78 }
 79
 80 void spinCube() {
 81     num = num + 0.1;
 82     glutPostRedisplay();
 83 }
 84
 85 void myReshape(GLsizei w, GLsizei h) {
 86     //为了调节杆的正常使用,直接固定窗口大小
 87     glutReshapeWindow(1200, 700);
 88 }
 89
 90
 91 void processMouse(int button, int state, int x, int y) {
 92     //处理鼠标点击
 93     if (state == GLUT_DOWN) {
 94         if (x > 300 && x < 900 && y >= 530 && y < 550) {
 95             block_x = (x + 0.0f - 300.0f) / 600.0f + (-0.5f);
 96             width = 4 * (1-(x + 0.0f - 300.0f) / 600.0f);
 97         }
 98
 99         if (x > 56 && x < 72 && y >= 255 && y < 456) {
100             block_y1 = 0.5f -(y + 0.0f - 249.0f) / 208.0f;
101             high = 2 * (1-(y + 0.0f - 249.0f) / 208.0f);
102         }
103     }
104 }
105
106
107 void processMouseActiveMotion(int x, int y) {
108     //处理鼠标拖动
109     if (x > 300 && x < 900 && y >= 530 && y < 550) {
110         block_x = (x + 0.0f - 300.0f) / 600.0f + (-0.5f);
111         width = 4 * (1 - (x + 0.0f - 300.0f) / 600.0f);
112     }
113     if (x > 56 && x < 72 && y >= 255 && y < 456) {
114         block_y1 = 0.5f - (y + 0.0f - 249.0f) / 208.0f;
115         high = 2 * (1 - (y + 0.0f - 249.0f) / 208.0f);
116     }
117
118 }
119
120 int main(int argc, char *argv[]) {
121     // init
122     glutInit(&argc, argv);
123     //set mode
124     glutInitDisplayMode(GLUT_DOUBLE | GLUT_RGB | GLUT_DEPTH);
125     //set the position
126     glutInitWindowPosition(100, 100);
127     //set the width and weigth
128     glutInitWindowSize(1200, 700);
129     glutCreateWindow("很荡漾的水波");
130     glutReshapeFunc(myReshape);
131     glutDisplayFunc(&myDisplay);
132     //to set the action
133     glutIdleFunc(spinCube);
134     //设置鼠标事件
135     glutMouseFunc(processMouse);
136     glutMotionFunc(processMouseActiveMotion);
137     //loop
138     glutMainLoop();
139     return 0;
140 }
标签:
原文地址:http://www.cnblogs.com/linchw3/p/4858077.html