标签:
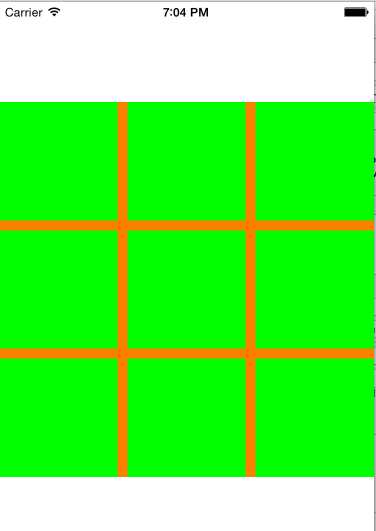
在浏览各种微博、QQ空间、在网购等时候都可以注意到显示的图片是由九宫格来布局完成的。开发者为其限定了最大个数--9。当然,有一张就添加一张,最多不过九张。那就拿微博为例来实现其功能。以下是其初始的图。
在做的过程中需要注意的地方就是:1.数据的传值问题(_imageList数组);2.在放大之后又要返回,则需要记住其原始的位置和大小;3.在变换的时候需要用到转换坐标系方法--- (CGPoint)convertPoint:(CGPoint)point toView:(UIView *)view;);4.图片都是放在scrollView上的,可以进行放大缩小滑动;5.在放大之后,注意一些细节问题--隐藏的要显示,而后将其放回原父视图上;6.缩小的道理只是将放大过程逆向返回。
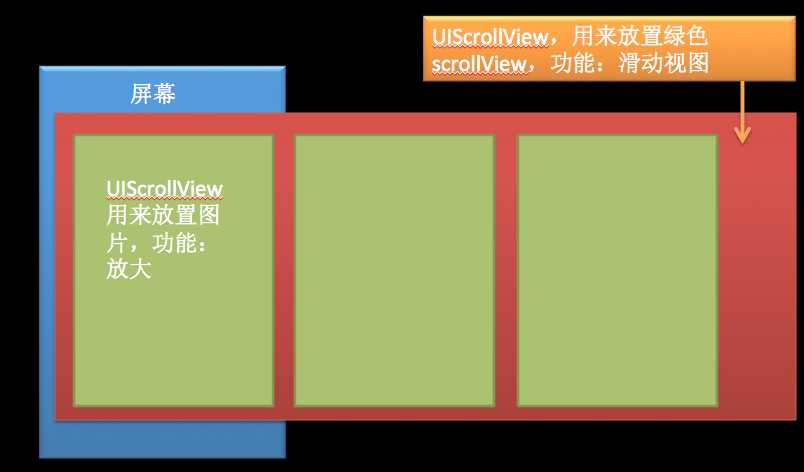
读者看到的放大过程,就是图片放大了,达到一定的大小之后就隐藏了(右侧图),而已经添加到scrollView上的就会显示出来(左侧图),这就是错觉,以为是一张图,其实是两张。所以要隐藏,完成放大之后要显示。同样 缩小的也是这个原理。

1 //WBImageView.h 中
2 #import "WBImageView.h"
3 #import "WBImageItem.h"
4 #import "UIImageView+WebCache.h"//针对于ImageView的第三方
1 //WBImageViewController中
2 #import "WBImageViewController.h"
3 #import "WBImageView.h"
4 #import "UIImageView+WebCache.h"
viewController.m
 1 //在viewDidLoad中
 2 WBImageView *wbImageView = [[WBImageView alloc] initWithFrame:CGRectMake(0, 100, [UIScreen mainScreen].bounds.size.width, 300)];
 3
 4     wbImageView.backgroundColor = [UIColor orangeColor];
 5     //图片的链接
 6     wbImageView.imageList = @[
 7                               @"http://a.vpimg2.com/upload/merchandise/20348/W-TU-3122934087-33-1.jpg",
 8                               @"http://img.kumi.cn/photo/5a/15/b7/5a15b7cb955fb13e.jpg",
 9                               @"http://pic.nipic.com/2007-11-09/2007119122519868_2.jpg",
10                               @"http://pic.nipic.com/2007-11-09/200711912230489_2.jpg",
11                               @"http://www.xxjxsj.cn/article/UploadPic/2009-10/2009101018545196251.jpg",
12                               @"http://pica.nipic.com/2008-03-19/2008319183523380_2.jpg",
13                               @"http://pic14.nipic.com/20110522/7411759_164157418126_2.jpg",
14                               @"http://h.hiphotos.baidu.com/image/pic/item/9d82d158ccbf6c812f9fe0e1be3eb13533fa400b.jpg",
15                               @"http://pic27.nipic.com/20130201/3789536_092151001379_2.jpg"
16                               ];
17
18     [self.view addSubview:wbImageView];
WBImageIvew.m
 1 #warning 用class 声明一下  否则会循环引用
 2 @class WBImageItem;
 3 @interface WBImageView : UIView
 4 @property (nonatomic, copy) NSArray *imageList;//存放图片的数组
 5 /**
 6  *  方法说明:返回做缩小动画时  获取做动画的item
 7  *
 8  *  @param  currentIndex:大图浏览时浏览到的图片的位置
 9  *
10  *  @return
11  */
12 - (WBImageItem *)getItemForIndex:(int)currentIndex;
WBImageIvew.h中要设置一个NSArray属性,来保存外部传入的URL。

 1 #define kItemWH (self.frame.size.width -20)/3
 2 #define kItemSpace 10
 3
 4 @implementation WBImageView
 5 {
 6     WBImageItem *_item;
 7 }
 8 - (id)initWithFrame:(CGRect)frame {
 9     if (self = [super initWithFrame:frame]) {
10     }
11     return self;
12 }
13
14 - (void)setImageList:(NSArray *)imageList {
15     _imageList = imageList;
16     [self creatSubviews];
17 }
18
19 //创建图片
20 - (void)creatSubviews {
21     int  index = 0;
22     for (NSString *url in _imageList) {
23         _item = [[WBImageItem alloc] initWithFrame:[self getItemFrameAtIndex:index]];
24 //        [_item setImageWithURL:[NSURL URLWithString:url]];
25         _item.backgroundColor = [UIColor greenColor];
26         _item.tag = 1000 + index;
27
28         //传值给item的imageList属性
29         _item.imageList = _imageList;
30
31         //需要给 原始的赋值才可以显示在controller中
32         _item.originFrame = _item.frame;
33         _item.originSupview = self;
34         _item.index = index;
35
36         [self addSubview:_item];
37         index ++;
38     }
39     CGFloat height = [self getWBImageViewHeight:(int)_imageList.count];
40     CGRect frame = self.frame;
41     frame.size.height = height;
42     self.frame = frame;
43
44 }
45
46 - (CGRect)getItemFrameAtIndex:(int)index {
47     /*
48      0-2  x: index*(宽+间距)
49           y: 0
50      3-5  x: (index%3)*(宽+间距)
51           y: (高+间距)
52      6-8  x: (index%3)*(宽+间距)
53           y:(index/3)(高+间距)
54      */
55     CGFloat x = index % 3 * (kItemWH + kItemSpace);
56     CGFloat y = index / 3 * (kItemWH + kItemSpace);
57
58     return CGRectMake(x, y, kItemWH, kItemWH);
59 }
60 + (CGFloat)getWBImageViewHeight:(int)count {
61         /*
62      1-3 1*kItemWH
63      4-6 2*kItemWH + 1*kItemSpace
64      7-9 3*kItemWH + 2*kItemSpace
65      */
66     CGFloat height = ((count - 1) / 3 +1 ) * kItemWH + (count - 1) / 3 * kItemSpace;
67     return height;
68 }
WBImageItem.h设置一些属性用于存储接收等。
 1 //避免循环引用
 2 @class WBImageView;
 3 @interface WBImageItem : UIImageView
 4 @property (nonatomic, copy)NSArray *imageList;//存放图片的数组
 5 @property (nonatomic, assign) int index;// item在父视图上的位置
 6 @property (nonatomic, assign) CGRect originFrame;//在原始父视图上的原始坐标
 7 @property (nonatomic, strong) WBImageView *originSupview;//item原始的父视图
 8 /**
 9  *  方法说明: 获取item 在新的坐标系统 (新的界面)上的frame
10  *
11  *  @param  originFrame:item原始的frame
12  *
13  *  @return
14  */
15 - (CGRect)getItemFrameAtWindow:(CGRect)originFrame;
WBImageItem.m的代码如下。
 1 #import "WBImageItem.h"
 2 #import "WBImageViewController.h"
 3 #import "UIView+UIViewController.h"
 4
 5 @implementation WBImageItem
 6 - (id)initWithFrame:(CGRect)frame {
 7     if (self = [super initWithFrame:frame]) {
 8         //开启触摸
 9         self.userInteractionEnabled = YES;
10         //禁止拉伸
11         self.contentMode = UIViewContentModeScaleAspectFit;
12         [self addGesture];
13     }
14     return self;
15 }
16
17 //点击手势
18 - (void)addGesture {
19     UITapGestureRecognizer *tap = [[UITapGestureRecognizer alloc] initWithTarget:self action:@selector(tapAction)];
20     //添加点击手势
21     [self addGestureRecognizer:tap];
22 }
23
24 - (void)tapAction {
25     WBImageViewController *controler = [[WBImageViewController alloc] init];
26     controler.imageList = _imageList;
27     //将点击的图片设置为大图,浏览当前图片,用来做动画
28     controler.currentItem = self;
29     controler.currentIndex = self.index;
30     [self.viewController presentViewController:controler animated:NO completion:nil];
31 }
32 - (void)setImageList:(NSArray *)imageList {
33     _imageList = imageList;
34 }
35 /**
36  *  方法说明: 获取item 在新的坐标系统 (新的界面)上的frame
37  *
38  *  @param  originFrame:item原始的frame
39  *
40  *  @return
41  */
42 - (CGRect)getItemFrameAtWindow:(CGRect)originFrame {
43
44     CGRect newFrame = [self.superview convertRect:originFrame toView:self.window];
45
46     return newFrame;
47 }
48 @end
WBImageViewController.h设置属性
1 @property (nonatomic, copy) NSArray *imageList;
2 @property (nonatomic, strong) WBImageItem *currentItem;//点击的图片显示在当前页面
3 @property (nonatomic, assign) int currentIndex;//当前在浏览界面看到的图片位置属性
4 // 1. 刚刚进入时 currentItem.index
5 // 2. 根据scrollView  的滚动的偏移量计算
WBImageViewController.m
  1 #define kSelfViewWidth self.view.frame.size.width
  2 #define kSelfViewHeight self.view.frame.size.height
  3
  4 @interface WBImageViewController ()
  5 {
  6     UIScrollView *_supScrollView;//图片的滚动浏览视图
  7     NSMutableArray *_subScrollViews;
  8 }
  9 @end
 10
 11 @implementation WBImageViewController
 12
 13 - (void)viewDidLoad {
 14     [super viewDidLoad];
 15     //把当前页面的item 放到当前的页面
 16     self.currentItem.frame = [self.currentItem getItemFrameAtWindow:self.currentItem.originFrame];
 17     [self.view.window addSubview:self.currentItem];
 18 #warning 需要在 item中给原始的originFrame赋值
 19     [self.view addSubview:self.currentItem];
 20
 21     [self createSubviews];
 22 }
 23 - (void)viewDidAppear:(BOOL)animated {
 24     [super viewDidAppear:animated];
 25     //放大动画
 26     [UIView animateWithDuration:.35 animations:^{
 27         self.currentItem.frame = self.view.bounds;
 28     }  completion:^(BOOL finished) {
 29         //动画结束之后,显示
 30         _supScrollView.hidden = NO;
 31         //放回原父视图上
 32         self.currentItem.frame = self.currentItem.originFrame;
 33 #warning 虽然在.h中已经导入,但是还需导入
 34         WBImageView *wbImageView = self.currentItem.originSupview;
 35         [wbImageView addSubview:self.currentItem];
 36
 37     }];
 38 }
 39 //获取imageList的传值 不调用set的话 ,可以直接使用 _imageList = self.imageList;
 40 - (void)setImageList:(NSArray *)imageList {
 41
 42     _imageList = imageList;
 43 }
 44 - (void)createSubviews {
 45 //   1. 初始化图片浏览的scrollView
 46     _supScrollView = [[UIScrollView alloc] initWithFrame:self.view.bounds];
 47     _supScrollView.delegate = self;
 48     _supScrollView.pagingEnabled = YES;//翻页
 49
 50     //默认隐藏,否则会出现两张图片
 51     _supScrollView.hidden = YES;
 52     _supScrollView.contentSize = CGSizeMake(kSelfViewWidth * _imageList.count, kSelfViewHeight);
 53     _supScrollView.contentOffset = CGPointMake(kSelfViewWidth * self.currentIndex, 0);
 54     [self.view addSubview:_supScrollView];
 55
 56 //   2.创建图片的显示控件
 57     _subScrollViews = [[NSMutableArray alloc] init];
 58     int index = 0;
 59     for (NSString *url in _imageList) {
 60         //第一层scrollView
 61         UIScrollView *subScrollView = [[UIScrollView alloc] initWithFrame:CGRectMake(kSelfViewWidth * index, 0, kSelfViewWidth, kSelfViewHeight)];
 62         subScrollView.contentSize = CGSizeMake(kSelfViewWidth, kSelfViewHeight);
 63         subScrollView.tag = 2000 + index;
 64         subScrollView.delegate = self;
 65         //设置放大缩小倍数
 66         subScrollView.maximumZoomScale = 2.f;
 67         subScrollView.minimumZoomScale = .5f;
 68         [_subScrollViews addObject:subScrollView];
 69         [_supScrollView addSubview:subScrollView];
 70
 71                 UIImageView *imageView = [[UIImageView alloc] initWithFrame:subScrollView.bounds];
 72         //禁止图片拉伸
 73         imageView.contentMode = UIViewContentModeScaleAspectFit;
 74         //默认是关闭的
 75         imageView.userInteractionEnabled = YES;
 76         [imageView setImageWithURL:[NSURL URLWithString:url]];
 77         [subScrollView addSubview:imageView];
 78
 79         //添加手势
 80         UITapGestureRecognizer *oneTap = [[UITapGestureRecognizer alloc] initWithTarget:self action:@selector(dismiss)];
 81         [imageView addGestureRecognizer:oneTap];
 82
 83         //双击手势
 84         UITapGestureRecognizer *twoTap = [[UITapGestureRecognizer alloc] initWithTarget:self action:@selector(tapTwoAction)];
 85         //numberOfTouchesRequired 触摸点的个数
 86         twoTap.numberOfTouchesRequired = 1;
 87         //numberOfTapsRequired 点击的次数,双击
 88         twoTap.numberOfTapsRequired = 2;
 89         [imageView addGestureRecognizer:twoTap];
 90
 91         //双击优先
 92         [oneTap requireGestureRecognizerToFail:twoTap];
 93         index ++;
 94     }
 95 }
 96 - (void)tapTwoAction {
 97     UIScrollView *scrollview = [_subScrollViews objectAtIndex:self.currentIndex];
 98     [UIView animateWithDuration:.25 animations:^{
 99         scrollview.zoomScale = scrollview.zoomScale == 1.0f ? 2.0f : 1.0f;
100
101         NSLog(@"________%.2f", scrollview.zoomScale);
102     }];
103
104 }
105
106
107
108
109 //给图片一个点击手势,使其返回
110 - (void)dismiss {
111     [self dismissViewControllerAnimated:NO completion:nil];
112     //缩小动画实现
113     WBImageView *wbImageView = self.currentItem.originSupview;
114     WBImageItem *item = [wbImageView getItemForIndex:self.currentIndex];
115
116     //再次将图片放回到原来View上
117     CGPoint newPoint = [self.view convertPoint:CGPointZero toView:wbImageView];
118     //大小
119     CGRect frame = item.frame;
120     //位置=新的位置
121     frame.origin = newPoint;
122     //大小=屏幕大小
123     frame.size = self.view.frame.size;
124     //重新复制给item
125     item.frame = frame;
126
127 //    动画实现
128     [wbImageView bringSubviewToFront:item];
129     [UIView animateWithDuration:.35 animations:^{
130         item.frame = item.originFrame;
131     }];
132 }
133
134 //此方法实现的是点击缩小之后,恢复到对应的原位置
135 - (void)scrollViewDidScroll:(UIScrollView *)scrollView {
136     //要分清楚
137     if (scrollView == _supScrollView) {
138         //获得最新滚动的界面的index属性
139         int newIndex = (int)scrollView.contentOffset.x/kSelfViewWidth;
140         if (self.currentIndex == newIndex) {
141             return;
142         }else {
143             self.currentIndex = newIndex;
144         }
145     }
146 }
147
148 @end
另外,在WBImageView.m中写一个方法,并开放出来,在WBImageViewController中缩小的时候使用。
 1 /**
 2  *  方法说明:返回做缩小动画时  获取做动画的item
 3  *
 4  *  @param  currentIndex:大图浏览时浏览到的图片的位置
 5  *
 6  *  @return
 7  */
 8 - (WBImageItem *)getItemForIndex:(int)currentIndex {
 9     WBImageItem *item = (WBImageItem *)[self viewWithTag:1000 + currentIndex];
10     return item;
11 }
以上需要第三方的文档。代码下载路径http://pan.baidu.com/s/1gdCrOVx
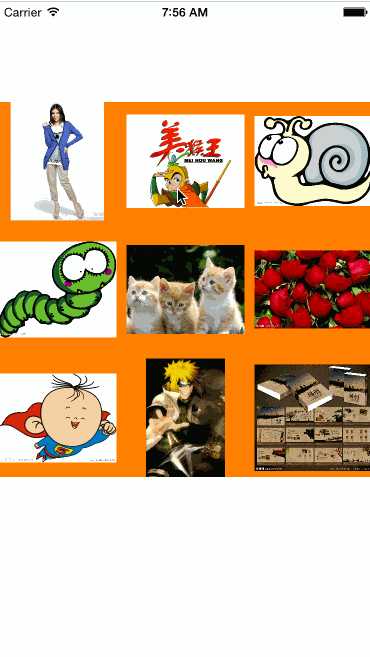
实现效果如下图

可以看到,图片大小不一样,这是设置了图片禁止拉伸的原因(self.contentMode = UIViewContentModeScaleAspectFit;
UIViewContentModeScaleToFill,//以宽为基准,对高度进行对应比例拉伸或压缩
UIViewContentModeScaleAspectFit,//不改变原来大小
UIViewContentModeScaleAspectFill,//以高为基准,对宽度进行对应比例拉伸或压缩
)
以上文章是博主原创文章,转载请标明出处。
标签:
原文地址:http://www.cnblogs.com/david-han/p/4902529.html
