标签:
public void getPixels(int[] pixels, int offset, int stride,int x, int y, int width, int height)
获取原Bitmap的像素值存储到pixels数组中。
参数:
pixels 接收位图颜色值的数组
offset 写入到pixels[]中的第一个像素索引值
stride pixels[]中的行间距个数值(必须大于等于位图宽度)。不能为负数
x 从位图中读取的第一个像素的x坐标值。
y 从位图中读取的第一个像素的y坐标值
width 从每一行中读取的像素宽度
height 读取的行数
|
1
2
3
4
5
6
7
8
9
10
11
12
13
14
15
16
17
18
19
20
21
22
23
24
25
26
27
28
29
30
31
32
33
34
35
36
37
38
39
|
@Override
public Bitmap process(Bitmap bitmap) {
// TODO Auto-generated method stub
Bitmap destImage = Bitmap.createBitmap(400,
400, Config.ARGB_8888);
int width = destImage.getWidth();
int height = destImage.getHeight();
for(int i = 0; i < width/2; i++){
for(int j = 0; j < height/2; j++){
destImage.setPixel(i, j, Color.RED);//左上区域红色
}
for(int j = height / 2; j < height; j++){
destImage.setPixel(i, j, Color.CYAN);//左下区域青色
}
}
for(int i = width / 2; i < width; i++){
for(int j = 0; j < height/2; j++){
destImage.setPixel(i, j, Color.YELLOW);//右上区域黄色
}
for(int j = height / 2; j < height; j++){
destImage.setPixel(i, j, Color.BLACK);//右下区域黑色
}
}//上述代码确定了原图destImage的所有像素值
int[] mPixels = new int[width * height];
for(int i = 0; i < mPixels.length; i++){
mPixels[i] = Color.BLUE;//数组中默认值为蓝色
}
destImage.getPixels(mPixels, 0, width, 0, 0,
width, height);
Bitmap mResultBitmap = Bitmap.createBitmap(mPixels, 0, width, width, height,
Bitmap.Config.ARGB_8888);
return mResultBitmap;
}
|
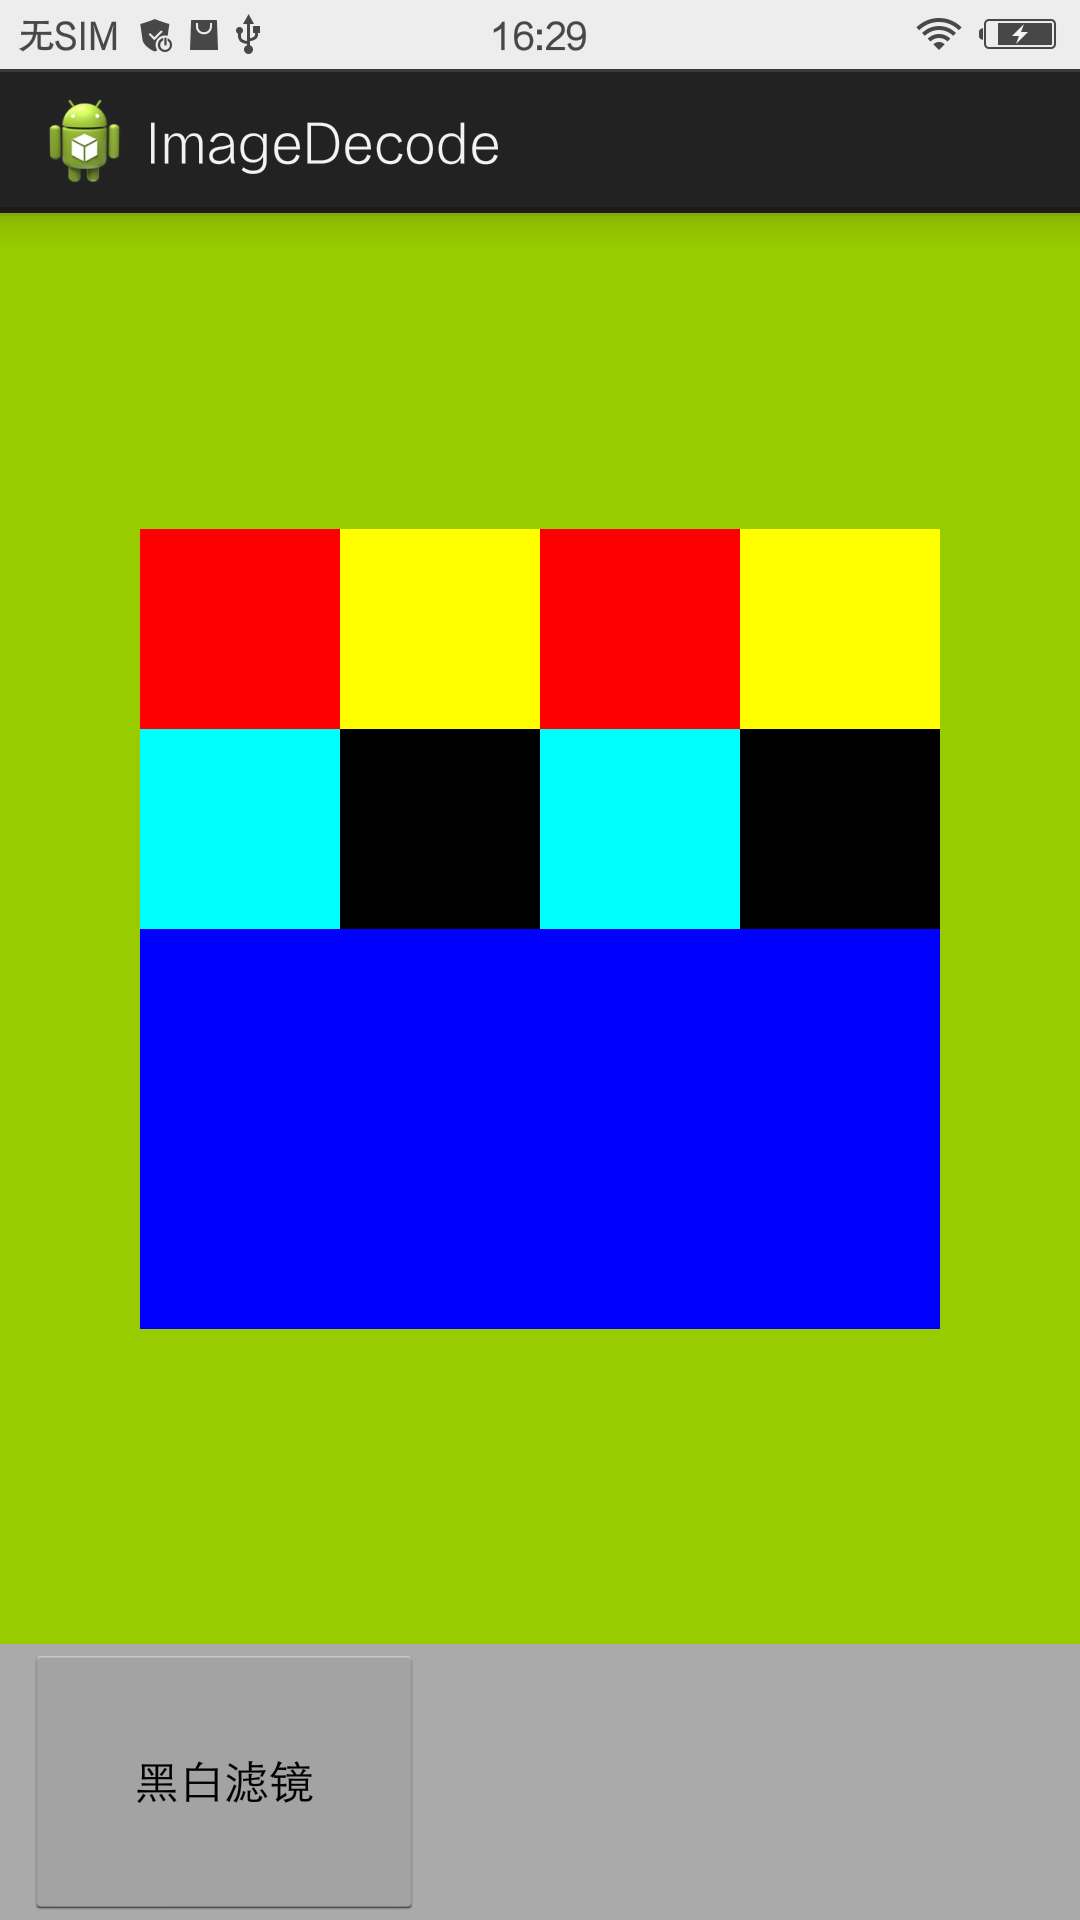
 原始destImage为四色的。
提取红色区域:
destImage.getPixels(mPixels, 0, width, 0, 0, width/2, height/2);

提取黄色区域:
destImage.getPixels(mPixels, 0, width, width/2, 0, width/2, height/2);

提取青色区域:
destImage.getPixels(mPixels, 0, width, 0, height/2, width/2, height/2);

提取黑色区域:
destImage.getPixels(mPixels, 0, width, width/2, height/2, width/2, height/2);

从上面四个操作可以理解了x,y,width,height四个参数是如何控制提取原图哪块区域位置的元素的。上面这些有两点需要说明:
1. 剩余的区域并不是透明的或空白的,因为mPixels数组的默认值为蓝色,且新生成的bitmap的宽高值也是按原图大小设定的。如果只需要提取之后的图,那么只需要设置mPixels数组大小为提取的区域的像素数目,新生成的bitmap宽高依照提取区域设置即可。
2. 所有提取的区域都在新图的左上角。这是因为提取的区域在mPixels中是从0位置存储的。也就是新图完全由提取之后的mPixels数组决定。offset参数则决定了新提取的元素存储在mPixels数组中的起始位置。这一点需要明白提取像素是一行一行的存储到mPixels数组中的。所以有如下结果:
提取区域在新图区域左上角:offset = 0;
提取区域在新图区域右上角:offset = width/2;
提取区域在新图区域左下角:offset = width * (height / 2);
提取区域在新图区域右下角:offset = width * (height / 2) + width / 2;
上面的这四个赋值同时也说明了提取的元素在mPixels这一二维数组中是呈块状区域存储的,用二维图来看比较清晰。我们只需要设定起始的元素的存储位置offset即可。
stride是什么意思呢?它的值必须大于等于原图的宽。通过实际应用来理解它:把两张上述的四色图拼接到一起
|
1
2
3
4
5
6
7
|
destImage.getPixels(mPixels, 0 , 2 * width, 0, 0,
width, height);
destImage.getPixels(mPixels, width , 2 * width, 0, 0,
width, height);
Bitmap mResultBitmap = Bitmap.createBitmap(mPixels, 0, width * 2, width * 2, height * 2,
Bitmap.Config.ARGB_8888);
|

createBitmap和getPixels中的stride参数的意义是一样的,正是通过这一参数实现了如何把块状区域在二维数组mPixels中也是块状区域的。
这个参数的意义是行间距,也即一行读取完毕后,下一行应该间隔多少读取,数组应该间隔多少才开始存储下一行数据。
标签:
原文地址:http://my.oschina.net/sfshine/blog/526607