标签:android style blog http color strong
——Android手机遥控小车
小车上的硬件和软件都开发好了,通过笔记本的串口调试器也就可以控制小车了,这当然不方便,所以我们得把这个遥控器搬到手机上来。
这里采用Android程序。
至于怎么来开发Android程序,这里就不一一说明了,可以查看其他博文。


蓝牙连接的类,网上也比较多,可以直接拿来用(自己也没有深入研究)。
这里我们写了一个setSensorListener的类,用于监听重力感应的数据,然后将数据传入到蓝牙处理类即可。
private void setSensorListener() {
mSensorManager = (SensorManager) getSystemService(Context.SENSOR_SERVICE);
mVibrator = (Vibrator) getSystemService(Context.VIBRATOR_SERVICE);
mSensor = mSensorManager.getDefaultSensor(Sensor.TYPE_ACCELEROMETER);
?
mSensorEventListener = new SensorEventListener() {
?
float x, y, z, lastX, lastY;
long lastT, lastST;
@Override
public void onAccuracyChanged(Sensor sensor, int accuracy) {
// TODO Auto-generated method stub
?
}
?
// int times =0;
@Override
public void onSensorChanged(SensorEvent event) {
?
long currT = System.currentTimeMillis();
if((currT - lastT) > 100) {
long diffT = (currT - lastT);
lastT = currT;
?
x = event.values[SensorManager.DATA_X];
y = event.values[SensorManager.DATA_Y];
z = event.values[SensorManager.DATA_Z];
?
float Rd =90 - Math.abs(x) * 9;
TextView txtTextView2= (TextView)findViewById(R.id.textView2);
if (y <0)
txtTextView2.setText("左:" + Rd + "度 获取传感器值:"+ "x="+x+" y="+y+"z="+z);
else
txtTextView2.setText("右:" + Rd + "度 获取传感器值:"+ "x="+x+" y="+y+"z="+z);
?
?
if (IsAutoGO)
{
int left =100;
int right =100;
?
if (Rd >9)
{
if (y<0)
left = (int)(100-Rd);
else
right = (int)(100-Rd);
}
?
String cmd = "CAR:L+";
if (left<10)
cmd +="00" + left;
else if (left<100)
cmd += "0" + left;
else
cmd += left;
cmd+="R+";
if (right<10)
cmd +="00" + right;
else if (right<100)
cmd += "0" + right;
else
cmd += right;
?
?
if (mChatService.getState() == BluetoothChatService.STATE_CONNECTED)
{
sendMessage(cmd);
}
else {
TextView txtSendmsg= (TextView)findViewById(R.id.txtSendmsg);
txtSendmsg.setText("测试:" + cmd);
}
}
?
// float axis = 0;
// if(lastX != 0) {
// axis = Math.abs((x+y-lastX-lastY))/diffT*10000;
// }
// if(axis > 1200 && (currT - lastST) > 200) {
// lastST = currT;
// mVibrator.vibrate(new long[] {500,100,1000}, -1);
// mContext.refreshView();
// }
lastX = x;
lastY = y;
}
?
}
?
};
mSensorManager.registerListener(mSensorEventListener, mSensor, SensorManager.SENSOR_DELAY_UI);
}
?
编写好后,就可以开玩了。
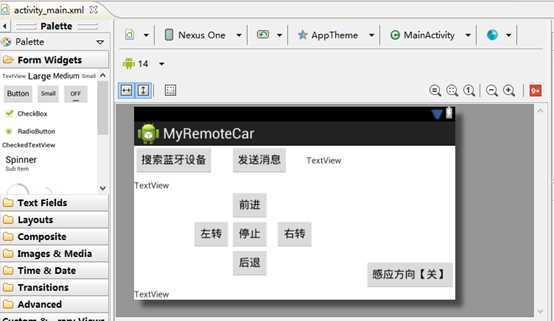
搜索蓝牙设备,然后连接上,可以点测试向其发送一些测试数据,然后按上下左右,可以直接控制小车,按下重力感应的,就可以利用手机当方向盘来操作了。
至此终于自己打造出一个智能小车了。
当然后续还有很多扩展,如把手机放上去,电脑远程控制之类的。慢慢来吧。
自己动手做个智能小车(8)[终],布布扣,bubuko.com
标签:android style blog http color strong
原文地址:http://www.cnblogs.com/zjfstudio/p/3856225.html