标签:
开发中系统提供的tabbar很难满足我们的项目需求,因此我们需要自定义。下面提供了一种简单自定义tabbar。
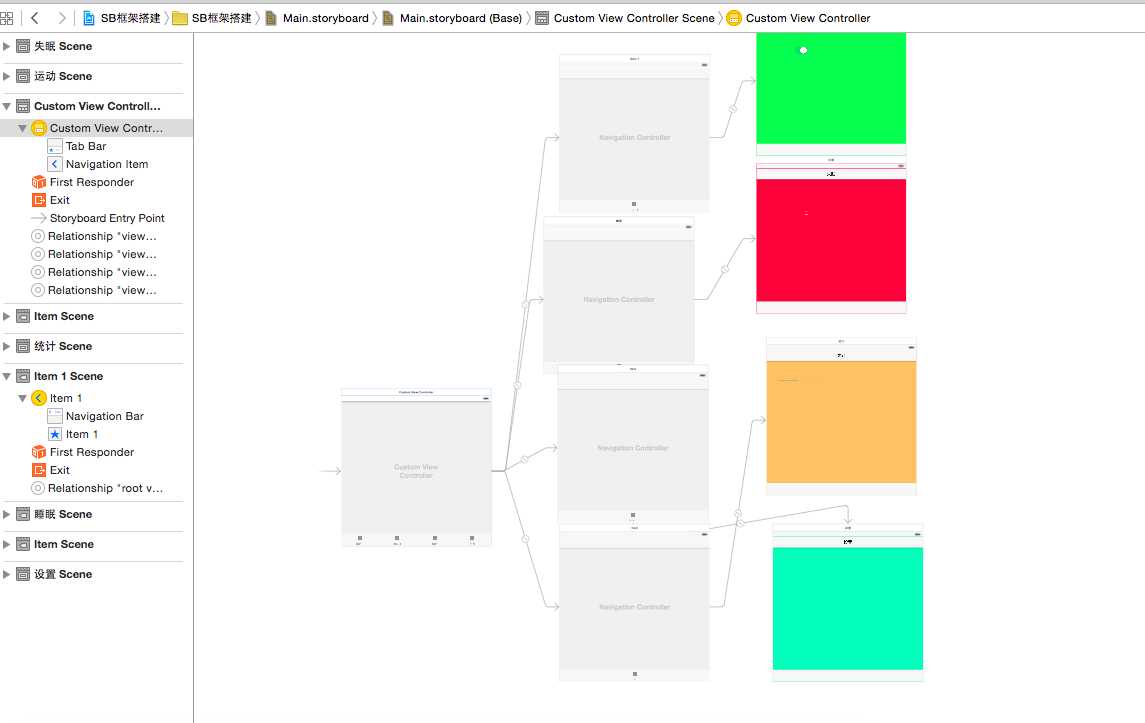
1.storyBoard中拖拽几个页面
file:///Users/dingyunfei/Desktop/屏幕快照%202015-11-30%20下午10.45.08.png

2.创建CustomViewController类代码如下
//
// CustomViewController.h
// SB框架搭建
//
// Created by 丁云飞 on 15/11/26.
// Copyright © 2015年 DLS. All rights reserved.
//
#import <UIKit/UIKit.h>
@interface CustomViewController : UITabBarController
@end
#import "CustomViewController.h"
#import "CustabBar.h"
//stroyBoard里面的四个控制器
#import "SportsViewController.h"
#import "SettingViewController.h"
#import "SleepingViewController.h"
#import "StasticViewController.h"
@interface CustomViewController ()<DSTabbarItemViewDelegate>
@end
@implementation CustomViewController
- (void)viewDidLoad {
[super viewDidLoad];
[self.tabBar removeFromSuperview];
CustabBar *tabBar = [[CustabBar alloc] initWithFrame:CGRectMake(0, self.view.frame.size.height - 49, 320, 49)];
tabBar.delegate = self;
// tabBar.frame = CGRectMake(0, self.view.frame.size.height - 49, 320, 49);
[self.view addSubview:tabBar];
}
#pragma mark -- DSTabBarItemViewDelegate
/**
* 切换控制器
*
* @param tag 控制器
*/
-(void)didSelectedTabbarItem:(NSInteger)tag {
self.selectedIndex = tag-1;
}
//自定义tabBar
#import <UIKit/UIKit.h>
#import "cusbutton.h"
@class CustabBar;
@protocol DSTabbarItemViewDelegate <NSObject>
//切换控制器
-(void)didSelectedTabbarItem:(NSInteger)tag;
@end
@interface CustabBar : UIView
{
// NSInteger select;
}
@property (nonatomic, unsafe_unretained)id<DSTabbarItemViewDelegate>delegate;
/**
* selectBtn记录当前点击的button。
*/
@property (nonatomic, weak)UIButton*selectBtn;
@end
#import "CustabBar.h"
@implementation CustabBar
-(instancetype)initWithFrame:(CGRect)frame{
self = [super initWithFrame:frame];
if (self) {
[self addBtn];
// self.backgroundColor = [UIColor greenColor];
}
return self;
}
-(void)addBtn{
static NSString *imageName = nil;
static NSString *selImageName = nil;
CGFloat btnW = self.frame.size.width/4;
CGFloat btnH = 49;
CGFloat btnX = 0;
CGFloat btnY = self.frame.size.height - 49;
for (int i = 0; i < 4; i++)
{
imageName = [NSString stringWithFormat:@"0%d_nor",i + 1];
selImageName = [NSString stringWithFormat:@"0%d_pre",i + 1];
cusbutton *btn = [cusbutton buttonWithType:UIButtonTypeCustom];
btnX = btnW *i;
btn.frame = CGRectMake(btnX, btnY, btnW, btnH);
btn.tag = i + 1;
[btn setBackgroundImage:[UIImage imageNamed:imageName] forState:UIControlStateNormal];
[btn setBackgroundImage:[UIImage imageNamed:selImageName] forState:UIControlStateSelected];
[btn addTarget:self action:@selector(btnClick:) forControlEvents:UIControlEventTouchUpInside];
[self addSubview:btn];
//设置第一个为默认控制器
if (i == 0) {
[self btnClick:btn];
//此处不能用btn.selected = YES,点击其他按钮时默认的按钮没有取消。
}
}
}
-(void)btnClick:(cusbutton *)btn{
//_selectBtn.selected = NO上一个按钮取消
_selectBtn.selected = NO;
btn.selected = YES;
_selectBtn = btn;
//处理点击事件
[self.delegate didSelectedTabbarItem:btn.tag];
}
//布局时调用。
-(void)layoutSubviews{
CGFloat btnW = self.frame.size.width/4;
CGFloat btnH = 49;
CGFloat btnX = 0;
CGFloat btnY = self.frame.size.height - 49;
for (int i = 0; i < self.subviews.count; i ++) {
btnX = btnW *i;
cusbutton *btn = (cusbutton *)self.subviews[i];
btn.frame = CGRectMake(btnX, btnY, btnW, btnH);
}
}
//自定义BUtton
#import <UIKit/UIKit.h>
@interface cusbutton : UIButton
@end
#import "cusbutton.h"
@implementation cusbutton
//重写高亮代码。不让按钮有高亮状态
-(void)setHighlighted:(BOOL)highlighted{
//highlighted = NO;
}
@end
标签:
原文地址:http://www.cnblogs.com/DLS520/p/5008749.html