标签:
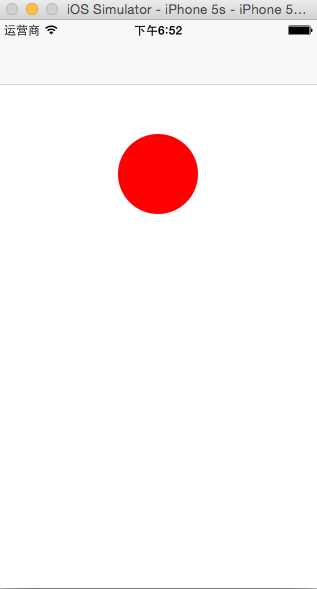
一:效果图
效果描述:点击相框,将手机摄像头拍摄的图片或者本地图片设置为我们定义的头像
功能控件:UIImageView , UIAlertController , UITapGestureRecognizer , UIImagePickerController
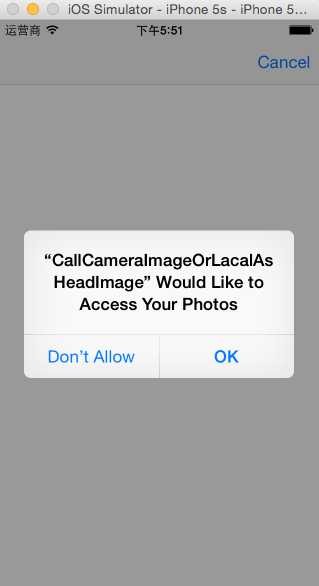
首次运行的时候会提醒是否允许程序访问手机相册,点击ok


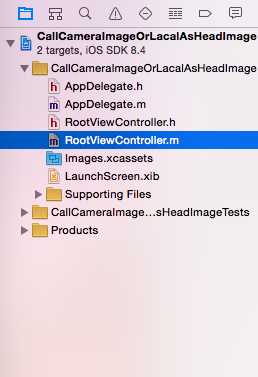
二:工程图

三:代码区
AppDelegate.h
#import <UIKit/UIKit.h>

@interface AppDelegate : UIResponder <UIApplicationDelegate>

@property (retain, nonatomic) UIWindow *window;


@end
AppDelegate.m
#import "AppDelegate.h"
#import "RootViewController.h"

@interface AppDelegate ()

@end

@implementation AppDelegate
- (void)dealloc
{
    self.window = nil;

    [super dealloc];
}

- (BOOL)application:(UIApplication *)application didFinishLaunchingWithOptions:(NSDictionary *)launchOptions {
    self.window = [[[UIWindow alloc] initWithFrame:[[UIScreen mainScreen] bounds]] autorelease];
    // Override point for customization after application launch.
    RootViewController *rootVC = [RootViewController alloc];

    UINavigationController *navigationVC = [[UINavigationController alloc] initWithRootViewController:rootVC];

    self.window.rootViewController = navigationVC;

    [rootVC release];

    [navigationVC release];

    self.window.backgroundColor = [UIColor whiteColor];
    [self.window makeKeyAndVisible];
    return YES;
}

@end
RootViewController.h
#import <UIKit/UIKit.h>

@interface RootViewController : UIViewController

@end
RootViewController.m
#import "RootViewController.h"

@interface RootViewController ()<UINavigationControllerDelegate , UIImagePickerControllerDelegate> // 查看API文档知道,需要遵循这两个代理

// 创建属性,为了让每个对象都能访问到
@property (nonatomic , retain)UIImageView *headImage;

@end

@implementation RootViewController

// 重写dealloc
- (void)dealloc
{
    self.headImage = nil;

    [super dealloc];
}

- (void)viewDidLoad {
    [super viewDidLoad];
    // Do any additional setup after loading the view.

    // 调用创建界面的对象
    [self showHeadImage];

    // 调用创建手势的对象
    [self tapGesture];
}

#pragma mark - 创建界面
- (void)showHeadImage {

    self.headImage = [[UIImageView alloc] initWithFrame:CGRectMake(120, 50, 80, 80)];

    _headImage.backgroundColor = [UIColor redColor]; // 验证,查看位置

    // 创建圆角
    _headImage.layer.cornerRadius = 40;

    // 切除多余的部分,如果切除,那么传进来的图片显示方式是正方形
    _headImage.clipsToBounds = YES;

    // 打开图片用户交互,不然点击图片将会没有反应
    _headImage.userInteractionEnabled = YES;

    [self.view addSubview:_headImage];

    [_headImage release];

}

#pragma mark - 创建轻拍手势
- (void)tapGesture {

    UITapGestureRecognizer *tap = [[UITapGestureRecognizer alloc] initWithTarget:self action:@selector(handleTap:)];

    // 将手势添加到_headImage视图上面
    [self.headImage addGestureRecognizer:tap];

    [tap release];
}


#pragma mark - 关联轻拍手势事件
- (void)handleTap:(UITapGestureRecognizer *)sender {

    // 创建警示视图控制器
    UIAlertController *alertController = [UIAlertController alertControllerWithTitle:@"提示" message:@"请选择图片来源" preferredStyle:(UIAlertControllerStyleActionSheet)];

    // 给警示图视图控制器添加控件
    UIAlertAction *camera = [UIAlertAction actionWithTitle:@"相机" style:(UIAlertActionStyleDefault) handler:^(UIAlertAction *action) {

        // 调用调用摄像头的方法
        [self callLocalCamera];

    }];

    UIAlertAction *photo = [UIAlertAction actionWithTitle:@"相册" style:(UIAlertActionStyleDefault) handler:^(UIAlertAction *action) {

        // 调用调用本地相册的方法
        [self callLocalPhotoAlbum];
    }];

    UIAlertAction *cancel = [UIAlertAction actionWithTitle:@"取消" style:(UIAlertActionStyleCancel) handler:^(UIAlertAction *action) {

    }];

    // 将控件添加到警示视图控制器上面
    [alertController addAction:camera];

    [alertController addAction:photo];

    [alertController addAction:cancel];

    // 模态出警示视图控制器
    [self presentViewController:alertController animated:YES completion:nil];

    // 下面使用push的方式展示alertController: 当前页面将会消失进入下一个页面,并且上面没有按钮控件
//    [self.navigationController pushViewController:alertController animated:YES];

}

#pragma mark - 调用本地相机
- (void)callLocalCamera {

    // 判断摄像头是否可用
    // UIImagePickerController相机选择控制器
    // isCameraDeviceAvailable:(UIImagePickerControllerCameraDeviceRear):如果后置摄像头可用返回YES,为假返回NO;(检测摄像头设备是否可用)
    BOOL isAvailabel = [UIImagePickerController isCameraDeviceAvailable:(UIImagePickerControllerCameraDeviceRear)];

    if (!isAvailabel) { // 如果相机设备不可用,则isAvailbel为空,非就为真

        NSLog(@"没有找到摄像头");

        return; // 结束调用摄像头
    }

    // 摄像头可用
    // 创建图像选择控制器
    UIImagePickerController *picker = [[UIImagePickerController alloc] init];

    // 设置图片的来源
    /*
     UIImagePickerControllerSourceTypePhotoLibrary, // 显示所有的图片来源
     UIImagePickerControllerSourceTypeCamera, // 显示摄像头中拍摄的照片
     UIImagePickerControllerSourceTypeSavedPhotosAlbum // 显示相册中的图片
     */
    picker.sourceType = UIImagePickerControllerSourceTypeCamera;

    // 允不允许用户对图片进行编辑
    picker.allowsEditing = YES;

    // 设置代理,执行代理方法
    picker.delegate = self;

    // 模态出视图控制器
    [self presentViewController:picker animated:YES completion:nil];

    [picker release];

}

#pragma mark - 调用当地相册
- (void)callLocalPhotoAlbum {

    // 创建图像选择控制器
    UIImagePickerController *picker = [[UIImagePickerController alloc] init];

    // 选择图片来源
    picker.sourceType = UIImagePickerControllerSourceTypeSavedPhotosAlbum;

    // 图片是否可编辑
    picker.allowsEditing = YES;

    // 设置代理,执行代理方法
    picker.delegate = self;

    // 模态出视图控制器
    [self presentViewController:picker animated:YES completion:nil];

    // 释放
    [picker release];
}


#pragma mark - 执行代理方法,将编辑好的图片存放到_headImage上面
- (void)imagePickerController:(UIImagePickerController *)picker didFinishPickingMediaWithInfo:(NSDictionary *)info {

    //
    self.headImage.image = [info objectForKey:UIImagePickerControllerEditedImage];

    // 模态出当前视图
    [self dismissViewControllerAnimated:YES completion:nil];
}

#pragma mark - 内存警告
- (void)didReceiveMemoryWarning {
    [super didReceiveMemoryWarning];
    // Dispose of any resources that can be recreated.


}

@end
标签:
原文地址:http://www.cnblogs.com/li625317534/p/5052057.html