标签:
1.简介
本文介绍在离线环境下安装Cloudera manager和简单使用方法
2.环境
OS:CentOS 6.7
Cloudera manager版本:5.5.1
CDH版本:5.4.2
安装用户:root
资源:
10.211.55.16 xufeng-1 CM主节点,CM代理节点
10.211.55.17 xufeng-2 CM代理节点
10.211.55.18 xufeng-3 CM代理节点
3.介质准备
由于是要求在离线环境下进行安装,所以我们必须是先下载好安装所需要的所有介质。
你也可以直接从我的分享下载对应的安装包。
1.下载cm5.5.1安装介质:
wget -c -r -nd -np -k -L -A rpm http://archive.cloudera.com/cm5/redhat/6/x86_64/cm/5.5.1/RPMS/x86_64/
2.下载CDH的Parcel介质(包含CDH中的Hadoop组件):
wget http://archive.cloudera.com/cdh5/parcels/5.4.2/CDH-5.4.2-1.cdh5.4.2.p0.2-el6.parcel

wget http://archive.cloudera.com/cdh5/parcels/5.4.2/manifest.json
3.下载httpd安装rpm包,后需要用于启动httpd服务。
yum install --downloadonly --downloaddir=./ httpd
4.下载createrepo工具rpm包,后续用于yum的安装源元数据构建。
yum install --downloadonly --downloaddir=./ createrepo
5.下载安装其他cloudera manager安装过程中其他依赖rpm文件.
在安装过程中系统会提示相应的依赖工具未安装,可使用上述yum的download方法去下载相应的工具rpm包即可。
下载完毕后按照如下文件木进行存放:
[安装CM管理节点]
1.[主节点]环境初始化
1.主节点主机初始化
a.关闭selinux
/etc/selinux/config
SELINUX=disabled
b.初始化网络服务
[root@xufeng-1 rpm]# chkconfig iptables off
[root@xufeng-1 rpm]# /etc/init.d/network restart
正在关闭接口 eth0:                                        [确定]
关闭环回接口:                                             [确定]
弹出环回接口:                                             [确定]
弹出界面 eth0:
正在决定 eth0 的 IP 信息...完成。
                                                           [确定]
[root@xufeng-1 rpm]# init 6
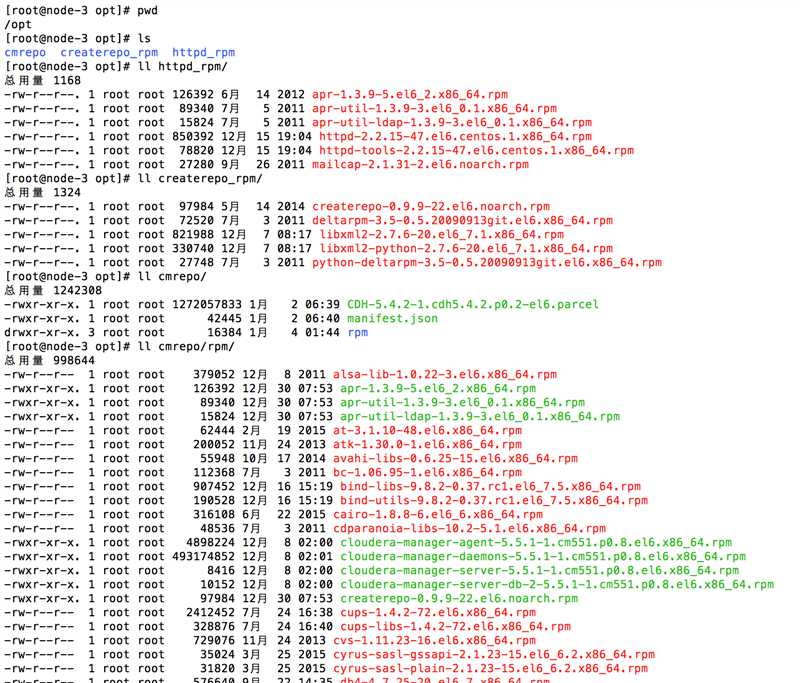
c.安装createrepo工具
[root@xufeng-1 createrepo_rpm]# ls
createrepo-0.9.9-22.el6.noarch.rpm           libxml2-2.7.6-20.el6_7.1.x86_64.rpm         python-deltarpm-3.5-0.5.20090913git.el6.x86_64.rpm
deltarpm-3.5-0.5.20090913git.el6.x86_64.rpm  libxml2-python-2.7.6-20.el6_7.1.x86_64.rpm
[root@xufeng-1 createrepo_rpm]# rpm -ivh * --force
warning: createrepo-0.9.9-22.el6.noarch.rpm: Header V3 RSA/SHA1 Signature, key ID c105b9de: NOKEY
Preparing...                ########################################### [100%]
   1:libxml2                ########################################### [ 20%]
   2:libxml2-python         ########################################### [ 40%]
   3:deltarpm               ########################################### [ 60%]
   4:python-deltarpm        ########################################### [ 80%]
   5:createrepo             ########################################### [100%]
[root@xufeng-1 createrepo_rpm]#
d.安装httpd服务
[root@xufeng-1 httpd_rpm]# ls
apr-1.3.9-5.el6_2.x86_64.rpm         apr-util-ldap-1.3.9-3.el6_0.1.x86_64.rpm  httpd-tools-2.2.15-47.el6.centos.1.x86_64.rpm
apr-util-1.3.9-3.el6_0.1.x86_64.rpm  httpd-2.2.15-47.el6.centos.1.x86_64.rpm   mailcap-2.1.31-2.el6.noarch.rpm
[root@xufeng-1 httpd_rpm]# rpm -ivh *
warning: apr-1.3.9-5.el6_2.x86_64.rpm: Header V3 RSA/SHA1 Signature, key ID c105b9de: NOKEY
Preparing...                ########################################### [100%]
   1:apr                    ########################################### [ 17%]
   2:apr-util               ########################################### [ 33%]
   3:apr-util-ldap          ########################################### [ 50%]
   4:httpd-tools            ########################################### [ 67%]
   5:mailcap                ########################################### [ 83%]
   6:httpd                  ########################################### [100%]
[root@xufeng-1 httpd_rpm]#
2.[主节点]搭建yum安装源
后续无论是节点发现还是hadoop安装等都需要一个yum安装源和httpd服务来负责将clouderamanager和cdh内容进行发布。
a.创建安装源元数据:
[root@xufeng-1 rpm]# pwd
/opt/cmrepo/rpm
[root@xufeng-1 rpm]# createrepo .
Spawning worker 0 with 170 pkgs
Workers Finished
Gathering worker results

Saving Primary metadata
Saving file lists metadata
Saving other metadata
Generating sqlite DBs
Sqlite DBs complete
执行完毕后在路径下生成repodata文件夹,即为元数据
b.将文件移动到特定目录,确保可以使用http协议进行访问
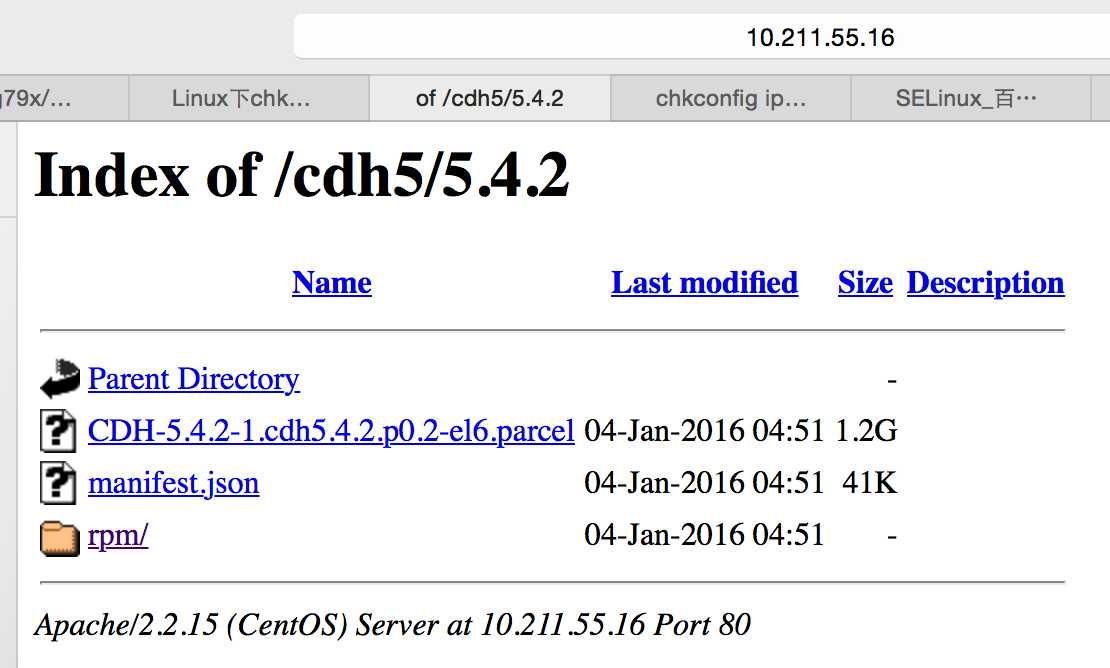
[root@xufeng-1 html]# mkdir -p /var/www/html/cdh5/5.4.2
[root@xufeng-1 html]# ls
cdh5
[root@xufeng-1 html]# cp /opt/
cmrepo/         createrepo_rpm/ httpd_rpm/
[root@xufeng-1 html]# cp -r /opt/cmrepo/* /var/www/html/cdh5/5.4.2/
[root@xufeng-1 html]# ls /var/www/html/cdh5/5.4.2/
CDH-5.4.2-1.cdh5.4.2.p0.2-el6.parcel  manifest.json  rpm
[root@xufeng-1 html]# chmod -R ugo+rX /var/www/html/
c.启动httpd服务
[root@xufeng-1 html]# service httpd start
Starting httpd: httpd: Could not reliably determine the server‘s fully qualified domain name, using 10.211.55.16 for ServerName
                                                           [  OK  ]
[root@xufeng-1 html]# chkconfig httpd on
d.在浏览器中输入<ip>/var/www/html/cdh5/5.4.2/ 你应该能够看到如下页面:
e.设置yum安装源:
由于是离线环境我们并不需要其他在线安装源,删除:
[root@xufeng-1 html]# rm -rf /etc/yum.repos.d/*
增加自建的yum安装源:
[root@xufeng-1 html]# cat /etc/yum.repos.d/myrepo.repo
[myrepo]
name=myrepo
baseurl=http://10.211.55.16/cdh5/5.4.2/rpm/
enabled=1
gpgcheck=0
f.使用自建yum安装源进行ntpd服务安装
[root@xufeng-1 rpm]# yum install ntp
[root@xufeng-1 rpm]# service ntpd start
Starting ntpd:                                             [  OK  ]
[root@xufeng-1 rpm]# chkconfig ntpd on
3.[主节点]cloudera manager 安装开始
1.安装jdk
yum install oracle-j2sdk1.7
2.安装cloudera manager管理器服务
yum install cloudera-manager-daemons cloudera-manager-server
3.安装内置数据库
yum install cloudera-manager-server-db-2
4.启动内置数据库
[root@xufeng-1 rpm]# service cloudera-scm-server-db start
5.启动Cloudera管理服务
[root@xufeng-1 rpm]# service cloudera-scm-server start
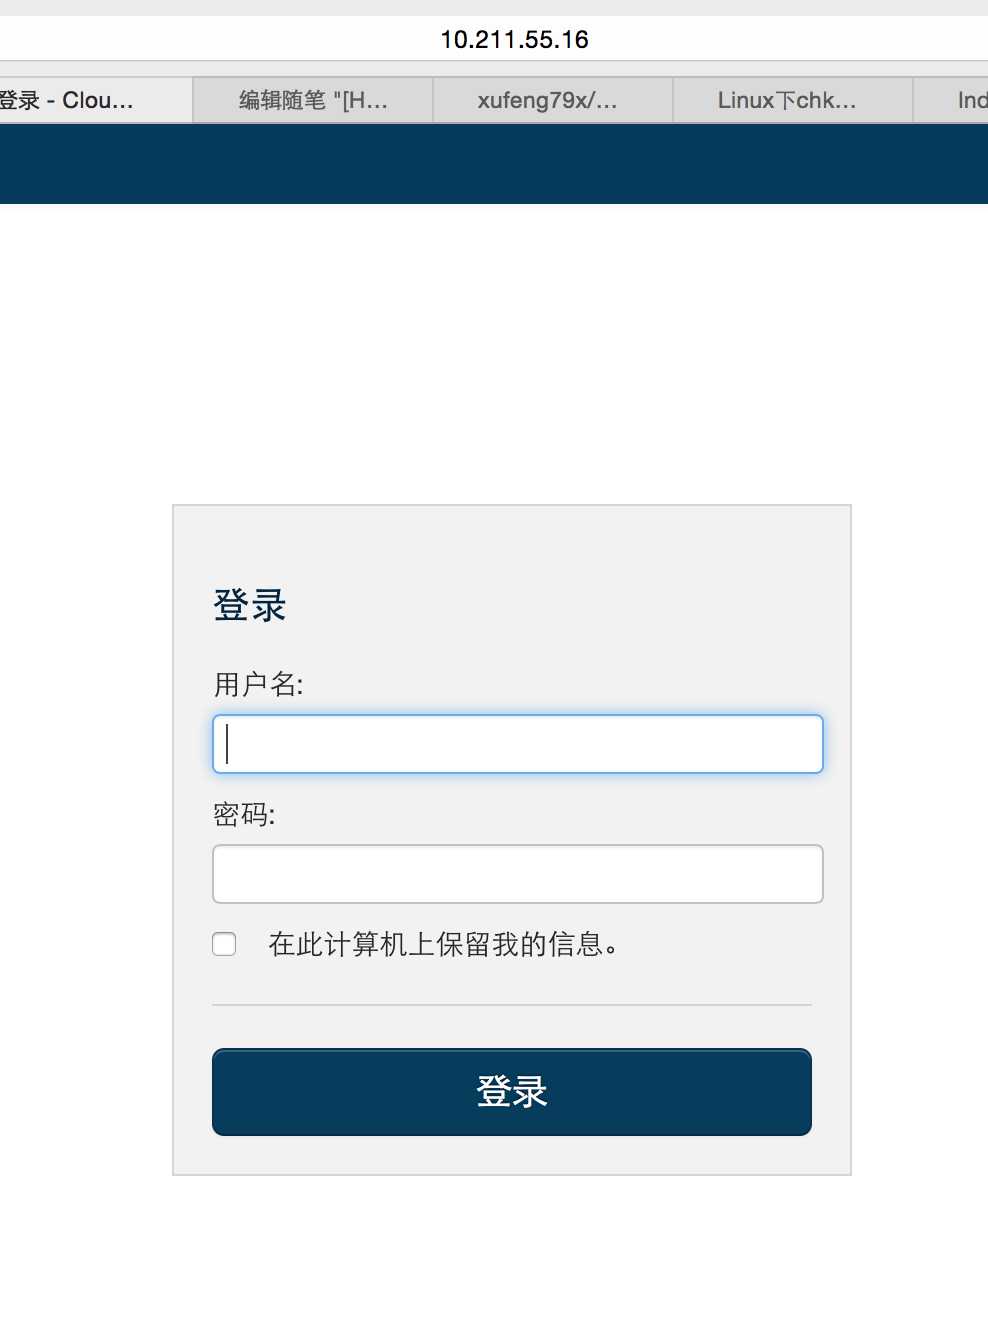
上述完成后即可访问管理页面,输入http://<ip>:7180
???? [安装CDH集群]
1.登陆集群
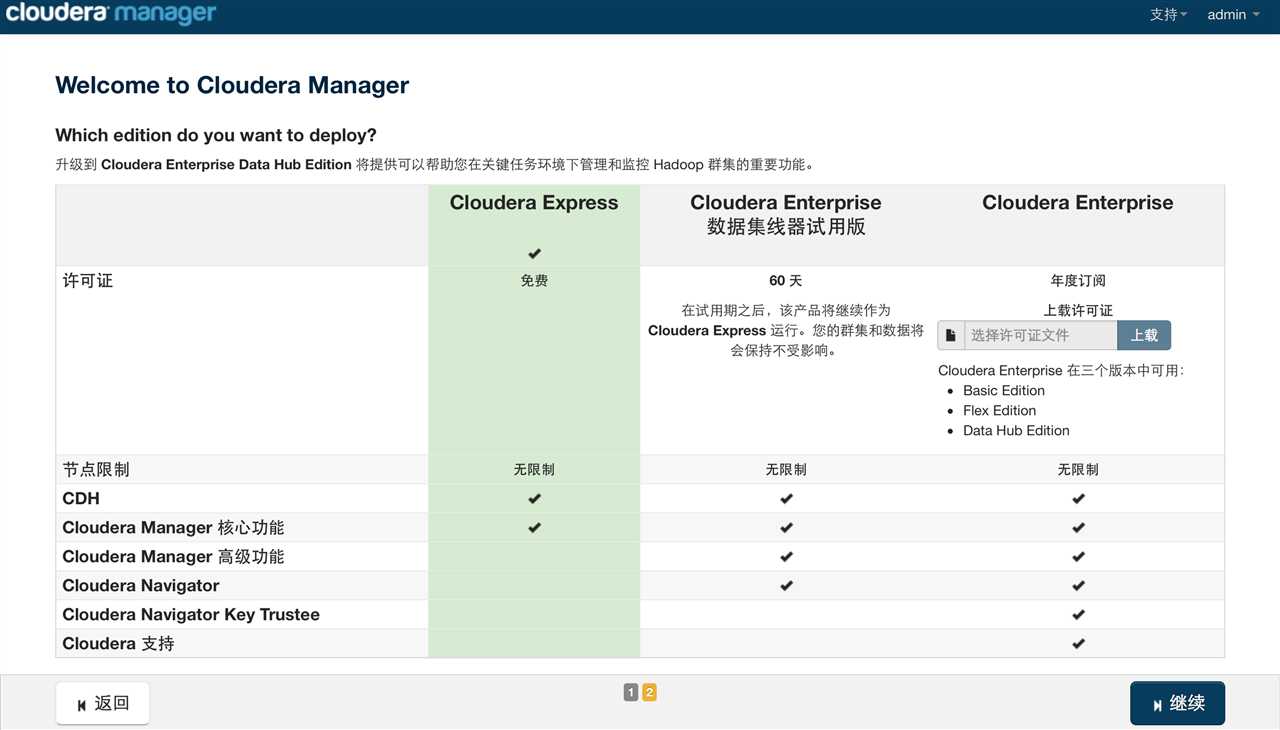
使用默认的admin/admin用户名和密码登陆管理服务,使用免费版本进行测试。
2.集群的资源首先是服务器,通过ip来发现节点
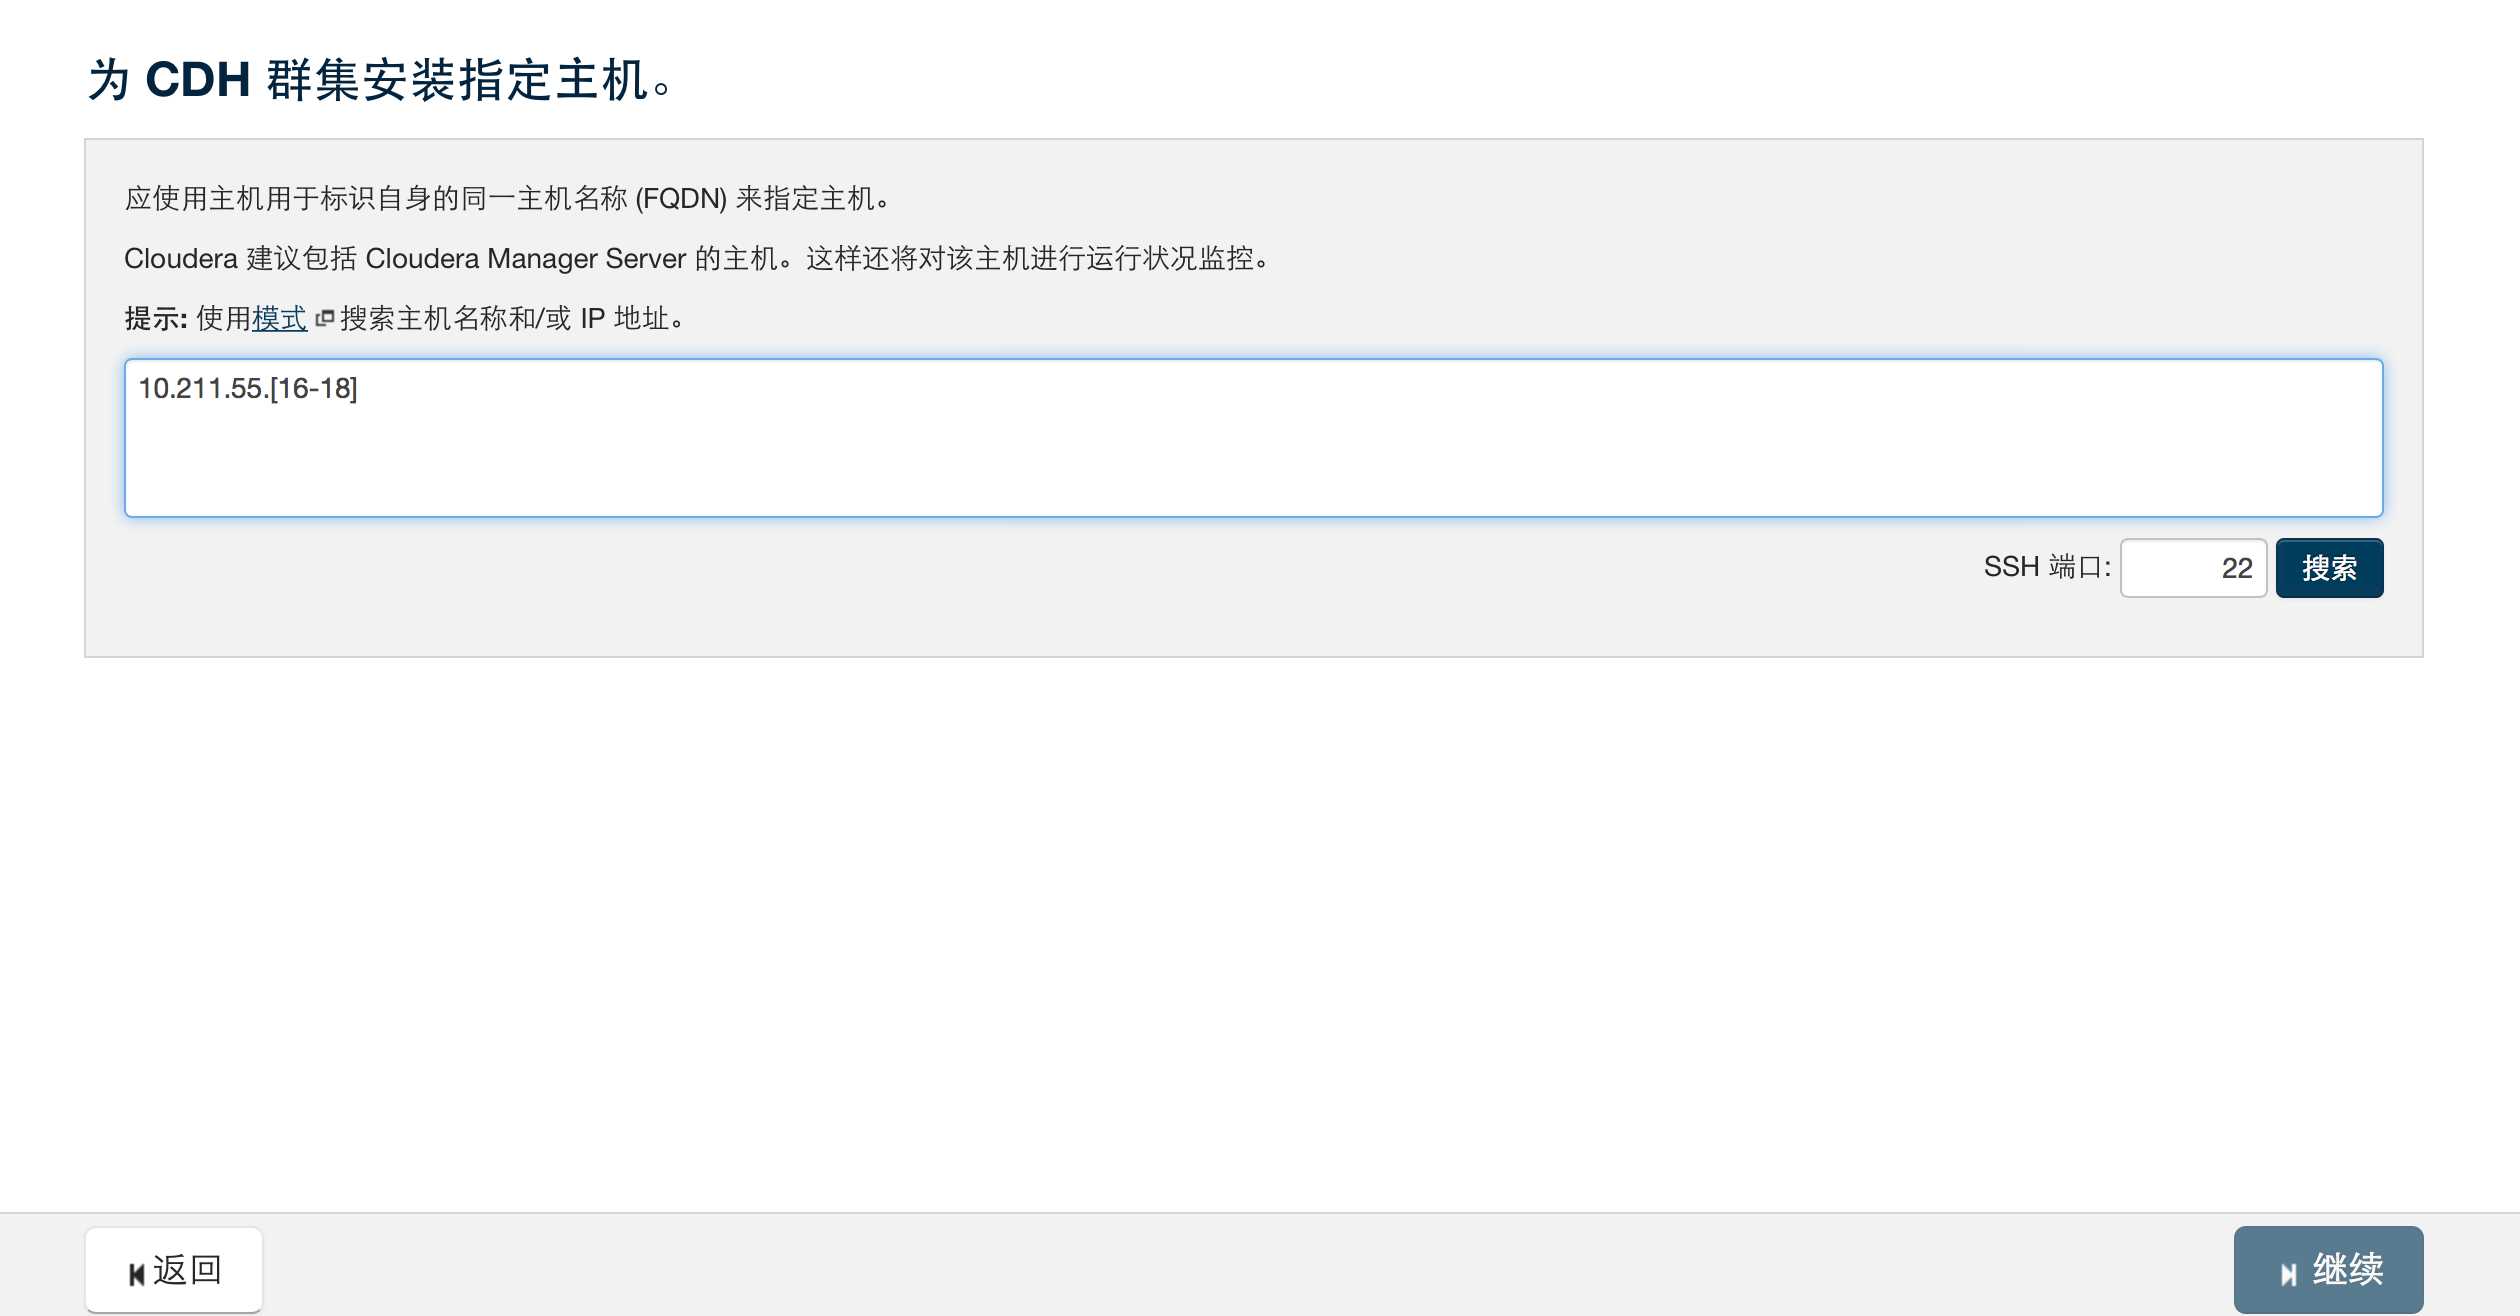
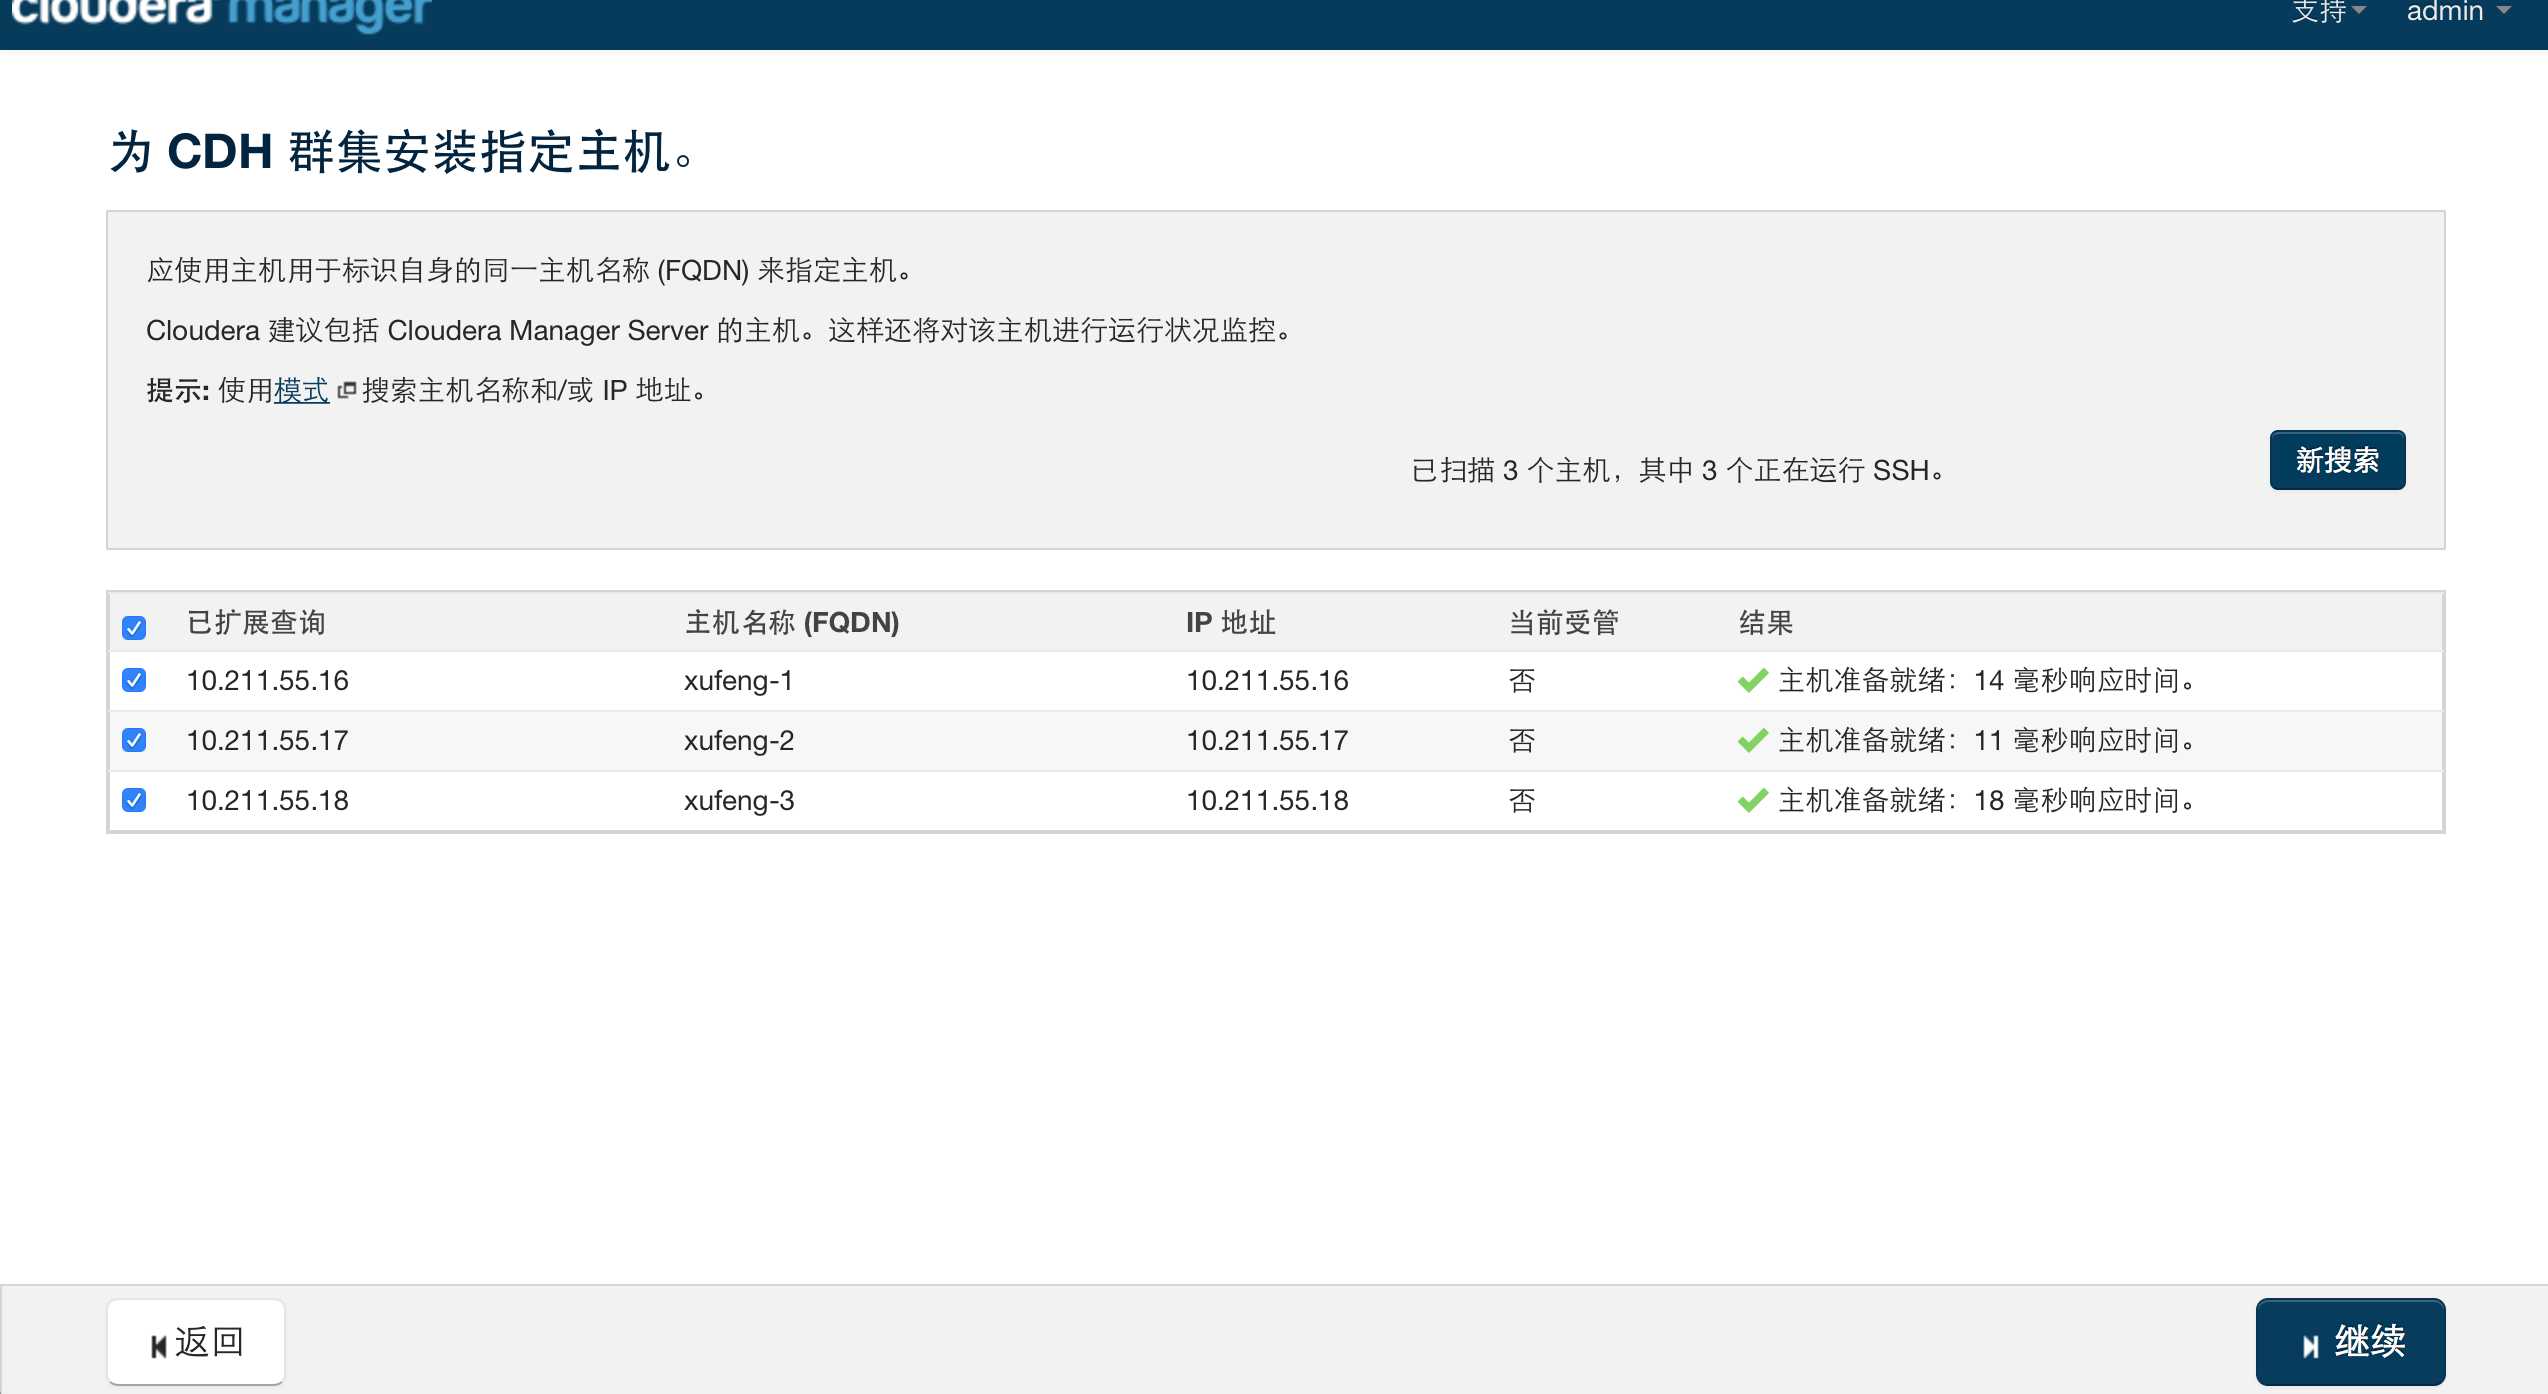
3.节点发现后为了后续让manager统一管理需要在被发现的节点上进行代理和cdh发行包的安装。
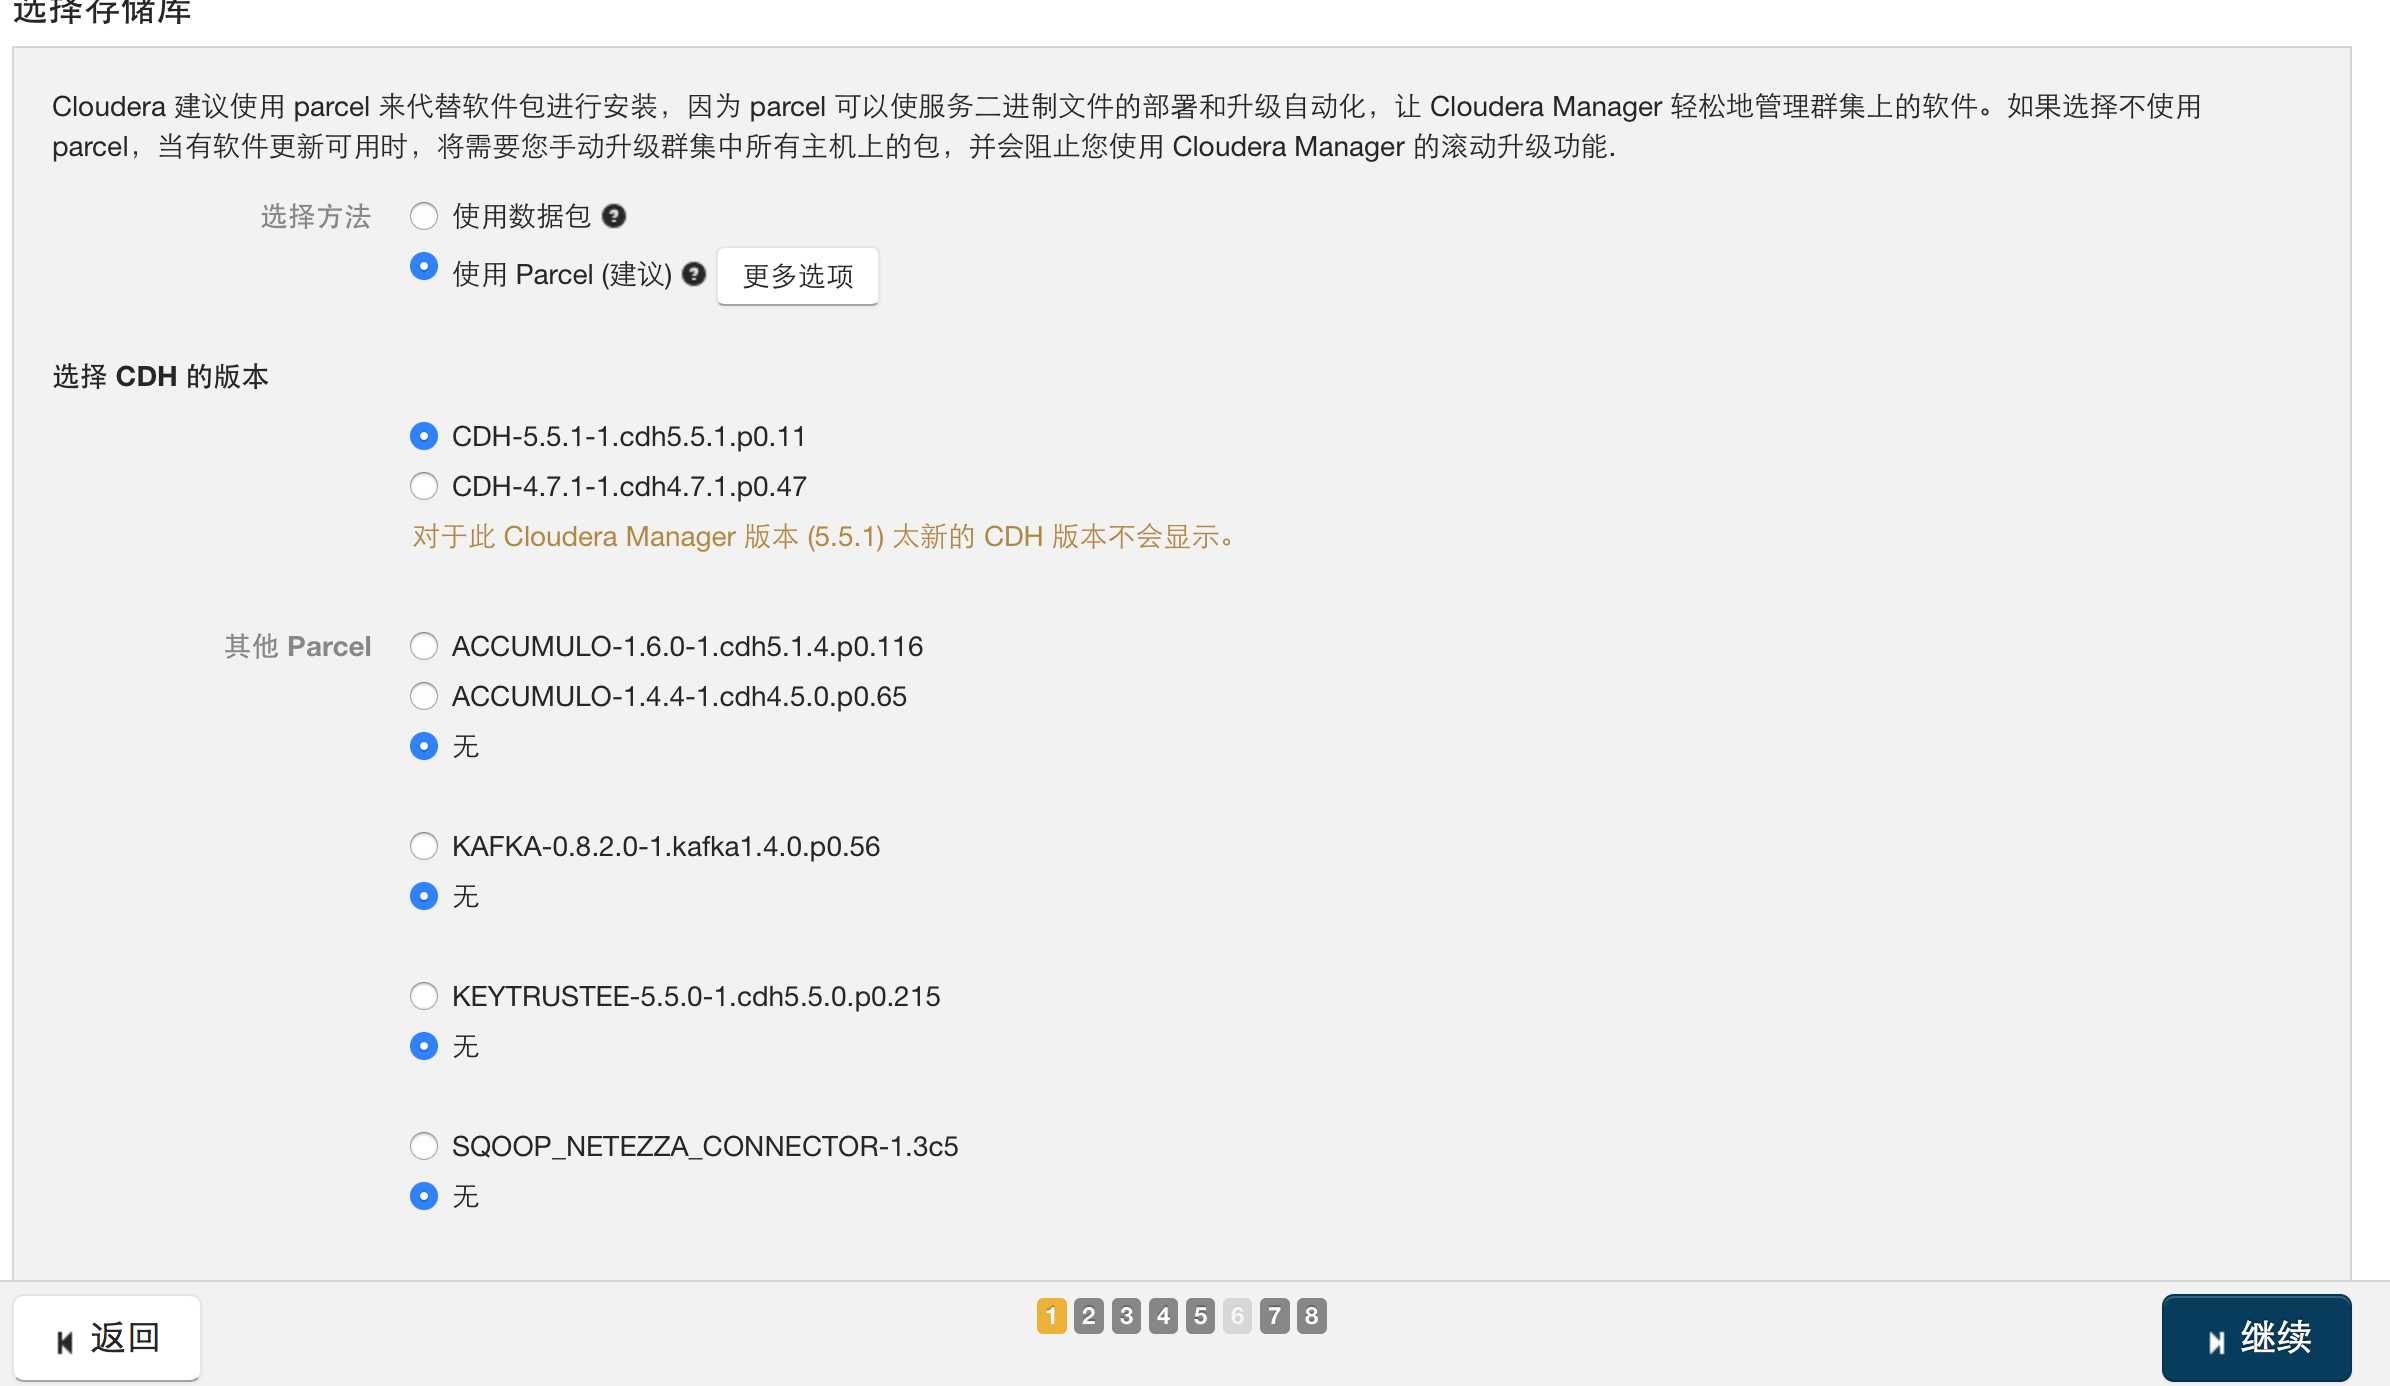
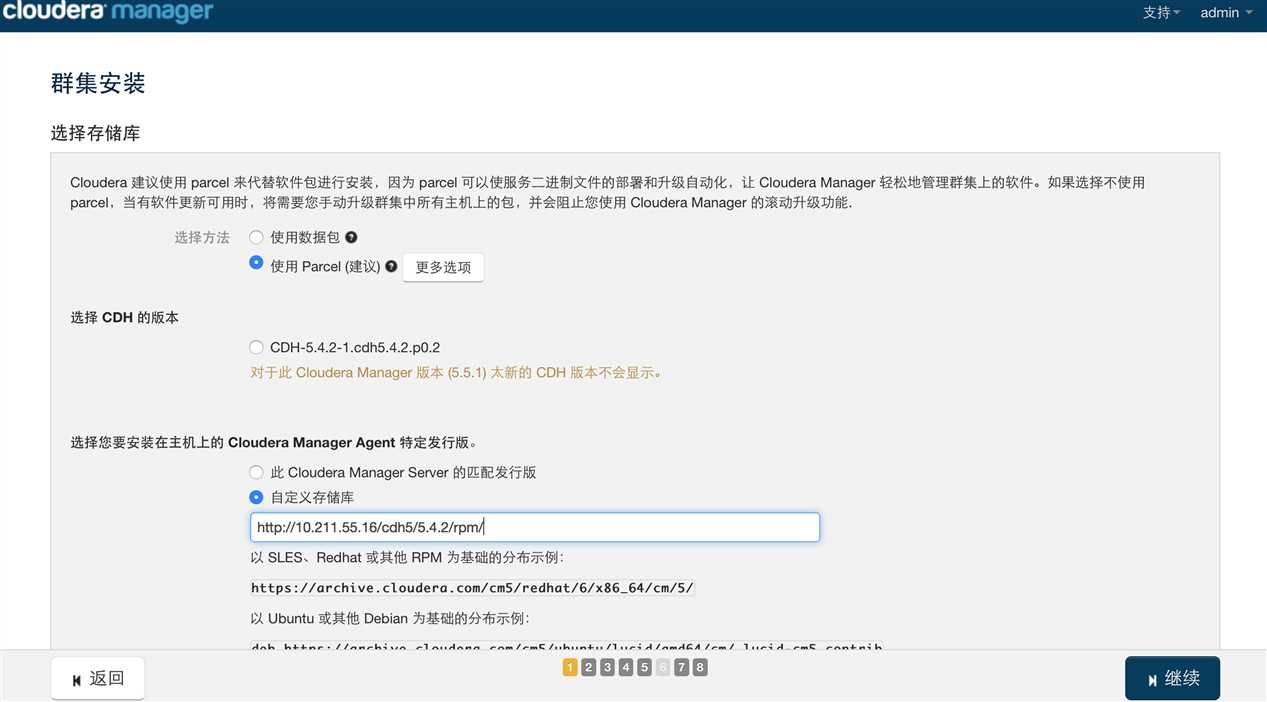
4.上述罗列很很多发行版本,但是我们需要安装指定版本的cdh,且这个版本我们已经放在httpd上了。
在上述步骤点击【更多选项】,进入CDH发行包的地址指定,按照下述图片进行设定。
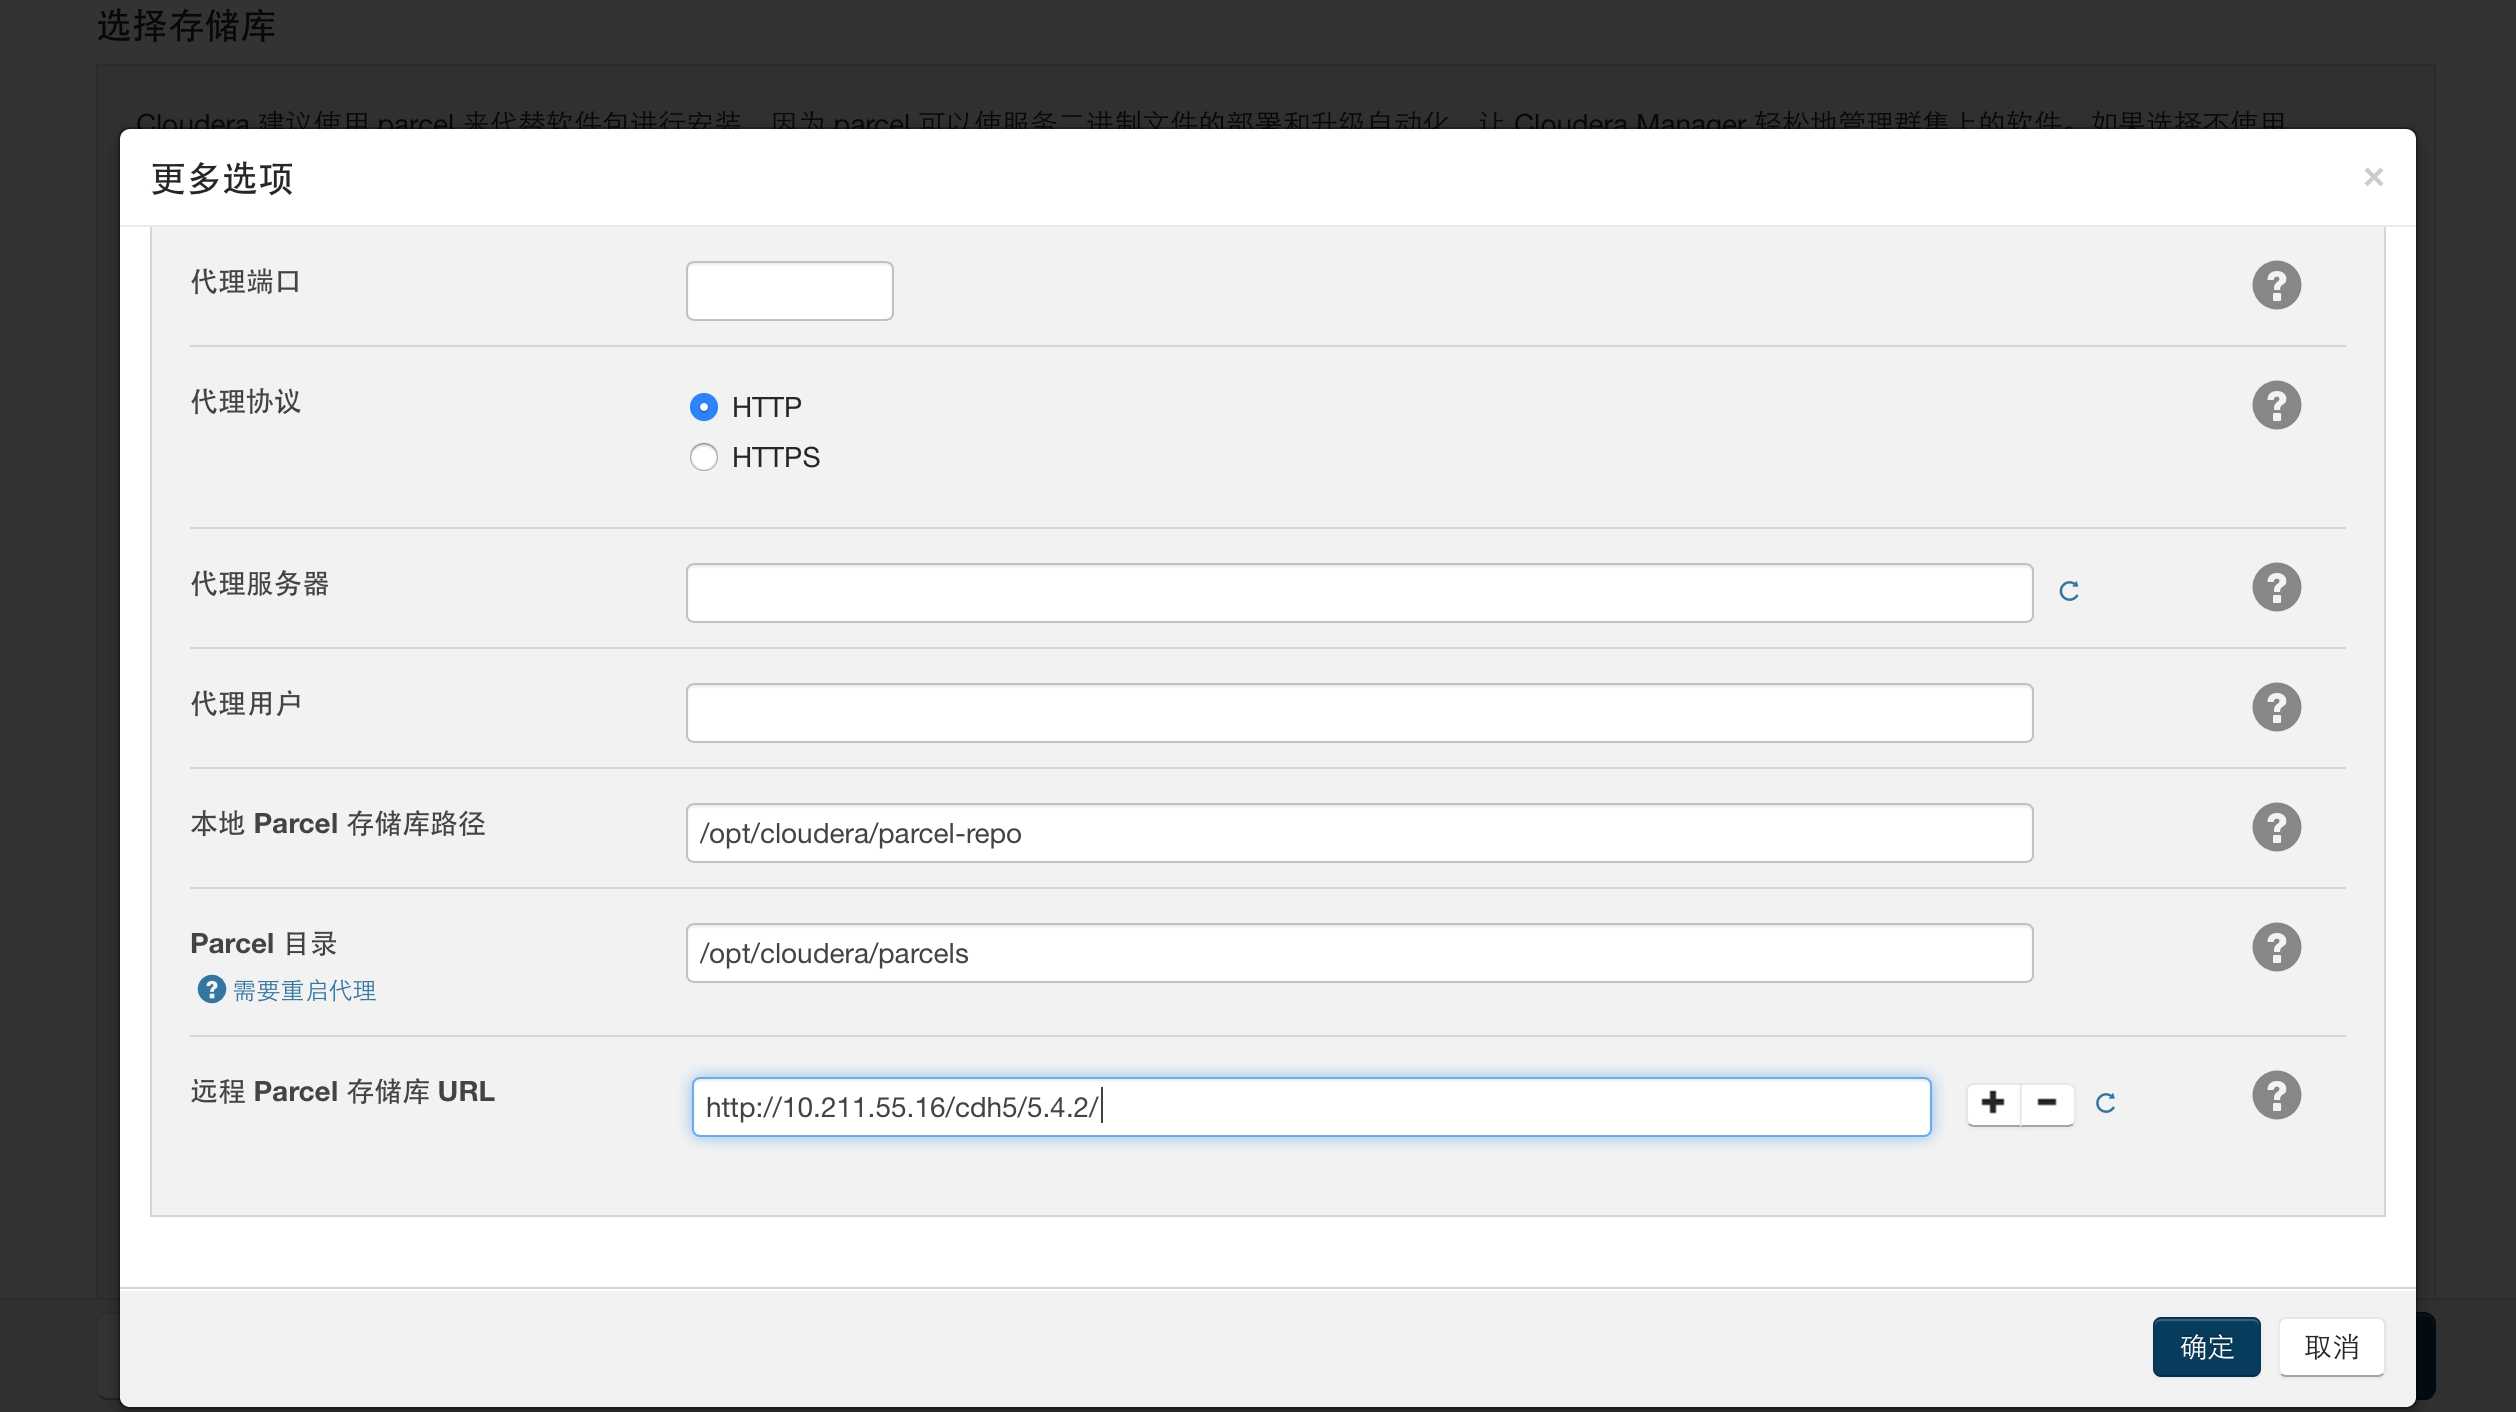
除了指定了CDH的版本库外,我们也需要指定代理的发行路径,如下图:
5.用户权限说明
6.集群中被发现待安装的节点其相同用户必须具有相同密码:

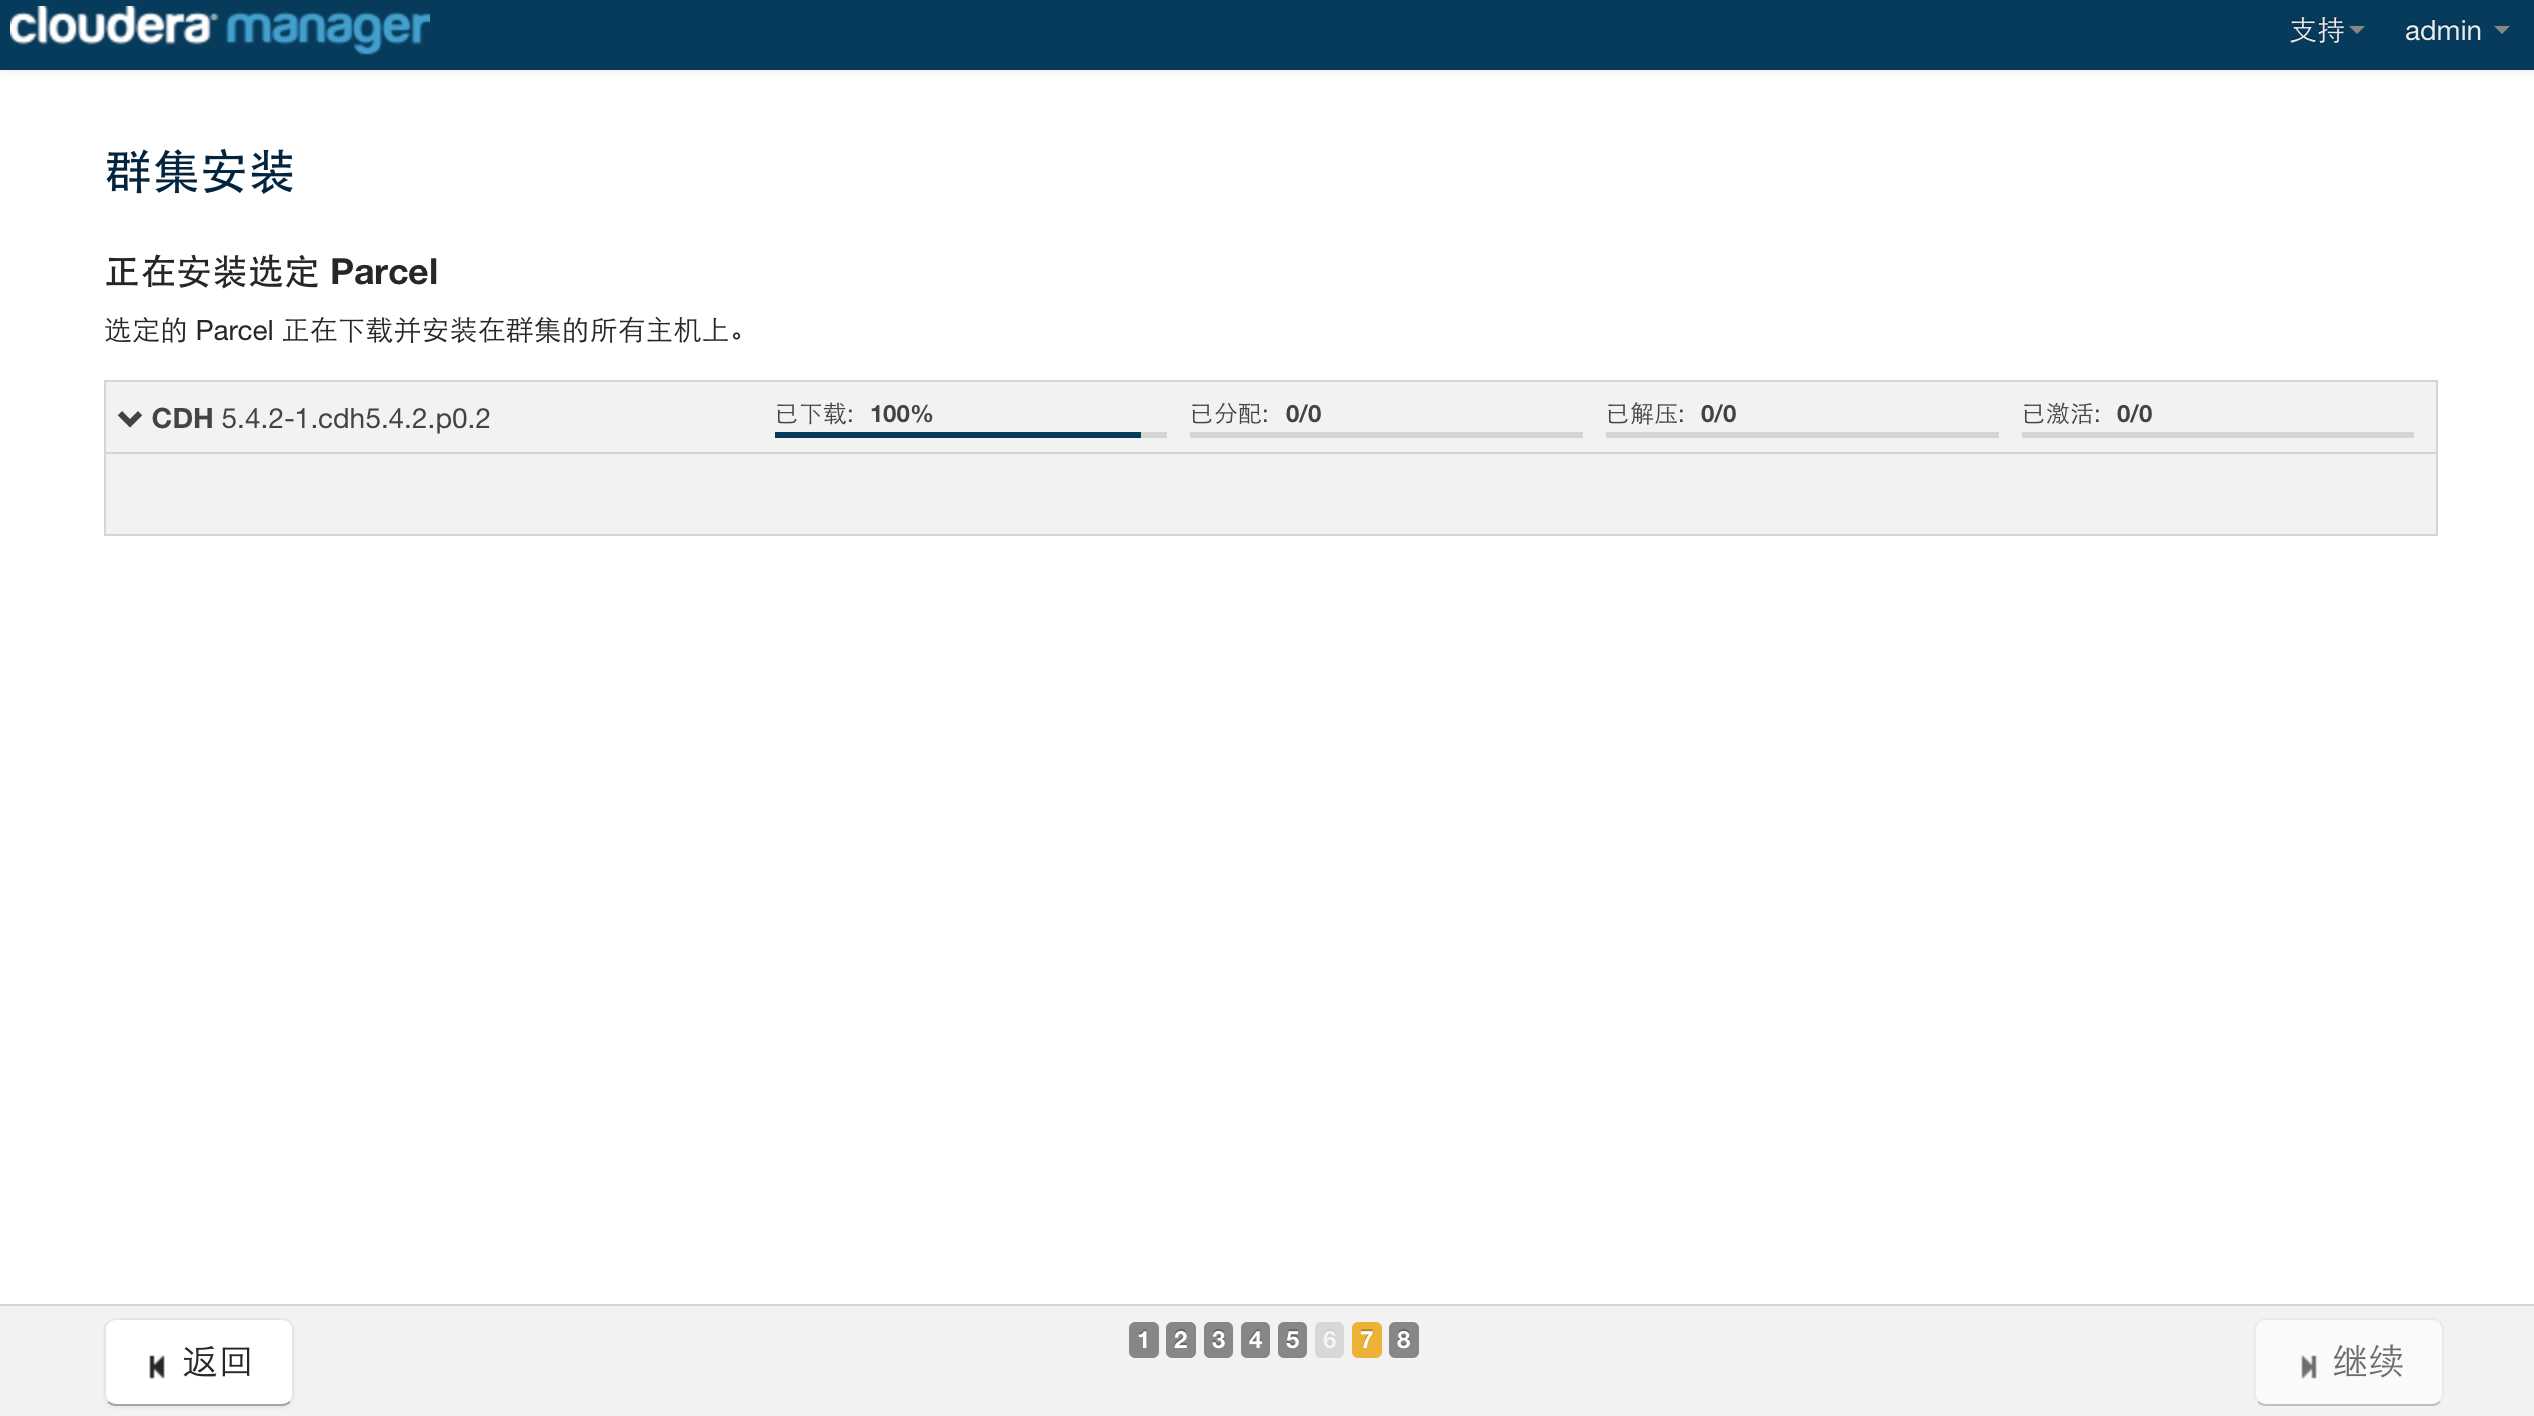
7.设定完毕访问信息后,manager将为被发现节点进行初始化安装,包括安装jdk,agent和parcl的cdh包等。

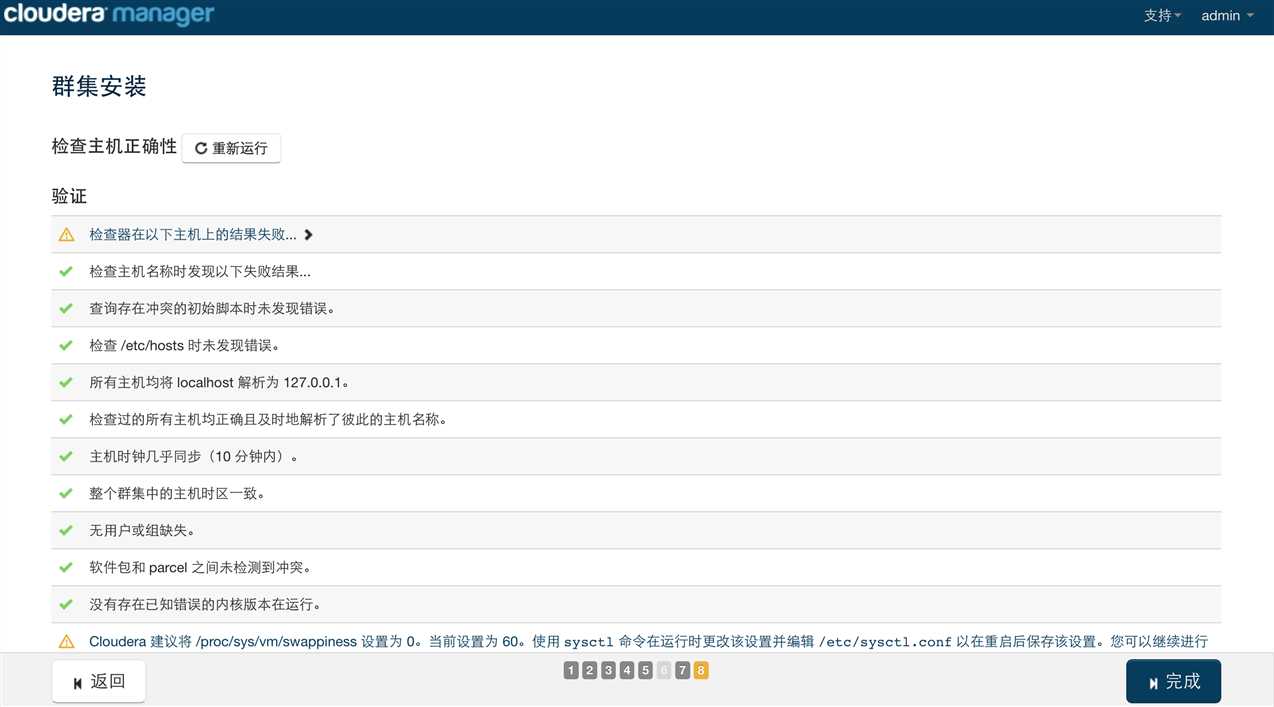
8.节点初始化安装完毕后manager将告知用户此时节点中存在的问题需要去解决。
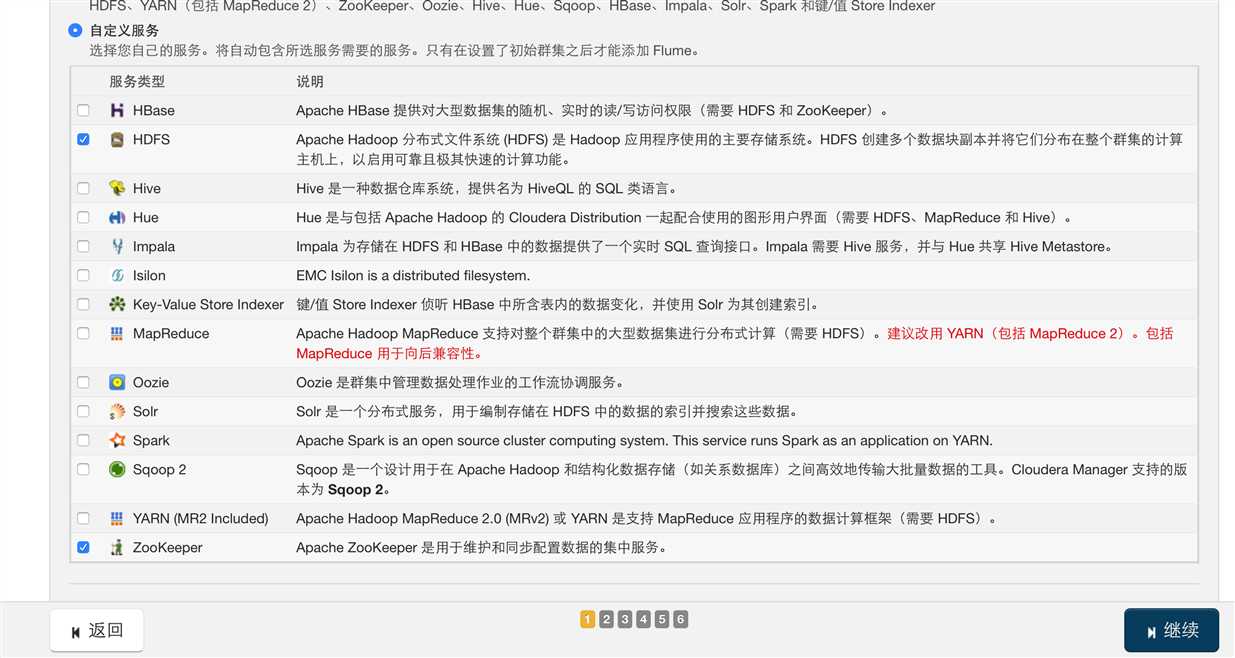
10.目前节点资源已经准备就绪了,那么我们就开始在这些节点上部署我们的hadoop,由于我使用的是运行于mac上的虚拟机,所以
只选择安装了zookeeeper和hdfs服务。
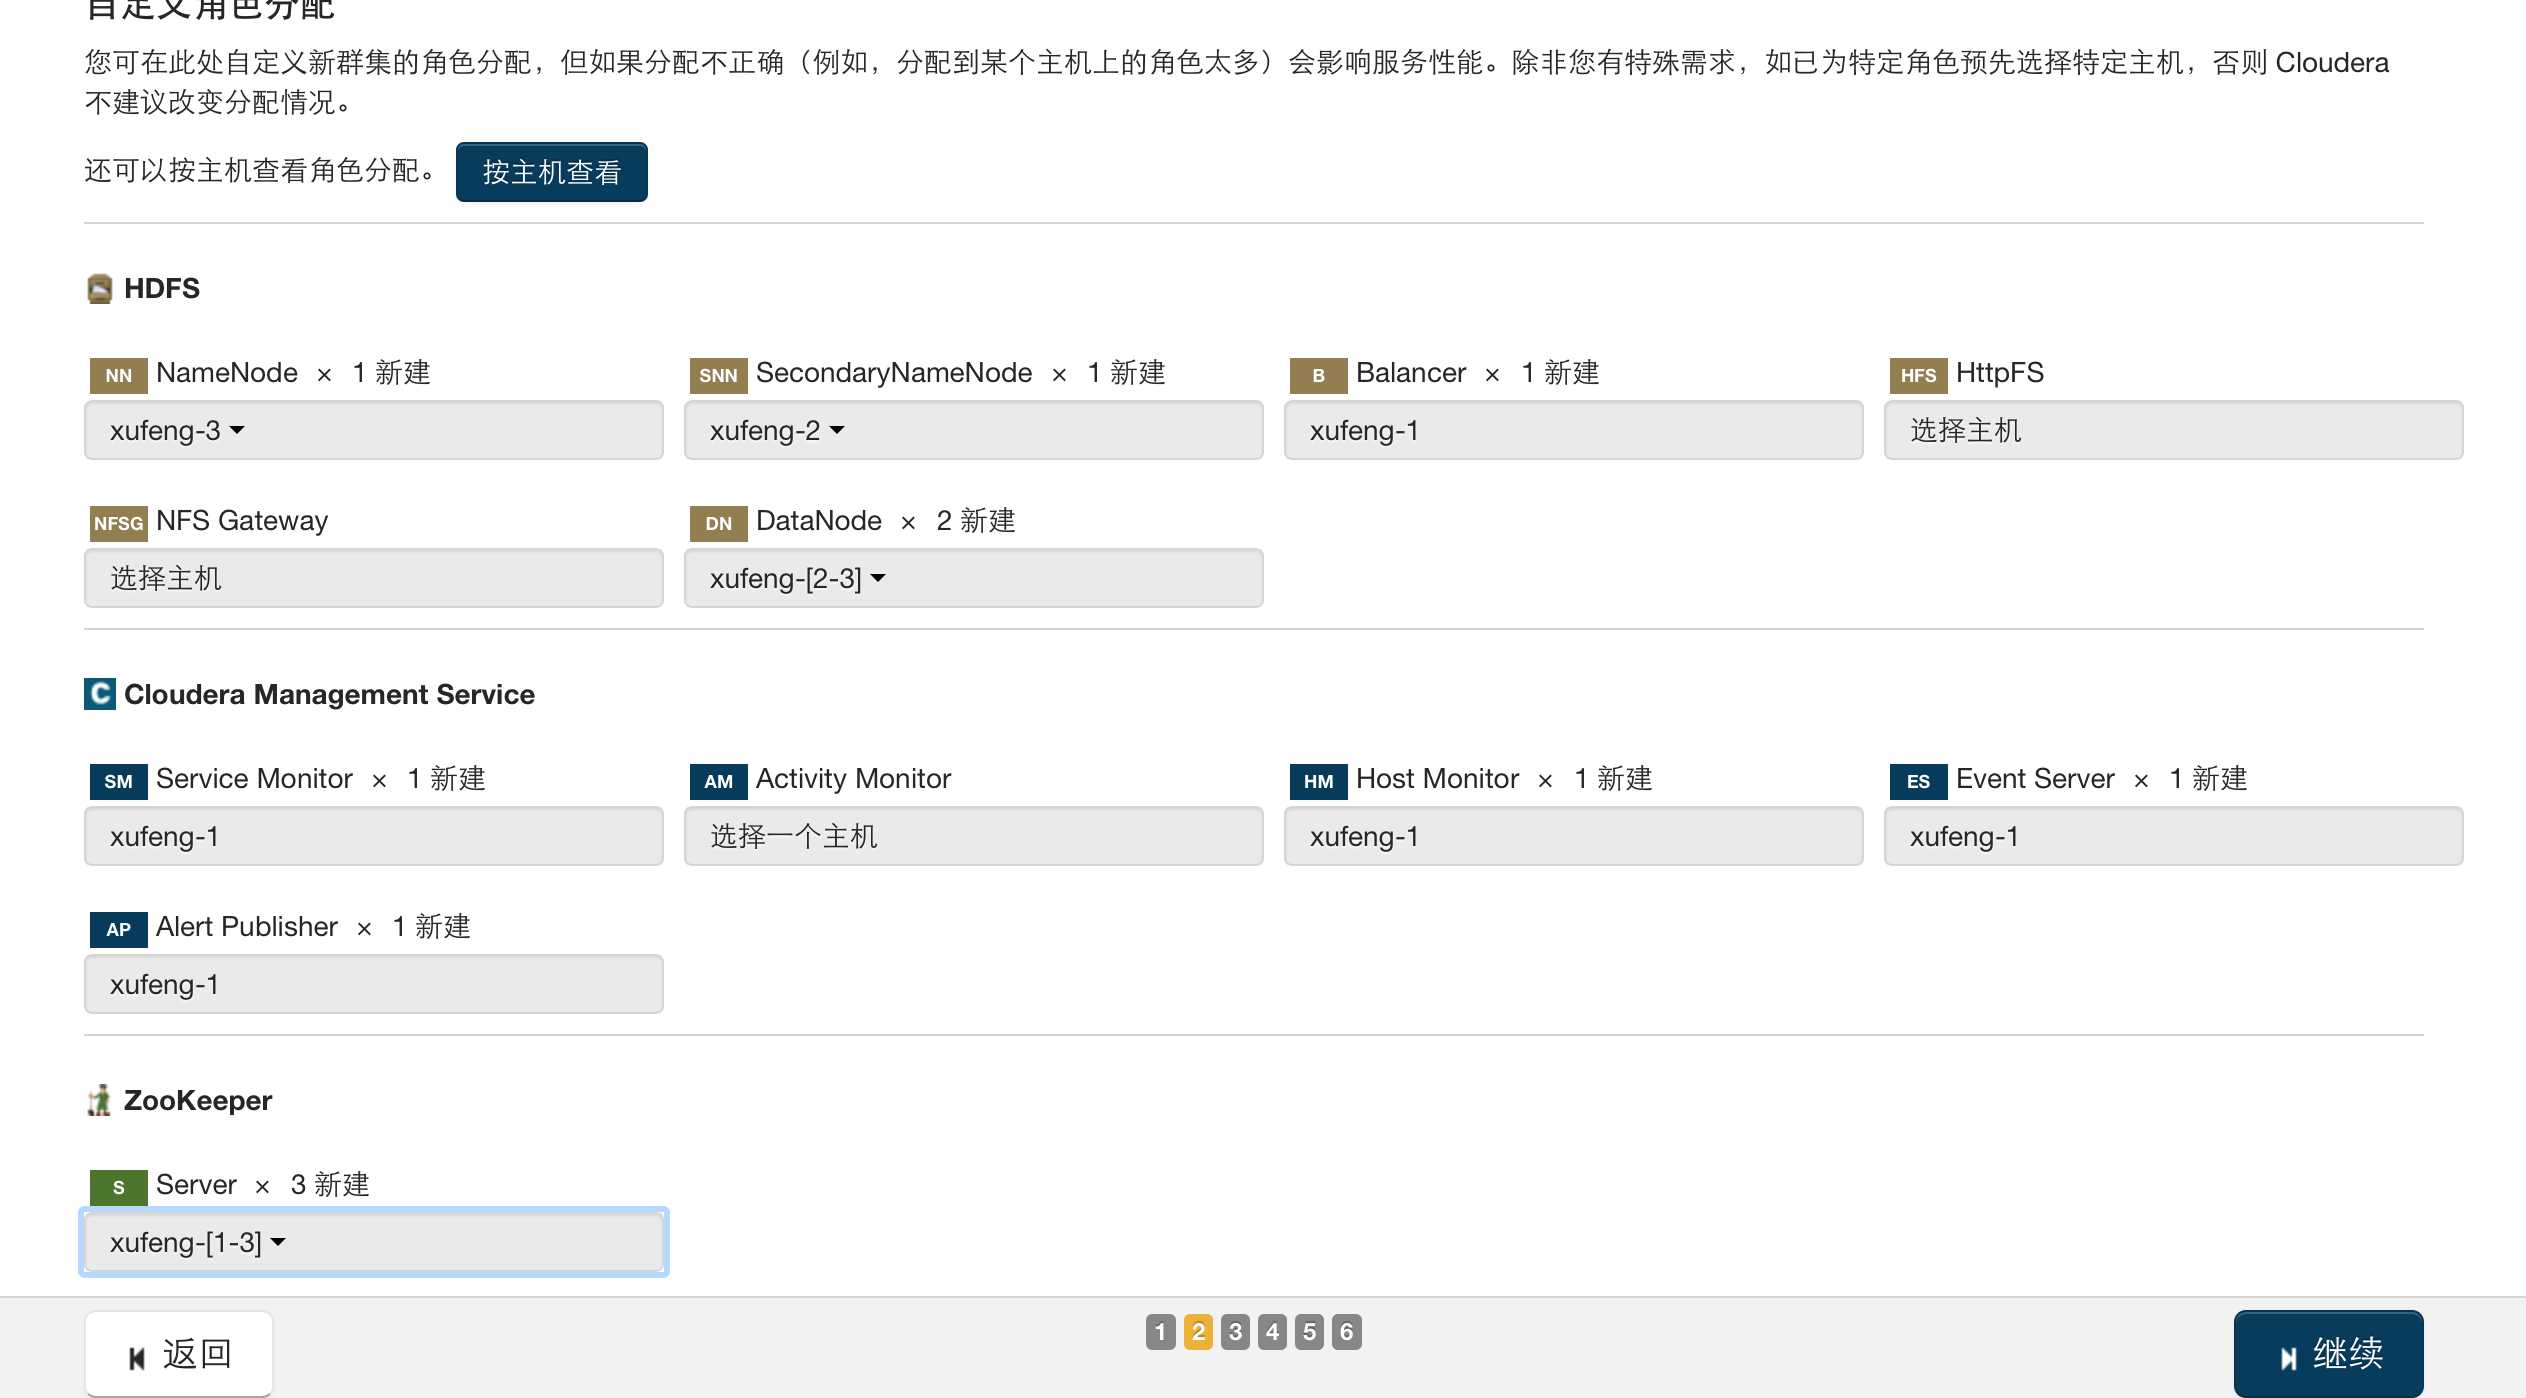
11.选择完毕需要安装的服务后,可以将服务的实例分配到指定节点上。
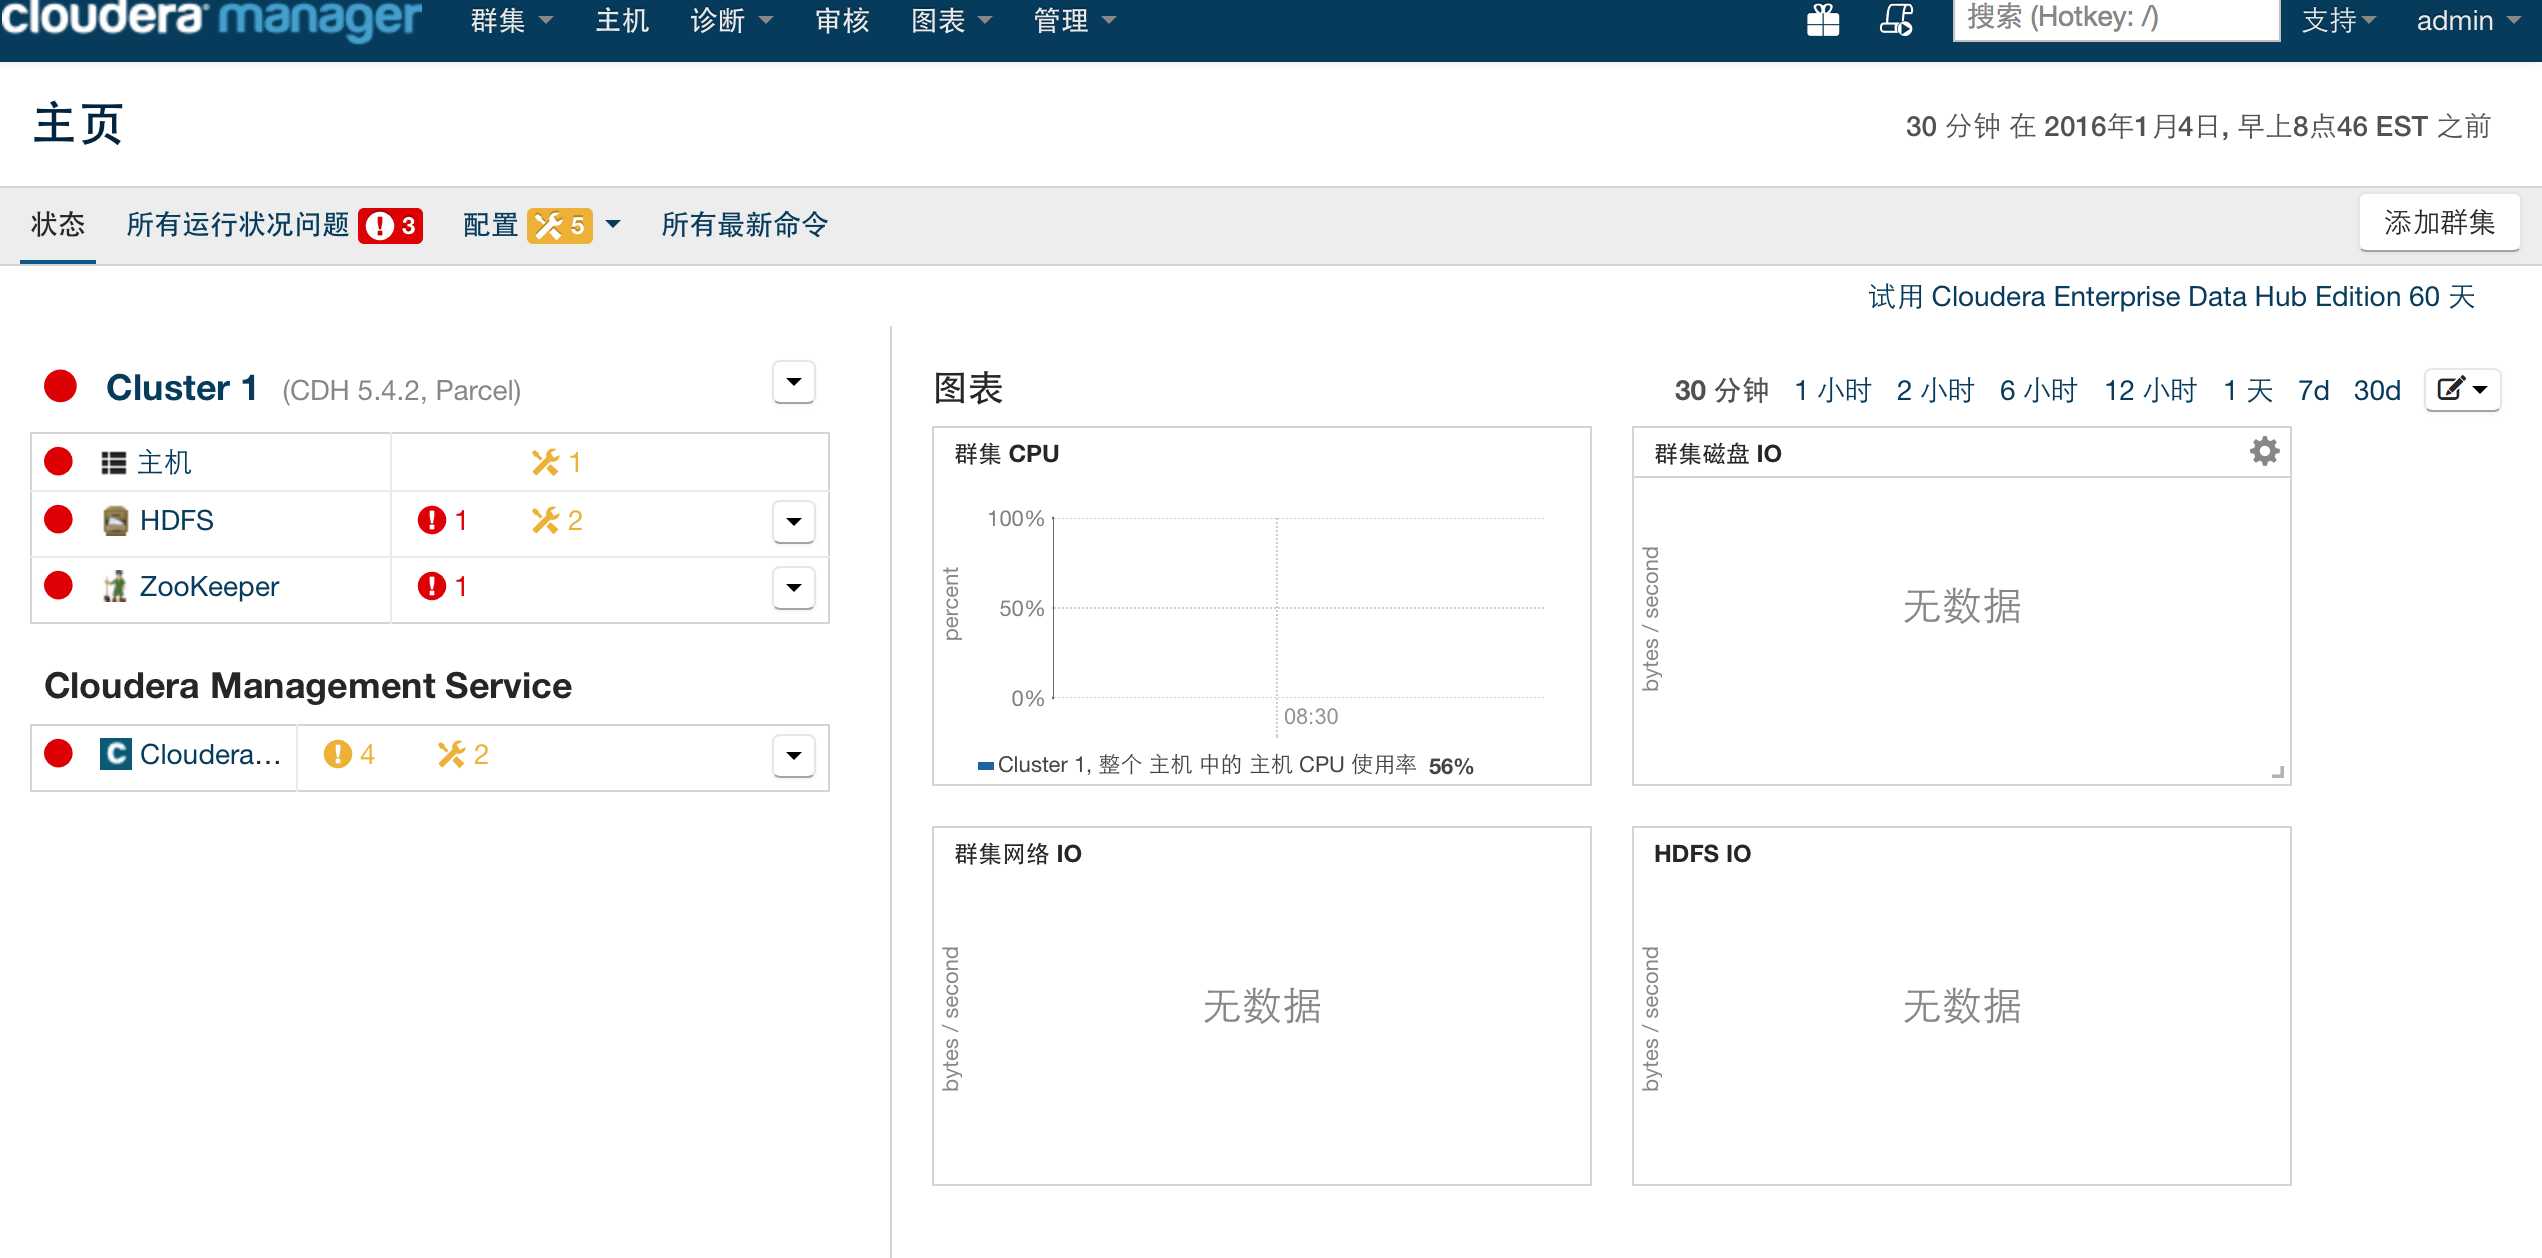
12.点击继续后,服务将会被安装,安装完毕后搭建完毕一个新的集群。
13.简单的去登陆一台节点,测试访问hdfs:
[root@xufeng-3 ~]# hadoop fs -ls /
Found 1 items
drwxrwxrwt   - hdfs supergroup          0 2016-01-04 08:36 /tmp
[root@xufeng-3 ~]#
说明hdfs目前已经可用。
以上。
[How to]Cloudera manager 离线安装手册
标签:
原文地址:http://www.cnblogs.com/ios123/p/5099752.html