标签:
各位好,终于讲到自定义Panel了。当系统自带的几个Panel比如Gird,StackPanel,RelativePanel不能满足我们的特定要求时(其实不常见啦),自定义Panel就显得非常必要,而且因为是针对性的处理,效果也会非常好。更何况自定义Panel其实并不复杂,今天俺们就来学习一下。
记得上一篇自定义CommandBar在增加占位控件AppBarEmpty时,采用的是通过Page的SizeChanged事件中计算页面Width,减去CommandBar中其他控件Width后再赋值Width给AppBarEmpty的方法。就可行性而言是绝对没问题的,代码复杂度也很低,不失为一个好方法。但是复用性不太好,需要在每个Page都写上一小段代码。而我们的初衷是希望AppBarEmpty能够自动撑开,计算自身所需的Width。
遇到的困难来自StackPanel这个控件,StackPanel在计算自身所需空间时,会非常吝啬按children元素所需的最小尺寸来申请。就好比申请经费时按最下限申请,这种精神ZF部门应该学习,而公司组织TeamBuilding就应该排斥……)。说到这里,本篇的主题有了,就是通过自定义一个StackPanelEx来实现让AppBarEmpty自动撑开的效果。
前面说了,自定义Panel其实并不复杂。只有两个方法需要override:
        //
        // Summary:(根据子元素测量控件本身需要的空间)
        //     Provides the behavior for the Measure pass of the layout cycle. Classes can override
        //     this method to define their own Measure pass behavior.
        //
        // Parameters:
        //   availableSize:(控件本身的可用空间。如指定无穷大值,表示控件的大小将调整为内容的可用大小)
        //     The available size that this object can give to child objects. Infinity can be
        //     specified as a value to indicate that the object will size to whatever content
        //     is available.
        //
        // Returns:(控件根据子元素大小计算得出的所需大小)
        //     The size that this object determines it needs during layout, based on its calculations
        //     of the allocated sizes for child objects or based on other considerations such
        //     as a fixed container size.
        protected virtual Size MeasureOverride(Size availableSize);
        //
        // Summary:(根据上面测量的结果,来对子元素进行布局)
        //     Provides the behavior for the Arrange pass of layout. Classes can override this
        //     method to define their own Arrange pass behavior.
        //
        // Parameters:
        //   finalSize:(控件用来排列自身及其子元素的最终确定的空间)
        //     The final area within the parent that this object should use to arrange itself
        //     and its children.
        //
        // Returns:(使用的实际大小)
        //     The actual size that is used after the element is arranged in layout.
        protected virtual Size ArrangeOverride(Size finalSize);
听上去是不是挺绕的?我们来看StackPanelEx的实际代码:
    public class StackPanelEx : Panel
    {
        protected override Size MeasureOverride(Size availableSize)
        {
         double height = 0;
            foreach (var child in Children)
            {
                // Tell the child control to determine the size needed
                child.Measure(availableSize);
                height = child.DesiredSize.Height > height ? child.DesiredSize.Height : height;
            }

            return new Size(availableSize.Width,height);
        }

        protected override Size ArrangeOverride(Size finalSize)
        {
            int count = Children.Count(_ => _ is AppBarEmpty2);
            double totalLength = Children.Where(_ => _ is AppBarEmpty2 == false).Sum(_ => (_ as FrameworkElement).Width);
            var emptyWidth = (finalSize.Width - totalLength) / count;

            double x = 0;
            foreach (var child in Children)
            {
                if (child is AppBarEmpty2)
                {
                    child.Arrange(new Rect(x, 0, emptyWidth, 0));
                    x += emptyWidth;
                }
                else
                {
                    child.Arrange(new Rect(x, 0, child.DesiredSize.Width, child.DesiredSize.Height));
                    x += child.DesiredSize.Width;
                }
            }
            return finalSize;
        }
    }
简单解释一下,首先在MeasureOverride方法里,告诉每个子元素(这里是AppBarButton和AppBarEmpty2)去算自己需要多少空间,一会要分地了。然后直接告诉上头,Width我全要了,Height按我们村里最高的人给就行了。
紧接着到了ArrangeOverride方法,上级领导比较大方,告诉该控件Width全给你,还有你Height要的太少,拖了上级Panel的后腿,多给一些Height免得挤到同级的其他控件……
然后村长及开始分地了。AppBarButton就按他自己申请的给,AppBarEmpty2感觉是村长亲戚,剩下的Width全给他们家承包了……
最后向上头汇报一下分地的情况,这事就算完了。
AppBarEmpty2还是没变,和上次一样。
    public class AppBarEmpty2 : FrameworkElement, ICommandBarElement
    {
        public bool IsCompact { get; set; }
    }
既然新的StackPanelEx写好了,就该替换CommandBar原有的StackPanel了,找到CommandBar模板中关于PrimaryItemsControl的部分
                                <Grid>
                                    <Grid.ColumnDefinitions>
                                        <ColumnDefinition Width="*"/>
                                        <ColumnDefinition Width="Auto"/>
                                    </Grid.ColumnDefinitions>
                                    <ContentControl x:Name="ContentControl" ContentTemplate="{TemplateBinding ContentTemplate}" ContentTransitions="{TemplateBinding ContentTransitions}" Content="{TemplateBinding Content}" Foreground="{TemplateBinding Foreground}" HorizontalAlignment="{TemplateBinding HorizontalContentAlignment}" HorizontalContentAlignment="{TemplateBinding HorizontalContentAlignment}" IsTabStop="False" VerticalAlignment="{TemplateBinding VerticalContentAlignment}" VerticalContentAlignment="{TemplateBinding VerticalContentAlignment}"/>
                                    <ItemsControl x:Name="PrimaryItemsControl" Grid.Column="0"
                                                  HorizontalAlignment="Stretch"  IsTabStop="False" MinHeight="{ThemeResource AppBarThemeMinHeight}">
                                        <ItemsControl.ItemsPanel>
                                            <ItemsPanelTemplate>
                                                <!--<StackPanel Orientation="Horizontal"/>-->
                                                <local:StackPanelEx ></local:StackPanelEx>
                                            </ItemsPanelTemplate>
                                        </ItemsControl.ItemsPanel>
                                    </ItemsControl>
                                </Grid>
将ItemsPanelTemplate中的StackPanel替换成StackPanelEx,同时将ItemsControl的HorizontalAlignment="Right"改成HorizontalAlignment="Stretch",大功告成,再来看一下Page中的XAML部分:
       <CommandBar x:Name="commandBar" Grid.Row="3" Style="{StaticResource CommandBarStyle2}" >
            <AppBarButton x:Name="appbarButton" Icon="Accept" Label="fdsfdsf" ></AppBarButton>
            <local:AppBarEmpty2  ></local:AppBarEmpty2>
            <AppBarButton Icon="Accept" Label="fdsfdsf"></AppBarButton>
            <local:AppBarEmpty2  ></local:AppBarEmpty2>
            <AppBarButton Icon="Accept" Label="fdsfdsf" ></AppBarButton>
        </CommandBar>
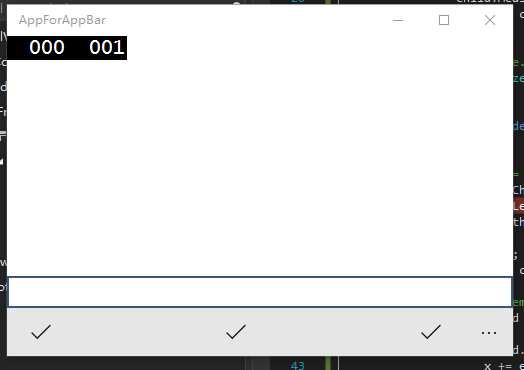
是不是非常的清爽,再也不用去写什么SizeChanged事件了。实际效果如下图:
标签:
原文地址:http://www.cnblogs.com/manupstairs/p/5119713.html