标签:
一般来说,我们会用到如下三种套接字:
TCP:SOCK_STREAM套接字
UDP:SOCK_DGRAM套接字
原始套接字:SOCK_RAW套接字
对于TCP和UDP两种套接字,相对来说只要配置好IP地址和端口号就可以了,比较简单,这里我们主要介绍原始套接字的使用。
1.原始套接字简介
原始套接字的强大之处在于,不同与UDP和TCP套接字只能访问传输层和传输层以上的数据包,原始套接字可以访问传输层以下的数据包,实现上至应用层下至链路层的数据操作,尤其适合用来进行抓包等工作。
2.原始套接字的建立
常用的原始套接字的建立方式有如下两种:
int sockfd=socket(PF_PACKET,SOCK_PACKET,htons(ETH_P_ALL));//这个socket可以访问处理链路层及以上所有的数据包
int sockfd=socket(PF_PACKET,SOCK_RAW,htons(ETH_P_IP));//这个socket可以访问处理链路层及以上所有的IP数据包
3.原始套接字权限
原始套接字需要root权限即管理员权限才能够创建,所以需要sudo和su进入root模式,而且在使用原始套接字进行抓包的过程中需要设置网卡为混杂模式。
下面给出两个例子,供大家参考:
第一个,利用原始套接字进行发包,使用wireshark抓包查看;
#include <stdio.h>
#include <stdlib.h>
#include <string.h>
#include <stdarg.h>
#include <time.h>

#include <sys/types.h>
#include <sys/socket.h>
#include <sys/errno.h>
#include <sys/time.h>
#include <sys/ioctl.h>
#include <sys/stat.h>

#include <net/if.h>
#include <net/ethernet.h>
#include <netinet/in.h>
#include <netinet/ip.h>
#include <netinet/if_ether.h>
#include <netpacket/packet.h>
#include <netdb.h>

#include <arpa/inet.h>
#include <unistd.h>
#include <pthread.h>
#include <time.h>
#include <errno.h>
#include <fcntl.h>
#include <dirent.h>
#include <resolv.h>
#include <signal.h>
#include <getopt.h>
#ifdef HAVE_CONFIG_H
#include <config.h>
#endif

//首先定义网卡端口
#define PHYSICALPORT "eth0"
#define PHYSICALPORT_LEN 30

//创建实际网卡端口数组
char physical_port[30];

//定义缓存大小
#define BUFSIZE 1024*5
char sendbuf[BUFSIZE]={0};

int main()
{
    memcpy(physical_port,PHYSICALPORT,PHYSICALPORT_LEN);
     int sock_send;
    sock_send=socket(PF_PACKET,SOCK_PACKET,htons(ETH_P_ALL));
    if(sock_send<0)
    {
        perror("scoket created");
    }

    //设置发包地址
    struct sockaddr send_addr;
    memset(&send_addr,0,sizeof(send_addr));
    strcpy(send_addr.sa_data,physical_port);

    //创建发送程序
    while(fgets(sendbuf,sizeof(sendbuf),stdin)!=0)
    {
        int len=sendto(sock_send,&sendbuf,strlen(sendbuf),0,&send_addr,sizeof(send_addr));
        memset(sendbuf,0,sizeof(sendbuf));
    }
    return 0;
}
使用wireshark抓包可以得到如下结果:

第二个,使用原始套接字建立一个接收程序,抓取本机的数据进行分析:
代码如下:
#include <stdio.h>
#include <stdlib.h>
#include <string.h>
#include <stdarg.h>
#include <time.h>

#include <sys/types.h>
#include <sys/socket.h>
#include <sys/errno.h>
#include <sys/time.h>
#include <sys/ioctl.h>
#include <sys/stat.h>

#include <net/if.h>
#include <net/ethernet.h>
#include <netinet/in.h>
#include <netinet/ip.h>
#include <netinet/if_ether.h>
#include <netpacket/packet.h>
#include <netdb.h>

#include <arpa/inet.h>
#include <unistd.h>
#include <pthread.h>
#include <time.h>
#include <errno.h>
#include <fcntl.h>
#include <dirent.h>
#include <resolv.h>
#include <signal.h>
#include <getopt.h>
#ifdef HAVE_CONFIG_H
#include <config.h>
#endif

//首先定义网卡端口
#define PHYSICALPORT "eth0"
#define PHYSICALPORT_LEN 30

//创建实际网卡端口数组
char physical_port[30];

//定义缓存大小
#define BUFSIZE 1024*5
char recvbuf[BUFSIZE]={0};

void ethernet_setpormisc(int fd,int i_flags);


int main()
{
    memcpy(physical_port,PHYSICALPORT,PHYSICALPORT_LEN);
    //首先创建一个原始套接字
    int sock_recv;
    sock_recv=socket(PF_PACKET,SOCK_RAW,htons(ETH_P_ALL));
    if(sock_recv<0)
    {
        perror("physicl socket created");
    }

    //设置网卡为混杂模式;
    ethernet_setpormisc(sock_recv,1);

    //setsockopt
    int recvbuf_size=BUFSIZE;
    setsockopt(sock_recv,SOL_SOCKET,SO_RCVBUF,&recvbuf,sizeof(char));

    //获取物理网卡接口索,用以传输数据
    struct ifreq ifr_recv;
    strcpy(ifr_recv.ifr_name,physical_port);
    if(ioctl(sock_recv,SIOCGIFINDEX,&ifr_recv)<0)
    {
        perror("[3]get interface index");
    }
    //绑定物理网卡
    struct sockaddr_ll local_addr;
    local_addr.sll_family=PF_PACKET;
    local_addr.sll_ifindex=ifr_recv.ifr_ifindex;
    local_addr.sll_protocol=htons(ETH_P_ALL);
    if((bind(sock_recv,(struct sockaddr *)&local_addr,sizeof(local_addr)))<0)
    {
        perror("[4]bind physical address");
    }

    //开始接收数据包
    while(1)
    {
        recvfrom(sock_recv,recvbuf,BUFSIZE,0,NULL,NULL);
        printf("%s",recvbuf);
        memset(recvbuf,0,sizeof(recvbuf));
    }
    close(sock_recv);
}


//创建设置网卡混杂模式函数
void ethernet_setpormisc(int fd,int i_flags)
{
    //首先获取网卡接口标志位
    struct ifreq ifr_s;
    memcpy(ifr_s.ifr_name,physical_port,sizeof(physical_port));
    if(ioctl(fd,SIOCGIFFLAGS,&ifr_s)<0)
    {
        perror("[1]get interface flags");
    }
    if(i_flags==0)
    {
        //取消混杂模式
        ifr_s.ifr_flags &= ~IFF_PROMISC;
    }
    else
    {
        //设置为混杂模式
        ifr_s.ifr_flags |= IFF_PROMISC;
    }

    //将接口设置为相应的模式
    if(ioctl(fd,SIOCSIFFLAGS,&ifr_s)<0)
    {
        perror("[2]set interface flags");
    }
}
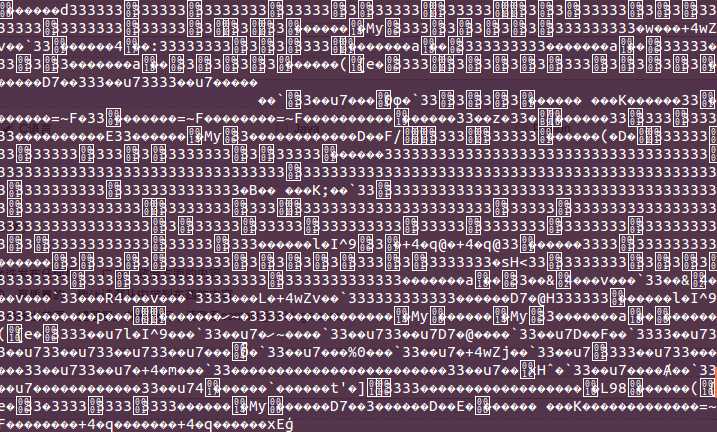
抓取到的数据包如下所示:

因为以%s字符串形式打印出来,所以有很多乱码,这里需要再写包解析函数进行解析!
标签:
原文地址:http://www.cnblogs.com/zuilehongdou/p/5127762.html