标签:
一、将Tiny6410一线触摸程序改成输入设备(input device)
由于友善一线触摸下位机不开源,所以只能在官方提供的内核模块上进行修改。
官方源代码:http://pan.baidu.com/s/1bog4rZD
1、修改模块加载函数
 1 static int __init dev_init(void)
 2 {
 3     int ret;
 4 #ifdef TS_INPUT_DRIVER
 5     /* alloc input system device */
 6     ts.input = input_allocate_device();
 7
 8     ts.input->evbit[0] = BIT_MASK(EV_KEY) | BIT_MASK(EV_ABS);
 9     ts.input->keybit[BIT_WORD(BTN_TOUCH)] = BIT_MASK(BTN_TOUCH);
10
11     input_set_abs_params(ts.input, ABS_X, 0, 0xFFFF, 0, 0);
12     input_set_abs_params(ts.input, ABS_Y, 0, 0xFFFF, 0, 0);
13
14     ts.input->name = "Tiny6410 TouchScreen";
15     ts.input->id.bustype = BUS_HOST;
16     ts.input->id.vendor = 0xDEAD;
17     ts.input->id.product = 0xBEEF;
18     ts.input->id.version = 0x0102;
19
20
21     set_pin_up();
22     set_pin_value(1);
23     set_pin_as_output();
24     setup_irq(IRQ_TIMER3, &timer_for_1wire_irq);
25     ret = init_timer_for_1wire();
26     if(ret < 0)
27     {
28         printk(TOUCH_DEVICE_NAME"timer init failed\n");
29         goto timer_err;
30     }
31     init_timer(&one_wire_timer);
32     one_wire_timer_proc(0);
33     create_proc_read_entry("driver/one-wire-info", 0, NULL, read_proc, NULL);
34
35     /* register to the input system */
36     ret = input_register_device(ts.input);
37     if(ret < 0)
38     {
39         printk(TOUCH_DEVICE_NAME"failed to register input device\n");
40         goto timer_err;
41     }
42
43     return 0;
44 timer_err:
45     free_irq(IRQ_TIMER3, &timer_for_1wire_irq);
46
47 #else
48
49     ret = misc_register(&ts_misc) | misc_register(&bl_misc) ;
50     set_pin_up();
51     set_pin_value(1);
52     set_pin_as_output();
53
54     if (ret == 0) {
55         setup_irq(IRQ_TIMER3, &timer_for_1wire_irq);
56         ret = init_timer_for_1wire();
57         init_timer(&one_wire_timer);
58         one_wire_timer_proc(0);
59         create_proc_read_entry("driver/one-wire-info", 0, NULL, read_proc, NULL);
60     }
61
62     if (ret == 0) {
63         printk (TOUCH_DEVICE_NAME"\tinitialized\n");
64         printk (BACKLIGHT_DEVICE_NAME"\tinitialized\n");
65     }
66 #endif
67
68     return ret;
69 }
在这个函数中提交输入的事件EV_KEY、EV_ABS、BTN_TOUCH,并注册输入设备到系统。
2、向输入子系统报告输入事件
修改源代码notify_ts_data()函数:
 1 static inline void notify_ts_data(unsigned x, unsigned y, unsigned down)
 2 {
 3     if (!down && !(ts_status &(1U << 31))) {
 4         // up repeat, give it up
 5 #ifdef TS_INPUT_DRIVER
 6         input_report_key(ts.input, BTN_TOUCH, 0);
 7         input_sync(ts.input);
 8 #endif
 9         return;
10     }
11 #ifdef TS_INPUT_DRIVER
12     ts.xp = x;
13     ts.yp = y;
14     //printk("ts.xp = %ld,ts.yp = %ld\n",ts.xp,ts.yp);
15     input_report_abs(ts.input, ABS_X, ts.xp);
16     input_report_abs(ts.input, ABS_Y, ts.yp);
17
18     input_report_key(ts.input, BTN_TOUCH, 1);
19     input_sync(ts.input);
20 #else
21     ts_status = ((x << 16) | (y)) | (down << 31);
22     ts_ready = 1;
23     wake_up_interruptible(&ts_waitq);
24 #endif
25 }
这个函数在按键按下时向输入子系统报告X/Y轴坐标的AD值和按键按下标志,在按键释放时报告按键释放标志。
3、修改模块卸载函数
 1 static void __exit dev_exit(void)
 2 {
 3     exitting = 1;
 4 #ifdef TS_INPUT_DRIVER
 5     input_unregister_device(ts.input);
 6 #endif
 7     remove_proc_entry("driver/one-wire-info", NULL);
 8     del_timer_sync(&one_wire_timer);
 9     free_irq(IRQ_TIMER3, &timer_for_1wire_irq);
10 #ifndef TS_INPUT_DRIVER
11     misc_deregister(&ts_misc);
12     misc_deregister(&bl_misc);
13 #endif
14 }
在模块卸载函数中卸载输入设备。
二、移植tslib到开发板
tslib源码下载:http://pan.baidu.com/s/1qXuqPdU
编译工具:arm-linux-gcc
1、下载源码并解压
tar xzbf tslib-1.4.tar.gz
2、修改源码
打开源码tslib/plugins/input-raw.c文件
首先修改check_fd()函数,由于设备驱动没有用到ioctl,所以这个检测函数直接返回0。但是设备驱动用到了同步所以要把using_syn = 1:
 1 static int check_fd(struct tslib_input *i)
 2 {
 3     struct tsdev *ts = i->module.dev;
 4     int version;
 5     u_int32_t bit;
 6     u_int64_t absbit;
 7 /*
 8     if (! ((ioctl(ts->fd, EVIOCGVERSION, &version) >= 0) &&
 9         (version == EV_VERSION) &&
10         (ioctl(ts->fd, EVIOCGBIT(0, sizeof(bit) * 8), &bit) >= 0) &&
11         (bit & (1 << EV_ABS)) &&
12         (ioctl(ts->fd, EVIOCGBIT(EV_ABS, sizeof(absbit) * 8), &absbit) >= 0) &&
13         (absbit & (1 << ABS_X)) &&
14         (absbit & (1 << ABS_Y)) && (absbit & (1 << ABS_PRESSURE)))) {
15         fprintf(stderr, "selected device is not a touchscreen I understand\n");
16         return -1;
17     }
18 */
19     printf("selected device!\n");
20     //if (bit & (1 << EV_SYN))
21         i->using_syn = 1;
22
23     return 0;
24 }
修改ts_input_read()函数,根据设备驱动程序可以知道,设备驱动提交BTN_TOUCH表示触摸屏有无按下,且设备驱动没有提交ABS_PRESSURE
 1 static int ts_input_read(struct tslib_module_info *inf,
 2              struct ts_sample *samp, int nr)
 3 {
 4     struct tslib_input *i = (struct tslib_input *)inf;
 5     struct tsdev *ts = inf->dev;
 6     struct input_event ev;
 7     int ret = nr;
 8     int total = 0;
 9
10     if (i->sane_fd == 0)
11         i->sane_fd = check_fd(i);
12
13     if (i->sane_fd == -1)
14         return 0;
15
16     if (i->using_syn) {
17         while (total < nr)
18         {
19             ret = read(ts->fd, &ev, sizeof(struct input_event));
20             if (ret < (int)sizeof(struct input_event)) {
21                 total = -1;
22                 break;
23             }
24             switch (ev.type)
25             {
26             case EV_KEY:
27                 switch (ev.code)
28                 {
29                 case BTN_TOUCH:
30                     if (ev.value == 0)
31                     {
32                         /* pen up */
33                         samp->x = 0;
34                         samp->y = 0;
35                         //samp->pressure = 0;
36                         i->current_p = 0;
37                         samp->tv = ev.time;
38                         //samp++;
39                         //total++;
40                         printf("key_up\n");
41                     }
42                     else if(ev.value == 1)
43                     {
44                         i->current_p = 1;
45                         printf("key_down\n");
46                     }
47                     break;
48                 }
49                 break;
50             case EV_SYN:
51                 /* Fill out a new complete event */
52                 samp->x = i->current_x;
53                 samp->y = i->current_y;
54                 samp->pressure = i->current_p;
55                 samp->tv = ev.time;
56     #ifdef DEBUG
57                 fprintf(stderr, "RAW---------------------> %d %d %d %d.%d\n",
58                         samp->x, samp->y, samp->pressure, samp->tv.tv_sec,
59                         samp->tv.tv_usec);
60     #endif         /*DEBUG*/
61                 samp++;
62                 total++;
63                 break;
64             case EV_ABS:
65                 switch (ev.code)
66                 {
67                 case ABS_X:
68                     i->current_x = ev.value;
69                     break;
70                 case ABS_Y:
71                     i->current_y = ev.value;
72                     break;
73                 /*
74                 case ABS_PRESSURE:
75                     i->current_p = ev.value;
76                     break;
77                 */
78                 }
79                 break;
80             }
81         }
82         ret = total;
83     }
84     return ret;
85 }
红色为修改的地方,修改之后保存退出。
3、安装
# ./autogen.sh
#./configure --host=arm-linux ac_cv_func_malloc_0_nonnull=yes --cache-file=arm-linux.cache -prefix=/usr/local/tslib
# make
# make install
-prefix=/usr/local/tslib 表示安装的路径
./autogen.sh可能会报错:
ming@ubuntu:~/windowsshar/tslib$ ./autogen.sh
./autogen.sh: 4: ./autogen.sh: autoreconf: not found
解决办法:
1 sudo apt-get install automake
2 sudo apt-get install autogen
3 sudo apt-get install autoconf
4、修改配置文件
sudo vim /usr/local/tslib/etc/ts.conf
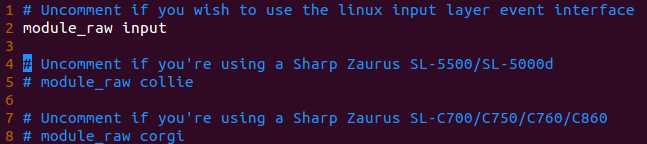
把第二行module_raw input前面的#号去掉(注意顶格)。
5、把/usr/local/下面编译好的tslib文件拷贝到开发板目录的/usr/local目录下(usr下面没有local文件夹就创建一个)
sudo -r /usr/local/tslib xxx/usr/local/
6、打开开发板/etc/profile文件
vi /etc/profile
在文件后面添加下面内容:
1 export TSLIB_ROOT=/usr/local/tslib
2 export TSLIB_TSDEVICE=/dev/event1
3 export TSLIB_CONFFILE=$TSLIB_ROOT/etc/ts.conf
4 export TSLIB_PLUGINDIR=$TSLIB_ROOT/lib/ts
5 export TSLIB_CALIBFILE=/etc/pointercal
6 export TSLIB_CONSOLEDEVICE=none
7 export TSLIB_FBDEVICE=/dev/fb0
8 export LD_LIBRARY_PATH=$LD_LIBRARY_PATH:$TSLIB_ROOT/lib
TSLIB_TSDEVICE=/dev/event1指明触摸屏设备,我的为/dev/event1
export TSLIB_FBDEVICE=/dev/fb0指明液晶显示设备
7、重启开发板
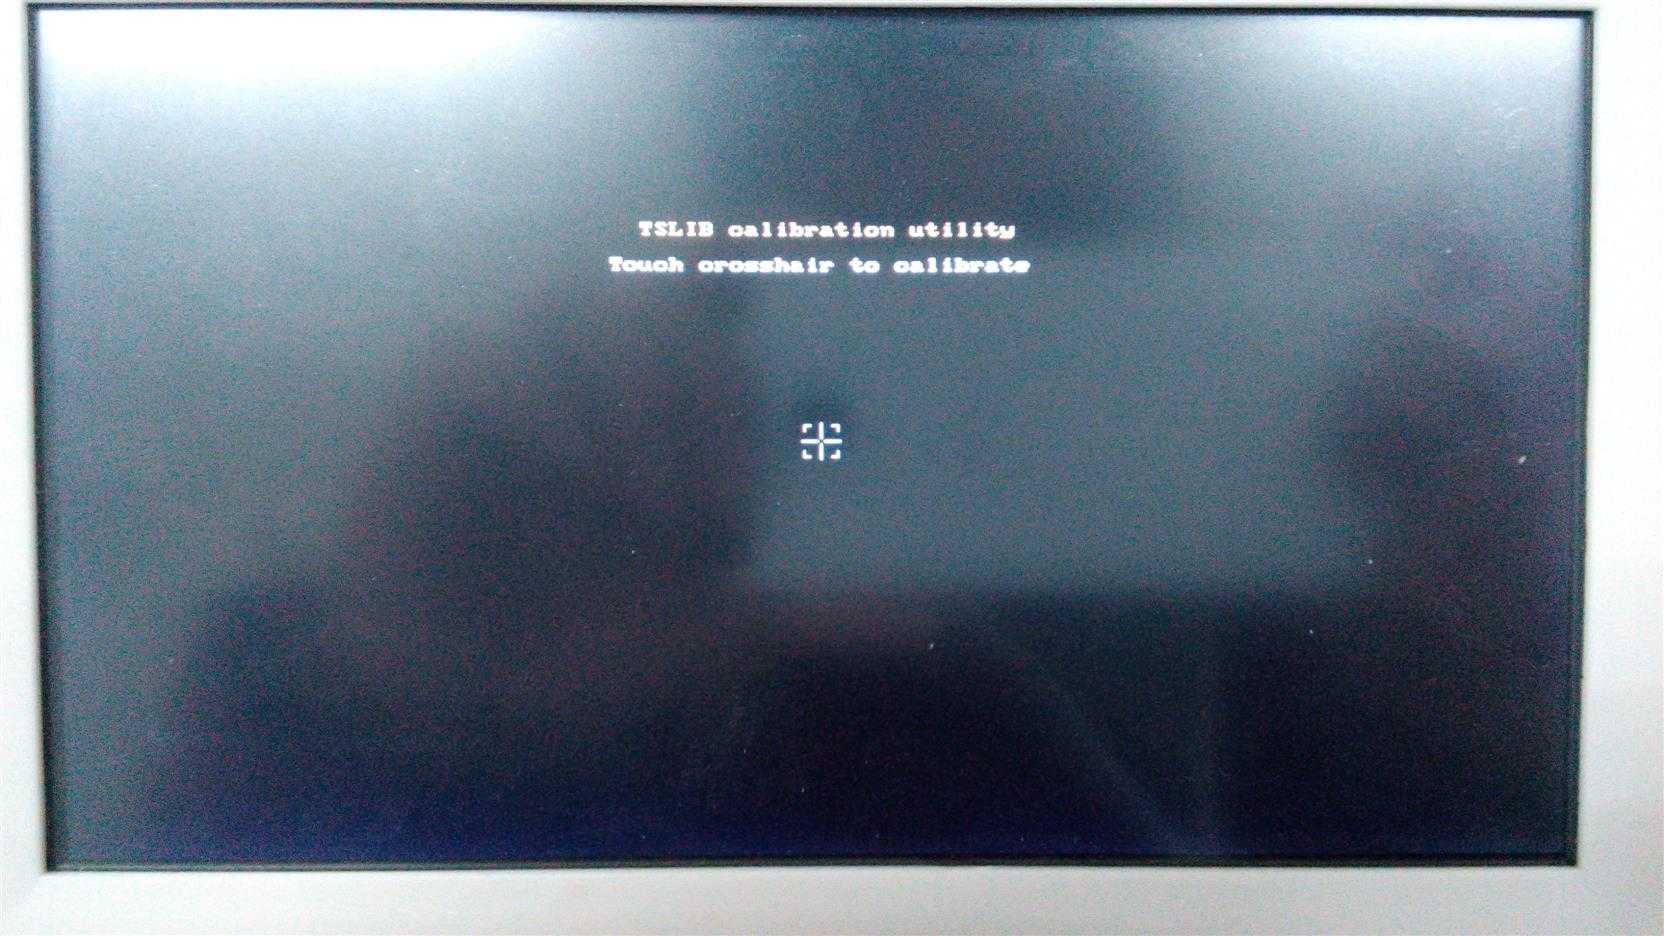
8、进入开发板/usr/local/tslib/bin目录,运行ts_calibrate程序进行屏幕校准。
1 cd /usr/local/tslib/bin/
2 ./ts_calibrate
结果出现下面问题:
-/bin/sh: ./ts_calibrate: not found
在Linux系统下用arm-linux-readelf查看下ts_calibreate运行所需要的库:
1 ming@ubuntu:~/windowsshar/nfs/rootfs/usr/local/tslib/bin$ arm-linux-readelf -d ts_calibrate
2
3 Dynamic section at offset 0x2ef8 contains 28 entries:
4   Tag        Type                         Name/Value
5  0x00000001 (NEEDED)                     Shared library: [libts-0.0.so.0]
6  0x00000001 (NEEDED)                     Shared library: [libdl.so.2]
7  0x00000001 (NEEDED)                     Shared library: [libc.so.6]
8  0x0000000f (RPATH)                      Library rpath: [/usr/local/tslib/lib]
9  0x0000001d (RUNPATH)                    Library runpath: [/usr/local/tslib/lib]
发现需要三个库libts-0.0.so.0 libdl.so.2 libc.so.6 ,其中libts-0.0.so.0是tslib自己提供的,所以需要从arm-linux-gcc里面的arm-none-linux-gnueabi/lib下面拷贝后两个库到开发板/lib目录下:
1 cd xxx/arm-liunx-gcc/xxx/arm-none-linux-gnueabi/lib
2 sudo cp libdl.so.2 libc.so.6 xxx/lib
再次运行ts_calibrate程序,还是一样的问题,再用arm-linux-readelf查看下ts_calibreate运行所需要的库:
1 ming@ubuntu:~/windowsshar/nfs/rootfs/usr/local/tslib/bin$ arm-linux-readelf -a ts_calibrate | grep "lib"
2       [Requesting program interpreter: /lib/ld-linux.so.3]
3  0x00000001 (NEEDED)                     Shared library: [libts-0.0.so.0]
4  0x00000001 (NEEDED)                     Shared library: [libdl.so.2]
5  0x00000001 (NEEDED)                     Shared library: [libc.so.6]
6  0x0000000f (RPATH)                      Library rpath: [/usr/local/tslib/lib]
7  0x0000001d (RUNPATH)                    Library runpath: [/usr/local/tslib/lib]
换一种方式,直接筛选"lib",发现还有一个库没有拷贝ld-linux.so.3,把这个库也拷贝进去:
cd xxx/arm-liunx-gcc/xxx/arm-none-linux-gnueabi/lib
sudo cp ld-linux.so.3 xxx/lib
再次运行,成功!
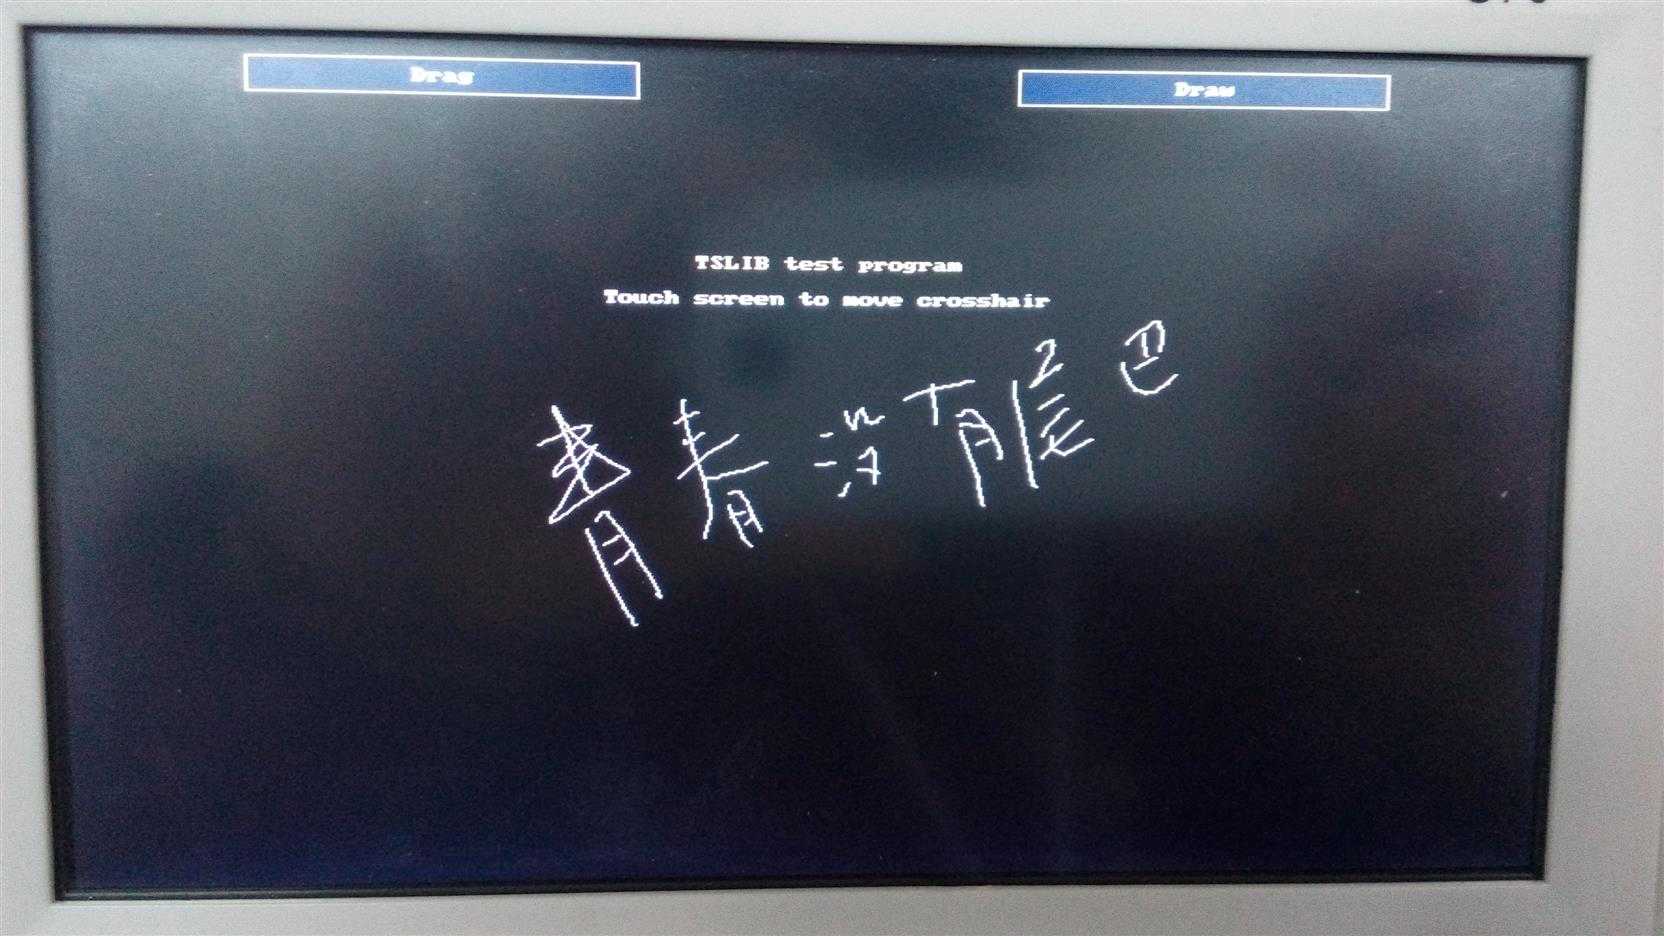
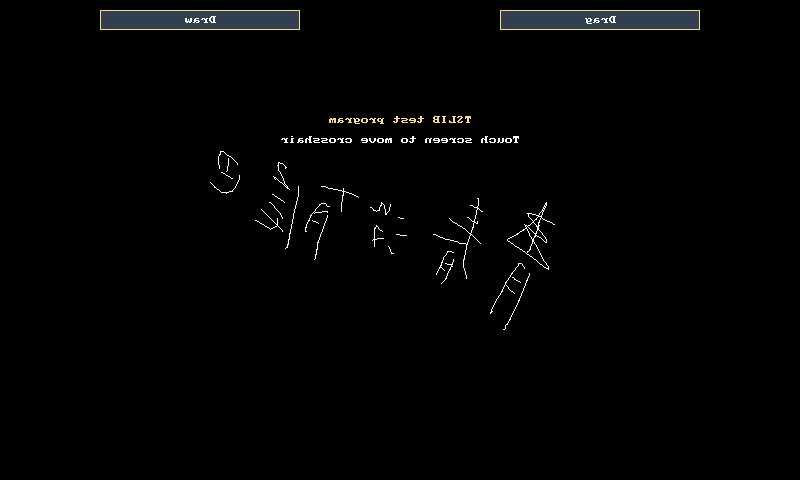
校准完成之后运行ts_test程序
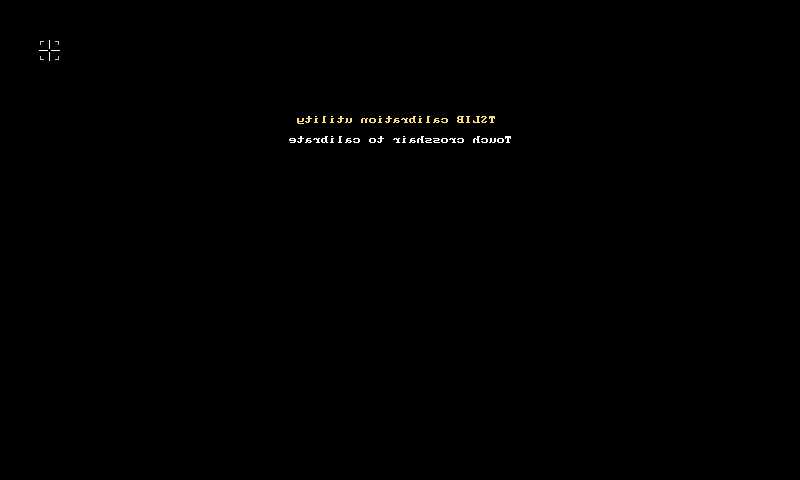
写了个屏幕截图程序,还没调好(镜像显示了~~),先秀两张^_^
标签:
原文地址:http://www.cnblogs.com/ape-ming/p/5134542.html