标签:
[转]TinyMCE(富文本编辑器)在Asp.Net中的使用方法
转自:http://www.cnblogs.com/hahacjh/archive/2010/07/24/1784268.html
TinyMCE 在Asp.Net中的使用方法其实挺简单的,从官方网站下载TinyMCE),然后将里面的jscripts目录拷到你的网站目录
假设你的aspx页面中某一个地方需要用到编辑器,则加入
<asp:TextBox ID=”brand” TextMode=”MultiLine” runat=”server” />
并同时在header里加入:
<script src=”../js/tiny_mce/tiny_mce_src.js” type=”text/javascript”></script>
<script language=”javascript” type=”text/javascript”>
tinyMCE.init({
mode : “textareas”,
theme : “simple”
});
</script>
运行页面,即可以看到一个编辑器出现了,并且你在服务端可以通过brand.Text来获取值(你可能会看到一个出错的提示,这时只需要将.aspx最开始的<%@ Page 里加入ValidateRequest=”false”,即可)
当然,如果你页面中有多个textareas,你可能只希望某一个用编辑器代替,则上面的mode一行改为:
mode : "exact", elements : “对应的ID”
需要其它的用法,可以到官方网站查看
----------------------------------------------------------------
中文乱码问题:
在设置好TinyMCE的语言包后,在ASP.net中使用的时候却总是不正常,无法争取读取到语言包内容。
仔细研究后发现,原来是因为ASP.net 2.0默认的HTTPResponse输出的编码是utf-8,而非中文gb2312,或是gb18030、HZ所以就会出现设置正确,但是在页面执行的时候却出现错误,不能正确读取语言包的配置的问题。
我们可以在Page类的加载过程Load中加入如果设置语句就可以解决这个问题
Response.ContentEncoding = Encoding.GetEncoding("gb2312")
重新编译执行后,就可以正常读取到中文语言资源包中的内容了。
-----------------------------------------------------
相关资源收集:
TinyMCE 中文手册 http://www.inpeck.com/TinyMceManual/
tinymce中几个比较有用的插件: http://joom.org.ru/home/article/14-tinymce-plugin.html
在线编辑器 TinyMCE 3 的简体中文语言包: http://www.metalstar.net/?d=86
tinymce中文字体过小解决方法 http://www.humker.com/2008/03/07/tinymce-chinese-font-size
做成自定义控件:http://www.jonllen.com/jonllen/aspnet/tinymce.aspx
tinymce不管哪个版本,中文的默认字体都是太小了,编辑了保存以后再拿出来还莫名其妙的变的很大。
解决方案:js\themes\advanced\css\editor_content.css中的
body, td, pre {
font-family: Verdana, Arial, Helvetica, sans-serif;
font-size: 12px;
}
10px改为12px就可以了。
Integrating TinyMCE Editor with ASP.NET
转自:http://www.cnblogs.com/zhouxiao/archive/2012/06/25/2560633.html
In one of my projects, there was a requirement to embed a WYSIWYG editor. Some of the features that were looked into were:
After searching a lot, I came across TinyMCE editor (http://tinymce.moxiecode.com/). But, I had some issues in integrating the same with ASP.NET applications. The following write up provides one of the ways to integrate with TinyMCE.
How To
The following section provides the steps to implement it in ASP.NET.
Step 1: Download the latest version (tinymce_3_3_7.zip) from the following location,http://tinymce.moxiecode.com/download.php. Unzip the downloaded .zip file in one of your local folders.
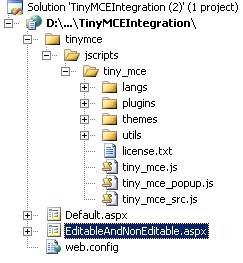
Step 2: Create an ASP.NET web application and copy the tinymce folder to the web application. The solution explorer would look something like this.
Note: You can remove the examples folder under tinymce folder.
Step 3: Add a reference of tiny_mce.js file to the page in which you would like to integrate the TinyMCE editor.
Include tiny_mce.js file at the top of your file.
<script type="text/javascript" src="tinymce/jscripts/tiny_mce/tiny_mce.js"></script>
Add the following lines of code which initialize all the textarea controls on the WYSIWYG editor type. They are quite customizable, please check the examples section in their web site.
<script type="text/javascript">
tinyMCE.init({
// General options
mode: "textareas",
theme: "advanced",
plugins: "pagebreak,style,layer,table,save,advhr,advimage,advlink,emotions,iespell,
inlinepopups,insertdatetime,preview,media,searchreplace,print,contextmenu,paste,
directionality,fullscreen,noneditable,visualchars,nonbreaking,xhtmlxtras,template,
wordcount,advlist,autosave",
setup: function(ed) {
ed.onKeyPress.add(
function(ed, evt) {
}
);
},
// Theme options
theme_advanced_buttons1: "save,newdocument,|,bold,italic,underline,strikethrough,|,
justifyleft,justifycenter,justifyright,justifyfull,styleselect,formatselect,
fontselect,fontsizeselect",
theme_advanced_buttons2: "cut,copy,paste,pastetext,pasteword,|,search,replace,|,
bullist,numlist,|,outdent,indent,blockquote,|,undo,redo,|,link,unlink,anchor,
image,cleanup,help,code,|,insertdate,inserttime,preview,|,forecolor,backcolor",
theme_advanced_buttons3: "tablecontrols,|,hr,removeformat,visualaid,|,sub,sup,|,
charmap,emotions,iespell,media,advhr,|,print,|,ltr,rtl,|,fullscreen",
theme_advanced_buttons4: "insertlayer,moveforward,movebackward,absolute,|,
styleprops,|,cite,abbr,acronym,del,ins,attribs,|,visualchars,nonbreaking,
template,pagebreak,restoredraft",
theme_advanced_toolbar_location: "top",
theme_advanced_toolbar_align: "left",
theme_advanced_statusbar_location: "bottom",
theme_advanced_resizing: true,
// Example content CSS (should be your site CSS)
content_css: "css/content.css",
// Drop lists for link/image/media/template dialogs
template_external_list_url: "lists/template_list.js",
external_link_list_url: "lists/link_list.js",
external_image_list_url: "lists/image_list.js",
media_external_list_url: "lists/media_list.js",
// Style formats
style_formats: [
{ title: ‘Bold text‘, inline: ‘b‘ },
{ title: ‘Red text‘, inline: ‘span‘, styles: { color: ‘#ff0000‘} },
{ title: ‘Red header‘, block: ‘h1‘, styles: { color: ‘#ff0000‘} },
{ title: ‘Example 1‘, inline: ‘span‘, classes: ‘example1‘ },
{ title: ‘Example 2‘, inline: ‘span‘, classes: ‘example2‘ },
{ title: ‘Table styles‘ },
{ title: ‘Table row 1‘, selector: ‘tr‘, classes: ‘tablerow1‘ }
],
// Replace values for the template plugin
template_replace_values: {
username: "Some User",
staffid: "991234"
}
});
</script>
Step 4: Add a text area control on to the page.
<textarea id="elm1" name="elm1" rows="15" cols="80" style="width: 80%"
runat="server"></textarea>
Step 5: Execute the Page J and you should able to see the editor embedded in your ASP.NET page.

In case you would want to have pre rendered text with some non editable text, use the CSS class mceNonEditablefor the text you would want to make it non editable.
this.elm1.Value = "<p>This is a test document. Some <span class=‘mceNonEditable‘ style=\"color: #ff0000;\">Portion</span> of this document can‘t be changed.</p>\r\n<p>The area with red <span class=‘mceNonEditable‘ style=\"color: #ff0000;\">background </span> can‘t be <span class=‘mceNonEditable‘ style=\"color: #ff0000;\">removed</span>. You can only <span class=‘mceNonEditable‘ style=\"color: #ff0000;\">change </span> the area with black.</p>\r\n<p> </p>";
Where this.elm1 is a textarea control.
I had difficulties in getting it to work, hence thought this should be useful for people wanting to integrate the TinyMCE editor with their ASP.NET applications.
转自 http://www.codeproject.com/Articles/88142/Integrating-TinyMCE-Editor-with-ASP-NET
标签:
原文地址:http://www.cnblogs.com/mfc-itblog/p/5154273.html