标签:
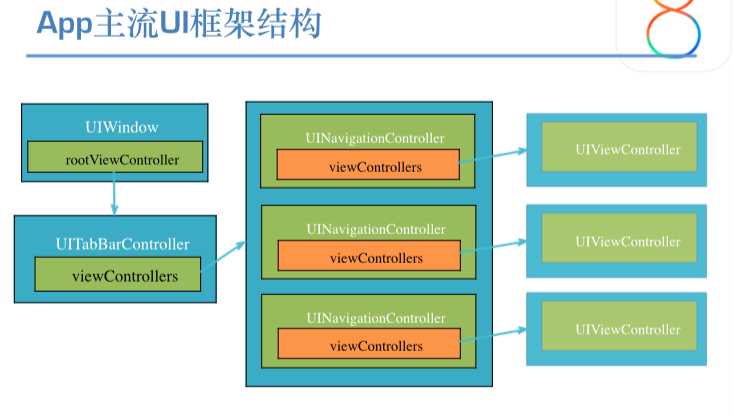
UITabBarController
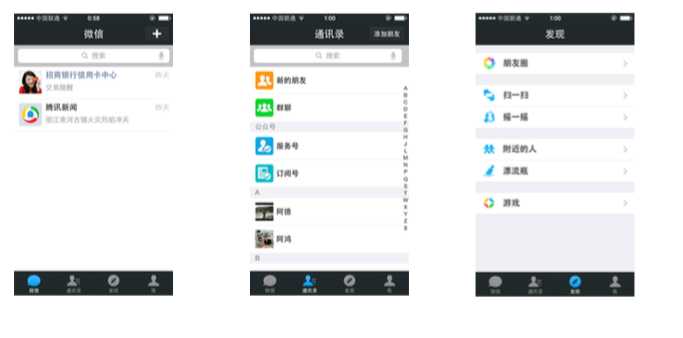
跟UINavigationController类似,UITabBarController也可以轻松地管理多个控制器,轻松完成控制器之间的切换,典型例子就是QQ、微信等应用
UITabBarController的简单使用
UITabBarController的使用步骤
(1)初始化UITabBarController
(2)设置UIWindow的rootViewController 为UITabBarController
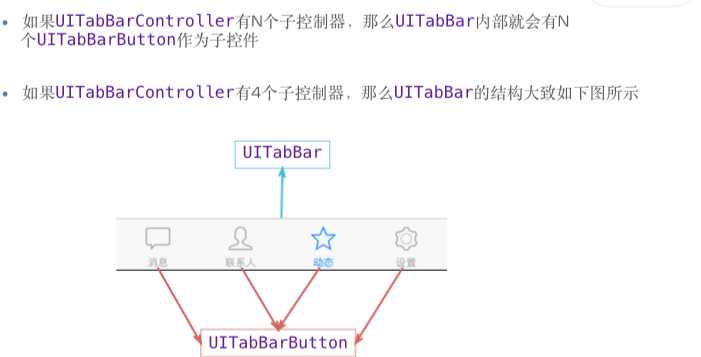
(3)根据具体情况,通过addChildViewController方法添加对应个数的自控制器
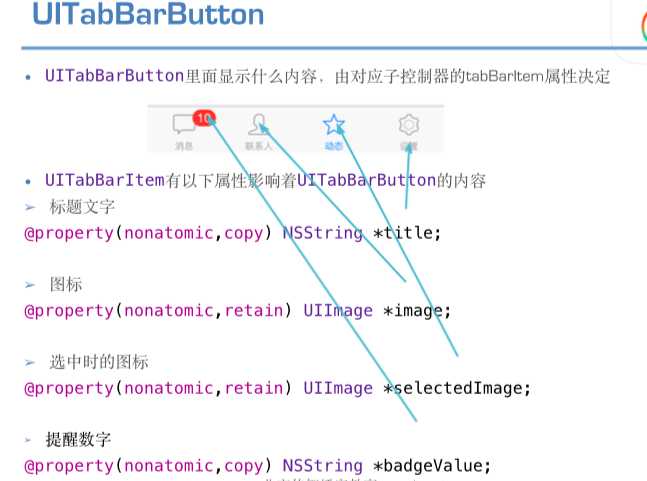
UITabBarController添加控制器的方式有2种
添加单个子控制器
-(void)addChildViewController:(UIViewController *)childController
设置子控制器数组
 @property(nonatomic, copy) NSArray *viewControllers;


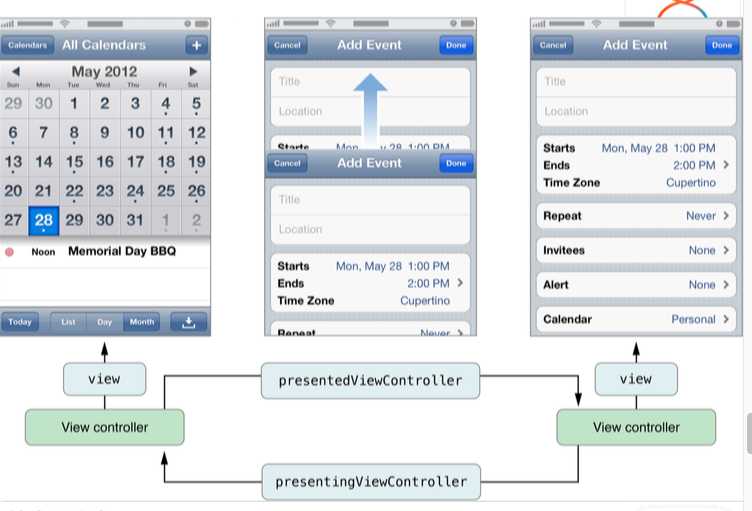
modal 控制器切换方式 控制器不会消失。
Main.storyboard
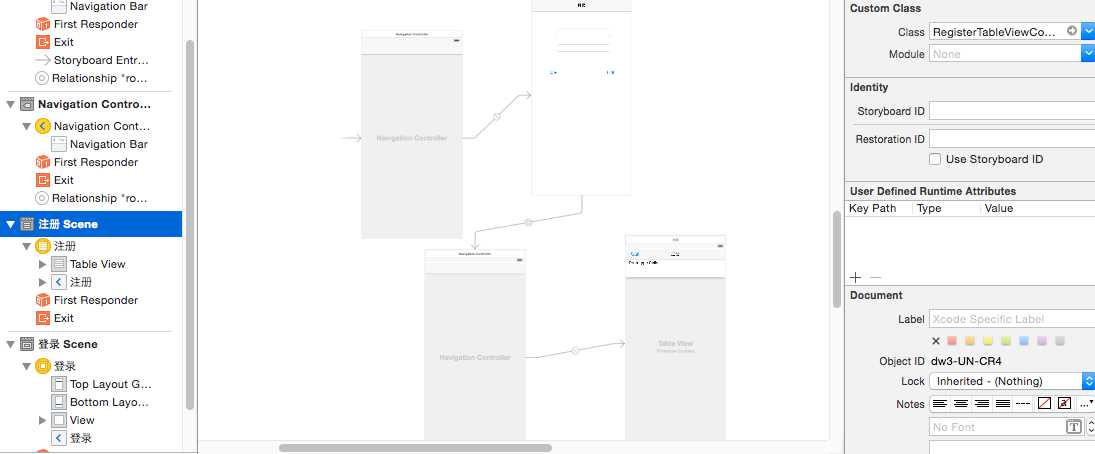
Main.storyboard 中的ID在注册前面的导航控制器里
RegisterTableViewController.h
#import <UIKit/UIKit.h>
@interface RegisterTableViewController : UITableViewController
@end
RegisterTableViewController.m
- (IBAction)backBtn:(id)sender {
//modal
[self dismissViewControllerAnimated:YES completion:^{
NSLog(@"模态窗口消失完成");
//打印窗口的子视图
// NSLog(@"%@", self.view.window.subviews);
//通过Appdelegate代理来获取窗口
AppDelegate *app = [UIApplication sharedApplication].delegate;
NSLog(@"%@", app.window.subviews);
}];
}
ViewController.m
#import "ViewController.h"
#import "RegisterTableViewController.h"
#import "AppDelegate.h"
@interface ViewController ()
@end
-(void)touchesBegan:(NSSet<UITouch *> *)touches withEvent:(UIEvent *)event{
//弹出注册控制器
// RegisterTableViewController *regVc = [[RegisterTableViewController alloc] init];
//UITransitionView 是给模态窗口用 包装注册控制器的view一起往上移
//UILayouContainerView 是导航控制器
//从storyboard 加载控制器
UIStoryboard *storyboard = [UIStoryboard storyboardWithName:@"Main" bundle:nil];
id regVc = [storyboard instantiateViewControllerWithIdentifier:@"register"];
[self presentViewController:regVc animated:YES completion:^{
NSLog(@"模态窗口展现完成");
//通过Appdelegate代理来获取窗口
AppDelegate *app = [UIApplication sharedApplication].delegate;
NSLog(@"%@", app.window.subviews);
}];
}
@end
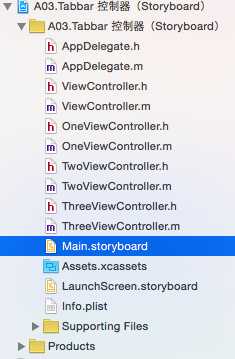
TabBar控制器(代码)
AppDelegate.m
#import "AppDelegate.h"
@interface AppDelegate ()
@end
@implementation AppDelegate
- (BOOL)application:(UIApplication *)application didFinishLaunchingWithOptions:(NSDictionary *)launchOptions {
// Override point for customization after application launch.
//1.创建窗口
UIWindow *window = [[UIWindow alloc] initWithFrame:[UIScreen mainScreen].bounds];
//2.设置窗口的根控制器 为Tabbar控制器
//2.1创建tabbar控制器
UITabBarController *tabbarVc = [[UITabBarController alloc] init];
//2.2 设置子控制器
UIViewController *vc1 = [[UIViewController alloc] init];
vc1.view.backgroundColor = [UIColor redColor];
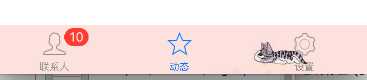
vc1.tabBarItem.badgeValue = @"123";
// [tabbarVc addChildViewController:vc1];
//设置UITabbarButton的标题
vc1.tabBarItem.title = @"联系人";
vc1.tabBarItem.image = [UIImage imageNamed:@"tab_buddy_nor"];
UIViewController *vc2 = [[UIViewController alloc] init];
vc2.view.backgroundColor = [UIColor yellowColor];
// [tabbarVc addChildViewController:vc2];
vc2.tabBarItem.title = @"动态";
vc2.tabBarItem.image = [UIImage imageNamed:@"tab_qworld_nor"];
UIViewController *vc3 = [[UIViewController alloc] init];
vc3.view.backgroundColor = [UIColor greenColor];
// [tabbarVc addChildViewController:vc3];
tabbarVc.viewControllers = @[vc1, vc2, vc3];
vc3.tabBarItem.title = @"设置";
vc3.tabBarItem.image = [UIImage imageNamed:@"tab_me_nor"];
window.rootViewController = tabbarVc;
//3.设置窗口为主窗口并可见
[window makeKeyAndVisible];
self.window = window;
return YES;
}
TabBar控制器(main.storyboard)
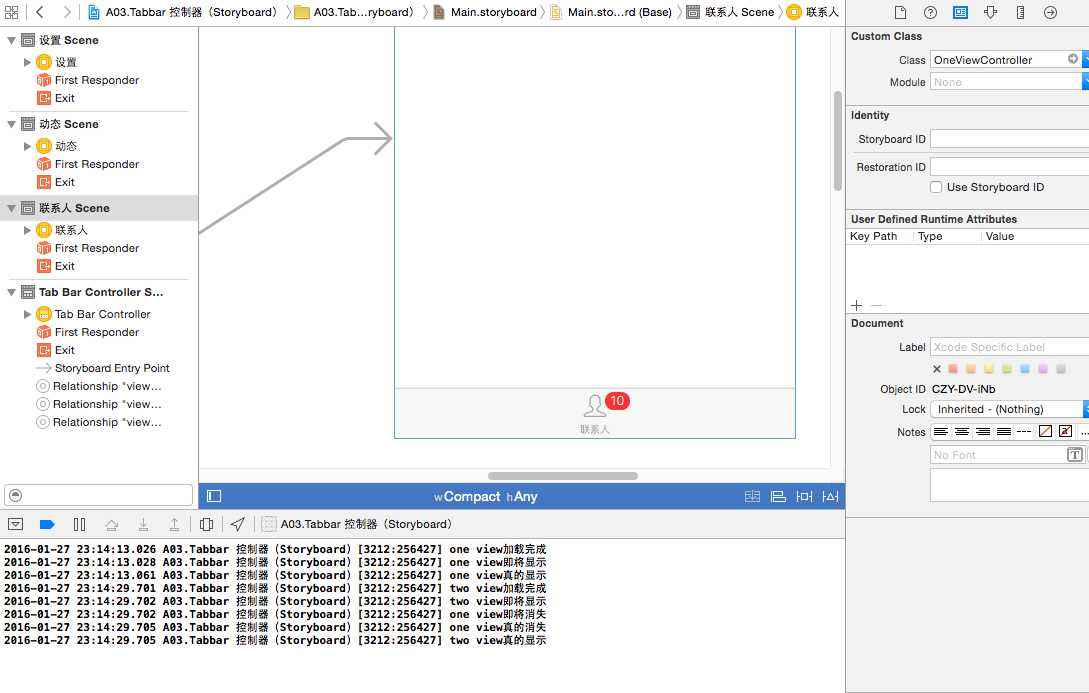
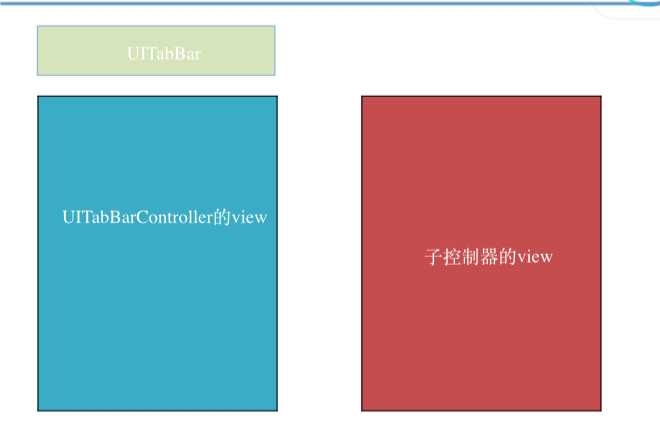
tabBar 的生命周期与 Navigation 不同 ,两个View在一起。
标签:
原文地址:http://www.cnblogs.com/Lu2015-10-03/p/5164900.html