标签:
我有点想要吐槽,因为用原生的js实现起来挺简单的一个小东西,改用react来写却花了我不少时间,也许react的写法只有在复杂的web应用中才能体现出它的优势吧!不过吐槽归吐槽,对react这种优雅的代码的写法我自己是很喜欢的啊!来简单的讲一下,希望能对react的初学者有一些帮助...
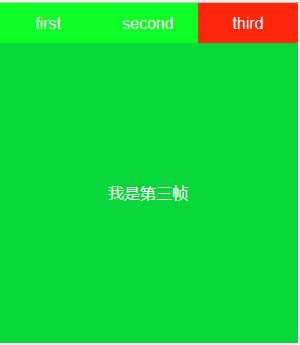
效果图:

组建的编写用了一些es6的语法,用webpack作为转译打包工具。
把核心代码贴上来下...
var React=require("react");
var ReactDOM=require("react-dom");
require("../css/style.css");

class TabsControl extends React.Component{

    constructor(){
        super();
        this.state={
            currentIndex : 0
        };
    }

    check_tittle_index(index){
        return index===this.state.currentIndex ? "Tab_tittle active" : "Tab_tittle";
    }

    check_item_index(index){
        return index===this.state.currentIndex ? "Tab_item show" : "Tab_item";
    }

    render(){
        let _this=this;
        return(
            <div>
                {/*动态生成Tab导航*/}
                <div className="Tab_tittle_wrap">
                    { React.Children.map( this.props.children , (element,index) => {
                        return(
                            /*箭头函数没有自己的this,这里的this继承自外围作用域,即组件本身*/
                            <div onClick={ () => { this.setState({currentIndex : index}) } } className={ this.check_tittle_index(index) }>{ element.props.name }</div>
                            );
                    }) }
                </div>
                {/*Tab内容区域*/}
                <div className="Tab_item_wrap">
                    {React.Children.map(this.props.children,(element,index)=>{
                        return(
                            <div className={ this.check_item_index(index) }>{ element }</div>
                            );
                    })}
                </div>
            </div>
            );
    }
}

class TabComponent extends React.Component{

    render(){
        return(
            <div className="container">
                <TabsControl>
                    <div name="first">
                        我是第一帧
                    </div>
                    <div name="second">
                        我是第二帧
                    </div>
                    <div name="third">
                        我是第三帧
                    </div>
                </TabsControl>
            </div>
            );
    }
}

ReactDOM.render(<TabComponent/>,document.getElementById("app"));
总体的思路是这样的:
在<TabComponent/>组件中</TabsControl>组件包含着主要内容区域=>任意数量的div,在</TabsControl>组件中通过this.props.children获取到这些div,并且动态生成相应数量的Tab_tittle,再对标题区和内容区设置合适的className,以控制标题区的颜色切换和内容区域的显示和隐藏,</TabsControl>中通过state设置index来记忆被点击的区域,并且每一个标题区域都有绑定一个click处理方法,每一次点击都会重新设置state的index值,组件会自动调用this.render方法重新渲染视图,上面说到的className的设置规则也是借由index值来实现的=>当标题区域或者内容区域其对应的索引值与state中的index相同的时候,给它们添加具有特殊的即动态标示的className。至于标题区域和内容区域它们所具有的索引值则是借助于this.props.children的React.Children.map()方法来添加的...
/*代码*/
* onClick={ () => { ,使用es6的箭头函数的话,在这里this就不再是onclick的触发对象了,而是指向了其所在的组件,因为箭头函数没有自己的this,这里的this继承自外围作用域,即组件本身。
* 像
                <TabsControl>
                    <div name="first">
                        我是第一帧
                    </div>
                    <div name="second">
                        我是第二帧
                    </div>
                    <div name="third">
                        我是第三帧
                    </div>
                </TabsControl>
则在<TabsControl>组件中使用this.props.children可以获取到一个包含三个div的数组,如果在这里只包含一个div的话,获取到的则是一个对象,react提供了React.Children.map()这样的方法来实现方便的对获取到的数组进行操作。
/*总结*/
react很好,我很喜欢,写出来的代码也很好看,不会像原生的js代码那样看起来很松散,而且我想react也是大势所趋吧,所以追随着react继续走下去是不会错的吧!
标签:
原文地址:http://www.cnblogs.com/tianheila/p/5170330.html