标签:
这俩天学习了yii2 ,写点心得,嘻嘻
第一部分呢,就写下关于yii2 的mvc的一些东东吧
用- 代替大小写
public function actionIndex()
{}
 1 //      获取 request 信息
 2 $request = \Yii::$app->request;
 3 //      获取所以get 的数据
 4 $get = $request->get();
 5 //      获取 put ,post , patch 的数据
 6 $params = $request->bodyParams;
 7 //      获取头部信息
 8 $header = \Yii::$app->request->headers;
 9 //      获取 userAgent
10 $userAgent = \Yii::$app->request->userAgent;
11 //      获取Content-type
12 $contype = \Yii::$app->request->contentType;
13 //      获取userhost
14 $userhost = \Yii::$app->request->userHost ;
15 //      获取userip
16 $userip = \Yii::$app->request->userIP;
 1 public function actionResponse()
 2 {
 3 //      获取响应信息
 4 $header = \Yii::$app->response->headers;
 5 //      添加响应信息
 6 $header->add(‘pragma‘,‘no-cache‘);
 7 //      设置响应信息
 8 $header->set(‘pragma‘ ,‘No-c‘);
 9 //      删除响应信息
10 $header->remove(‘pragma‘);
11 //      设置响应文本
12 \Yii::$app->response->content = "hello yii2;";
13 //      数据格式化 json
14 $response = \Yii::$app->response;
15 $response->format = \yii\web\Response::FORMAT_JSON;
16 $response->data = [‘message‘=>‘hello zeopean‘ , ‘status‘=>1];
17 echo $response->data;
18 }
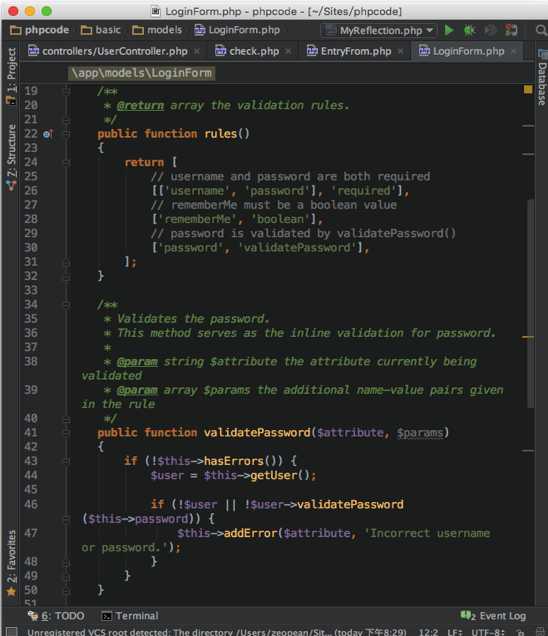
模型中的 rules 表示 对模型字段对验证规则 ,validatePassword 则是验证方法
在模型中的 定义
1 public function scenarios()
2 {
3 return [
4 ‘create‘    => [‘message‘ , ‘created_at‘ ],
5 ‘update‘    => [‘message‘ , ‘updated_at‘]
6 ];
7 }
在控制器中的使用:
 1 public function actionUpdate($id)
 2 {
 3 $model = $this->findModel($id);
 4 $model->setScenario(‘update‘);     //设置场景模式
 5 $model->updated_at = time();
 6 if ($model->load(Yii::$app->request->post()) && $model->save()) {
 7 return $this->redirect([‘view‘, ‘id‘ => $model->id]);
 8 } else {
 9 return $this->render(‘update‘, [
10 ‘model‘ => $model,
11 ]);
12 }
13 }
我们可以通过不同的场景,对模型字段进行验证 例如,我们在进行创建操作时,想要验证 created_at , message ,但是我们却没必要验证 updated_at,
故而我们的 create 场景就是这样的了,
public function scenarios()
 {
   return [
     ‘create‘    => [‘message‘ , ‘created_at‘ ],
   ]
}
这个场景只针对 create 时有效 ,故而有以下代码
  public function actionUpdate($id)
  {
    $model = $this->findModel($id);
    $model->setScenario(‘update‘);     //设置场景模式
...
}
1 <?php $form= ActiveForm::begin(); ?>
2 <?= $form->field($model , ‘name‘)->label(‘请输入姓名‘) ?>
3 <?= $form->field($model , ‘email‘)->label("请输入邮箱") ?>
4 <div class="form-group">
5 <?= Html::submitButton("Submit" , [‘class‘ => ‘btn btn-primary‘]) ?>
6 </div>
7 <?php $form= ActiveForm::end(); ?>
在basic/assets/AppAsset.php进行一下配置 ,此处为全局设置
/* 全局css 文件*/
public $css = [
‘css/site.css‘,
];
/*全局js 文件*/
public $js = [
‘js/file.lazyload.min.js‘,
];
在视图中初始化,让视图文件能找到 这个配置项
1 <?php
2     \app\assets\AppAsset::register($this);
3 ?>
在视图中 使用
js 文件
<?php
$this->registerJs(‘
LazyLoad.js(["js/zepto.js"     //这是一个延迟加载js/css文件的插件
], function () {
$(function(){
alert("hello");
});
});
‘);
?>
css 文件
<?php
$cssString = ".gray-bg{color:red;}";
$this->registerCss($cssString);
?>
标签:
原文地址:http://www.cnblogs.com/zeopean/p/yii2.html