标签:
一,首先下载安装nginx需要依赖的库文件:
1.1,选定源码目录
选定目录 /usr/local/RTMP
cd /usr/local/RTMP
1.2,安装PCRE库
cd /usr/local/RTMP
到www.pcre.org 下载pcre-8.37.tar.gz , 然后拷贝到/usr/local/HLS
tar -zxvf pcre-8.37.tar.gz
cd pcre-8.37
./configure
make
make install
1.3,安装zlib库
cd /usr/local/RTMP
到www.zlib.net 下载zlib-1.2.8.tar.gz, 然后拷贝到/usr/local/HLS
tar -zxvf zlib-1.2.8.tar.gz cd zlib-1.2.8
./configure
make
make install
1.4,安装SSL
cd /usr/local/RTMP
到www.openssl.org下载openssl-1.0.2g.tar.gz, 然后拷贝到/usr/local/HLS
tar -zxvf openssl-1.0.2g.tar.gz
./config
make
make install
二,安装包含 nginx-rtmp-module模块的nginx
2.1,下载并解压nginx
到nginx.org 下载稳定版本的nginx-1.8.1.tar.gz, 然后拷贝到/usr/local/RTMP
tar -zxvf nginx-1.8.1.tar.gz
2.2,下载 nginx-rtmp-module
到 https://github.com/arut/nginx-rtmp-module 下载:nginx-rtmp-module.1.1.4.tar.gz 然后拷贝到/usr/local/RTMP
tar -zxvf nginx-rtmp-module.1.1.4.tar.gz
2.3,编译安装包含 nginx-rtmp-module模块的nginx
2.3.1,进入nginx-1.8.1源码目录
依次执行以下命令运行:
./configure --prefix=/usr/local/nginx --add-module=/usr/local/RTMP/nginx-rtmp-module.1.1.4 --with-http_ssl_module
make -f objs/Makefile
make -f objs/Makefile install
三,配置点播RTMP
3.1,打开nginx/conf目录下的nginx.conf配置文件
3.1.1 在http{
……
} 大括号里面的末尾添加以下配置内容:
#配置rtmp状态页
server {
listen 8080;
location /stat {
rtmp_stat all;
rtmp_stat_stylesheet stat.xsl;
}
location /stat.xsl {
root /usr/local/rtmp/nginx-rtmp-module.1.1.4/; #在nginx-rtmp-module源码根目录
}
}
3.1.2, 然后在nginx.conf的末尾加上以下内容:
#rtmp点播配置
rtmp {
server {
listen 1935;
chunk_size 4000;
application vod {
play /usr/local/nginx/vod/flvs; #点播媒体文件存放目录
}
}
}
3.1.3,保存以上配置信息。
3.2,配置点播环境信息
3.2.1,建立媒体文件夹
mkdir /usr/local/nginx/vod/flvs
3.2.2, 准备媒体文件
把媒体文件(如oooo.flv)拷贝到 /usr/local/nginx/vod/flvs目录下
3.2.3, 准备网页
下载jwplayer: www.jwplayer.com 需要注册,才能下载并获取相应的license key(如:601u+htlhuXp5LQPeZtRlAABKwyX/94L3LRAcg==)
下载jwplayer7.3.6.zip后, 解压到:/usr/local/nginx/html/
建立测试网页test.html,也放到上面的目录下:
<html>
         <head>
		 welcome test rtmp <br>
                   <script src="/jwplayer/jwplayer.js"></script>
         </head>
         <body>
		 <script type="text/javascript">
							jwplayer.key="601u+htlhuXp5LQPeZtRlAABKwyX/94L3LRAcg==";
				   </script>
                   <div id=‘my-video‘></div>
                   <script type=‘text/javascript‘>
                            jwplayer(‘my-video‘).setup({
                                     file:‘rtmp://192.168.1.104/vod/oooo.flv‘,
                                     width:‘50%‘,
                                     aspectratio:‘3:2‘,
                                     fallback:‘false‘,
                                     primary:‘flash‘
                                     });
                   </script>
				   <script type="text/javascript">
							jwplayer.key="601u+htlhuXp5LQPeZtRlAABKwyX/94L3LRAcg==";
				   </script>
         </body>
</html>
3.3,启动nginx
3.3.1 执行 /usr/local/nginx/sbin/nginx
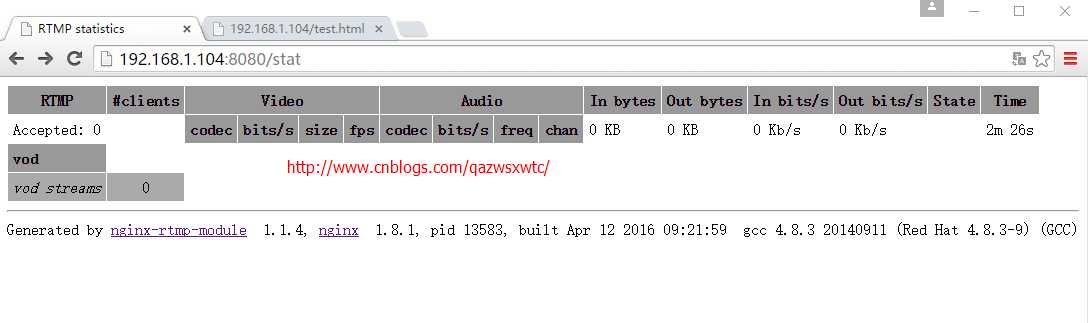
3.3.2,从客户端网页输入 http://192.168.1.104:8080/stat 得到如图结果:
3.3.3,从客户端网页输入:http://192.168.1.104/test.html 得到如下如图结果:

四,配置直播RTMP
4.1,打开nginx/conf目录下的nginx.conf配置文件
4.1.1 在配置文件里面加入如下配置信息:
#rtmp直播配置
rtmp {
server {
listen 1935;
chunk_size 4000;
application live {
live on;
}
}
}
4.1.2,如3.1.1相同加入rtmp的状态配置信息
#配置rtmp状态页
server {
listen 8080;
location /stat {
rtmp_stat all;
rtmp_stat_stylesheet stat.xsl;
}
location /stat.xsl {
root /usr/local/hls/nginx-rtmp-module-master/; #在nginx-rtmp-module源码根目录
}
}
4.1.3,保存配置信息。
4.2配置资源信息
4.2.1, 准备网页
下载jwplayer: www.jwplayer.com 需要注册,才能下载并获取相应的license key(如:601u+htlhuXp5LQPeZtRlAABKwyX/94L3LRAcg==)
下载jwplayer7.3.6.zip后, 解压到:/usr/local/nginx/html/
建立测试网页test.html,也放到上面的目录下:
<html>
         <head>
		 welcom to test rtml <br>
                   <script src="/jwplayer/jwplayer.js"></script>
         </head>
         <body>
		 <script type="text/javascript">
							jwplayer.key="601u+htlhuXp5LQPeZtRlAABKwyX/94L3LRAcg==";
				   </script>
                   <div id=‘my-video‘></div>
                   <script type=‘text/javascript‘>
                            jwplayer(‘my-video‘).setup({
                               file:‘rtmp://192.168.0.128/live/test‘, #live是applicatioin,test是直播缓存流文件
                                     width:‘50%‘,
                                     aspectratio:‘3:2‘,
                                     fallback:‘false‘,
                                     primary:‘flash‘
                                     });
                   </script>
				   <script type="text/javascript">
							jwplayer.key="601u+htlhuXp5LQPeZtRlAABKwyX/94L3LRAcg==";
				   </script>
         </body>
</html>
4.3,启动nginx, 如3.3中的启动
4.4,模拟推流
用ffmpeg模拟产生一个直播源,向配置的rtmp服务器推送
ffmpeg –i /usr/local/nginx/vod/flvs/oooo.flv -strict -2 -c:v libx264 -c:a aac -f flv rtmp://192.168.1.104/live/test
注意:源文件必须是H.264+AAC的编码格式
其中,live是application; test是直播缓存流文件,需要与配置文件中的直播缓存文件名一致。(关于rtmp的URL格式请自行查阅相关资料)
4.5,从客户端网页输入:http://192.168.1.104/test.html 得到类似3.3的效果图:
基于nginx的rtmp的服务器(nginx-rtmp-module)
标签:
原文地址:http://www.cnblogs.com/qazwsxwtc/p/5384967.html