标签:
最近在自学前端的东西,感觉很神奇的样子。没事的时候就写点小东西。 刚刚自己写了一个图片的放大镜效果。请大家多多提出修改建议。
不说废话了, 先贴代码!
$(function () {
var w = $(".mask img").width() / 2; //获取图片的宽和高。
var h = $(".mask img").height() / 2;
var mask = $(".mask");
mask.css({ "width":w, "height": h }); //设置中图Div的大小。
mask.css("border", "1px solid #ddd");
$(".mask img").css({ "width": w, "height": h }); //设置图片的宽和高。
$(".now").css({
"width": w/2, "height": h/2, "backgroundColor": "#DBD09B",
"position": "absolute", "top": "0px", "opacity": 0.5,"display":"none" //遮罩层的大小及样式
});
$(".supermask").css({
"width": w, "height": h, "position": "absolute", "top": "0px",
"backgroundColor":"#fff","border":"1px solid #fff","cursor":"move","opacity":0 //透明DIV的大小及样式
})
$(".bigimg").css({
"width": w, "height":h, "position": "absolute", "top": "0px",
"left": w+2, "backgroundColor": "#fff","border":"1px solid #ddd","display":"none" //右侧显示大图的DIV
})
$(".supermask").mouseover(function () {
$(".now").css("display", "block");
$(".bigimg").css("display", "block");
})
$(".supermask").mouseout(function () {
$(".now").css("display", "none");
$(".bigimg").css("display", "none"); //对遮罩层和大图DIV的操作。
})
$(".supermask").mousemove(function () {
var x = event.offsetX - w/2/ 2;
var y = event.offsetY - h/2/ 2;
x = x < 0 ? 0 : x > (w - w/2) ? (w - w/2) : x;
y = y < 0 ? 0 : y > (h - h/2) ? (h - h/2) : y;
$(".now").css({ "left": x, "top": y }); //遮罩层跟随鼠标移动,并且鼠标在遮罩层的中心点
var srcimg = $(".mask img")[0].src;
$(".bigimg").css("background-image", "url(" + srcimg + ")");
$(".bigimg").css("background-positionX", x * (-2));
$(".bigimg").css("background-positionY", y * (-2)); //右侧DIV中的背景根据遮罩层移动显示不同的图片区域。
})
})
以上为JS文件中的内容,只需引用此文件,并在页面设置对应的类名,和修改图片的路径就可以实现效果。
而且它会根据你图片的大小,计算设置遮罩层,中图DIV和大图DIV的大小。
页面代码:
<body>
<div style="position:relative;">
<div class="mask"><img src="images/c.jpeg"/></div>
<div class="now"></div>
<div class="supermask"></div>
<div class="bigimg"></div>
</div>
</body>
样式在JS文件中已经设置,当然也可以根据自己的需要自行设置!
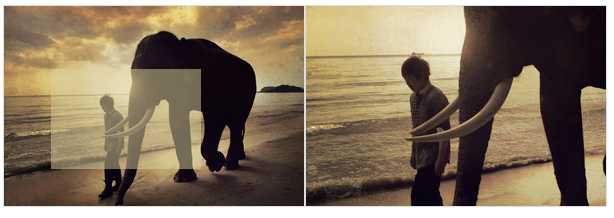
效果图:

自学中,请大神们多多提出宝贵建议。
标签:
原文地址:http://www.cnblogs.com/yjh-bl/p/5412657.html