标签:
一.说明:
新建一个Single View Application,删除main.stroryboard中原有的控制器,拖入一个新的CollectionViewController;
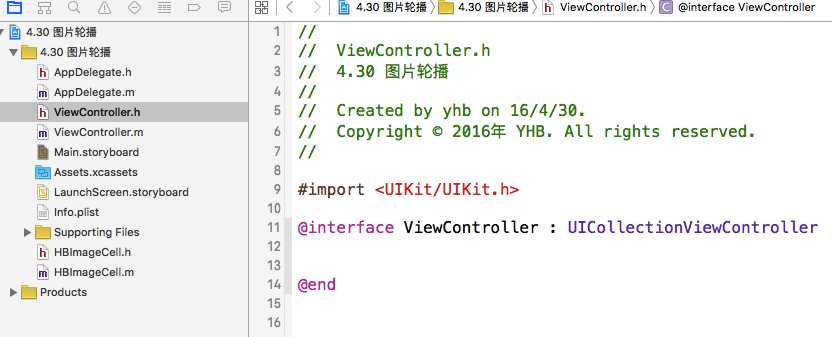
在原有的ViewController.h文件中,将继承改成UICollectionViewController,且绑定CollectionViewController


要使用原型cell来创建每张图片,故建立相应的cell文件并绑定.在原型cell中拖入一张imageView,并设定其约束覆盖全cell

在Assets.xcassets中拖入图片,至此基本界面搭建完毕.

二.实现代码:
//
//  HBImageCell.h文件
//  4.30 图片轮播

#import <UIKit/UIKit.h>

@interface HBImageCell : UICollectionViewCell
//创建一个imgName属性,当导入imgName时,为图像赋值
@property (nonatomic,copy)NSString *imgName;
@end
设置cell中图片的Outlets接口
//
//  HBImageCell.m文件
//  4.30 图片轮播

#import "HBImageCell.h"
@interface HBImageCell ()
@property (weak, nonatomic) IBOutlet UIImageView *imgView;
@end

@implementation HBImageCell
-(void)setImgName:(NSString *)imgName{
    _imgName = imgName;
    UIImage *img = [UIImage imageNamed:imgName];
    self.imgView.image = img;
}


@end
/*
  ViewController.m文件中

 思想:为了使图片能无限轮播,将图片每次的位置都滚动到第2位,且设立个新索引,图片内容根据新索引变化
 */

#import "ViewController.h"
#import "HBImageCell.h"
//将图片数量定义为宏,方便后期维护
#define IMG_COUNT 9
@interface ViewController ()
//拖入layout的输出接口
@property (weak, nonatomic) IBOutlet UICollectionViewFlowLayout *flowLayout;
@property (assign,nonatomic)int index;
@end

@implementation ViewController
//在main.storyboard的cell中也应设定相同的可重用identifier
static NSString *ID = @"IMG";

#pragma mark - ViewDidLoad
- (void)viewDidLoad {
    [super viewDidLoad];
    //使每个单元格的尺寸与屏幕相同
    self.flowLayout.itemSize = self.view.frame.size;
    //设置单元格之间的间隙为0
    self.flowLayout.minimumLineSpacing = 0;
    //设置滚动方式为水平滚动
    self.flowLayout.scrollDirection = UICollectionViewScrollDirectionHorizontal;
    //隐藏水平滚动条
    self.collectionView.showsHorizontalScrollIndicator = NO;
    //设置分页显示
    self.collectionView.pagingEnabled = YES;
    //刚开始就将其滚动到第2个位置
    [self scrollToSecondPosition];
}
#pragma mark - 返回个数
-(NSInteger)collectionView:(UICollectionView *)collectionView numberOfItemsInSection:(NSInteger)section{
    return IMG_COUNT;
}
#pragma mark - 返回内容
-(UICollectionViewCell *)collectionView:(UICollectionView *)collectionView cellForItemAtIndexPath:(NSIndexPath *)indexPath{
    //取出原型cell
    HBImageCell *cell = [collectionView dequeueReusableCellWithReuseIdentifier:ID forIndexPath:indexPath];

    //要先判断是向左拖还是向右拖,在拖动时就显示图片内容
    //但不能直接在self.index上改动,否则在拖动结束后index还会自增(自减),故建立一个临时变量
    int tempIndex = self.index;
    if (indexPath.item == 0) {
        tempIndex --;
    }else if (indexPath.item == 2){
        tempIndex ++;
    }
    //判断越界
    if (tempIndex == IMG_COUNT) {
        tempIndex = 0;
    }else if (tempIndex == -1){
        tempIndex = IMG_COUNT - 1;
    }

    //为cell赋imgName
    NSString *imgName = [NSString stringWithFormat:@"%zd",tempIndex];
    cell.imgName = imgName;

    return cell;
}

#pragma mark - 拖动结束时调用
//通过该方法来确定图片最后显示的内容
-(void)scrollViewDidEndDecelerating:(UIScrollView *)scrollView{
    //通过偏移来得知是向左还是向右拖动
    CGFloat offset = scrollView.contentOffset.x;
    int next = offset/self.flowLayout.itemSize.width;
    if (next == 0) {
        self.index--;
    }else if (next == 2){
        self.index++;
    }
    //越界判断
    if (self.index == IMG_COUNT) {
        self.index = 0;
    }else if (self.index == -1){
        self.index = IMG_COUNT - 1;
    }

    //加入异步线程,回到第2个位置
    dispatch_async(dispatch_get_main_queue(), ^{
        [self scrollToSecondPosition];
    });

}

#pragma mark - 滚动到第二个的位置方法
-(void)scrollToSecondPosition{
    NSIndexPath *indexPath = [NSIndexPath indexPathForItem:1 inSection:0];
    [self.collectionView scrollToItemAtIndexPath:indexPath atScrollPosition:UICollectionViewScrollPositionNone animated:NO];

}
@end
至此实现代码完成.
三.优化
图片的索引变化和判断越界可使用一句优化算法代替
/*
    ViewController.m文件中
 */


-(UICollectionViewCell *)collectionView:(UICollectionView *)collectionView cellForItemAtIndexPath:(NSIndexPath *)indexPath{
    ....
    int tempIndex = self.index;
    if (indexPath.item == 0) {
        tempIndex --;
    }else if (indexPath.item == 2){
        tempIndex ++;
    }
    //判断越界
    if (tempIndex == IMG_COUNT) {
        tempIndex = 0;
    }else if (tempIndex == -1){
        tempIndex = IMG_COUNT - 1;
    }
    tempIndex = (tempIndex + (indexPath.item -1))%IMG_COUNT;
    ....
}

#pragma mark - 拖动结束时调用
//通过该方法来确定图片最后显示的内容
-(void)scrollViewDidEndDecelerating:(UIScrollView *)scrollView{
    //通过偏移来得知是向左还是向右拖动
    CGFloat offset = scrollView.contentOffset.x;
    int next = offset/self.flowLayout.itemSize.width;
    if (next == 0) {
        self.index--;
    }else if (next == 2){
        self.index++;
    }
    //越界判断
    if (self.index == IMG_COUNT) {
        self.index = 0;
    }else if (self.index == -1){
        self.index = IMG_COUNT - 1;
    }
    self.index = (self.index + (next - 1))%IMG_COUNT;
   ...
}
四.注意点
HBImageCell *cell = [collectionView dequeueReusableCellWithReuseIdentifier:ID forIndexPath:indexPath];
从原型cell中取得cell不需要注册,而使用xib或class文件中获得cell则要在viewDidLoad中注册相应的cell
    //注册nib
    [self.collectionView registerNib:<#(nullable UINib *)#> forCellWithReuseIdentifier:<#(nonnull NSString *)#>]
    //注册class
    [self.collectionView registerClass:<#(nullable Class)#> forCellWithReuseIdentifier:<#(nonnull NSString *)#>]
标签:
原文地址:http://www.cnblogs.com/decomfor/p/5448259.html