标签:
参考:https://zsisme.gitbooks.io/ios-/content/
前面的文章动画基础--基于Core Animation(1)提到了图层的基本概念以及可动画参数几何学等知识。
本片文章将继续探讨更加深入的动画知识。
6.视觉效果
圆角
圆角设定可以让原本死板的直角视图更加美观和谐:>
-(void)radiusView
{
    radiusView  = [[UIView alloc]initWithFrame:CGRectMake(100.0f, 50.0f, 100.0f, 100.0f)];
    radiusView.backgroundColor = [UIColor grayColor];
    [self.view addSubview:radiusView];


    CALayer *layer = [CALayer layer];

    layer.frame = CGRectMake(80.0f, 30.0f, 100.0f, 100.0f);
    layer.backgroundColor = [UIColor blueColor].CGColor;

    [radiusView.layer addSublayer:layer];


    // 作用于视图的图层

    // 1. 设定圆角半径,如果视图本身是一个正方形,此时如果设定半径为其边长一半的时候将会哟圆形效果
    radiusView.layer.cornerRadius = 20.0f;

    // 2. 剪切掉子视图超出父视图的部分
    radiusView.layer.masksToBounds = YES;

}
结果:
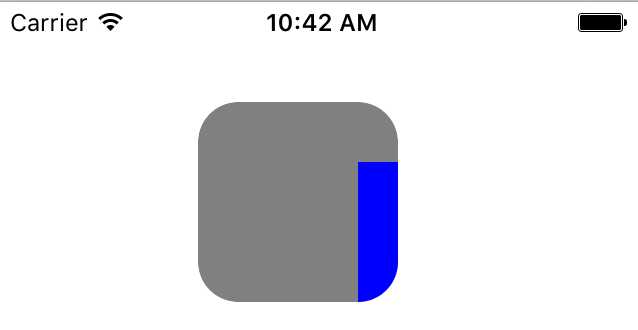
边框:
主要用到图层的
borderWidth:单位为点,默认为0既无边框
borderColor:类型为CGColorRef
边框是绘制在图层边界里面的,而且在所有子内容之前,也在子图层之前。
如下代码我们将masksToBounds设定为NO这样就能清楚的看到边框的子图层的上面。
-(void)radiusViewBorder
{
    radiusView  = [[UIView alloc]initWithFrame:CGRectMake(100.0f, 50.0f, 100.0f, 100.0f)];
    radiusView.backgroundColor = [UIColor grayColor];
    [self.view addSubview:radiusView];


    CALayer *layer = [CALayer layer];

    layer.frame = CGRectMake(80.0f, 30.0f, 100.0f, 100.0f);
    layer.backgroundColor = [UIColor blueColor].CGColor;

    [radiusView.layer addSublayer:layer];


    // 作用于视图的图层

    // 1. 设定圆角半径,如果视图本身是一个正方形,此时如果设定半径为其边长一半的时候将会哟圆形效果
    radiusView.layer.cornerRadius = 20.0f;

    // 2. 剪切掉子视图超出父视图的部分
    radiusView.layer.masksToBounds = NO;

    radiusView.layer.borderWidth = 5.0f;
    radiusView.layer.borderColor = [UIColor blackColor].CGColor;

}
结果:
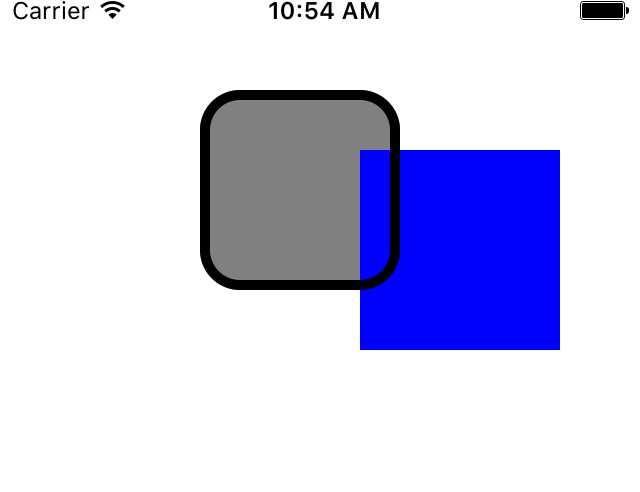
阴影
关联四个属性:
shadowOpacity:阴影的透明度,[0.0(不可见),1.0(完全不透明)]
shadowColor:CGColorRef类型,阴影的颜色,默认是黑色。
shadowOffset:属性控制着阴影的方向和距离。CGSize的值,宽度控制这阴影横向的位移,高度控制着纵向的位移。默认值是 {0, -3},
意即阴影相对于Y轴有3个点的向上位移。
shadowRadius:控制着阴影的模糊度,当它的值是0的时候,阴影就和视图一样有一个非常确定的边界线。当值越来越大的时候,
边界线看上去就会越来越摸糊和自然。苹果自家的应用设计更偏向于自然的阴影,所以一个非零值再合适不过了。
例子:
-(void)shadowView
{
    shadowView  = [[UIView alloc]initWithFrame:CGRectMake(100.0f, 50.0f, 100.0f, 100.0f)];
    shadowView.backgroundColor = [UIColor grayColor];
    [self.view addSubview:shadowView];

    // 设定阴影
    shadowView.layer.shadowOpacity = 1.0f;
    shadowView.layer.shadowOffset = CGSizeMake(0.0, 5.0);
    shadowView.layer.shadowRadius = 5;


//    // 1. 设定圆角半径,如果视图本身是一个正方形,此时如果设定半径为其边长一半的时候将会哟圆形效果
//    shadowView.layer.cornerRadius = 20.0f;
//
//    // 2. 剪切掉子视图超出父视图的部分
//    shadowView.layer.masksToBounds = YES;

}
结果:
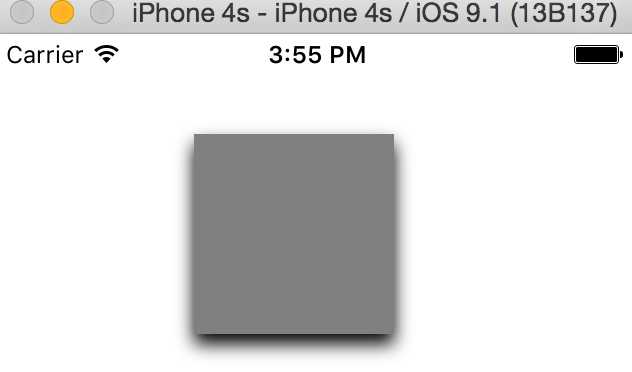
上述代码中特意将圆角和masksToBounds部分注释掉了,因为masksToBounds设定为true的时候会将图层范围以外的所有东西都切掉,包括阴影:
    // 1. 设定圆角半径,如果视图本身是一个正方形,此时如果设定半径为其边长一半的时候将会哟圆形效果
    shadowView.layer.cornerRadius = 20.0f;

    // 2. 剪切掉子视图超出父视图的部分
    shadowView.layer.masksToBounds = YES;
结果:
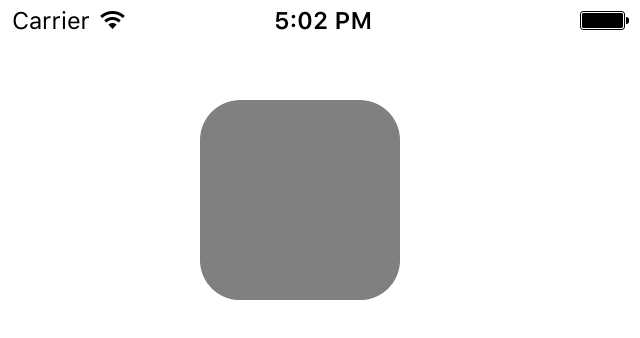
解决方法,我们可以在其底部或者说给他一个相同大小和规格的view来实现阴影:
-(void)shadowAndRadiusView
{
    // 在创建一个空的阴影视图或者图层在shadowView下方,其他参数不重要最主要的是要形状一致即可
    shadowViewBottom  = [[UIView alloc]initWithFrame:CGRectMake(100.0f, 50.0f, 100.0f, 100.0f)];
    shadowViewBottom.backgroundColor = [UIColor whiteColor];
    [self.view addSubview:shadowViewBottom];

    // 设定阴影
    shadowViewBottom.layer.shadowOpacity = 1.0f;
    shadowViewBottom.layer.shadowOffset = CGSizeMake(0.0, 5.0);
    shadowViewBottom.layer.shadowRadius = 5;
    shadowViewBottom.layer.cornerRadius = 20.0f;

    shadowView  = [[UIView alloc]initWithFrame:CGRectMake(100.0f, 50.0f, 100.0f, 100.0f)];
    shadowView.backgroundColor = [UIColor grayColor];
    [self.view addSubview:shadowView];

    // 设定阴影
    shadowView.layer.shadowOpacity = 1.0f;
    shadowView.layer.shadowOffset = CGSizeMake(0.0, 5.0);
    shadowView.layer.shadowRadius = 5;
    // 1. 设定圆角半径,如果视图本身是一个正方形,此时如果设定半径为其边长一半的时候将会哟圆形效果
    shadowView.layer.cornerRadius = 20.0f;
    // 2. 剪切掉子视图超出父视图的部分
    shadowView.layer.masksToBounds = YES;

}
结果:
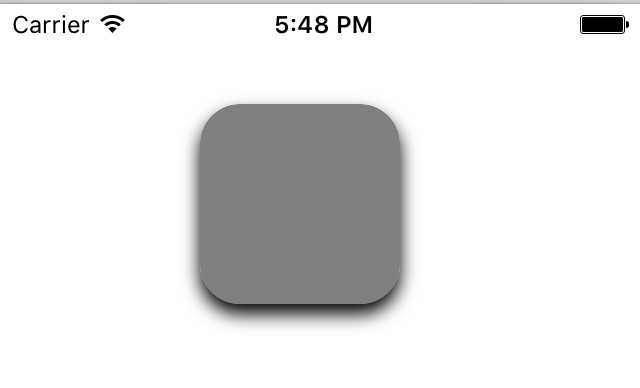
特别注意:1.当不设置视图的颜色的时候是无法表现阴影的。2.图层阴影与图层边框不同,图层阴影是根据图层内容进行阴影计算的(本节没有体现)
上述提到图层阴影是根据图层内容来计算得来的,所以所是一个比较耗资源的一个特性,如果我们早知道了图层的阴影表现则科技提前将图层轮廓计算出后直接加载即可
此时我们可以使用到
shadow属性
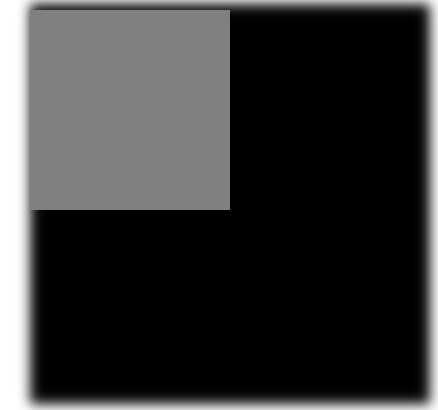
是一个CGPathRef类型(一个指向CGPath的指针)。CGPath是一个Core Graphics对象,用来指定任意的一个矢量图形。我们可以通过这个属性单独于图层形状之外指定阴影的形状。
-(void)shadowPathView
{

    shadowView  = [[UIView alloc]initWithFrame:CGRectMake(100.0f, 50.0f, 100.0f, 100.0f)];
    shadowView.backgroundColor = [UIColor grayColor];
    [self.view addSubview:shadowView];

    // 阴影的透明度是必须制定的
    shadowView.layer.shadowOpacity = 1.0f;

    // 创建一个矩形的阴影,除了矩形阴影,还可以创建其他形状的阴影,比如圆形等
    CGMutablePathRef squarePath = CGPathCreateMutable();

    CGPathAddRect(squarePath, NULL, CGRectMake(0,0,shadowView.bounds.size.width*2, shadowView.bounds.size.height*2));
    shadowView.layer.shadowPath = squarePath;
    CGPathRelease(squarePath);

}
结果:
标签:
原文地址:http://www.cnblogs.com/ios123/p/5455933.html