标签:
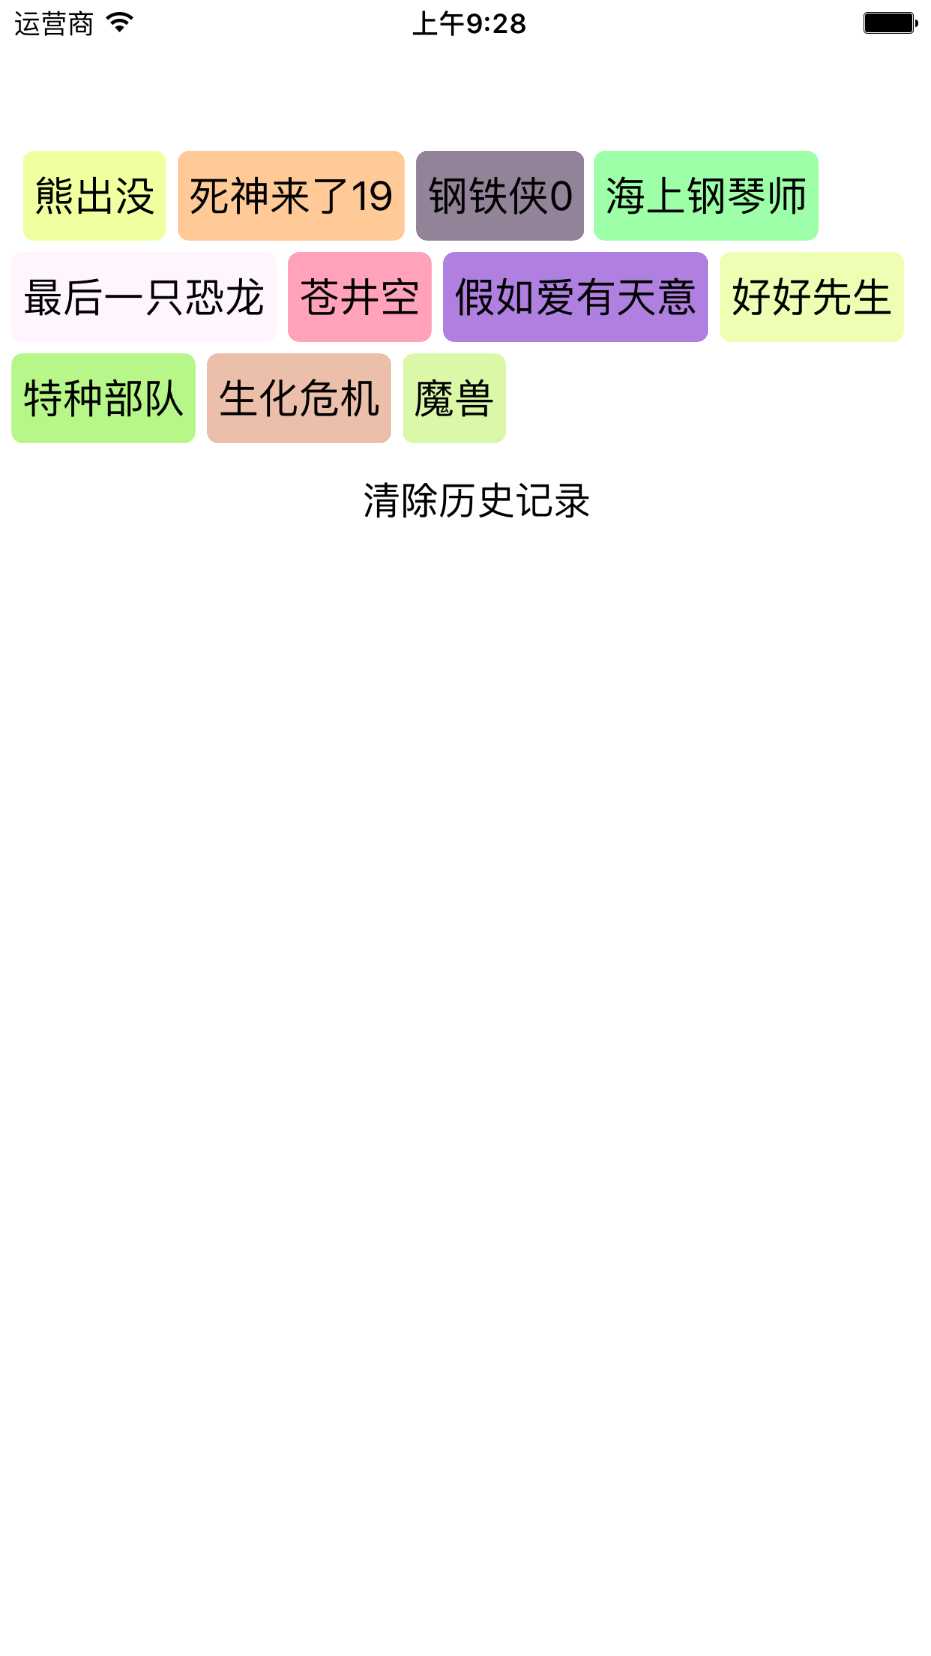
先看一下效果图,方便理解:

想实现如上图的历史堆砌效果,如果仅仅使用原生的UICollectionView,会发现例如第一行的“海上钢琴师”两侧的空白会均分,非常影响美观。因此,我们需要对UICollectionView的流布局配置文件进行自定义的操作,来实现九宫格的格间距固定。代码如下:
首先进行自定义类的创建:
@interface JHCustomFlow : UICollectionViewFlowLayout
然后重写父类中的布局计算方法:
/**
* 重写当前方法 实现控制item最大间距
*
* @param rect 绘图范围
*
* @return item属性数组
*/
-(NSArray *)layoutAttributesForElementsInRect:(CGRect)rect{
NSArray *attributes = [[super layoutAttributesForElementsInRect:rect] mutableCopy];
for(int i = 0; i < [attributes count]; i++) {
if (i==0) {
UICollectionViewLayoutAttributes *currentLayoutAttributes = attributes[i];
CGRect frame = currentLayoutAttributes.frame;
frame.origin.x = 10;
currentLayoutAttributes.frame = frame;
continue;
}
//当前attributes
UICollectionViewLayoutAttributes *currentLayoutAttributes = attributes[i];
//上一个attributes
UICollectionViewLayoutAttributes *prevLayoutAttributes = attributes[i - 1];
//我们想设置的最大间距,可根据需要改
NSInteger maximumSpacing = 5;
//前一个cell的最右边
NSInteger origin = CGRectGetMaxX(prevLayoutAttributes.frame);
//如果当前一个cell的最右边加上我们想要的间距加上当前cell的宽度依然在contentSize中,我们改变当前cell的原点位置
//不加这个判断的后果是,UICollectionView只显示一行,原因是下面所有cell的x值都被加到第一行最后一个元素的后面了
if(origin + maximumSpacing + currentLayoutAttributes.frame.size.width < self.collectionViewContentSize.width) {
CGRect frame = currentLayoutAttributes.frame;
frame.origin.x = origin + maximumSpacing;
currentLayoutAttributes.frame = frame;
}else{
CGRect frame = currentLayoutAttributes.frame;
frame.origin.x = 5;
currentLayoutAttributes.frame = frame;
}
}
return attributes;
}
将该方法实现完毕后,使用刚刚自定义的布局文件来布局:
/* 自定义布局格式 */
JHCustomFlow *flow = [[JHCustomFlow alloc] init];
flow.minimumLineSpacing = 5;
flow.minimumInteritemSpacing = 5;
/* 初始化流布局视图 */
_collectionView = [[UICollectionView alloc] initWithFrame:self.bounds collectionViewLayout:flow];
_collectionView.dataSource = self;
_collectionView.delegate = self;
_collectionView.backgroundColor = [UIColor whiteColor];
[self addSubview:_collectionView];
/* 提前注册流布局item */
[_collectionView registerClass:[UICollectionViewCell class] forCellWithReuseIdentifier:@"cell"];
最终效果如上图
标签:
原文地址:http://www.cnblogs.com/ToBeTheOne/p/5636867.html