标签:
首先介绍下MQ,MQ英文名MessageQueue,中文名也就是大家用的消息队列,干嘛用的呢,说白了就是一个消息的接受和转发的容器,可用于消息推送。
下面介绍主题,就是今天为大家介绍的ActiveMQ:
他是Apache出品的一个开源的消息队列软件,运行在JVM下,支持多种语言,如JAVA,C++,C#。
现在先为大家介绍下如何配置ActiveMQ的服务器端:
1、当然是下载软件了
去官方网站下载:http://activemq.apache.org/ 我下载的是apache-activemq-5.8.0-bin 5.8版本,当然开源的也是支持下载source的,需要自己编译下,这里不做过多介绍
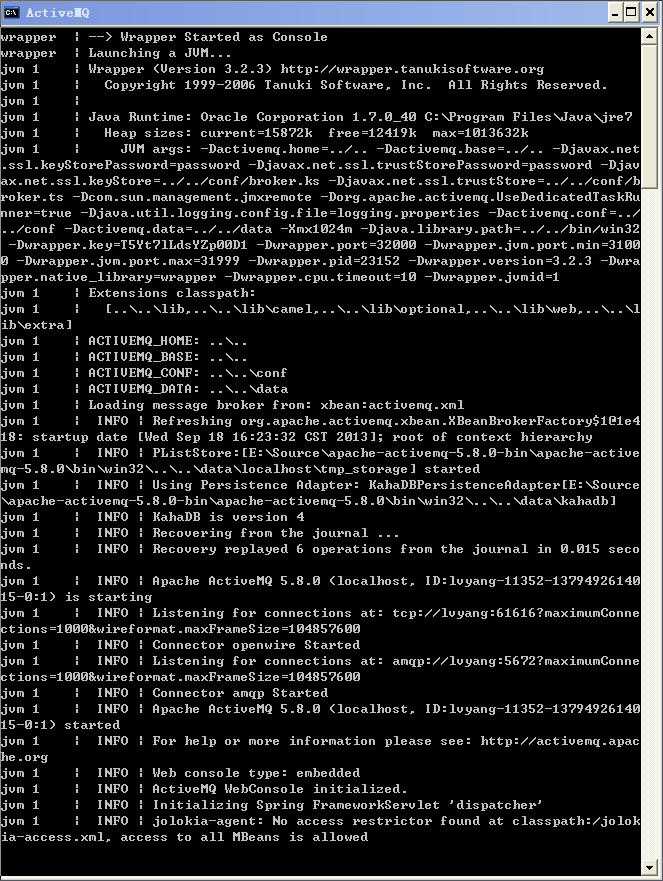
2、解压后,进入\apache-activemq-5.8.0\bin\win32启动activemq.bat。系统会自动执行启动过程,当然一般安装失败的情况是没有装JVM环境,启动成功应该是这样

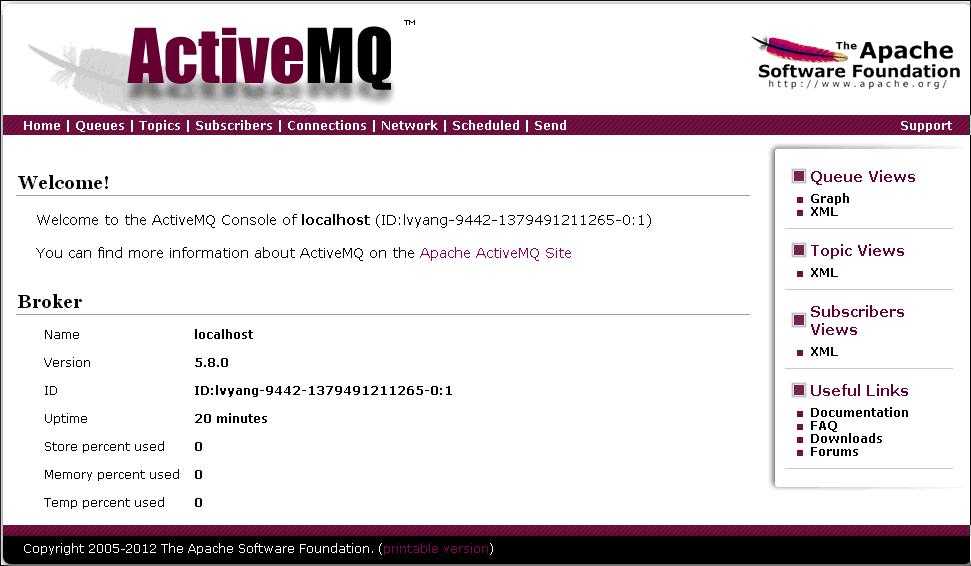
3、打开浏览器输入http://localhost:8161/admin/默认配置是这个,当然你也可以更改这个配置

4、至此,服务端启动完毕
—————————————————————————————————完美分割———————————————————————————————————
现在就是今天的主题了,怎样在C#中使用ActiveMQ提供的API实现消息的订阅和发布
1、首先需要下载ActiveMQ提供的API函数,这个也从官网下Apache.NMS-1.6.0-bin和Apache.NMS.ActiveMQ-1.6.0-bin 这两个dll都在下载后文件夹的bin目录下;
2、将这两个文件在项目中引用;
3、在ActiveMQ中,有两个概念,一个是生产者(Producer),另一个是消费者(Consumer),生产者就是我们常说的发布者,而消费者,就是订阅者,这样解释可能更好理解一下吧,如果知道发布订阅模式的话,不知道的话,字面意思也很好理解,发布者就是发布消息的,而订阅者通过订阅事件,将消息接收到;
4、直接上代码了,Winform下的代码,如果不想处理界面线程回调问题,可以使用Console程序
5、Produce
 1 using System;
 2 using System.Collections.Generic;
 3 using System.ComponentModel;
 4 using System.Data;
 5 using System.Drawing;
 6 using System.Linq;
 7 using System.Text;
 8 using System.Windows.Forms;
 9 using Apache.NMS;
10 using Apache.NMS.ActiveMQ;
11
12 namespace MqProducer
13 {
14     public partial class ProducerDemo : Form
15     {
16         //声明连接对象工厂
17         private IConnectionFactory factory;
18
19         public ProducerDemo()
20         {
21             InitializeComponent();
22             InitProducer();
23         }
24
25         public void InitProducer()
26         {
27             try
28             {
29                 //初始化工厂,这里默认的URL是不需要修改的
30                 factory = new ConnectionFactory("tcp://localhost:61616");
31
32             }
33             catch
34             {
35                 lbMessage.Text = "初始化失败!!";
36             }
37         }
38
39         private void btnConfirm_Click(object sender, EventArgs e)
40         {
41             //通过工厂建立连接
42             using (IConnection connection = factory.CreateConnection())
43             {
44                 //通过连接创建Session会话
45                 using (ISession session = connection.CreateSession())
46                 {
47                     //通过会话创建生产者,方法里面new出来的是MQ中的Queue
48                     IMessageProducer prod = session.CreateProducer(new Apache.NMS.ActiveMQ.Commands.ActiveMQQueue("firstQueue"));
49                     //创建一个发送的消息对象
50                     ITextMessage message = prod.CreateTextMessage();
51                     //给这个对象赋实际的消息
52                     message.Text = txtMessage.Text;
53                     //设置消息对象的属性,这个很重要哦,是Queue的过滤条件,也是P2P消息的唯一指定属性
54                     message.Properties.SetString("filter","demo");
55                     //生产者把消息发送出去,几个枚举参数MsgDeliveryMode是否长链,MsgPriority消息优先级别,发送最小单位,当然还有其他重载
56                     prod.Send(message, MsgDeliveryMode.NonPersistent, MsgPriority.Normal, TimeSpan.MinValue);
57                     lbMessage.Text = "发送成功!!";
58                     txtMessage.Text = "";
59                     txtMessage.Focus();
60                 }
61             }
62
63         }
64     }
65 }
6、consumer
 1 using System;
 2 using System.Collections.Generic;
 3 using System.ComponentModel;
 4 using System.Data;
 5 using System.Drawing;
 6 using System.Linq;
 7 using System.Text;
 8 using System.Windows.Forms;
 9 using Apache.NMS;
10 using Apache.NMS.ActiveMQ;
11
12 namespace MqConsumer
13 {
14     public partial class ConsumerDemo : Form
15     {
16         public ConsumerDemo()
17         {
18             InitializeComponent();
19             InitConsumer();
20         }
21
22         public void InitConsumer()
23         {
24             //创建连接工厂
25             IConnectionFactory factory = new ConnectionFactory("tcp://localhost:61616");
26             //通过工厂构建连接
27             IConnection connection = factory.CreateConnection();
28             //这个是连接的客户端名称标识
29             connection.ClientId = "firstQueueListener";
30             //启动连接,监听的话要主动启动连接
31             connection.Start();
32             //通过连接创建一个会话
33             ISession session = connection.CreateSession();
34             //通过会话创建一个消费者,这里就是Queue这种会话类型的监听参数设置
35             IMessageConsumer consumer = session.CreateConsumer(new Apache.NMS.ActiveMQ.Commands.ActiveMQQueue("firstQueue"), "filter=‘demo‘");
36             //注册监听事件
37             consumer.Listener += new MessageListener(consumer_Listener);
38             //connection.Stop();
39             //connection.Close();
40
41         }
42
43         void consumer_Listener(IMessage message)
44         {
45             ITextMessage msg = (ITextMessage)message;
46             //异步调用下,否则无法回归主线程
47             tbReceiveMessage.Invoke(new DelegateRevMessage(RevMessage),msg);
48
49         }
50
51         public delegate void DelegateRevMessage(ITextMessage message);
52
53         public void RevMessage(ITextMessage message)
54         {
55             tbReceiveMessage.Text += string.Format(@"接收到:{0}{1}", message.Text, Environment.NewLine);
56         }
57     }
58 }
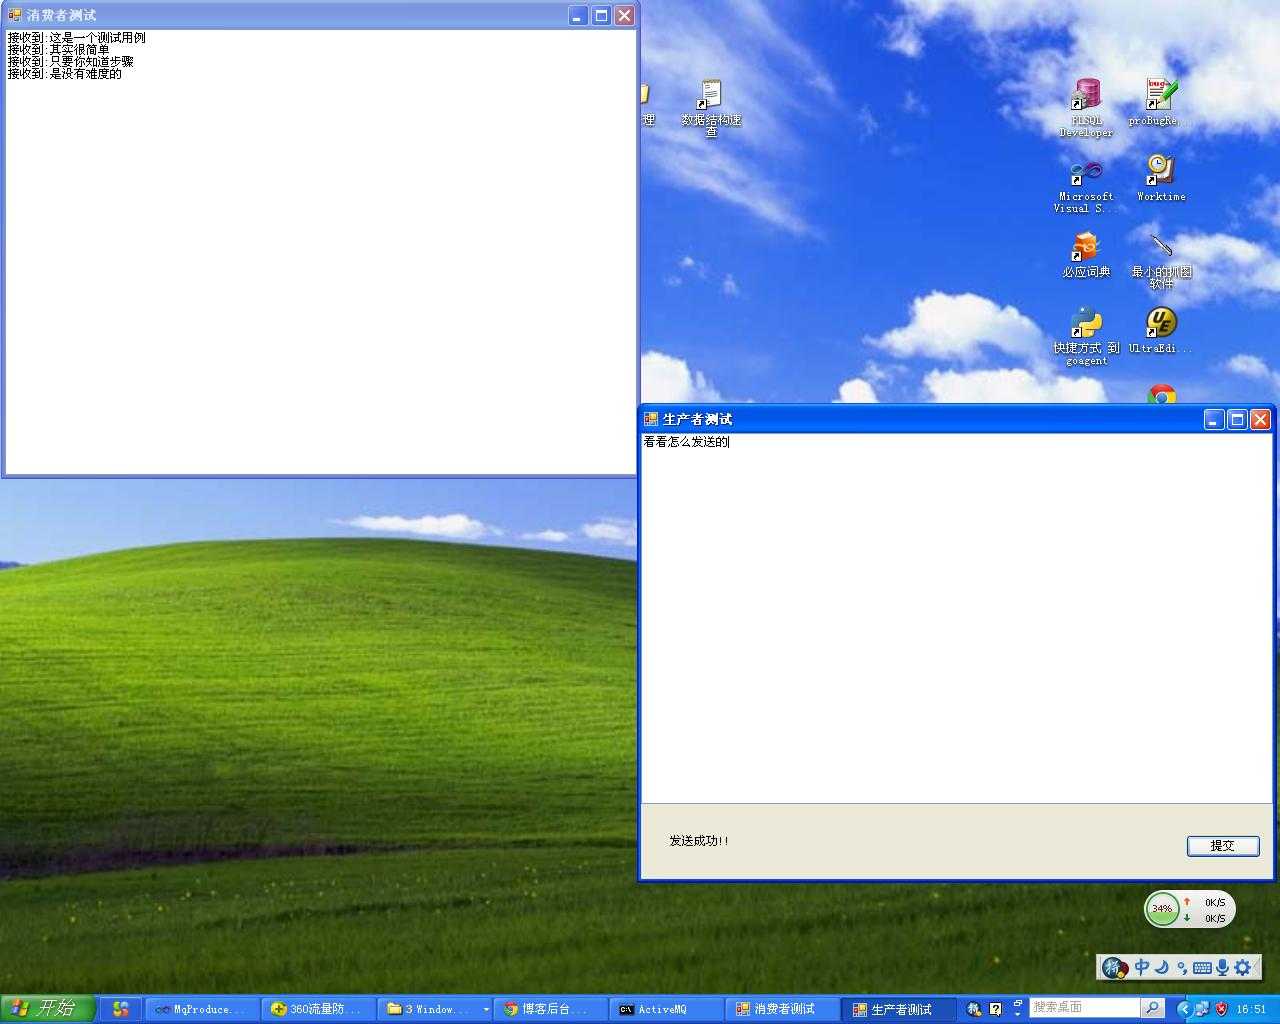
7、启动界面这就完事了

今天咱说的就是一个皮毛,我也是下午接到任务要做MQ方面的开发,才临时抱的佛教,希望抛砖引玉,大家继续钻研,当然没事可以把API的代码下来自己看看以上是怎么实现的,开源的好处就不多说了,自己做功课去了
标签:
原文地址:http://www.cnblogs.com/xmc0551/p/5643765.html