标签:
Code-based migration is useful when you want more control on the migration, i.e. set default value of the column, etc.
Code-First has two commands for code based migration:
Assume that you have Student and Course entity classes initially and you want to use code-based migration for your application. Before running the commands above, you must enable migration for your application, by using the enable-migrations commands. These are in package manager that we used previously for automatic migration. This will create a configuration file, as was the case with automated migration. Also, you need to set the database initializer in the context class:
public class SchoolDBContext: DbContext
{
    public SchoolDBContext(): base("SchoolDBConnectionString")
    {
        Database.SetInitializer(new MigrateDatabaseToLatestVersion<SchoolDBContext, SchoolDataLayer.Migrations.Configuration>("SchoolDBConnectionString"));

    }

    public DbSet<Student> Students { get; set; }
    public DbSet<Course> Courses { get; set; }

    protected override void OnModelCreating(DbModelBuilder modelBuilder)
    {

        base.OnModelCreating(modelBuilder);
    }

}
Now, you have to create a scaffold code file which consists of your database requirement from your existing domain classes. You can do this by running the “add-migration" command in the package manager. (from Tools → Library Package Manager → Package Manager Console). You will have to pass the name parameter, which will be part of the code file name.

    Add-Migration [-Name] <String> [-Force]
      [-ProjectName <String>] [-StartUpProjectName <String>]
      [-ConfigurationTypeName <String>] [-ConnectionStringName <String>]
      [-IgnoreChanges] [<CommonParameters>]

    Add-Migration [-Name] <String> [-Force]
      [-ProjectName <String>] [-StartUpProjectName <String>]
      [-ConfigurationTypeName <String>] -ConnectionString <String>
      -ConnectionProviderName <String> [-IgnoreChanges] [<Common Parameters>]
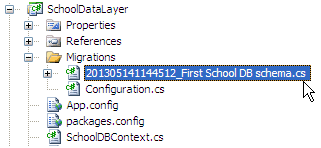
You can see that this command has created a new file in the Migration folder with the name of the parameter you passed to the command with a timestamp prefix:
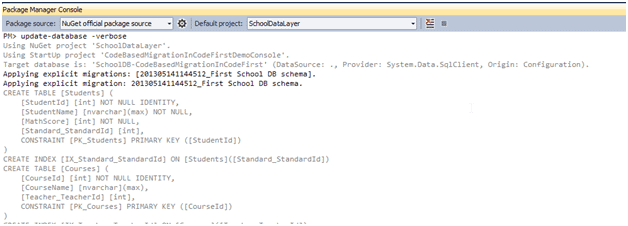
After creating the file above using the add-migration command, you have to update the database. You can create or update the database using the “update-database” command. You can use –verbose to see what‘s going on in the database:
Update-Database [-SourceMigration <String>]
    [-TargetMigration <String>] [-Script] [-Force] [-ProjectName <String>]
    [-StartUpProjectName <String>] [-ConfigurationTypeName <String>]
    [-ConnectionStringName <String>] [<CommonParameters>]

Update-Database [-SourceMigration <String>] [-TargetMigration <String>]
    [-Script] [-Force] [-ProjectName <String>] [-StartUpProjectName <String>]
    [-ConfigurationTypeName <String>] -ConnectionString <String>
    -ConnectionProviderName <String> [<CommonParameters>]
At this point, the database will be created or updated.
Now, suppose you added more domain classes. So before running the application, you have to create a scaffold file for new classes, by executing the "Add-Migration" command. Once it creates the file, update the database using the Update-Database command. In this way, you have to repeat the Add-Migration and Update-Database command each time you make any changes in your domain classes.
Suppose you want to roll back the database schema to any of the previous states, then you can use "update-database" command with –TargetMigration parameter as shown below:
update-database -TargetMigration:"First School DB schema"
Use the "get-migration" command to see what migration has been applied.
Note: Use the "get-help" command for add-migration and update-database command in order to see what parameters can be passed with this command.
Entity Framework Code-First(22):Code-based Migration
标签:
原文地址:http://www.cnblogs.com/purplefox2008/p/5644383.html