标签:style blog http color 使用 os io strong
快速设置UITableView不同section对应于不同种类的cell
本文主要是为了写明如何在UITableView中,一个section对应于一种类型的cell,写起来不凌乱.
在不封装任何类的前提下提供如下源码:
请自行创建出3种类型的cell,创建好了就行,你需要创建出ModelOneCell,ModelTwoCell,ModelThreeCell,内容为空
//
//  RootViewController.m
//  Sections
//
//  Copyright (c) 2014年 Y.X. All rights reserved.
//

#import "RootViewController.h"
#import "ModelOneCell.h"
#import "ModelTwoCell.h"
#import "ModelThreeCell.h"

@interface RootViewController ()<UITableViewDelegate, UITableViewDataSource>

@property (nonatomic, strong) UITableView      *tableView;  // tableView


@property (nonatomic, strong) NSMutableArray   *dataArray;  // 数据数组
@property (nonatomic, strong) NSMutableArray   *nameList;   // 数组名字


@end

@implementation RootViewController

#pragma mark - 只初始化一次
#define REUESED_SIZE  100
static NSString *reUsedStr[REUESED_SIZE] = {nil}; // 重用标示
#define REUESED_FLAG  reUsedStr[0]
+ (void)initialize
{
    if (self == [RootViewController class])
    {
        for (int i = 0; i < REUESED_SIZE; i++)
        {
            reUsedStr[i] = [NSString stringWithFormat:@"GoodBoy_%d", i];
        }
    }
}

- (void)viewDidLoad
{
    [super viewDidLoad];

    // 初始化tableView
    _tableView         = [[UITableView alloc] initWithFrame:self.view.bounds
                                                      style:UITableViewStylePlain];
    [self.view addSubview:_tableView];
    _tableView.delegate       = self;
    _tableView.dataSource     = self;

    // 模拟三种类型的数据源
    NSArray *type1 = @[@"1", @"2", @"3"];
    NSArray *type2 = @[@"一", @"二", @"三"];
    NSArray *type3 = @[@"one", @"two", @"three"];

    // 添加数据源 + 数据源标签名字
    _dataArray = [NSMutableArray new];
    _nameList  = [NSMutableArray new];
    [_dataArray addObject:type1]; [_nameList addObject:@"ModelOneCell"];
    [_dataArray addObject:type2]; [_nameList addObject:@"ModelTwoCell"];
    [_dataArray addObject:type3]; [_nameList addObject:@"ModelThreeCell"];
}

#pragma mark - UITableView‘delegate & dataSource
// 每个区有几个cell
- (NSInteger)tableView:(UITableView *)tableView numberOfRowsInSection:(NSInteger)section
{
    return [_dataArray[section] count];
}

// 设定tableView有几个区域
- (NSInteger)numberOfSectionsInTableView:(UITableView *)tableView
{
    return [_nameList count];
}

// cell的初始化以及重用设置
-(UITableViewCell *)tableView:(UITableView *)tableView
        cellForRowAtIndexPath:(NSIndexPath *)indexPath
{
    // 根据section区域获取几种cell的公共父类
    UITableViewCell *cell = [tableView dequeueReusableCellWithIdentifier:reUsedStr[indexPath.section]];

    // 根据不同的区域对应创建出该区域的cell
    if (cell == nil)
    {
        if ([_nameList[indexPath.section] isEqualToString:@"ModelOneCell"])
        {
            cell = [[ModelOneCell alloc] initWithStyle:UITableViewCellStyleDefault
                                       reuseIdentifier:reUsedStr[indexPath.section]];
        }
        else if ([_nameList[indexPath.section] isEqualToString:@"ModelTwoCell"])
        {
            cell = [[ModelTwoCell alloc] initWithStyle:UITableViewCellStyleDefault
                                       reuseIdentifier:reUsedStr[indexPath.section]];
        }

        else if ([_nameList[indexPath.section] isEqualToString:@"ModelThreeCell"])
        {
            cell = [[ModelThreeCell alloc] initWithStyle:UITableViewCellStyleDefault
                                         reuseIdentifier:reUsedStr[indexPath.section]];
        }
    }

    // 对cell进行设置
    if ([_nameList[indexPath.section] isEqualToString:@"ModelOneCell"])
    {
        cell = [[ModelOneCell alloc] initWithStyle:UITableViewCellStyleDefault
                                   reuseIdentifier:reUsedStr[indexPath.section]];
        cell.textLabel.text = _dataArray[indexPath.section][indexPath.row];
    }
    else if ([_nameList[indexPath.section] isEqualToString:@"ModelTwoCell"])
    {
        cell = [[ModelTwoCell alloc] initWithStyle:UITableViewCellStyleDefault
                                   reuseIdentifier:reUsedStr[indexPath.section]];
        cell.textLabel.text = _dataArray[indexPath.section][indexPath.row];
    }

    else if ([_nameList[indexPath.section] isEqualToString:@"ModelThreeCell"])
    {
        cell = [[ModelThreeCell alloc] initWithStyle:UITableViewCellStyleDefault
                                     reuseIdentifier:reUsedStr[indexPath.section]];
        cell.textLabel.text = _dataArray[indexPath.section][indexPath.row];
    }

    return cell;
}

// 点击cell获取数据
- (void)tableView:(UITableView *)tableView didSelectRowAtIndexPath:(NSIndexPath *)indexPath
{
    if ([_nameList[indexPath.section] isEqualToString:@"ModelOneCell"])
    {
        NSLog(@"%@", _dataArray[indexPath.section][indexPath.row]);
    }
    else if ([_nameList[indexPath.section] isEqualToString:@"ModelTwoCell"])
    {
        NSLog(@"%@", _dataArray[indexPath.section][indexPath.row]);
    }

    else if ([_nameList[indexPath.section] isEqualToString:@"ModelThreeCell"])
    {
        NSLog(@"%@", _dataArray[indexPath.section][indexPath.row]);
    }
}

// 设定不同种类cell的高度
- (CGFloat)tableView:(UITableView *)tableView heightForRowAtIndexPath:(NSIndexPath *)indexPath
{
    if ([_nameList[indexPath.section] isEqualToString:@"ModelOneCell"])
    {
        return 50;
    }
    else if ([_nameList[indexPath.section] isEqualToString:@"ModelTwoCell"])
    {
        return 70;
    }

    else if ([_nameList[indexPath.section] isEqualToString:@"ModelThreeCell"])
    {
        return 100;
    }
    else
    {
        return 0;
    }
}

@end
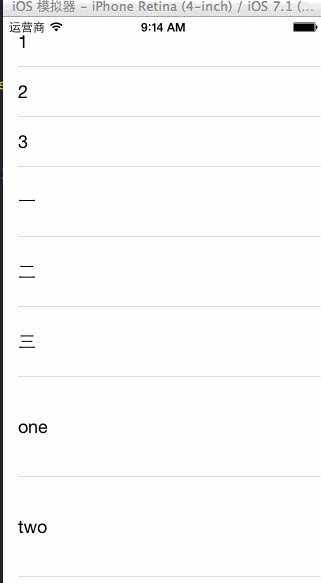
运行时候的效果如下:
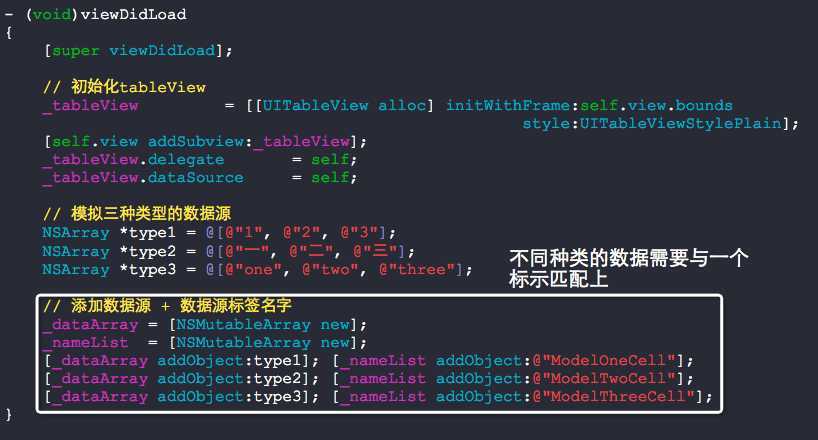
核心思想:
接下来,我们就要来进行封装,达到好用的目的:)
我们把数据源以及数据源标签抽象成一个对象就可以很好的管理这些东西了,以下给出源码:
//
//  TableVewData.h
//  Sections
//
//  Copyright (c) 2014年 Y.X. All rights reserved.
//

#import <Foundation/Foundation.h>

@interface TableViewData : NSObject

// 添加数据源 + 数据源标签
- (void)addDataArray:(NSArray *)array arrayFlag:(NSString *)flag;

// 对应区域中的row的个数
- (NSInteger)numberOfRowsInSection:(NSInteger)section;

// 有几个section
- (NSInteger)numberOfSections;

// 对应于Section上的flag值标签
- (NSString *)flagInSection:(NSIndexPath *)indexPath;

// 对应于indexPath中的数据
- (id)dataInIndexPath:(NSIndexPath *)indexPath;

@end
//
//  TableVewData.m
//  Sections
//
//  Copyright (c) 2014年 Y.X. All rights reserved.
//

#import "TableViewData.h"

@interface TableViewData ()

@property (nonatomic, strong) NSMutableArray  *dataArray;
@property (nonatomic, strong) NSMutableArray  *nameList;

@end

@implementation TableViewData

- (instancetype)init
{
    self = [super init];
    if (self)
    {
        _dataArray = [NSMutableArray new];
        _nameList  = [NSMutableArray new];
    }
    return self;
}

- (void)addDataArray:(NSArray *)array arrayFlag:(NSString *)flag
{
    [_dataArray addObject:array];
    [_nameList  addObject:flag];
}

- (NSInteger)numberOfRowsInSection:(NSInteger)section
{
    return [_dataArray[section] count];
}

- (NSInteger)numberOfSections
{
    return [_dataArray count];
}

- (NSString *)flagInSection:(NSIndexPath *)indexPath
{
    return _nameList[indexPath.section];
}

- (id)dataInIndexPath:(NSIndexPath *)indexPath
{
    return _dataArray[indexPath.section][indexPath.row];
}

@end
主函数使用情形如下:
//
//  RootViewController.m
//  Sections
//
//  Copyright (c) 2014年 Y.X. All rights reserved.
//

#import "RootViewController.h"
#import "ModelOneCell.h"
#import "ModelTwoCell.h"
#import "ModelThreeCell.h"

#import "TableViewData.h"

@interface RootViewController ()<UITableViewDelegate, UITableViewDataSource>

@property (nonatomic, strong) UITableView      *tableView;  // tableView

@property (nonatomic, strong) TableViewData    *tableData;


@end

@implementation RootViewController

#pragma mark - 只初始化一次
#define REUESED_SIZE  100
static NSString *reUsedStr[REUESED_SIZE] = {nil}; // 重用标示
#define REUESED_FLAG  reUsedStr[0]
+ (void)initialize
{
    if (self == [RootViewController class])
    {
        for (int i = 0; i < REUESED_SIZE; i++)
        {
            reUsedStr[i] = [NSString stringWithFormat:@"GoodBoy_%d", i];
        }
    }
}

- (void)viewDidLoad
{
    [super viewDidLoad];

    // 初始化tableView
    _tableView         = [[UITableView alloc] initWithFrame:self.view.bounds
                                                      style:UITableViewStylePlain];
    [self.view addSubview:_tableView];
    _tableView.delegate       = self;
    _tableView.dataSource     = self;


    // 模拟三种类型的数据源
    NSArray *type1 = @[@"1", @"2", @"3"];
    NSArray *type2 = @[@"一", @"二", @"三"];
    NSArray *type3 = @[@"one", @"two", @"three"];

    // 添加数据源 + 数据源标签名字
    _tableData = [TableViewData new];
    [_tableData addDataArray:type1 arrayFlag:@"ModelOneCell"];
    [_tableData addDataArray:type2 arrayFlag:@"ModelTwoCell"];
    [_tableData addDataArray:type3 arrayFlag:@"ModelThreeCell"];
}

#pragma mark - UITableView‘delegate & dataSource
// 每个区有几个cell
- (NSInteger)tableView:(UITableView *)tableView numberOfRowsInSection:(NSInteger)section
{
    return [_tableData numberOfRowsInSection:section];
}

// 设定tableView有几个区域
- (NSInteger)numberOfSectionsInTableView:(UITableView *)tableView
{
    return [_tableData numberOfSections];
}

// cell的初始化以及重用设置
-(UITableViewCell *)tableView:(UITableView *)tableView
        cellForRowAtIndexPath:(NSIndexPath *)indexPath
{
    // 根据section区域获取几种cell的公共父类
    UITableViewCell *cell = [tableView dequeueReusableCellWithIdentifier:reUsedStr[indexPath.section]];

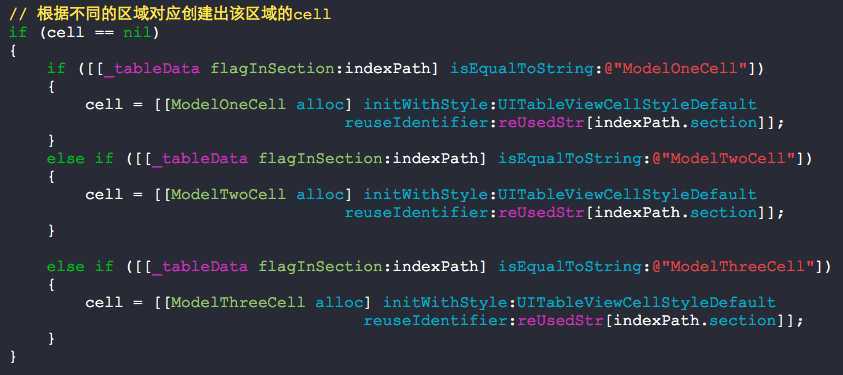
    // 根据不同的区域对应创建出该区域的cell
    if (cell == nil)
    {
        if ([[_tableData flagInSection:indexPath] isEqualToString:@"ModelOneCell"])
        {
            cell = [[ModelOneCell alloc] initWithStyle:UITableViewCellStyleDefault
                                       reuseIdentifier:reUsedStr[indexPath.section]];
        }
        else if ([[_tableData flagInSection:indexPath] isEqualToString:@"ModelTwoCell"])
        {
            cell = [[ModelTwoCell alloc] initWithStyle:UITableViewCellStyleDefault
                                       reuseIdentifier:reUsedStr[indexPath.section]];
        }

        else if ([[_tableData flagInSection:indexPath] isEqualToString:@"ModelThreeCell"])
        {
            cell = [[ModelThreeCell alloc] initWithStyle:UITableViewCellStyleDefault
                                         reuseIdentifier:reUsedStr[indexPath.section]];
        }
    }

    // 对cell进行设置
    if ([[_tableData flagInSection:indexPath] isEqualToString:@"ModelOneCell"])
    {
        cell = [[ModelOneCell alloc] initWithStyle:UITableViewCellStyleDefault
                                   reuseIdentifier:reUsedStr[indexPath.section]];
        cell.textLabel.text = [_tableData dataInIndexPath:indexPath];
    }
    else if ([[_tableData flagInSection:indexPath] isEqualToString:@"ModelTwoCell"])
    {
        cell = [[ModelTwoCell alloc] initWithStyle:UITableViewCellStyleDefault
                                   reuseIdentifier:reUsedStr[indexPath.section]];
        cell.textLabel.text = [_tableData dataInIndexPath:indexPath];
    }

    else if ([[_tableData flagInSection:indexPath] isEqualToString:@"ModelThreeCell"])
    {
        cell = [[ModelThreeCell alloc] initWithStyle:UITableViewCellStyleDefault
                                     reuseIdentifier:reUsedStr[indexPath.section]];
        cell.textLabel.text = [_tableData dataInIndexPath:indexPath];
    }

    return cell;
}

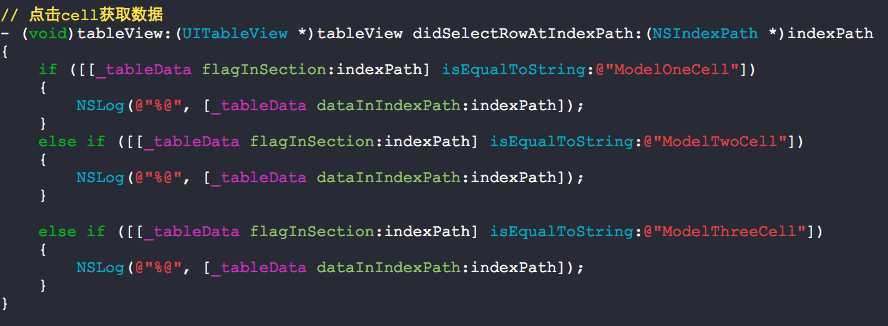
// 点击cell获取数据
- (void)tableView:(UITableView *)tableView didSelectRowAtIndexPath:(NSIndexPath *)indexPath
{
    if ([[_tableData flagInSection:indexPath] isEqualToString:@"ModelOneCell"])
    {
        NSLog(@"%@", [_tableData dataInIndexPath:indexPath]);
    }
    else if ([[_tableData flagInSection:indexPath] isEqualToString:@"ModelTwoCell"])
    {
        NSLog(@"%@", [_tableData dataInIndexPath:indexPath]);
    }

    else if ([[_tableData flagInSection:indexPath] isEqualToString:@"ModelThreeCell"])
    {
        NSLog(@"%@", [_tableData dataInIndexPath:indexPath]);
    }
}

// 设定不同种类cell的高度
- (CGFloat)tableView:(UITableView *)tableView heightForRowAtIndexPath:(NSIndexPath *)indexPath
{
    if ([[_tableData flagInSection:indexPath] isEqualToString:@"ModelOneCell"])
    {
        return 50;
    }
    else if ([[_tableData flagInSection:indexPath] isEqualToString:@"ModelTwoCell"])
    {
        return 70;
    }

    else if ([[_tableData flagInSection:indexPath] isEqualToString:@"ModelThreeCell"])
    {
        return 100;
    }
    else
    {
        return 0;
    }
}

@end
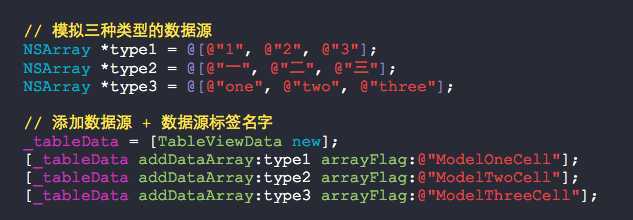
添加数据源:
见名知意:

使用很便利:
这就是将面向过程变成抽象成面向对象变成哦.
快速设置UITableView不同section对应于不同种类的cell,布布扣,bubuko.com
快速设置UITableView不同section对应于不同种类的cell
标签:style blog http color 使用 os io strong
原文地址:http://www.cnblogs.com/YouXianMing/p/3896336.html