标签:
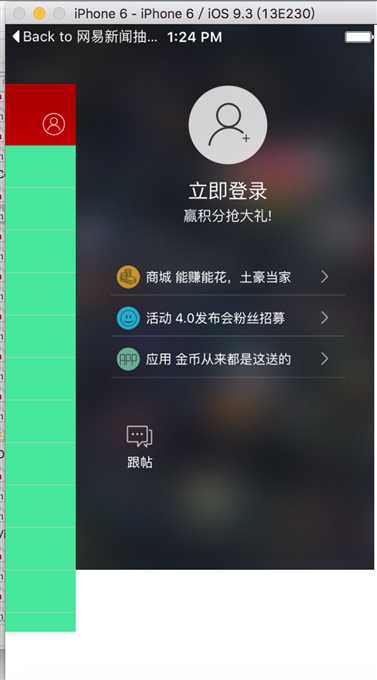
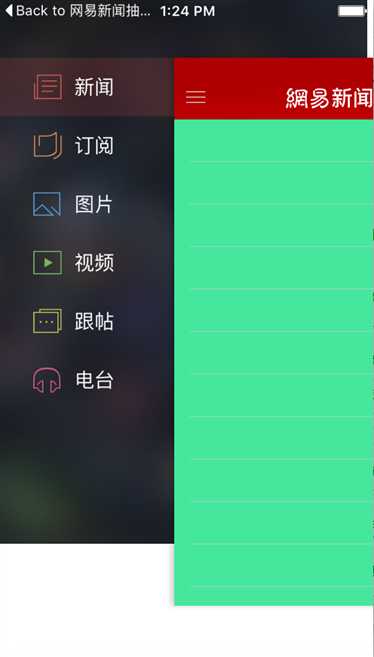
一:类似于网易的抽屉效果,启动有广告,进入主界面后,点击左上角按钮,侧滑左抽屉,点击右上角,侧滑出右抽屉。点击左抽屉按钮,对视图进行切换
。
二代码:
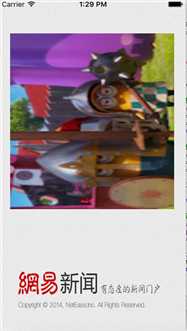
1:启动图展示广告界面实现:先吧启动图控制器作为窗口的根视图控制器,展示完广告消失后,再切换窗口的根视图控制器为主控制器。其中窗口指的是项目中的主窗口也就是keyWindow,主窗口主要负责接收一些键盘事件,文本框输入事件,若是键盘文本框,textView或是textfield不能输入,则考虑是不是当前窗口是否是主窗口
@interface HMAdViewController ()

@end

@implementation HMAdViewController
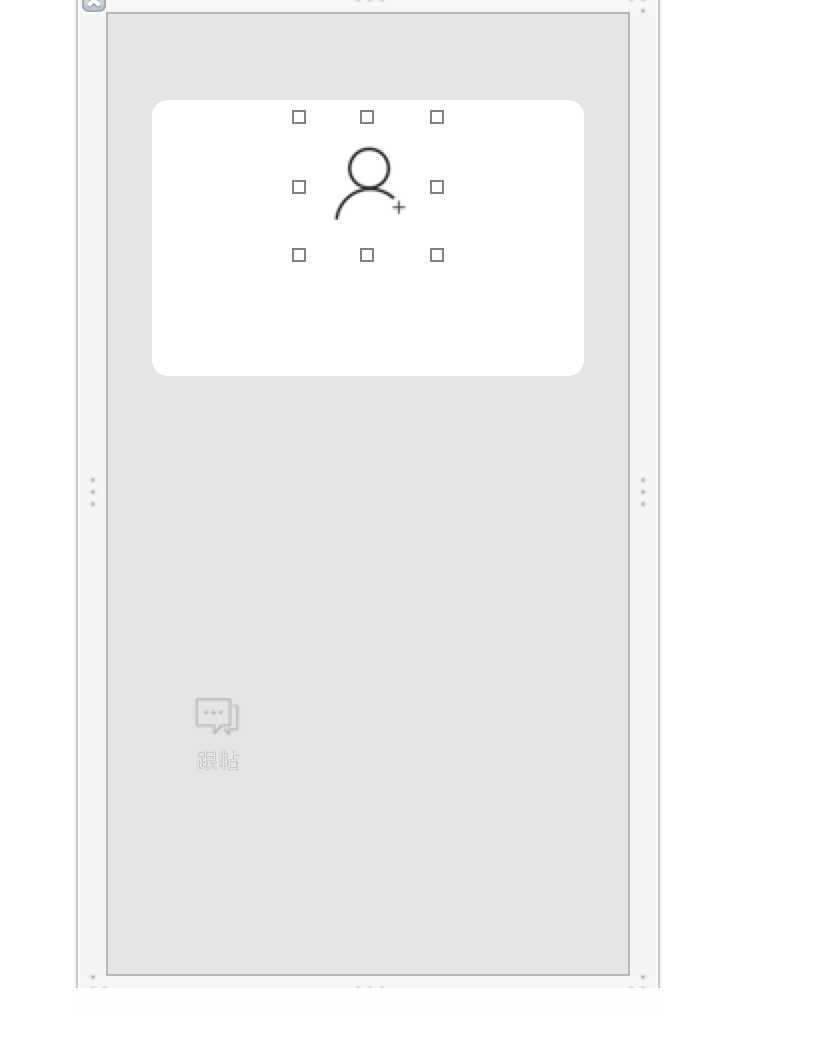
- (void)viewDidLoad
{
    [super viewDidLoad];

    // 1.背景图片
    UIImageView *bg = [[UIImageView alloc] init];
    bg.image = [UIImage imageNamed:@"Default"];
    bg.frame = self.view.bounds;
    [self.view addSubview:bg];

    // 2.广告图片(真实的广告图片应该要先下载广告图片)
    UIImageView *ad = [[UIImageView alloc] init];
    ad.image = [UIImage imageNamed:@"ad"];
    ad.width = 280;
    ad.height = 300;
    ad.centerX = self.view.width * 0.5;
    ad.y = 60;
    [self.view addSubview:ad];

    // 3.2s后调到下一个主界面
    dispatch_after(dispatch_time(DISPATCH_TIME_NOW, (int64_t)(10.0 * NSEC_PER_SEC)), dispatch_get_main_queue(), ^{
        UIWindow *window = [UIApplication sharedApplication].keyWindow;
        UIStoryboard *storyboard = [UIStoryboard storyboardWithName:@"Main" bundle:nil];
        window.rootViewController = [storyboard instantiateViewControllerWithIdentifier:@"Main"];
    });
}

@end
2:当启动图广告界面展示完毕后,切换窗口根视图控制器。
  1 #import "HMMainViewController.h"
  2 #import "HMLeftMenu.h"
  3 #import "HMRightMenuController.h"
  4 #import "HMNavigationController.h"
  5 #import "HMNewsViewController.h"
  6 #import "HMReadingViewController.h"
  7 #import "HMTitleView.h"
  8
  9 #define HMNavShowAnimDuration 0.25
 10 #define HMCoverTag 100
 11 #define HMLeftMenuW 150
 12 #define HMLeftMenuH 300
 13 #define HMLeftMenuY 50
 14
 15 @interface HMMainViewController () <HMLeftMenuDelegate>
 16 /**
 17  *  正在显示的导航控制器
 18  */
 19 @property (nonatomic, weak) HMNavigationController *showingNavigationController;
 20 @property (nonatomic, strong) HMRightMenuController *rightMenuVc;
 21 @property (nonatomic, weak) HMLeftMenu *leftMenu;
 22 @end
 23
 24 @implementation HMMainViewController
 25
 26 - (void)viewDidLoad
 27 {
 28     [super viewDidLoad];
 29
 30     // 1.创建子控制器
 31     [self setupAllChildVcs];
 32
 33     // 2.添加左菜单
 34     [self setupLeftMenu];
 35
 36     // 3.添加右菜单
 37     [self setupRightMenu];
 38 }
 39
 40
 41 /**
 42  *  添加右菜单
 43  */
 44 - (void)setupRightMenu
 45 {
 46     HMRightMenuController *rightMenuVc = [[HMRightMenuController alloc] init];
 47     rightMenuVc.view.x = self.view.width - rightMenuVc.view.width;
 48     [self.view insertSubview:rightMenuVc.view atIndex:1];
 49     self.rightMenuVc = rightMenuVc;
 50 }
 51
 52 /**
 53  *  添加左菜单
 54  */
 55 - (void)setupLeftMenu
 56 {
 57     HMLeftMenu *leftMenu = [[HMLeftMenu alloc] init];
 58     leftMenu.delegate = self;
 59     leftMenu.height = HMLeftMenuH;
 60     leftMenu.width = HMLeftMenuW;
 61     leftMenu.y = HMLeftMenuY;
 62     [self.view insertSubview:leftMenu atIndex:1];
 63     self.leftMenu = leftMenu;
 64 }
 65
 66 /**
 67  *  创建子控制器
 68  */
 69 - (void)setupAllChildVcs
 70 {
 71     // 1.新闻控制器
 72     HMNewsViewController *news = [[HMNewsViewController alloc] init];
 73     [self setupVc:news title:@"新闻"];
 74
 75     // 2.订阅控制器
 76     HMReadingViewController *reading = [[HMReadingViewController alloc] init];
 77     [self setupVc:reading title:@"订阅"];
 78
 79     // 3.图片控制器
 80     UIViewController *photo = [[UIViewController alloc] init];
 81     [self setupVc:photo title:@"图片"];
 82
 83     // 4.视频控制器
 84     UIViewController *video = [[UIViewController alloc] init];
 85     [self setupVc:video title:@"视频"];
 86
 87     // 5.跟帖控制器
 88     UIViewController *comment = [[UIViewController alloc] init];
 89     [self setupVc:comment title:@"跟帖"];
 90
 91     // 6.电台控制器
 92     UIViewController *radio = [[UIViewController alloc] init];
 93     [self setupVc:radio title:@"电台"];
 94 }
 95
 96 - (UIStatusBarStyle)preferredStatusBarStyle
 97 {
 98     return UIStatusBarStyleLightContent;
 99 }
100
101 /**
102  *  初始化一个控制器
103  *
104  *  @param vc      需要初始化的控制器
105  *  @param title   控制器的标题
106  */
107 - (void)setupVc:(UIViewController *)vc title:(NSString *)title
108 {
109     // 1.设置背景色
110     vc.view.backgroundColor = HMRandomColor;
111
112     // 2.设置标题
113     HMTitleView *titleView = [[HMTitleView alloc] init];
114     titleView.title = title;
115     vc.navigationItem.titleView = titleView;
116
117     // 3.设置左右按钮
118     vc.navigationItem.leftBarButtonItem = [UIBarButtonItem itemWithImageName:@"top_navigation_menuicon" target:self action:@selector(leftMenuClick)];
119     vc.navigationItem.rightBarButtonItem = [UIBarButtonItem itemWithImageName:@"top_navigation_infoicon" target:self action:@selector(rightMenuClick)];
120
121     // 4.包装一个导航控制器
122     HMNavigationController *nav = [[HMNavigationController alloc] initWithRootViewController:vc];
123     // 让newsNav成为self(HMMainViewController)的子控制器,能保证:self在,newsNav就在
124     // 如果两个控制器互为父子关系,那么它们的view也应该互为父子关系
125     [self addChildViewController:nav];
126 }
127
128 #pragma mark - 监听导航栏按钮点击
129 - (void)leftMenuClick
130 {
131     self.leftMenu.hidden = NO;
132     self.rightMenuVc.view.hidden = YES;
133
134     [UIView animateWithDuration:HMNavShowAnimDuration animations:^{
135         // 取出正在显示的导航控制器的view
136         UIView *showingView = self.showingNavigationController.view;
137
138         // 缩放比例
139         CGFloat navH = [UIScreen mainScreen].bounds.size.height - 2 * HMLeftMenuY;
140         CGFloat scale = navH / [UIScreen mainScreen].bounds.size.height;
141
142         // 菜单左边的间距
143         CGFloat leftMenuMargin = [UIScreen mainScreen].bounds.size.width * (1 - scale) * 0.5;
144         CGFloat translateX = HMLeftMenuW - leftMenuMargin;
145
146         CGFloat topMargin = [UIScreen mainScreen].bounds.size.height * (1 - scale) * 0.5;
147         CGFloat translateY = HMLeftMenuY - topMargin;
148
149         // 缩放
150         CGAffineTransform scaleForm = CGAffineTransformMakeScale(scale, scale);
151         // 平移
152         CGAffineTransform translateForm = CGAffineTransformTranslate(scaleForm, translateX / scale, translateY / scale);
153
154         showingView.transform = translateForm;
155
156         // 添加一个遮盖
157         UIButton *cover = [[UIButton alloc] init];
158         cover.tag = HMCoverTag;
159         [cover addTarget:self action:@selector(coverClick:) forControlEvents:UIControlEventTouchUpInside];
160         cover.frame = showingView.bounds;
161         [showingView addSubview:cover];
162     }];
163 }
164
165 - (void)coverClick:(UIView *)cover
166 {
167     [UIView animateWithDuration:HMNavShowAnimDuration animations:^{
168         self.showingNavigationController.view.transform = CGAffineTransformIdentity;
169     } completion:^(BOOL finished) {
170         [cover removeFromSuperview];
171     }];
172 }
173
174 - (void)rightMenuClick
175 {
176     self.leftMenu.hidden = YES;
177     self.rightMenuVc.view.hidden = NO;
178
179     [UIView animateWithDuration:HMNavShowAnimDuration animations:^{
180         // 取出正在显示的导航控制器的view
181         UIView *showingView = self.showingNavigationController.view;
182
183         // 缩放比例
184         CGFloat navH = [UIScreen mainScreen].bounds.size.height - 2 * HMLeftMenuY;
185         CGFloat scale = navH / [UIScreen mainScreen].bounds.size.height;
186
187         // 菜单左边的间距
188         CGFloat leftMenuMargin = [UIScreen mainScreen].bounds.size.width * (1 - scale) * 0.5;
189         CGFloat translateX = leftMenuMargin - self.rightMenuVc.view.width;
190
191         CGFloat topMargin = [UIScreen mainScreen].bounds.size.height * (1 - scale) * 0.5;
192         CGFloat translateY = HMLeftMenuY - topMargin;
193
194         // 缩放
195         CGAffineTransform scaleForm = CGAffineTransformMakeScale(scale, scale);
196         // 平移
197         CGAffineTransform translateForm = CGAffineTransformTranslate(scaleForm, translateX / scale, translateY / scale);
198
199         showingView.transform = translateForm;
200
201         // 添加一个遮盖
202         UIButton *cover = [[UIButton alloc] init];
203         cover.tag = HMCoverTag;
204         [cover addTarget:self action:@selector(coverClick:) forControlEvents:UIControlEventTouchUpInside];
205         cover.frame = showingView.bounds;
206         [showingView addSubview:cover];
207     } completion:^(BOOL finished) {
208         [self.rightMenuVc didShow];
209     }];
210 }
211
212 #pragma mark - HMLeftMenuDelegate
213 - (void)leftMenu:(HMLeftMenu *)menu didSelectedButtonFromIndex:(int)fromIndex toIndex:(int)toIndex
214 {
215     // 0.移除旧控制器的view
216     HMNavigationController *oldNav = self.childViewControllers[fromIndex];
217     [oldNav.view removeFromSuperview];
218
219     // 1.显示新控制器的view
220     HMNavigationController *newNav = self.childViewControllers[toIndex];
221     [self.view addSubview:newNav.view];
222
223     // 2.设置新控制的transform跟旧控制器一样
224     newNav.view.transform = oldNav.view.transform;
225     // 设置阴影
226     newNav.view.layer.shadowColor = [UIColor blackColor].CGColor;
227     newNav.view.layer.shadowOffset = CGSizeMake(-3, 0);
228     newNav.view.layer.shadowOpacity = 0.2;
229
230     // 一个导航控制器的view第一次显示到它的父控件上时,如果transform的缩放值被改了,上面的20高度当时是不会出来
231
232     // 2.设置当前正在显示的控制器
233     self.showingNavigationController = newNav;
234
235     // 3.点击遮盖
236     [self coverClick:[newNav.view viewWithTag:HMCoverTag]];
237 }
238 @end
3:封装NAV导航控制器
 1 #import "HMNavigationController.h"
 2 #import "HMNavigationBar.h"
 3
 4 @interface HMNavigationController ()
 5
 6 @end
 7
 8 @implementation HMNavigationController
 9
10 + (void)initialize
11 {
12     UINavigationBar *appearance = [UINavigationBar appearance];
13
14     // 设置导航栏背景
15     [appearance setBackgroundImage:[UIImage imageNamed:@"top_navigation_background"] forBarMetrics:UIBarMetricsDefault];
16 }
17
18 - (void)viewDidLoad
19 {
20     [super viewDidLoad];
21
22     // 替换为自定义的导航栏
23     [self setValue:[[HMNavigationBar alloc] init] forKeyPath:@"navigationBar"];
24 }
25
26 #pragma mark - 这个方法也是专门用来布局子控件(当控制器的view尺寸发生改变的时候会调用)
27 //- (void)viewDidLayoutSubviews
28 //{
29 //    [super viewDidLayoutSubviews];
30 //
31 //    for (UIButton *button in self.navigationBar.subviews) {
32 //        if (![button isKindOfClass:[UIButton class]]) continue;
33 //
34 //        if (button.centerX < self.navigationBar.width * 0.5) { // 左边的按钮
35 //            button.x = 0;
36 //        } else if (button.centerX > self.navigationBar.width * 0.5) { // 右边的按钮
37 //            button.x = self.view.width - button.width;
38 //        }
39 //    }
40 //}
41
42 @end
4:封装导航栏:目的是调整导航栏上左右item距离边框的位置.。左右按钮的背景图片,应该做成图片在中间,四周为镂空的图片
 1 #import "HMNavigationBar.h"
 2
 3 @implementation HMNavigationBar
 4
 5 - (id)initWithFrame:(CGRect)frame
 6 {
 7     self = [super initWithFrame:frame];
 8     if (self) {
 9         // Initialization code
10     }
11     return self;
12 }
13
14 - (void)layoutSubviews
15 {
16     [super layoutSubviews];
17
18     for (UIButton *button in self.subviews) {
19         if (![button isKindOfClass:[UIButton class]]) continue;
20
21         if (button.centerX < self.width * 0.5) { // 左边的按钮
22             button.x = 0;
23         } else if (button.centerX > self.width * 0.5) { // 右边的按钮
24             button.x = self.width - button.width;
25         }
26     }
27 }
28 @end
5:封装titleView:titleView由图片和文字构成,可以用button来实现,既可以设置图片也可以设置文字
1 #import <UIKit/UIKit.h>
2
3 @interface HMTitleView : UIButton
4 @property (nonatomic, copy) NSString *title;
5 @end
 1 #import "HMTitleView.h"
 2
 3 @implementation HMTitleView
 4
 5 - (id)initWithFrame:(CGRect)frame
 6 {
 7     self = [super initWithFrame:frame];
 8     if (self) {
 9         self.userInteractionEnabled = NO;
10         [self setImage:[UIImage imageNamed:@"navbar_netease"] forState:UIControlStateNormal];
11         [self setTitleColor:[UIColor whiteColor] forState:UIControlStateNormal];
12         self.titleLabel.font = [UIFont boldSystemFontOfSize:22];
13         self.titleEdgeInsets = UIEdgeInsetsMake(0, 5, 0, 0);
14         self.height = self.currentImage.size.height;
15     }
16     return self;
17 }
18
19 - (void)setTitle:(NSString *)title
20 {
21     _title = [title copy];
22
23     [self setTitle:title forState:UIControlStateNormal];
24
25     NSDictionary *attrs = @{NSFontAttributeName : self.titleLabel.font};
26     CGFloat titleW = [title boundingRectWithSize:CGSizeMake(MAXFLOAT, MAXFLOAT) options:NSStringDrawingUsesLineFragmentOrigin attributes:attrs context:nil].size.width;
27
28     self.width = titleW + self.titleEdgeInsets.left + self.currentImage.size.width;
29 }
30 @end
6:封装item,uiview,image分类
1 #import <UIKit/UIKit.h>
2
3 @interface UIBarButtonItem (Extension)
4 + (UIBarButtonItem *)itemWithImageName:(NSString *)imageName target:(id)target action:(SEL)action;
5 @end
 1 #import "UIBarButtonItem+Extension.h"
 2
 3 @implementation UIBarButtonItem (Extension)
 4 + (UIBarButtonItem *)itemWithImageName:(NSString *)imageName target:(id)target action:(SEL)action
 5 {
 6     UIButton *button = [[UIButton alloc] init];
 7     [button setBackgroundImage:[UIImage imageNamed:imageName] forState:UIControlStateNormal];
 8
 9     // 设置按钮的尺寸为背景图片的尺寸
10     button.size = button.currentBackgroundImage.size;
11
12     // 监听按钮点击
13     [button addTarget:target action:action forControlEvents:UIControlEventTouchUpInside];
14     return [[UIBarButtonItem alloc] initWithCustomView:button];
15 }
16 @end
 1 #import <UIKit/UIKit.h>
 2
 3 @interface UIView (Extension)
 4 @property (nonatomic, assign) CGFloat x;
 5 @property (nonatomic, assign) CGFloat y;
 6 @property (nonatomic, assign) CGFloat centerX;
 7 @property (nonatomic, assign) CGFloat centerY;
 8 @property (nonatomic, assign) CGFloat width;
 9 @property (nonatomic, assign) CGFloat height;
10 @property (nonatomic, assign) CGSize size;
11 @end
 1 #import "UIView+Extension.h"
 2
 3 @implementation UIView (Extension)
 4
 5 - (void)setX:(CGFloat)x
 6 {
 7     CGRect frame = self.frame;
 8     frame.origin.x = x;
 9     self.frame = frame;
10 }
11
12 - (CGFloat)x
13 {
14     return self.frame.origin.x;
15 }
16
17 - (void)setY:(CGFloat)y
18 {
19     CGRect frame = self.frame;
20     frame.origin.y = y;
21     self.frame = frame;
22 }
23
24 - (CGFloat)y
25 {
26     return self.frame.origin.y;
27 }
28
29 - (void)setCenterX:(CGFloat)centerX
30 {
31     CGPoint center = self.center;
32     center.x = centerX;
33     self.center = center;
34 }
35
36 - (CGFloat)centerX
37 {
38     return self.center.x;
39 }
40
41 - (void)setCenterY:(CGFloat)centerY
42 {
43     CGPoint center = self.center;
44     center.y = centerY;
45     self.center = center;
46 }
47
48 - (CGFloat)centerY
49 {
50     return self.center.y;
51 }
52
53 - (void)setWidth:(CGFloat)width
54 {
55     CGRect frame = self.frame;
56     frame.size.width = width;
57     self.frame = frame;
58 }
59
60 - (CGFloat)width
61 {
62     return self.frame.size.width;
63 }
64
65 - (void)setHeight:(CGFloat)height
66 {
67     CGRect frame = self.frame;
68     frame.size.height = height;
69     self.frame = frame;
70 }
71
72 - (CGFloat)height
73 {
74     return self.frame.size.height;
75 }
76
77 - (void)setSize:(CGSize)size
78 {
79 //    self.width = size.width;
80 //    self.height = size.height;
81     CGRect frame = self.frame;
82     frame.size = size;
83     self.frame = frame;
84 }
85
86 - (CGSize)size
87 {
88     return self.frame.size;
89 }
90
91 @end
1 #import <UIKit/UIKit.h>
2
3 @interface UIImage (Extension)
4 + (UIImage *)imageWithColor:(UIColor *)color;
5 @end
 1 #import "UIImage+Extension.h"
 2
 3 @implementation UIImage (Extension)
 4 + (UIImage *)imageWithColor:(UIColor *)color
 5 {
 6     CGFloat imageW = 100;
 7     CGFloat imageH = 100;
 8     // 1.开启基于位图的图形上下文
 9     UIGraphicsBeginImageContextWithOptions(CGSizeMake(imageW, imageH), NO, 0.0);
10
11     // 2.画一个color颜色的矩形框
12     [color set];
13     UIRectFill(CGRectMake(0, 0, imageW, imageH));
14
15     // 3.拿到图片
16     UIImage *image = UIGraphicsGetImageFromCurrentImageContext();
17
18     // 4.关闭上下文
19     UIGraphicsEndImageContext();
20
21     return image;
22 }
23 @end
7:封装左侧菜单
 1 #import <UIKit/UIKit.h>
 2 @class HMLeftMenu;
 3
 4 @protocol HMLeftMenuDelegate <NSObject>
 5 @optional
 6 - (void)leftMenu:(HMLeftMenu *)menu didSelectedButtonFromIndex:(int)fromIndex toIndex:(int)toIndex;
 7 @end
 8
 9 @interface HMLeftMenu : UIView
10 @property (nonatomic, weak) id<HMLeftMenuDelegate> delegate;
11 @end
  1 #import "HMLeftMenu.h"
  2 #import "HMLeftMenuButton.h"
  3
  4 @interface HMLeftMenu()
  5 @property (nonatomic, weak) HMLeftMenuButton *selectedButton;
  6 @end
  7
  8 @implementation HMLeftMenu
  9
 10 #pragma mark - 初始化
 11 - (id)initWithFrame:(CGRect)frame
 12 {
 13     self = [super initWithFrame:frame];
 14     if (self) {
 15         self.backgroundColor = [UIColor clearColor];
 16
 17         CGFloat alpha = 0.2;
 18
 19         [self setupBtnWithIcon:@"sidebar_nav_news" title:@"新闻" bgColor:HMColorRGBA(202, 68, 73, alpha)];
 20         [self setupBtnWithIcon:@"sidebar_nav_reading" title:@"订阅" bgColor:HMColorRGBA(190, 111, 69, alpha)];
 21         [self setupBtnWithIcon:@"sidebar_nav_photo" title:@"图片" bgColor:HMColorRGBA(76, 132, 190, alpha)];
 22         [self setupBtnWithIcon:@"sidebar_nav_video" title:@"视频" bgColor:HMColorRGBA(101, 170, 78, alpha)];
 23         [self setupBtnWithIcon:@"sidebar_nav_comment" title:@"跟帖" bgColor:HMColorRGBA(170, 172, 73, alpha)];
 24         [self setupBtnWithIcon:@"sidebar_nav_radio" title:@"电台" bgColor:HMColorRGBA(190, 62, 119, alpha)];
 25     }
 26     return self;
 27 }
 28
 29 - (void)setDelegate:(id<HMLeftMenuDelegate>)delegate
 30 {
 31     _delegate = delegate;
 32
 33     // 默认选中新闻按钮
 34     [self buttonClick:[self.subviews firstObject]];
 35 //    [self buttonClick:self.subviews[1]];
 36 }
 37
 38 /**
 39  *  添加按钮
 40  *
 41  *  @param icon  图标
 42  *  @param title 标题
 43  */
 44 - (HMLeftMenuButton *)setupBtnWithIcon:(NSString *)icon title:(NSString *)title bgColor:(UIColor *)bgColor
 45 {
 46     HMLeftMenuButton *btn = [[HMLeftMenuButton alloc] init];
 47     btn.tag = self.subviews.count;
 48     [btn addTarget:self action:@selector(buttonClick:) forControlEvents:UIControlEventTouchDown];
 49     [self addSubview:btn];
 50
 51     // 设置图片和文字
 52     [btn setImage:[UIImage imageNamed:icon] forState:UIControlStateNormal];
 53     [btn setTitle:title forState:UIControlStateNormal];
 54     [btn setTitleColor:[UIColor whiteColor] forState:UIControlStateNormal];
 55     btn.titleLabel.font = [UIFont systemFontOfSize:17];
 56
 57     // 设置按钮选中的背景
 58     [btn setBackgroundImage:[UIImage imageWithColor:bgColor] forState:UIControlStateSelected];
 59
 60     // 设置高亮的时候不要让图标变色
 61     btn.adjustsImageWhenHighlighted = NO;
 62
 63     // 设置按钮的内容左对齐
 64     btn.contentHorizontalAlignment = UIControlContentHorizontalAlignmentLeft;
 65
 66     // 设置间距
 67     btn.titleEdgeInsets = UIEdgeInsetsMake(0, 10, 0, 0);
 68     btn.contentEdgeInsets = UIEdgeInsetsMake(0, 30, 0, 0);
 69
 70     return btn;
 71 }
 72
 73 - (void)layoutSubviews
 74 {
 75     [super layoutSubviews];
 76
 77     // 设置按钮的frame
 78     int btnCount = self.subviews.count;
 79     CGFloat btnW = self.width;
 80     CGFloat btnH = self.height / btnCount;
 81     for (int i = 0; i<btnCount; i++) {
 82         HMLeftMenuButton *btn = self.subviews[i];
 83         btn.width = btnW;
 84         btn.height = btnH;
 85         btn.y = i * btnH;
 86     }
 87 }
 88
 89 #pragma mark - 私有方法
 90 /**
 91  *  监听按钮点击
 92  */
 93 - (void)buttonClick:(HMLeftMenuButton *)button
 94 {
 95     // 0.通知代理
 96     if ([self.delegate respondsToSelector:@selector(leftMenu:didSelectedButtonFromIndex:toIndex:)]) {
 97         [self.delegate leftMenu:self didSelectedButtonFromIndex:self.selectedButton.tag toIndex:button.tag];
 98     }
 99
100     // 1.控制按钮的状态
101     self.selectedButton.selected = NO;
102     button.selected = YES;
103     self.selectedButton = button;
104 }
105 @end
8:封装右侧菜单
1 #import <UIKit/UIKit.h>
2
3 @interface HMRightMenuController : UIViewController
4 /**
5  *  右边菜单全部显示出来
6  */
7 - (void)didShow;
8 @end
 1 #import "HMRightMenuController.h"
 2 #import "HMRightMenuCenterViewRow.h"
 3
 4 @interface HMRightMenuController ()
 5 @property (weak, nonatomic) IBOutlet UIImageView *iconView;
 6 @property (weak, nonatomic) IBOutlet UIView *centerView;
 7 @property (weak, nonatomic) IBOutlet UIView *bottomView;
 8 @end
 9
10 @implementation HMRightMenuController
11 - (void)viewDidLoad
12 {
13     [super viewDidLoad];
14
15     // 1.填充中间的内容
16     [self setupCenterView];
17
18     // 2.填充底部的内容
19     [self setupBottomView];
20 }
21
22 /**
23  *  填充中间的内容
24  */
25 - (void)setupCenterView
26 {
27     HMRightMenuCenterViewRow *row =[self setupCenterViewRow:@"商城 能赚能花,土豪当家" icon:@"promoboard_icon_mall"];
28     [self setupCenterViewRow:@"活动 4.0发布会粉丝招募" icon:@"promoboard_icon_activities"];
29     [self setupCenterViewRow:@"应用 金币从来都是这送的" icon:@"promoboard_icon_apps"];
30
31     self.centerView.height = self.centerView.subviews.count * row.height;
32 }
33
34 - (HMRightMenuCenterViewRow *)setupCenterViewRow:(NSString *)title icon:(NSString *)icon
35 {
36     HMRightMenuCenterViewRow *row = [HMRightMenuCenterViewRow centerViewRow];
37     row.icon = icon;
38     row.title = title;
39     row.y = row.height * self.centerView.subviews.count;
40     [self.centerView addSubview:row];
41     return row;
42 }
43
44 /**
45  *  填充底部的内容
46  */
47 - (void)setupBottomView
48 {
49
50 }
51
52 - (void)didShow
53 {
54     // 让头像旋转
55 //    [UIView animateWithDuration:1.0 animations:^{
56 //        self.iconView.layer.transform = CATransform3DMakeRotation(M_PI_2, 0, 1, 0);
57 //    } completion:^(BOOL finished) {
58 //        self.iconView.image = [UIImage imageNamed:@"user_defaultgift"];
59 //
60 //        [UIView animateWithDuration:1.0 animations:^{
61 //            self.iconView.layer.transform = CATransform3DMakeRotation(M_PI, 0, 1, 0);
62 //        }];
63 //    }];
64 //    CATransition
65 //    CATransition *anim = [CATransition animation];
66 //    anim.duration = 1.0;
67 //    anim.type = @"rippleEffect";
68 //    [self.iconView.layer addAnimation:anim forKey:nil];
69
70     [UIView transitionWithView:self.iconView duration:1.0 options:UIViewAnimationOptionTransitionFlipFromLeft animations:^{
71         self.iconView.image = [UIImage imageNamed:@"user_defaultgift"];
72     } completion:^(BOOL finished) {
73         dispatch_after(dispatch_time(DISPATCH_TIME_NOW, (int64_t)(1.0 * NSEC_PER_SEC)), dispatch_get_main_queue(), ^{
74             [UIView transitionWithView:self.iconView duration:1.0 options:UIViewAnimationOptionTransitionFlipFromRight animations:^{
75                 self.iconView.image = [UIImage imageNamed:@"default_avatar"];
76             } completion:nil];
77         });
78     }];
79 }
80
81 @end
1 #import <UIKit/UIKit.h>
2
3 @interface HMRightMenuCenterViewRow : UIView
4 + (instancetype)centerViewRow;
5
6 @property (nonatomic, copy) NSString *icon;
7 @property (nonatomic, copy) NSString *title;
8 @end
 1 #import "HMRightMenuCenterViewRow.h"
 2
 3 @interface HMRightMenuCenterViewRow()
 4 @property (weak, nonatomic) IBOutlet UIButton *titleView;
 5 @property (weak, nonatomic) IBOutlet UIImageView *iconView;
 6 @end
 7
 8 @implementation HMRightMenuCenterViewRow
 9 + (instancetype)centerViewRow
10 {
11     return [[[NSBundle mainBundle] loadNibNamed:@"HMRightMenuCenterViewRow" owner:nil options:nil] lastObject];
12 }
13
14 - (void)setIcon:(NSString *)icon
15 {
16     _icon = [icon copy];
17
18     self.iconView.image = [UIImage imageNamed:icon];
19 }
20
21 - (void)setTitle:(NSString *)title
22 {
23     _title = [title copy];
24
25     [self.titleView setTitle:title forState:UIControlStateNormal];
26 }
27 @end
三:知识点总结:
1:启动图的广告展示界面:1:创建启动图展示控制器,其中广告的图片一般是从服务器获取,搞个定时器,GCD延迟函数,经过一段时间后,再切换窗口的根视图控制器为主控制器。 UIWindow *window = [UIApplication sharedApplication].keyWindow;keyWindow为主窗口,负责键盘处理和文本框输入事件,若是textView,textField不能处理-输入事件,或是响应键盘则判断当前显示窗口是否是主窗口keyWindow。2:其中还可以通过keyWindow获取rootViewController,和当前显示的导航控制器,keyWindow.rootViewController, TabBarVC *tab = keyWindow.rootViewController; NAV *nav = tab.selecteViewcontroller;得到当前显示的导航控制器,nav.viewControllers,得到当前导航控制器栈里的所有控制器。
2:sattic const 定义常量来代替宏定义: static const CGFloat HMNavShowAnimDuration = 0.25;来代替 #define HMNavShowAnimDuration 0.25 ,因为static const定义的常量在系统中只会开辟一份内存,而#define,所定义的每一个常量都会开辟一份临时的内存空间。用static修饰的全局变量,只能是全局变量,该变量才会限制在本类中使用,外部不可以访问,若不加static,则用ertern,就可以在其他类中访问该变量。const在前在后都是一样的,定义字符串变量时,static NSString * const name = @"name";则指针name不可改变。const修饰变量或是常量时,就看const右侧是什么,则const右侧的指针或是变量不可改变。
3:创建子控制器addChildViewController:苹果官方建议当控制器互为父子关系时,控制器上的view也应该为父子关系。1:将创建子控制器的代码封装起来,创建子控制器对象,将子控制对象和title作为参数传入。2:titleView的封装:1:因为titleView为图片和文字构成,所以用button去封装titleView,创建控件继承UIButton,设置自身属性,btn的ennable,或是userenable为NO,titleLable.font,titleColor,setImage,btn.adjustImageWhenHeighlight(当setImage时),titleEdgeInsets,imageEdgeInset,contentEdgeInset,继承UIcontrol的contentHorizanAliment(整个btn文本的对其方式),btn的高度,self.height =self.currentImage.size.height;self.currentImage获得当前的image,btn.currentBackgroundImage,获得背景图片 2:懒加载子控件,添加到父视图上,无 3:layoutSubView布局子控件 4:向外界提供model接口,重写model的set方法,外界提供title接口,重写title的set方法,btn要设置自身的宽度自适应,用boundingRectWithSize,如下:
NSDictionary *attrs = @{NSFontAttributeName : self.titleLabel.font}; CGFloat titleW = [title boundingRectWithSize:CGSizeMake(MAXFLOAT, MAXFLOAT) options:NSStringDrawingUsesLineFragmentOrigin attributes:attrs context:nil].size.width; self.width = titleW + self.titleEdgeInsets.left + self.currentImage.size.width;
其中,只要赋值,就调用set方法,想获得此变量,就调用get方法,没必要再UIFont去设置,boundingRectWithSize,单行绘制文本时,两个参数都穿MAXFLOAT,基于基线绘制NSStringDrawingUsesLineFragmentOrigin,若是多行,则先设置lable.numberoflines = 0;再限制宽度或是高度,参数采用基线绘制,NSStringDrawingUsesLineFragmentOrigin,和行间距 NSStringDrawingUsesFontLeading。总的宽度就为,image的宽度+self.titleEdgeInsets.left+self.currentImage.size.width。其中titleEdgeInsets的设置,指的是距离左侧图片的距离,为正数,则指的是右侧距离
4:自定义导航栏上的左右item,自定义btn,btn setBackgroundImage,图片为按钮的背景图片,btn的大小为图片的大小, button.size = button.currentBackgroundImage.size;
5:封装导航控制器:1:继承系统导航控制器,因为设置全局导航栏的属性,只需设置一次就好,所以写在+ (void)initialize里,该方法只在该方法所在类第一个方法被调用之前被调用一次,只在整个项目中只会调用一次。先获得全局导航栏,item对象,利用settitleTextAttribute forState属性,可以设置不同状态下的属性 2:左右item距离屏幕左右边框的距离很大,想要调整,1:可遍历系统控件的子控件,找出左右按钮,再设置左右按钮的frame 2:自定义bar用kvc代替系统的bar:新建类继承系统的bar,在layoutSubView方法中,则子类继承了系统bar的属性,遍历子控件数组,self.subViews,在遍历时,要做条件过滤,不符合条件的直接return,或是continue。找到子控件的时候停止遍历,做性能优化。找到左右按钮后,判断左右按钮的btn的center与中点比较,看是哪个左右item。3:设置完frame之后,再在封装的nav控制器中创建对象,setValue forKeyPath ,kvc来代替系统的控件,第二个参数,就是nav控制器下属性定义的navBar,调用此方法,得是某个控制器下的某个属性
// 替换为自定义的导航栏 [self setValue:[[HMNavigationBar alloc] init] forKeyPath:@"navigationBar"];4:其中:layoutSubView方法只适用于在UIView中,在控制器中调整子控件可以重写系统方法:- (void)viewDidLayoutSubviews,但是不要忘记调用super
6:[self addChildViewController:nav];1:添加子控制器,能则父控制器就对子控制器有一个强引用,只要父控制器在,则子控制器就在,而且控制器互为父子关系,则他们的view也应该互为父子关系。2:子控制器数组:self.childViewControllers,得到子控制器数组,只读,子控制器从父控制器移除,subNav removeFromParentViewController ,获得父控制器:subNav.parentViewController
7:封装左侧菜单:1:有背景的话可以继承UIImageView,但要开启用户交互权限,也可以继承UIView,设置背景图片时,添加UIImageView,或是view.backgroundColor = [UIColor colorWithPatternImage:[UIImage imageNamed:]];,平铺图片,或有间隔线,或是调用drawInRect,画上一张图片 2:先设置自身的属性,clearcolor 3:懒加载控件,设置控件属性,添加到父视图上,创建相同的控件,例如button,可以采用for循环创建,也可以一个一个创建,传title,image,枚举tag值或是其他参数,封装一个button,创建对象,setImage,btn.adjust,setBackgroudImage,可以设枚举tag值,也可以通过设置self.subViews.count为tag值,也可以设置titleEdgeInset,ImageEdgeInset,contentEdgeInset,继承UIcontrol的也可以用contentHorizanAliment(文本的对齐方式),在layoutSubView里设置控件的frame,1:属性,成员变量 ,通过tag值取出,若是有多个子控件,可以设置tag值,遍历子控件数组,通过tag值将子控件取出2:放在大数组里,从数组里取出,若是又有button又有其他控件,则两两分别放在数组里,分别从数组里取出,设置frame 3:遍历subView,从subViews的数组里取出。4:设置按钮的回调:1:可通过协议代理,通知 ,block ,协议代理,block适用于层级较浅的回调,通知,多播委托适用于层级较深的结构 2 :若是监听系统的控件:继承UIControl的可以addTarget,可以系统的代理,系统通知,子类若没有查看父类,也可以重写系统的方法,不要忘记调用super方法,来实现监听 3:按钮的协议代理,传枚举tag值是为了在控制器实现监听点击,传fromIndex,传toIndex,是为了从数组取出旧的移除,并添加新的 4:按钮的回调方法,两个按钮状态的判断,btn.selected = !btn.isSelected,三个按钮切换状态则用按钮三部曲,若是传index则把代理方法放前面 5:设置按钮默认选中:1:直接设哪个按钮被选中,再设seletedBtn 2:返回按钮,调用按钮的点击方法,要考虑需不需要重写代理的setDelegate方法在该方法中设置按钮的默认选中。
标签:
原文地址:http://www.cnblogs.com/cqb-learner/p/5724434.html