标签:lnmp
实验软件:Centos6.5;nginx-1.4.7.tar.gz;mysql-5.0.41.tar.gz;php-5.5.38.tar.gz
编译安装 Nginx
添加Nginx用户和用户组
groupadd -r -g 108 nginx
useradd -r -g 108 -u nginx
解压nginx-1.4.7.tar.gz之后,进去解压目录编译
./configure \
--prefix=/usr \
--sbin-path=/usr/sbin/nginx \
--conf-path=/etc/nginx/nginx.conf \
--error-log-path=/var/log/nginx/erroe.log \
--http-log-path=/var/log/nginx/access.log \
--pid-path=/var/run/nginx/nginx.pid \
--lock-path=/var/lock/nginx.lock \
--user=nginx \
--group=nginx \
--with-http_ssl_module \
--with-http_flv_module \
--with-http_stub_status_module \
--with-http_gzip_static_module \
--http-client-body-temp-path=/var/tmp/nginx/client/ \
--http-proxy-temp-path=/var/tmp/nginx/proxy/ \
--http-fastcgi-temp-path=/var/tmp/nginx/fcgi/ \
--http-uwsgi-temp-path=/var/tmp/nginx/uwsgi \
--http-scgi-temp-path=/var/tmp/nginx/scgi \
--with-pcre \
--with-file-aio \
--with-http_image_filter_module
报错GD library没安装
yum install gd-devel
之后
make && make install
之后手动启动 编译安装在usr安装目录 所以
报错没有目录 直接创建
配置脚本自动启动 vim /etc/init.d/nginx
#!/bin/bash
#
nginx_cmd="/usr/sbin/nginx"
prog=nginx
lockfile="/var/lock/subsys/nginx"
# chkconfig: - 85 15
# description: Nginx is an HTTP(S) server, HTTP(S) reverse \
# proxy and IMAP/POP3 proxy server
. /etc/init.d/functions
start() {
$nginx_cmd
[ $? -eq 0 ] && {
action "Starting $prog" /bin/true
touch $lockfile
}
}
stop() {
$nginx_cmd -s stop
[ $? -eq 0 ] && {
action "Stopping $prog" /bin/true
rm -f $lockfile
}
}
case "$1" in
start)
start
;;
stop)
stop
;;
restart)
stop
start
;;
*)
echo "Usage: $0 {start|stop|restart}"
;;
esac
将里面的路径改成自己编译安装的nginx配置文件路径
开机启用nginx
访问OK
编译安装 mysql--5.0.41
1、创建用户 用户组
groupadd mysql
useradd mysql -g mysql -M -s /sbin/nologin
2、编译 进入 mysql 解压目录
./configure --prefix=/usr/local/mysql --with-unix-socket-path=/usr/local/mysql/tmp/mysql.sock --localstatedir=/usr/local/mysql/data --enable-assembler --enable-thread-safe-client --with-mysqld-user=mysql --with-big-tables --without-debug --with-pthread --enable-assembler --with-extra-charsets=complex --with-readline --with-ssl --with-embedded-server --enable-local-infile --with-plugins=partition,innobase --with-mysqld-ldflags=-all-static
报错
yum list|grep ncurses
yum -y install ncurses-devel 安装好后 就ok~~~
编译完成后
make && make instal
cp mysql 解压目录support-files 下的my-small.cnf 到 /etc/my.cnf
3、初始化
创建mkdir -pv /usr/local/data; 修改属主 chown -R mysql.mysql /usr/local/mysql
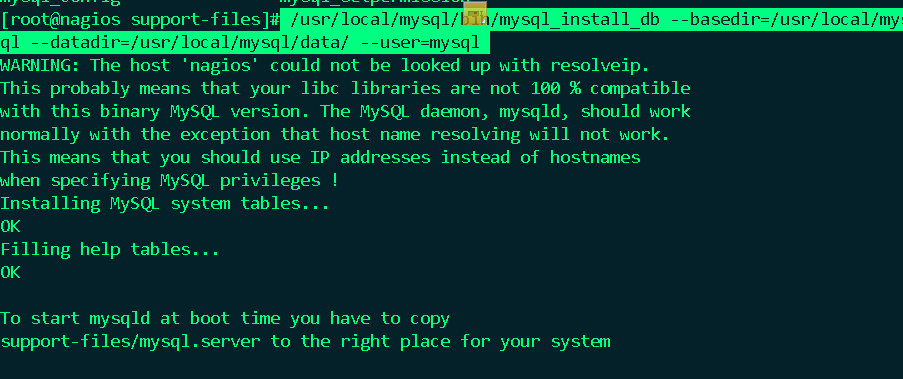
初始化 /usr/local/mysql/bin/mysql_install_db --basedir=/usr/local/mysql --datadir=/usr/local/mysql/data/ --user=mysql
 cp mysql 解压目录support-files 下的 mysql.server 到 /etc/init.d/mysqld 并给X执行权限
配置开机自启 启动mysql
service mysqld start
编译安装PHP
进入PHP解压目录
./configure --prefix=/usr/local/php --with-mysql=/usr/local/mysql --with-openssl --enable-fpm --enable-sockets --enable-sysvshm --with-mysqli=/usr/local/mysql/bin/mysql_config --enable-mbstring --with-freetype-dir --with-jpeg-dir --with-png-dir --with-zlib-dir --with-libxml-dir=/usr --enable-xml --with-config-file-path=/etc --with-configfile-scan-dir=/etc/php.d --with-bz2 --with-curl 缺什么装什么
make && make install
复制文件 php.ini-production 到 /etc/php.ini 下
配置文件 将安装目录下的/usr/local/php/etc 的php-fpm.conf.default 改名为 php-fpm.conf 结尾
编辑 这个 php-fpm.conf 文件 修改几个参数
复制启动文件 到 /etc/init.d/下
cp sapi/fpm/init.d.php-fpm /etc/init.d/php-fpm
添加执行权限 并启动 php-fpm
整合nginx和 PHP
编辑 /etc/nginx/nginx.conf 文件 启用 PHP 模块
编辑 fastcgi_params
将里面内容删了:.,$d
添加为
fastcgi_param GATEWAY_INTERFACE CGI/1.1;
fastcgi_param SERVER-SOFTWARE nginx;
fastcgi_param QUERY_STRING $query_string;
fastcgi_param REQUEST_METHOD $request_method;
fastcgi_param CONTENT_TYPE $content_type;
fastcgi_param CONTENT_LENGTH $content_length;
fastcgi_param SCRIPT_FILENAME $document_root$fastcgi_script_name;
fastcgi_param SCRIPT_NAME $fastcgi_script_name;
fastcgi_param REQUEST_URI $request_uri;
fastcgi_param DOCUMENT_URI $document_uri;
fastcgi_param DOCUMENT_ROOT $document_root;
fastcgi_param SERVER_PROTOCOL $server_protocol;
fastcgi_param REMOTE_ADDR $remote_addr;
fastcgi_param REMOTE_PORT $remote_port;
fastcgi_param SERVER_ADDR $server_addr;
fastcgi_param SERVER_PORT $server_port;
fastcgi_param SERVER_NAME $server_name;
测试语法 再重启 nginx
nginx -t
service nginx restart
提供PHP测试页
vim /usr/html/index.php
<?php
phpinfo();
?>
访问测试页 OK
第一次写博客,有什么不懂的大家可以提问,共同学习进步。
本文出自 “小白的进阶之路” 博客,请务必保留此出处http://vip1992.blog.51cto.com/9448297/1834611
标签:lnmp
原文地址:http://vip1992.blog.51cto.com/9448297/1834611