标签:
什么是单元测试
每个单元测试就是一段用于测试一个模块或接口是否能达到预期结果的代码。
QUnitjs
一 hello wolrd
1. 目前版本:2.0.1
2. 需要链接QUnit的js资源和css资源(可以npm下载,官网下载,链接静态资源)
3. 简单的测试案例
<!DOCTYPE html>
<html lang="en">
<head>
<meta charset="UTF-8">
<title>Document</title>
<link rel="stylesheet" href="node_modules/qunitjs/qunit/qunit.css">
<script src="node_modules/qunitjs/qunit/qunit.js"></script>
</head>
<body>
<!--页面输出标记-->
<h1 id="qunit-header">QUnit Hello World</h1>
<h2 id="qunit-banner"></h2>
<ol id="qunit-tests"></ol>
<script>
// 2.*
QUnit.test("hello", function(assert) {
assert.ok(true, "wolrd");
});
// 1.*
test("hello", function() {
ok(true, "wolrd");
});
</script>
</body>
</html>
4. 上述案例定义了一个名为hello的测试(test),在页面载入完毕的时候运行;test的第二个参数为测试函数;ok方法接收两个参数:第一个是表明测试是否通过,第二个是需要输出的信息。
5. 上述案例声明了两个版本的测试。2.*版本的全局方法test()被QUnit.test()替代;
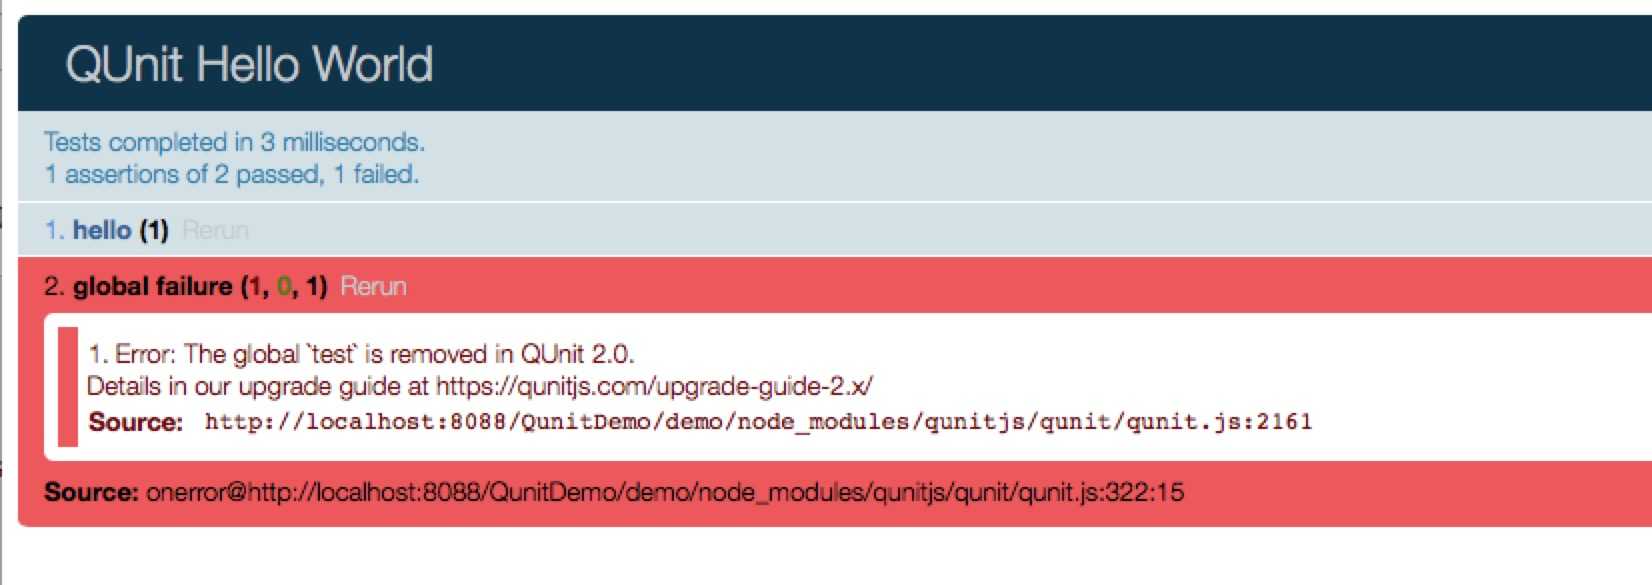
6. 效果图

二 HTML部分的标记
1. html部分
<body>
<!--页面输出标记-->
<h1 id="qunit-header">QUnit测试</h1>
<h2 id="qunit-banner"></h2>
<div id="qunit-testrunner-toolbar"></div>
<h2 id="qunit-userAgent"></h2>
<ol id="qunit-tests"></ol>
<div id="qunit-fixture">
<input id="input" type="text" placeholder="placeholder text" />
</div>>
</body>
2. 效果图

3. toolbar调试工具
1. Hide passed tests“隐藏通过的测试”,勾选后,通过的测试就不显示了。
2. Check for Global “全局检测”。 如果勾选此项,在运行测试之前,QUnit会枚举window所有属性,然后与运行结束之后的window做比较,如果前后不一样,就会显示不通过-failed, 以及显示“引入或缺失全局属性”。**该工具作用在于可以很容易被发现判断导致全局变量的引入.**
3. No try-catch "不要try-catch". **选中则意味着QUnit会在try-catch语句外运行回调,此时,如果测试出现异常,测试就会停止。**这有什么用呢?要知道,有些浏览器的调试工具是相当弱的,尤其IE6,一个未处理的异常要比捕获的异常可以提供更多的信息。即使再次抛出,由于JavaScript不擅长异常处理,原来的堆栈跟踪在大多数浏览器里都丢失了。
4. toolbar的filter类似于搜索
5. toolbar的Module可选择module
6. (原子性)如果要测试DOM修改,我们可以使用***#qunit-fixture***元素。在做测试的时候,这个静态标记你**可以随便置空或append元素**,每个测试结束的时候QUnit会自动把**#qunit-fixture**元素的innerHTML属性值设置为初始值。如果可以使用jQuery,QUnit会使用jQuery的html()方法代替,同时清除jQuery事件句柄。
QUnit.module(‘qunit-fixture‘);
QUnit.test( "Appends a span", function( assert ) {
var fixture = $( "#qunit-fixture");
fixture.append( "<span>hello!</span>");
assert.equal( $( "span", fixture ).length, 1, "span added successfully!" );
});
QUnit.test( "Appends a span again", function( assert ) {
var fixture = $( "#qunit-fixture");
fixture.append("<span>hello!</span>");
assert.equal( $( "span", fixture ).length, 1, "span added successfully!" );
});
部分API
test
1. module 分组
QUnit.module("M one",{
before: function(assert) {//在M one的第一个test前执行
console.log(assert);
},
after: function(assert) {//在M one的最后一个test后执行
console.log(assert);
}
});
2. test
QUnit.test(‘test b‘, function(assert) {
  assert.ok(true, ‘true is passed‘);
  assert.ok(1 ,"1 is passed");
  assert.ok(2, ‘2 is passed‘);
  assert.ok(new Object(), ‘object is pass‘);
  assert.ok(2>1,‘2>1 is passed‘);
  assert.ok(" ","‘ ‘ is passed");
  assert.ok([],‘[] is passed‘);
});
在下一个module出来之前,M one之后的test都属于M one
Assert
1. ok()上面已经提到
2. equal()
function add (a,b) {
return a + b + 1;
}
QUnit.test("test a", function(assert) {
assert.ok(add(1,2) === 4, ‘add is true‘);
assert.equal(add(1,2) , 4 , ‘add is true‘);
});
接收三个参数,参数一与参数二相等则为true否则为false,参数三为输出信息.
3. notEqual,deepEqual, notDeepEqual,strictEqual,notStrictEqual,propEqual,notPropEqual
QUnit.test(‘test-assert‘, function(assert) {
assert.equal(1,‘1‘,‘相等‘);//将参一和参二进行比较(==) 相等则通过
assert.notEqual(1,2,‘不相等‘);//不相等,则通过
assert.strictEqual(1,1,‘全相等‘);//将参一和参二进行比较(===) 全相等则通过
assert.notStrictEqual(1,‘1‘,‘不全相等‘);//不全相等则通过
assert.deepEqual({foo:1},{foo:‘1‘},‘对象相等‘);//深度比较,如果是对象,则将值进行简单对比(相当于==),只有相等才能通过。
assert.notDeepEqual({foo:1},{foo:‘2‘},‘对象不相等‘);
assert.propEqual({foo:1},{foo:1},‘对象全等‘);//深度比较,如果是对象 则将值进行全等比较;
assert.notPropEqual({foo:1},{foo:‘1‘},‘对象不全等‘);
});
notEqual: 将参一和参二进行比较(==) 不相等则通过
strictEqual: 将参一和参二进行比较(===) 全相等则通过
deepEqual: 深度比较,如果是对象,则将值进行简单对比(相当于==),只有相等才能通过
propEqual: 深度比较,如果是对象 则将值进行全等比较
Async Control
//模拟数据
Mock.mock(‘http://lhy‘, {
‘name‘ : ‘name@lhy‘,
‘age|10-28‘: 20
});
//定义module
QUnit.module(‘m-ajax‘);
function ajax(successCallback) {
$.ajax({
url: ‘http://lhy‘,
dataType: ‘json‘,
success: function(data){
successCallback(data)
}
});
}
QUnit.test(‘test-ajax‘, function(assert) {
var done = assert.async();
var obj;
ajax(function(val){
obj = val;
console.log(val);
});
setTimeout(function(){
assert.ok(typeof obj === ‘object‘,‘ajax返回的数据类型正确‘);
done();
},200);
});
也可以QUnit.start()与QUnit.stop()来控制异步回调中断言的判断。
callbacks
1. begin()
QUnit.begin(function(tests){
  console.log(tests);
  console.log(tests.totalTests);
});
在所有test之前被调用一次。tests包括totalTests(test的数量)和modules(module的数组).
2. done
QUnit.done(function( details ) {
    console.log( "Total: ", details.total, " Failed: ", details.failed, " Passed: ",     details.passed, " Runtime: ", details.runtime );
});
在test结束之后调用,details包括failed(失败的断言数),total(总断言数),passed(通过的断言数),runtime(所有test执行完所用的时间)
Configuration and Utilities
assert 断言
自定义判断
1. 定义
QUnit.assert.mod2 = function(value, expected,message) {
  var actual = value % 2;
  this.push(actual === expected ,actual ,expected,message);
};
2. 使用
QUnit.test("mod2",function(assert) {
  assert.expect(2);
  assert.mod2(2, 0, "2 % 2 == 0");
  assert.mod2(3, 1, "3 % 2 == 1");
});
example:判断设备
//判断是否是pc
function IsPC() {
  var userAgentInfo = navigator.userAgent;
  var Agents = new Array("Android", "iPhone", "SymbianOS", "Windows Phone", "iPad", "iPod");
  var flag = true;
  for (var v = 0; v < Agents.length; v++) {
    if (userAgentInfo.indexOf(Agents[v]) > 0) {
      flag = false;
      break;
    }
  }
  return flag;
}
//判断是Android还是iOS
function getOSType() {
  if (/(iPhone|iPad|iPod|iOS)/i.test(navigator.userAgent)) {
    return "IOS";
  } else if (/(Android)/i.test(navigator.userAgent)) {
    return "Android";
  } else {
    return "other";
  }
}
QUnit.module("M one");
  QUnit.test(‘test-device‘, function(assert) {
  assert.ok(IsPC(), ‘this is PC‘);
  assert.ok(getOSType()==‘Android‘, ‘this is Android‘);
});
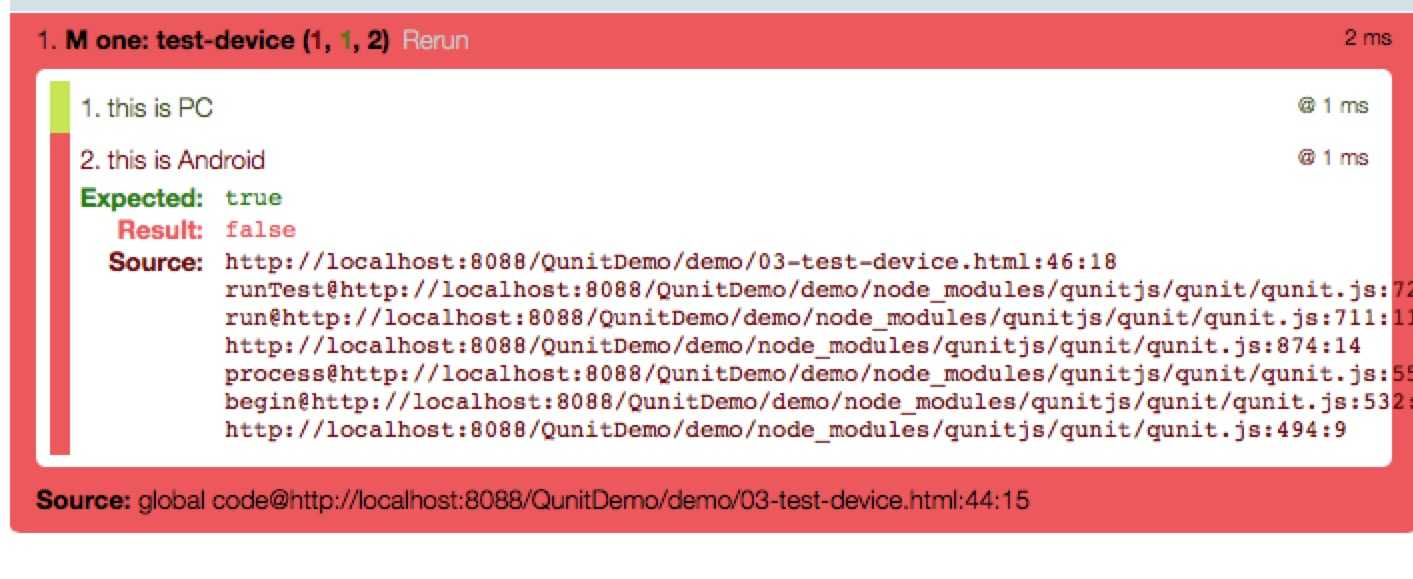
PC运行截图:

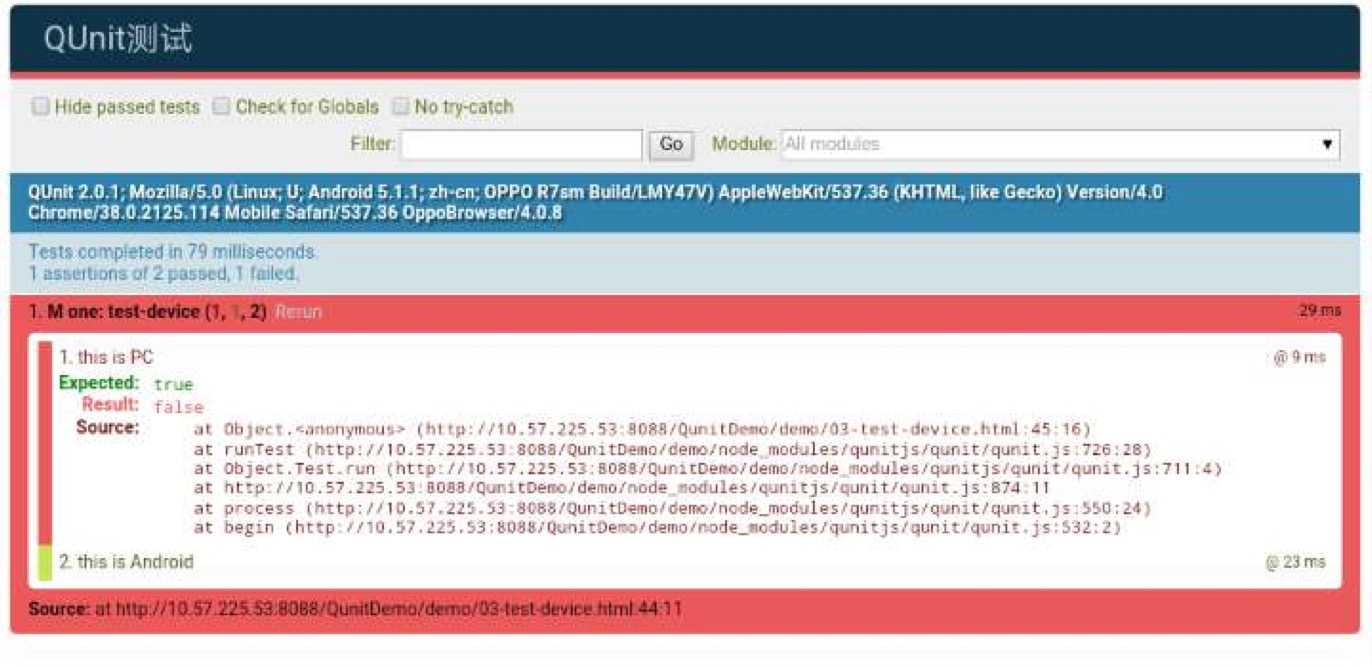
Android端运行截图:

标签:
原文地址:http://www.cnblogs.com/lhy-93/p/5825116.html