标签:
@interface ViewController ()
@property (nonatomic, strong) id<IJKMediaPlayback> player;
@end

@implementation ViewController
- (void)viewDidLoad {
    [super viewDidLoad];
    self.player = [[IJKFFMoviePlayerController alloc]initWithContentURL:[NSURL URLWithString:@"rtmp://live.hkstv.hk.lxdns.com/live/hks"] withOptions:nil];
    // 设置 player 中 view 属性的frame,且加入到控制器的 view 中
    self.player.view.frame = self.view.bounds;
    [self.view addSubview:self.player.view];
    // 设置 横屏时自动伸缩
    self.player.view.autoresizingMask = UIViewAutoresizingFlexibleWidth | UIViewAutoresizingFlexibleHeight;
    [self.player prepareToPlay];
    [self.player play];
}
- (void)viewDidDisappear:(BOOL)animated {
    [super viewDidDisappear:animated];
    [self.player stop];
    self.player = nil;
}nginx.conf, 找到/usr/local/etc/nginx/nginx.conf 文件,
http {
……
}
# 在http节点下面(也就是文件的尾部)加上rtmp配置:
rtmp {
server {
listen 1935;
application xxx {
live on;
record off;
}
}
}
说明:
rtmp是协议名称
server 说明内部中是服务器相关配置
listen 监听的端口号, rtmp协议的默认端口号是1935
application 访问的应用路径是 xxx
live on; 开启实时
record off; 不记录数据
只是简单的修改下配置文件 nginx.conf 即可
1.打开 /usr/local/etc/nginx/nginx.conf
2.找到 http 下的 server ,在花括号中增加
server {
        listen       8080;
        server_name  localhost;

        location / {
            root   html;
            index  index.html index.htm;
        }
       #HLS配置开始,这个配置为了`客户端`能够以http协议获取HLS的拉流
        location /hls {
            # Serve HLS fragments
            types {
                application/vnd.apple.mpegurl m3u8;
                video/mp2t ts;
            }
            root html;
            add_header Cache-Control no-cache;
        }
       #HLS配置结束
        error_page   500 502 503 504  /50x.html;
        location = /50x.html {
            root   html;
        }
    }
    找到rtmp 下的  server 在花括号中增加
    rtmp {
    server {
        listen 1935;
        application xxx {
            live on;
            record off;
        }
        #增加对HLS支持开始
        #推流必须是基于H264/AAC格式
        application hls {
            live on;
            hls on;
            hls_path /usr/local/var/www/hls;
        }
      #增加对HLS支持结束
    }
}
nginx -s reloadffmpeg -f avfoundation -framerate 30 -i "1:0" -f avfoundation -framerate 30 -video_size 640x480 -i "0" -c:v libx264 -preset ultrafast -filter_complex ‘overlay=main_w-overlay_w-10:main_h-overlay_h-10‘ -acodec libmp3lame -ar 44100 -ac 1 -f flv rtmp://192.168.33.245:1935/xxx/roomrtmp://192.168.33.245:1935/xxx/room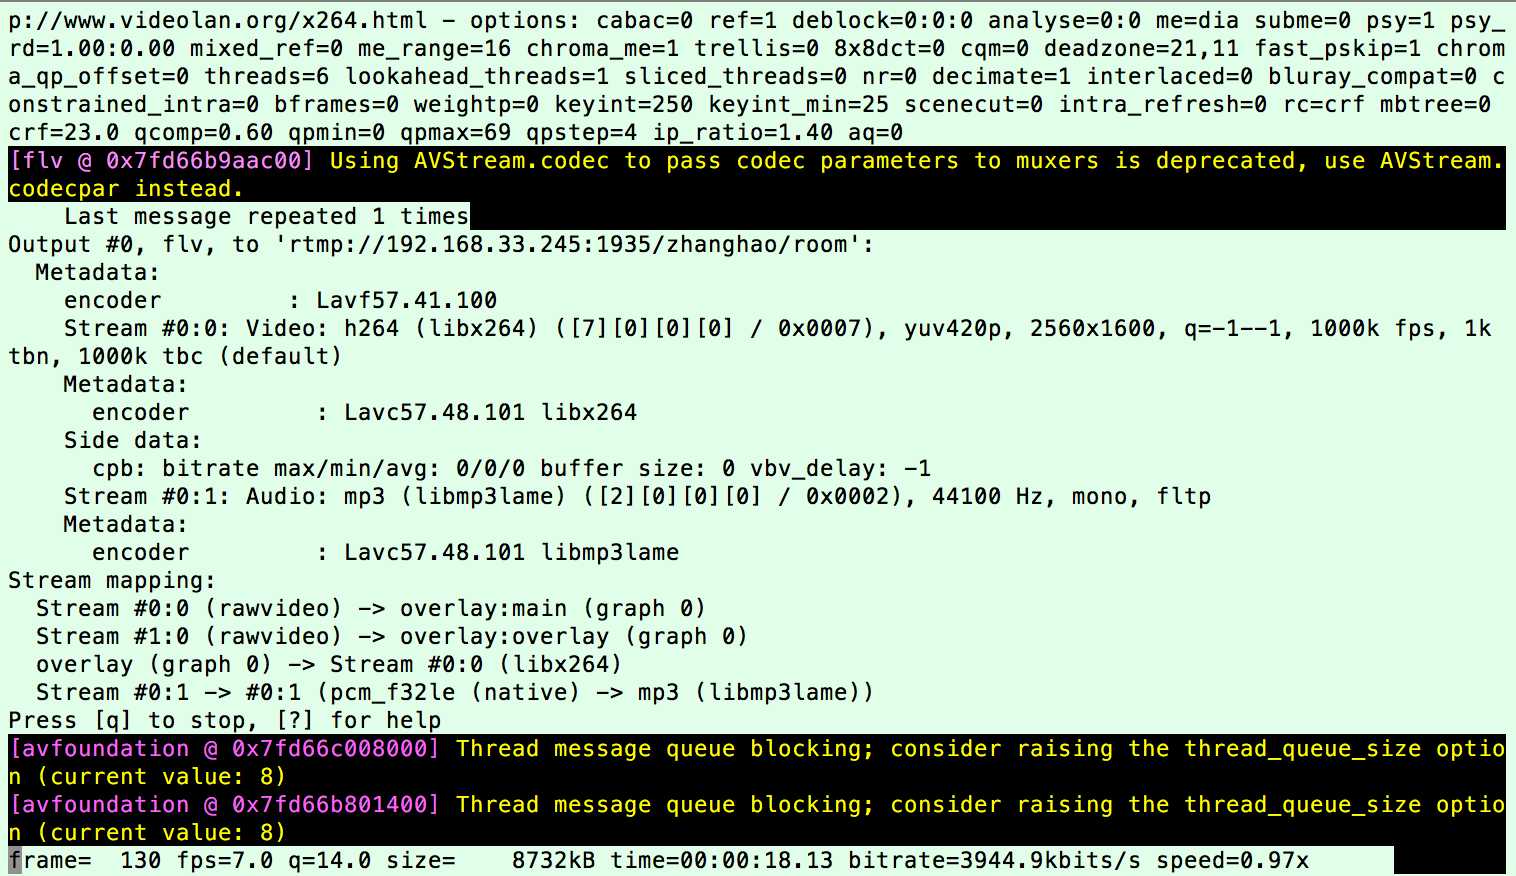
ffmpeg -loglevel verbose -re -i /Users/HOWIE-CH/Desktop/1.mp4 -vcodec libx264 -vprofile baseline -acodec libmp3lame -ar 44100 -ac 1 -f flv rtmp://localhost:1935/hls/1命令后如下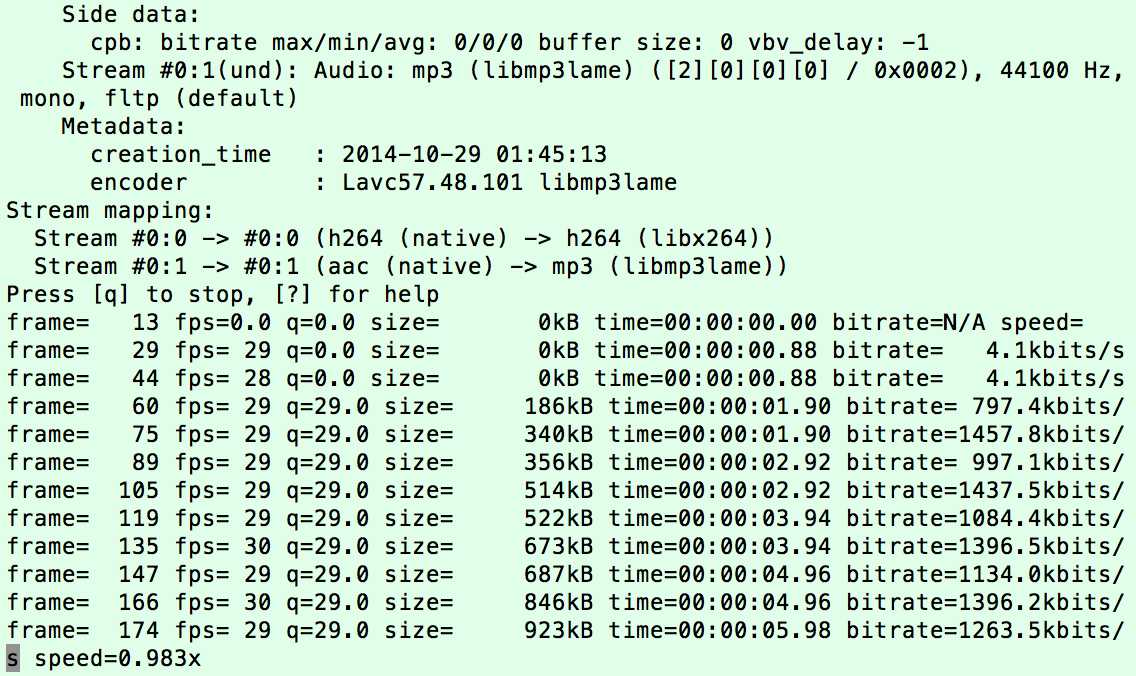
查看 然后你就可以在这个目录 /usr/local/var/www/hls 看到生成一个个ts的文件,还会生成一个你的 m3u8 的文件名称.m3u8的文件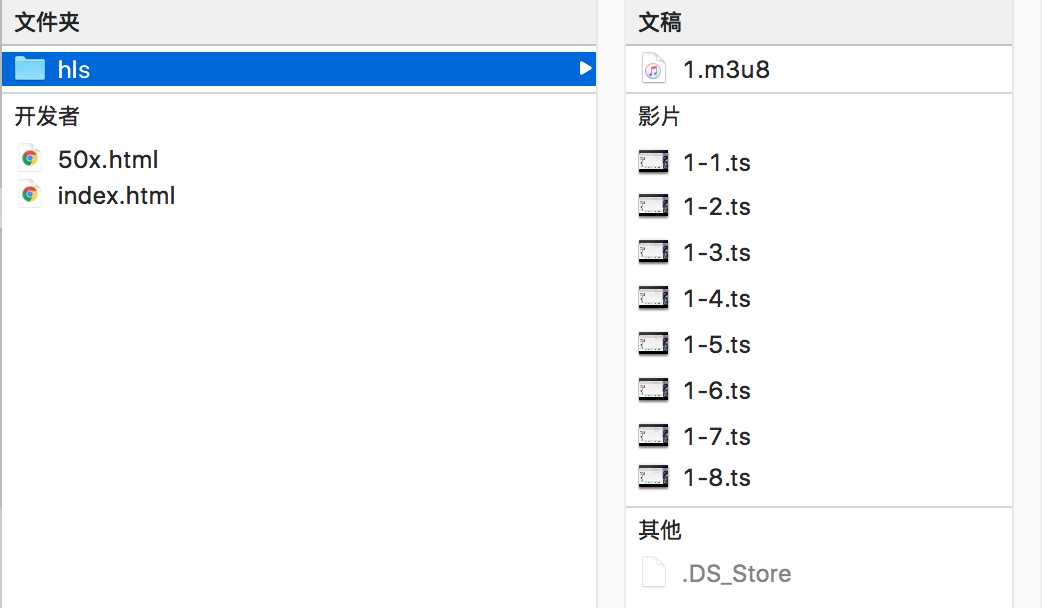
测试方法
1、用 safari 浏览测试
2、也可在 Xcode 项目中用 ijkplayer框架在模拟器中测试该地址(拉流)
#import "ViewController.h"
#import <GDLiveStreaming/GDLRawDataOutput.h>
#import <GPUImage/GPUImageVideoCamera.h>
#import <GPUImage/GPUImageView.h>
@interface ViewController ()
@property (nonatomic, strong) GPUImageVideoCamera *camera;
@end
@implementation ViewController
- (void)viewDidLoad {
    [super viewDidLoad];
    //  1. 创建视频摄像头
    self.camera = [[GPUImageVideoCamera alloc] initWithSessionPreset:AVCaptureSessionPreset1280x720
                                                      cameraPosition:AVCaptureDevicePositionBack];
    //  2. 设置摄像头帧率
    self.camera.frameRate = 25;
    //  3. 设置摄像头输出视频的方向
    self.camera.outputImageOrientation = UIInterfaceOrientationPortraitUpsideDown;


    //  4. 创建用于展示视频的GPUImageView
    GPUImageView *imageView = [[GPUImageView alloc] init];
    imageView.frame = self.view.bounds;
    [self.view addSubview:imageView];

    //  4.1 添加GPUImageView为摄像头的的输出目标
    [self.camera addTarget:imageView];

    //  5. 创建原始数据输出对象
    GDLRawDataOutput *output = [[GDLRawDataOutput alloc] initWithVideoCamera:self.camera withImageSize:CGSizeMake(720, 1280)];

    //  5.1 添加数据输出对象为摄像头输出目标
    [self.camera addTarget:output];


    //  6.开启前置摄像头, 不写这句代码默认开启的是后置摄像头
    [self.camera rotateCamera];

    //  7.开始捕获视频
    [self.camera startCameraCapture];

    //  8.开始上传视频
    [output startUploadStreamWithURL:@"rtmp://192.168.33.245:1935/zhanghao" andStreamKey:@"room"];
}
@end
真机 debug 打印
模拟器中
标签:
原文地址:http://www.cnblogs.com/jx66/p/5834326.html