标签:
一、创建github pages 个人主页
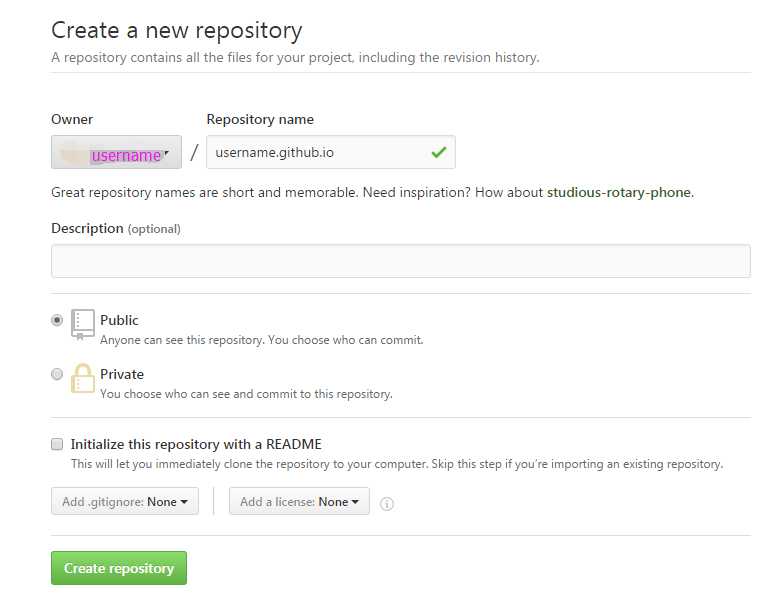
1.在github上创建username.github.io项目,其中用户名即为github用户名

2.增加项目首页
clone项目到本地文件夹
~ $ git clone https://github.com/username/username.github.io
切换到项目目录下
~ $ cd username.github.io
增加项目首页文件,内容可以按需更改
~$echo "Hello World" > index.html
增加修改到暂存区
~ $ git add --all
提交修改到本地仓库
~$git commit -m "Initial commit"
推送到远程仓库
~$git push -u origin master
完成后便可以访问 http://username.github.io
二、使用jekyll
1.安装ruby
下载地址:http://rubyinstaller.org/downloads/
本例使用:
rubyinstaller-2.3.1-x64.exe
2.安装DevKit
下载地址:http://rubyinstaller.org/downloads/
本例使用:DevKit-mingw64-64-4.7.2-20130224-1432-sfx.exe
双击DevKit,解压到文件夹,如:D:\RubyDevKit
cd D:\RubyDevKit

ruby dk.rb init
在生成的config.yml文件中添加ruby安装路径
# Example:
#
# ---
# - C:/ruby19trunk
# - C:/ruby192dev
#
---
- D:/Ruby23-x64
执行命令
ruby dk.rb install
3.安装jekyll
安装jekyll前,公司内网需要设置gem的http代理,设置方式为增加环境变量http_proxy
~ $ gem install jekyll
~ $ jekyll new myblog
~ $ cd myblog
~/myblog $ jekyll server
# => Now browse to http://localhost:4000
4.更换markdown
三、参考资源
https://pages.github.com/
http://jekyll-windows.juthilo.com/1-ruby-and-devkit/
https://help.github.com/articles/setting-up-your-github-pages-site-locally-with-jekyll/
http://www.cnblogs.com/purediy/archive/2013/03/07/2948892.html
http://www.worldhello.net/gotgithub/03-project-hosting/050-homepage.html
标签:
原文地址:http://www.cnblogs.com/fanyegong/p/5886005.html