标签:
前言:
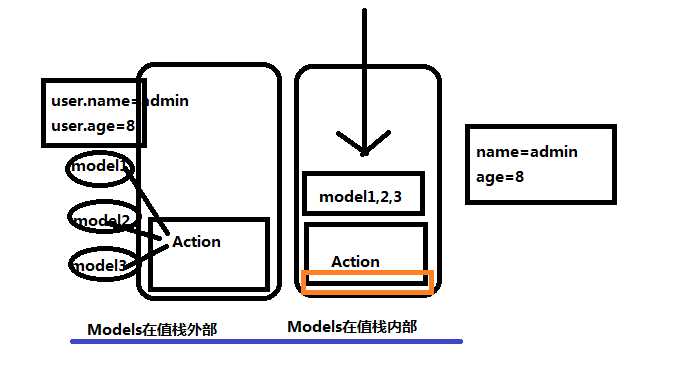
前面已经有一篇随笔介绍了Struts2的大概原理。本文就Struts2中Action与jsp页面进行数据对接时介绍几种常见方法!

Action1

package com.gdufe.action;

import com.opensymphony.xwork2.ActionSupport;

/*
 * Action接收参数之后通过set方法赋给普通变量age,name;
 */
public class UserAction1 extends ActionSupport{

    private int age;
    private String name;


    public int getAge() {
        return age;
    }

    public void setAge(int age) {
        this.age = age;
    }

    public String getName() {
        return name;
    }

    public void setName(String name) {
        this.name = name;
    }

    public String execute(){

        return SUCCESS;
    }

    public String test(){
        System.out.println(age +"|"+ name);
        return SUCCESS;
    }
}
Action2

package com.gdufe.action;

import com.gdufe.pojo.User;
import com.opensymphony.xwork2.ActionSupport;

/*
 * Action接收参数之后赋给引用对象“user”,内部是set方法赋值
 */
public class UserAction2 extends ActionSupport {

    private User user;

    public User getUser() {
        return user;
    }

    public void setUser(User user) {
        this.user = user;
    }

    public String test(){
        System.out.println(user.getName() + "|" + user.getAge());
        return "success";
    }
}
Action3

package com.gdufe.action;

import com.gdufe.pojo.User;
import com.opensymphony.xwork2.ActionSupport;
import com.opensymphony.xwork2.ModelDriven;

public class UserAction3 extends ActionSupport implements ModelDriven<User> {

    private User user = new User();

    public String test(){

        System.out.println(user.getName() + "|" + user.getAge());
        return "success";
    }

    public User getModel() {
        return user;
    }
}
index.jsp
<%@ page language="java" import="java.util.*" pageEncoding="UTF-8"%>
<%@ taglib prefix="s" uri="/struts-tags" %>
<%
String path = request.getContextPath();
String basePath = request.getScheme()+"://"+request.getServerName()+":"+request.getServerPort()+path+"/";
%>

<!DOCTYPE HTML PUBLIC "-//W3C//DTD HTML 4.01 Transitional//EN">
<html>
  <head>
    <base href="<%=basePath%>">

    <title>My JSP ‘index.jsp‘ starting page</title>
    <meta http-equiv="pragma" content="no-cache">
    <meta http-equiv="cache-control" content="no-cache">
    <meta http-equiv="expires" content="0">
    <meta http-equiv="keywords" content="keyword1,keyword2,keyword3">
    <meta http-equiv="description" content="This is my page">

  </head>

  <body>
<h2>Action传值测试</h2>
<a href="userAction1!test?age=8&name=admin">test1:Attribution</a> <br>
<a href="userAction2!test?user.age=8&user.name=admin">test2:JavaBean</a> <br>
<a href="userAction3!test?age=8&name=admin">test3:ModelDriven</a> <br>
  </body>
</html>
success.jsp
<%@ page language="java" import="java.util.*" pageEncoding="UTF-8"%>
<%@ taglib prefix="s" uri="/struts-tags" %>
<%
String path = request.getContextPath();
String basePath = request.getScheme()+"://"+request.getServerName()+":"+request.getServerPort()+path+"/";
%>

<!DOCTYPE HTML PUBLIC "-//W3C//DTD HTML 4.01 Transitional//EN">
<html>
  <head>
    <base href="<%=basePath%>">

    <title>My JSP ‘index.jsp‘ starting page</title>
    <meta http-equiv="pragma" content="no-cache">
    <meta http-equiv="cache-control" content="no-cache">
    <meta http-equiv="expires" content="0">
    <meta http-equiv="keywords" content="keyword1,keyword2,keyword3">
    <meta http-equiv="description" content="This is my page">

  </head>

  <body>

    <h2>Action传值双击debug</h2>
    <s:debug></s:debug>
    <!-- debug重要的strut2标签调试工具 -->
  </body>
</html>
<?xml version="1.0" encoding="UTF-8" ?>
<!DOCTYPE struts PUBLIC
    "-//Apache Software Foundation//DTD Struts Configuration 2.0//EN"
    "http://struts.apache.org/dtds/struts-2.0.dtd">

<struts>

     <!-- devMode设置为开发模式   -->
     <constant name="struts.devMode" value="true" />
     <package name="default" extends="struts-default">
         <!-- 注:因为Action采用DMI方式,故不需要指明method 以及 ‘result’ -->
        <action name="userAction1" class="com.gdufe.action.UserAction1" >
            <result>/success.jsp</result>
        </action>

        <action name="userAction2" class="com.gdufe.action.UserAction2" >
            <result>/success.jsp</result>
        </action>

        <action name="userAction3" class="com.gdufe.action.UserAction3" >
            <result>/success.jsp</result>
        </action>

    </package>

</struts>
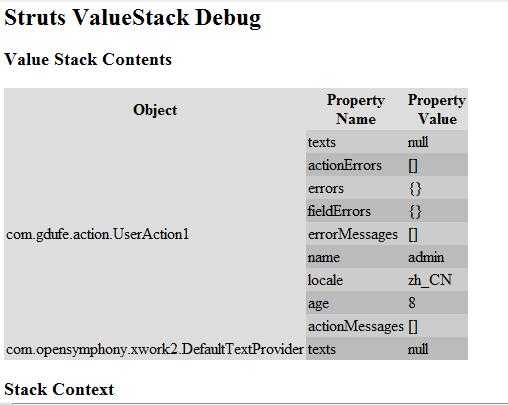
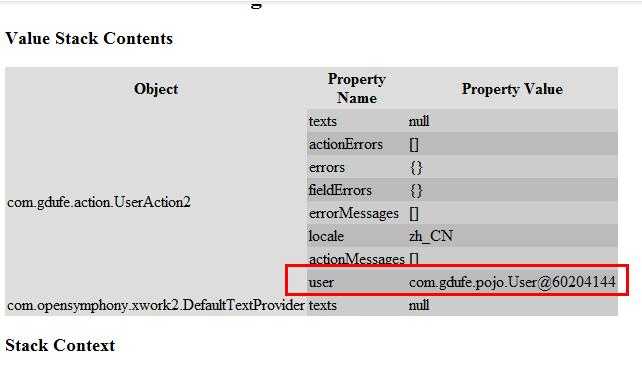
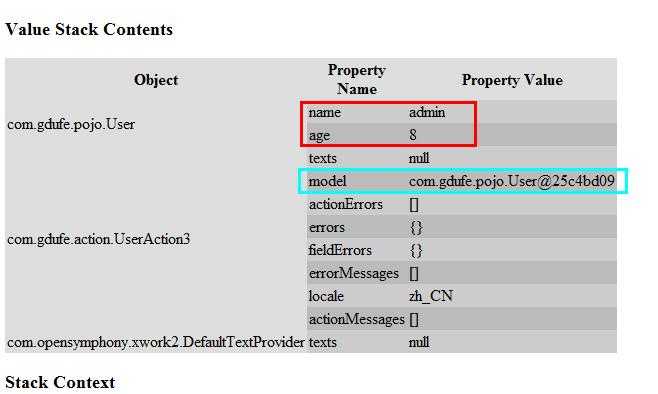
运行结果:
对应Action1——------------------*-------------------------

对应Action2——------------------*-------------------------

对应Action3——------------------*-------------------------

标签:
原文地址:http://www.cnblogs.com/dengyuqing/p/5978166.html